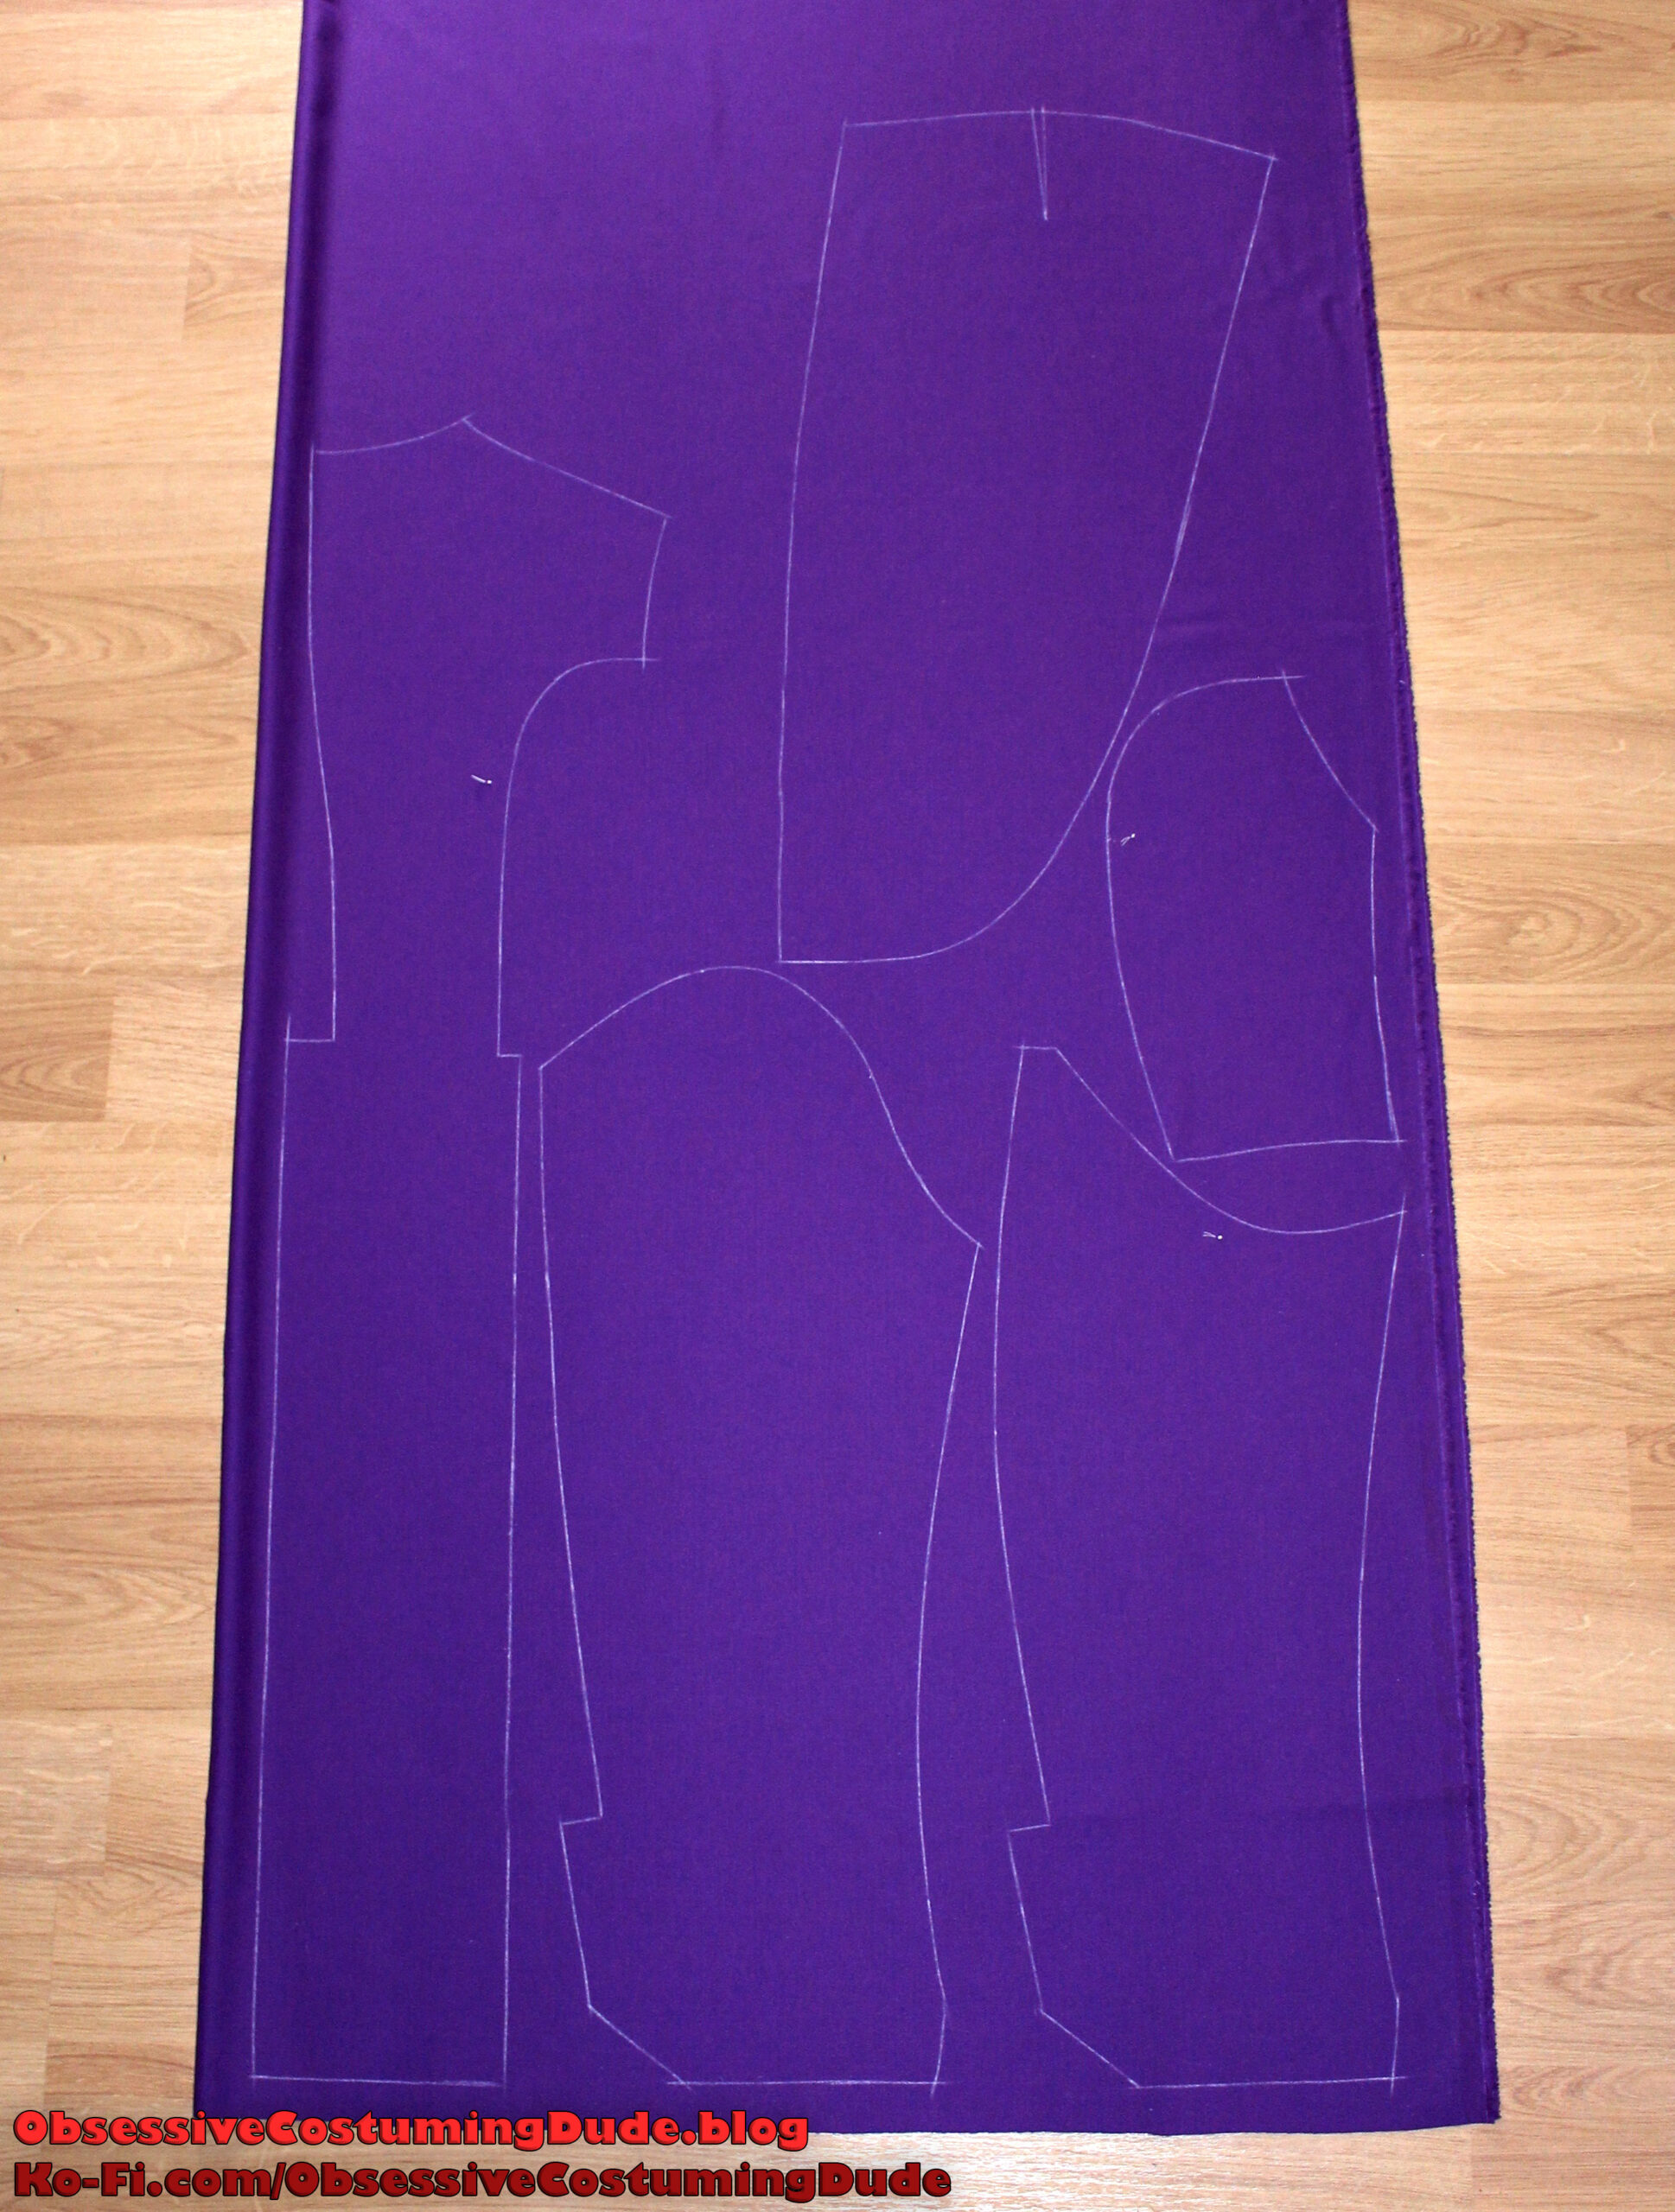
I recommend marking the various dots, balance points, button/pocket placements, etc. with small tailor’s tacks using the cotton basting thread.
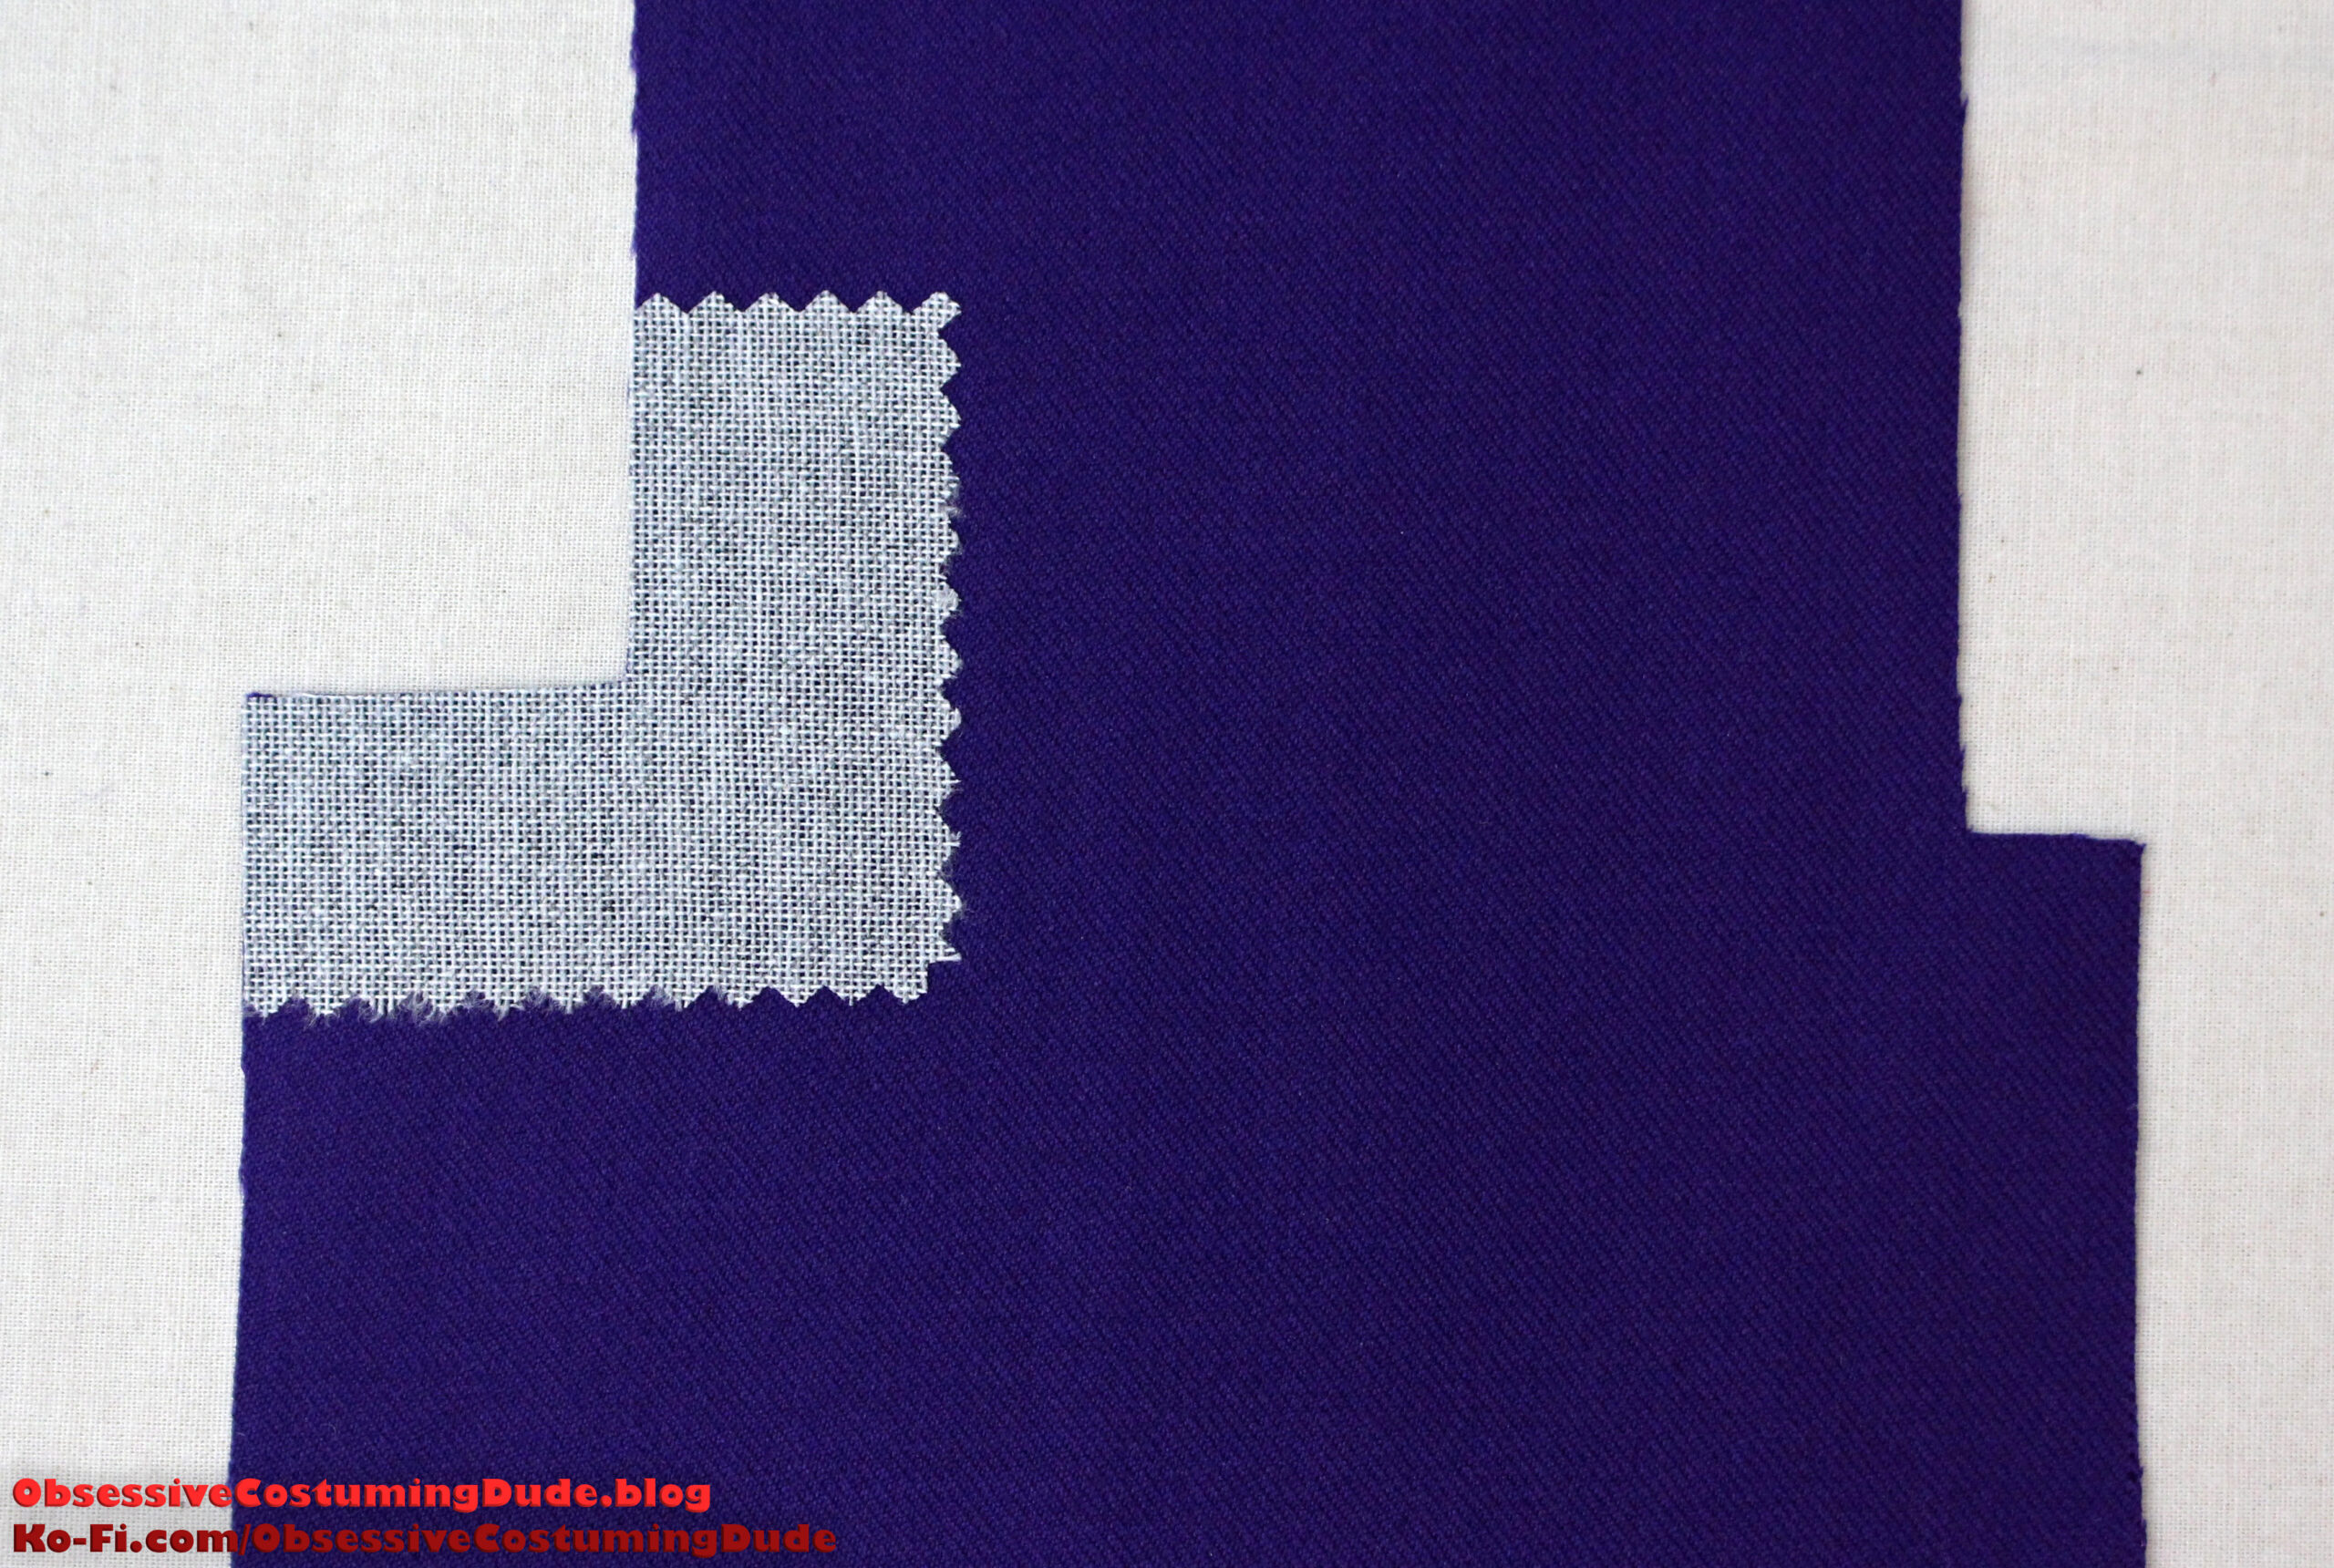
Although obviously not period-accurate, I suggest applying some fusible interfacing to several panels and areas throughout the tailcoat before beginning construction.
First, apply a lightweight fusible interfacing to the underside of the tailcoat fronts (piece A).
Apply a fusible hair canvas to the underside of the front facings (piece L).
Apply a lightweight fusible interfacing to the underside of the upper collar (piece I) and serge the front edges.
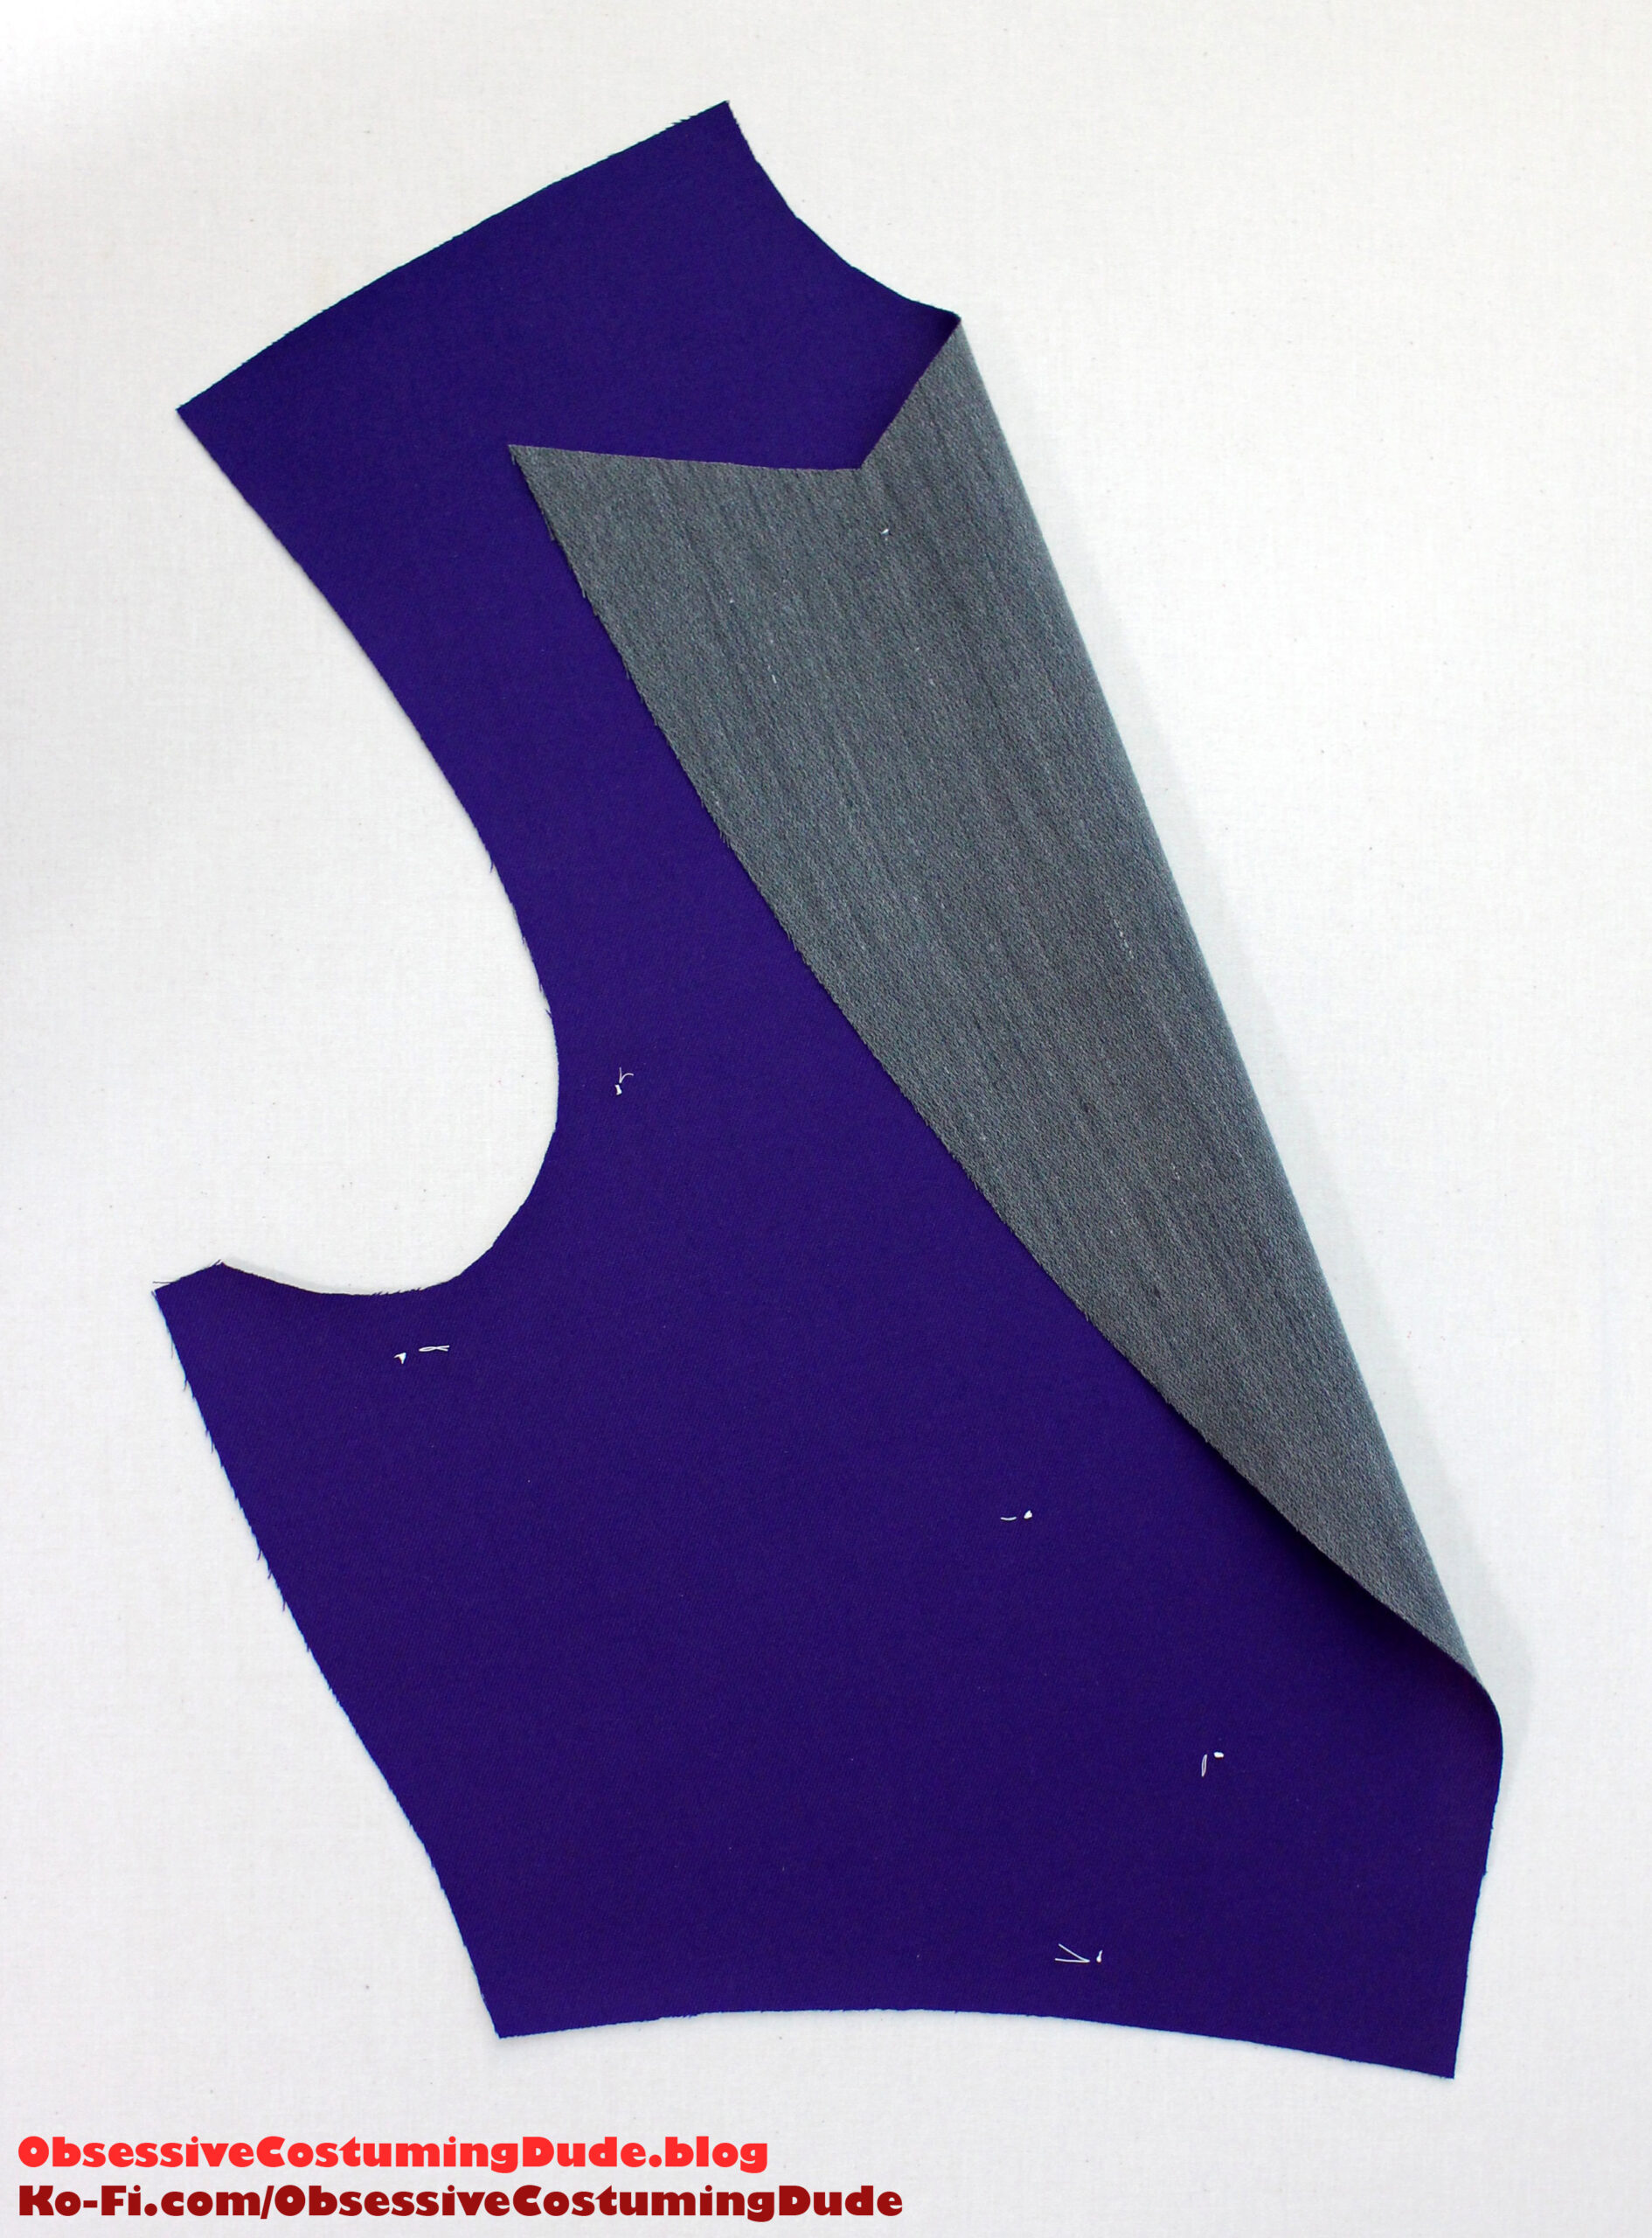
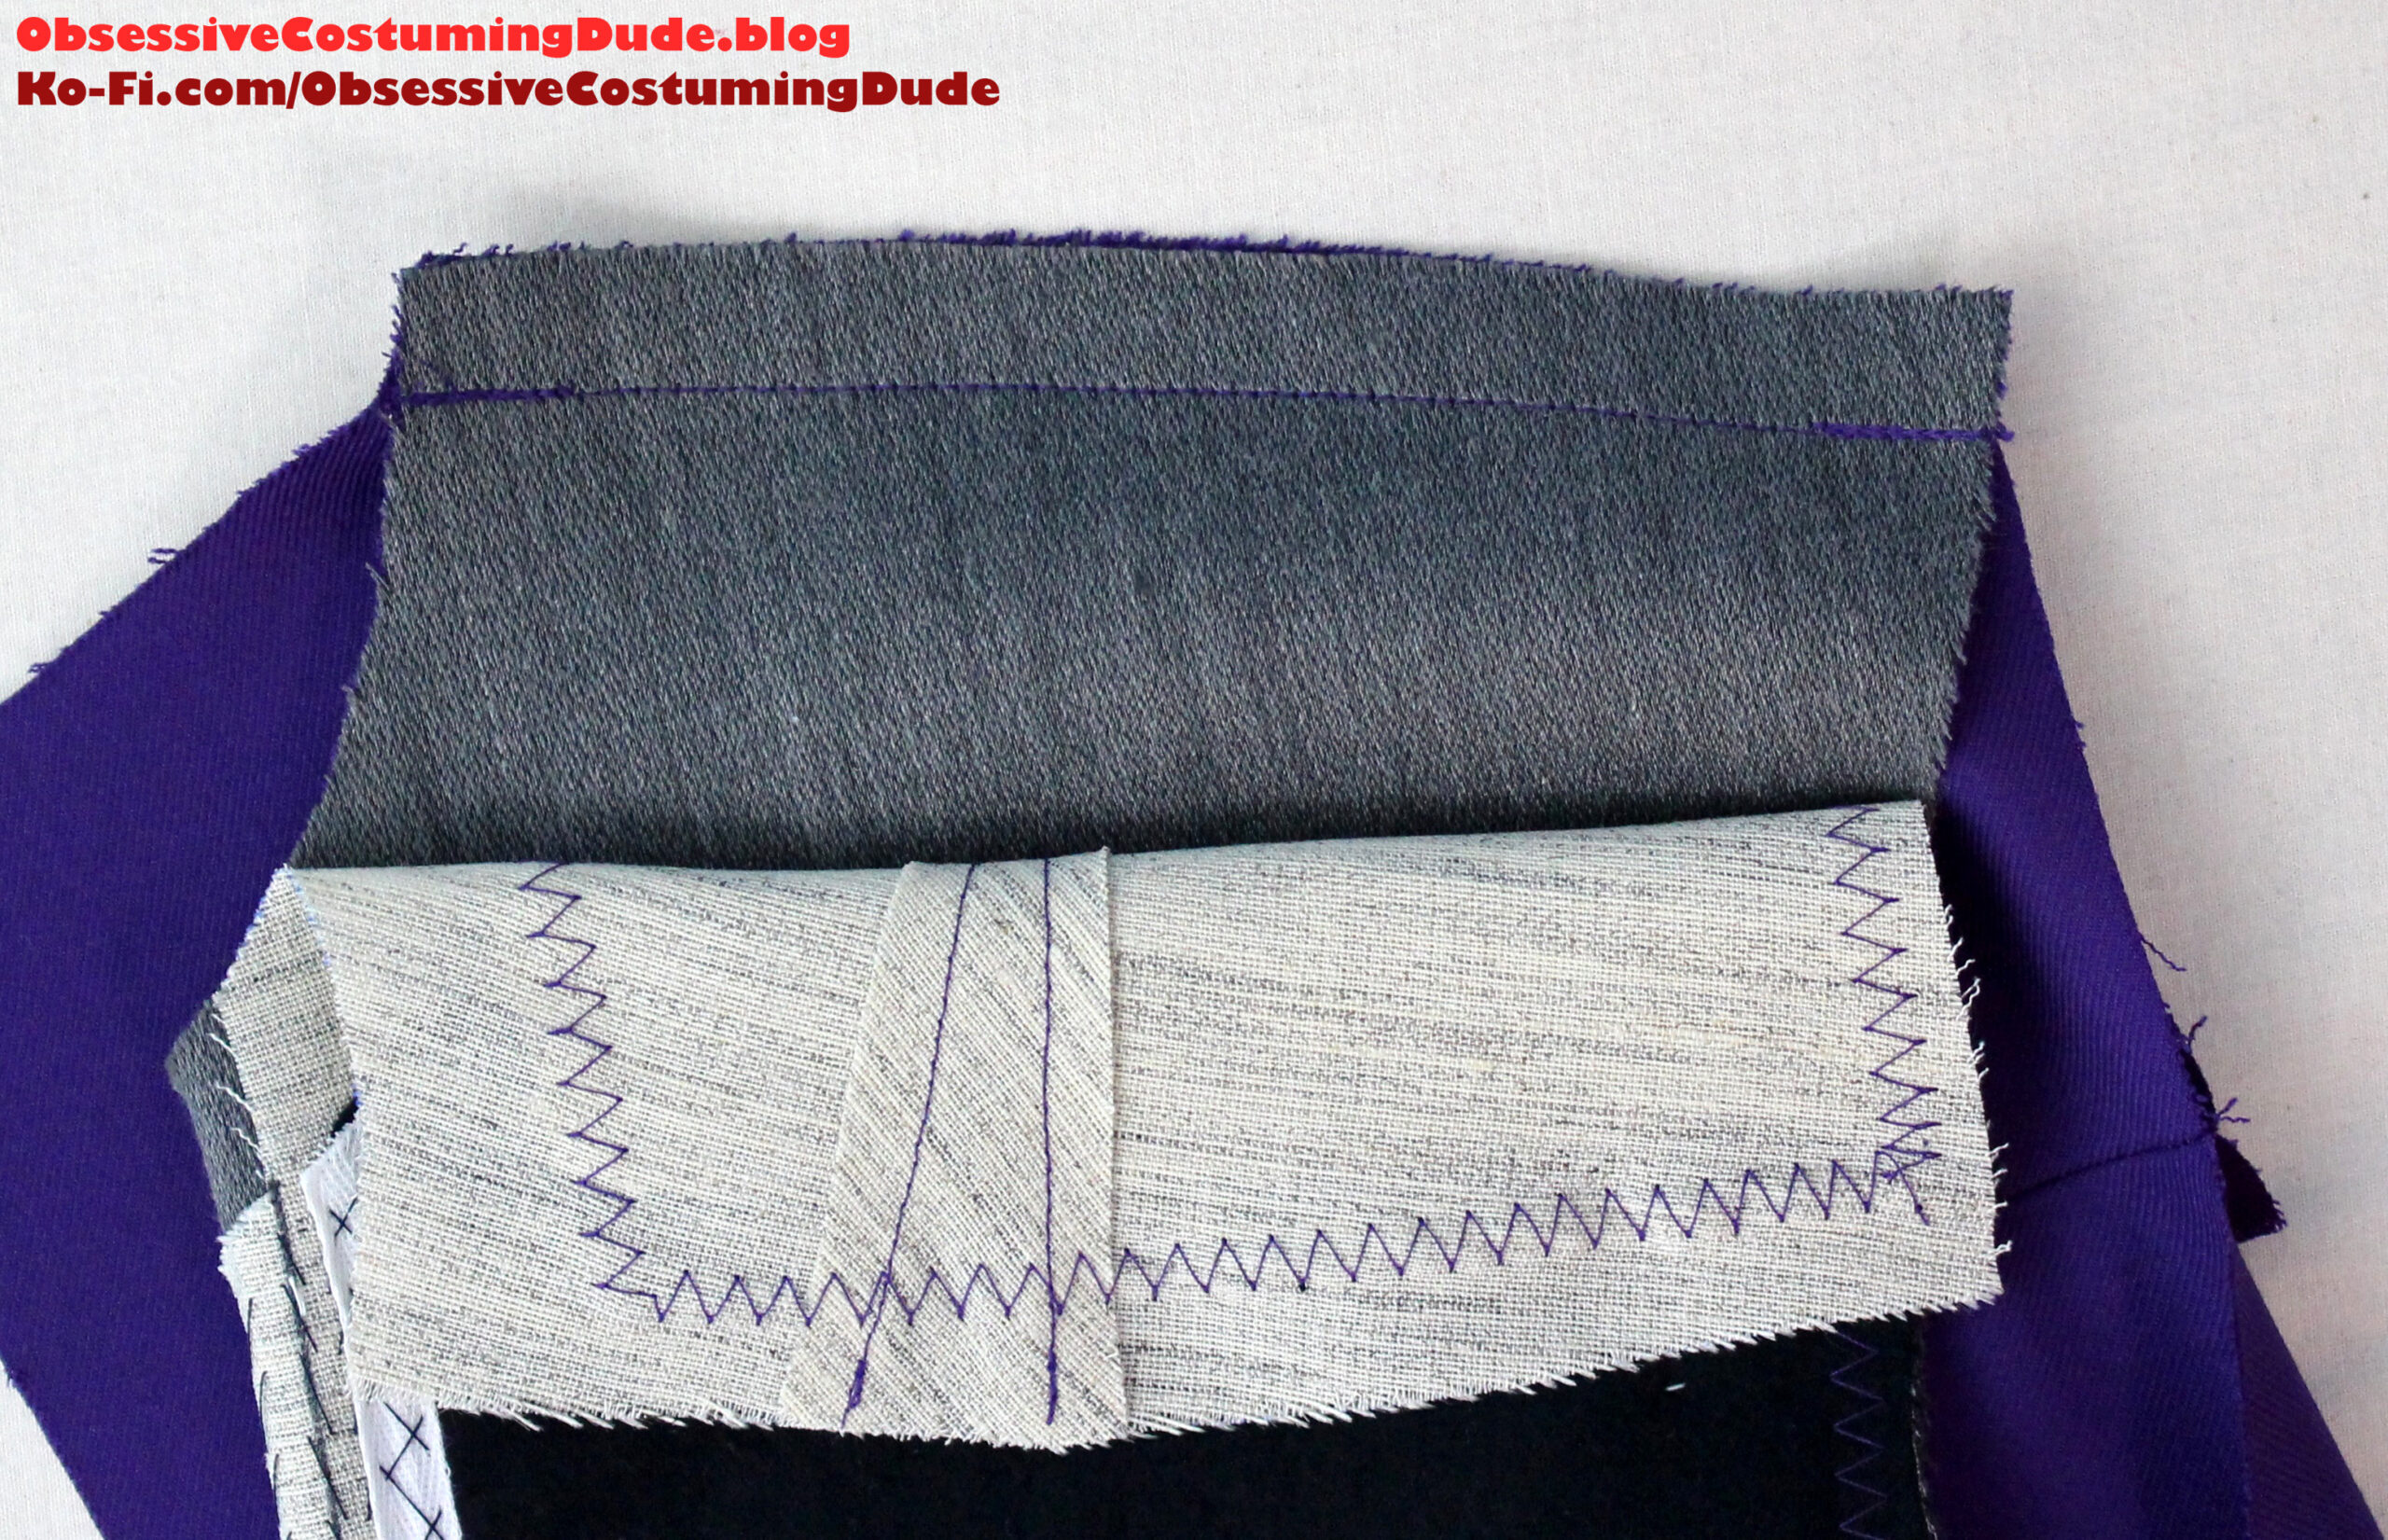
Also apply some lightweight fusible interfacing to the underside of the sleeve hems.
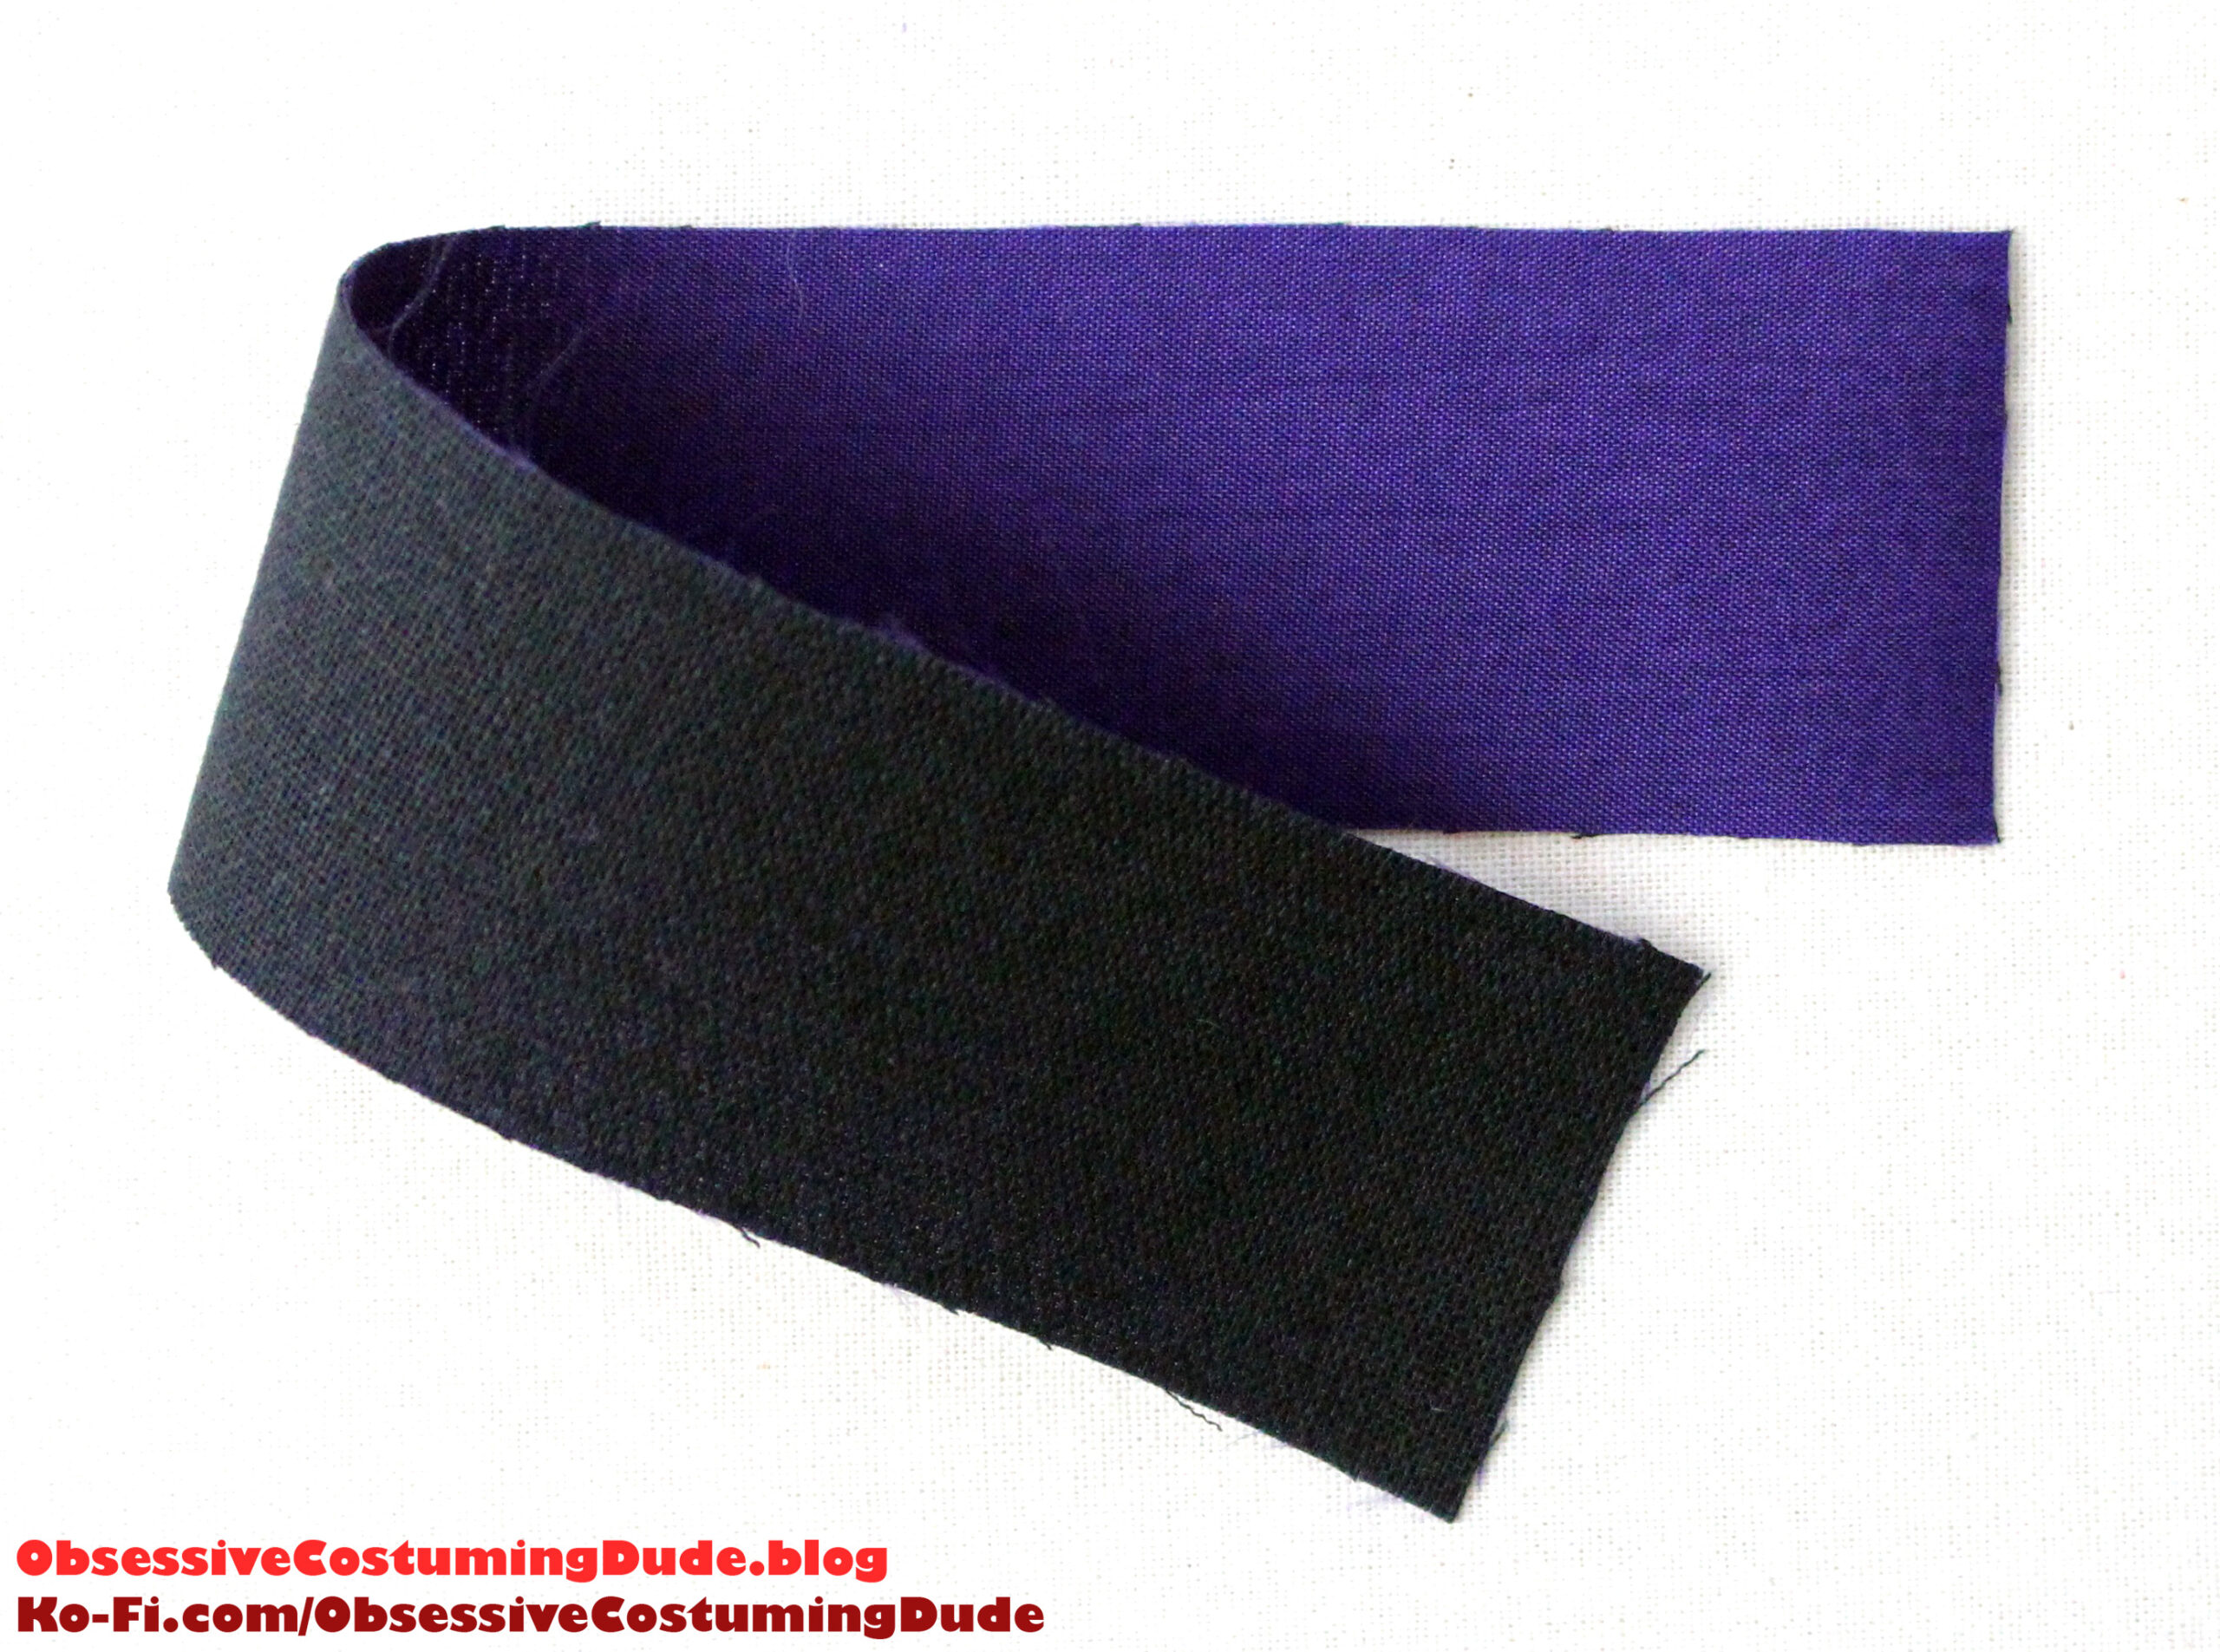
I suggest using strips about 3” wide and cut with pinking shears (to avoid making an impression on the right side of the finished sleeves), overlapping the hem line by about ½” and trimmed out of the seam allowances.
And finally, apply some fusible interfacing to corner of the center backs (piece F).
BODY ASSEMBLIES
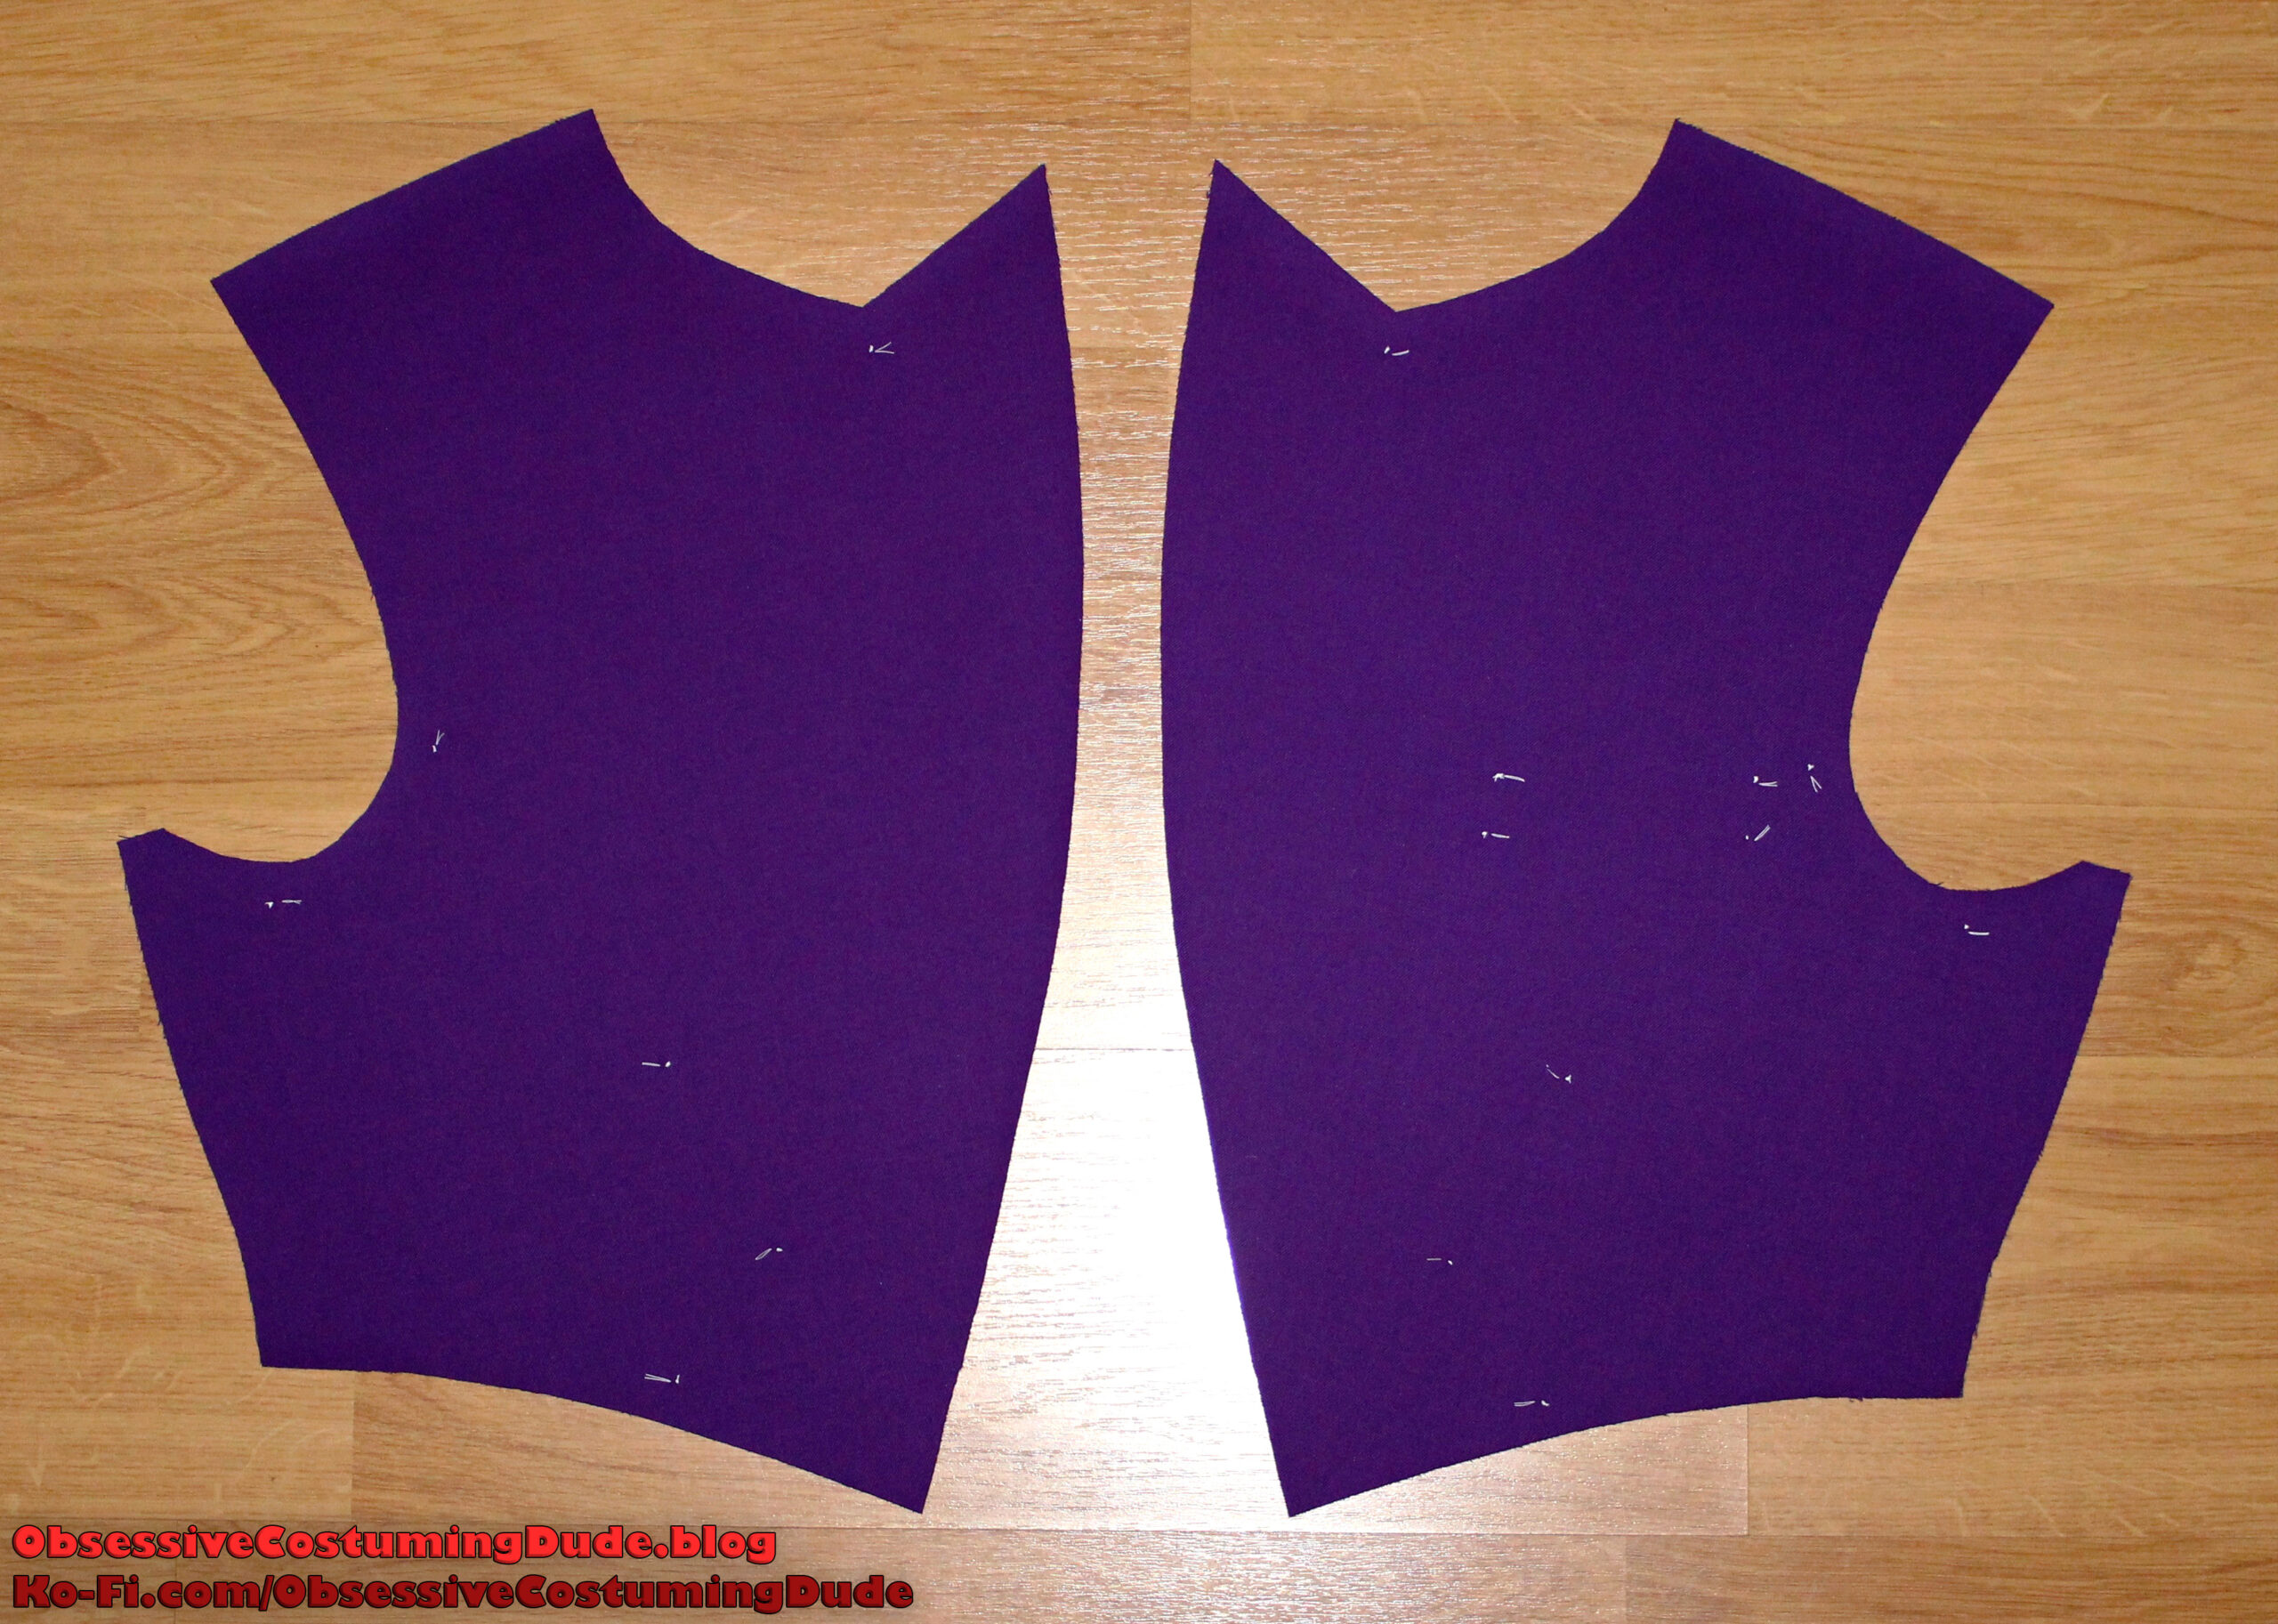
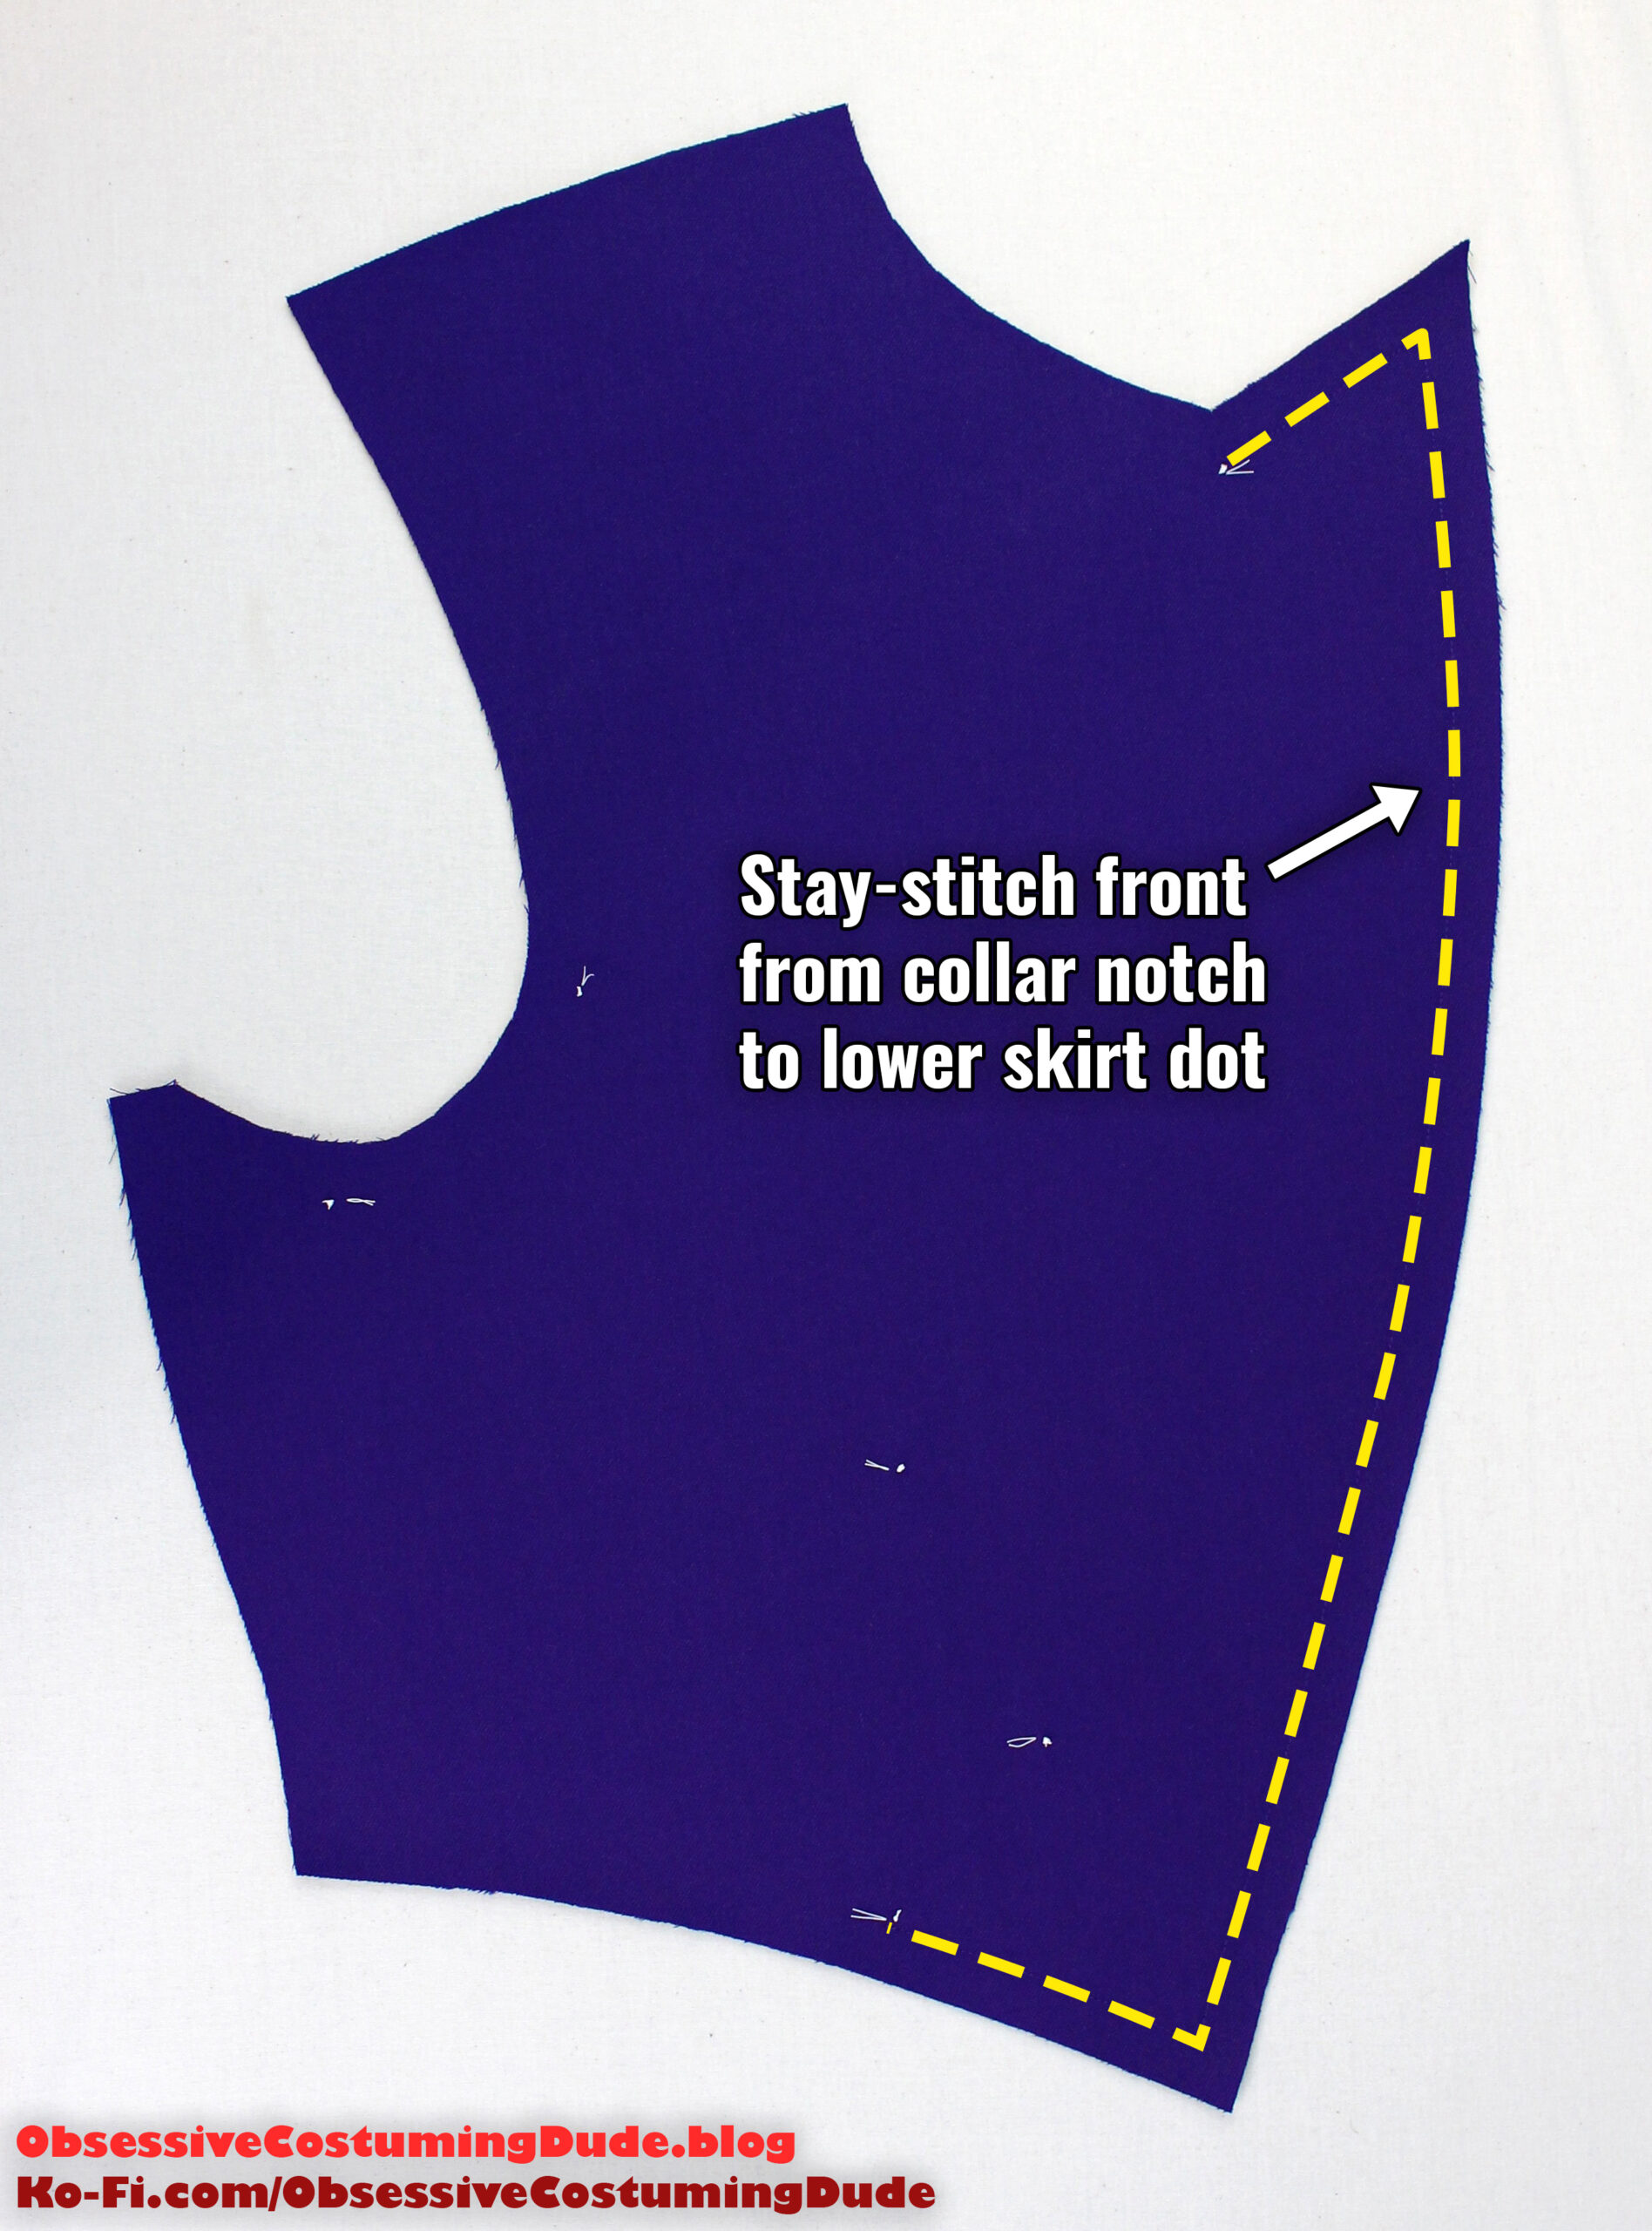
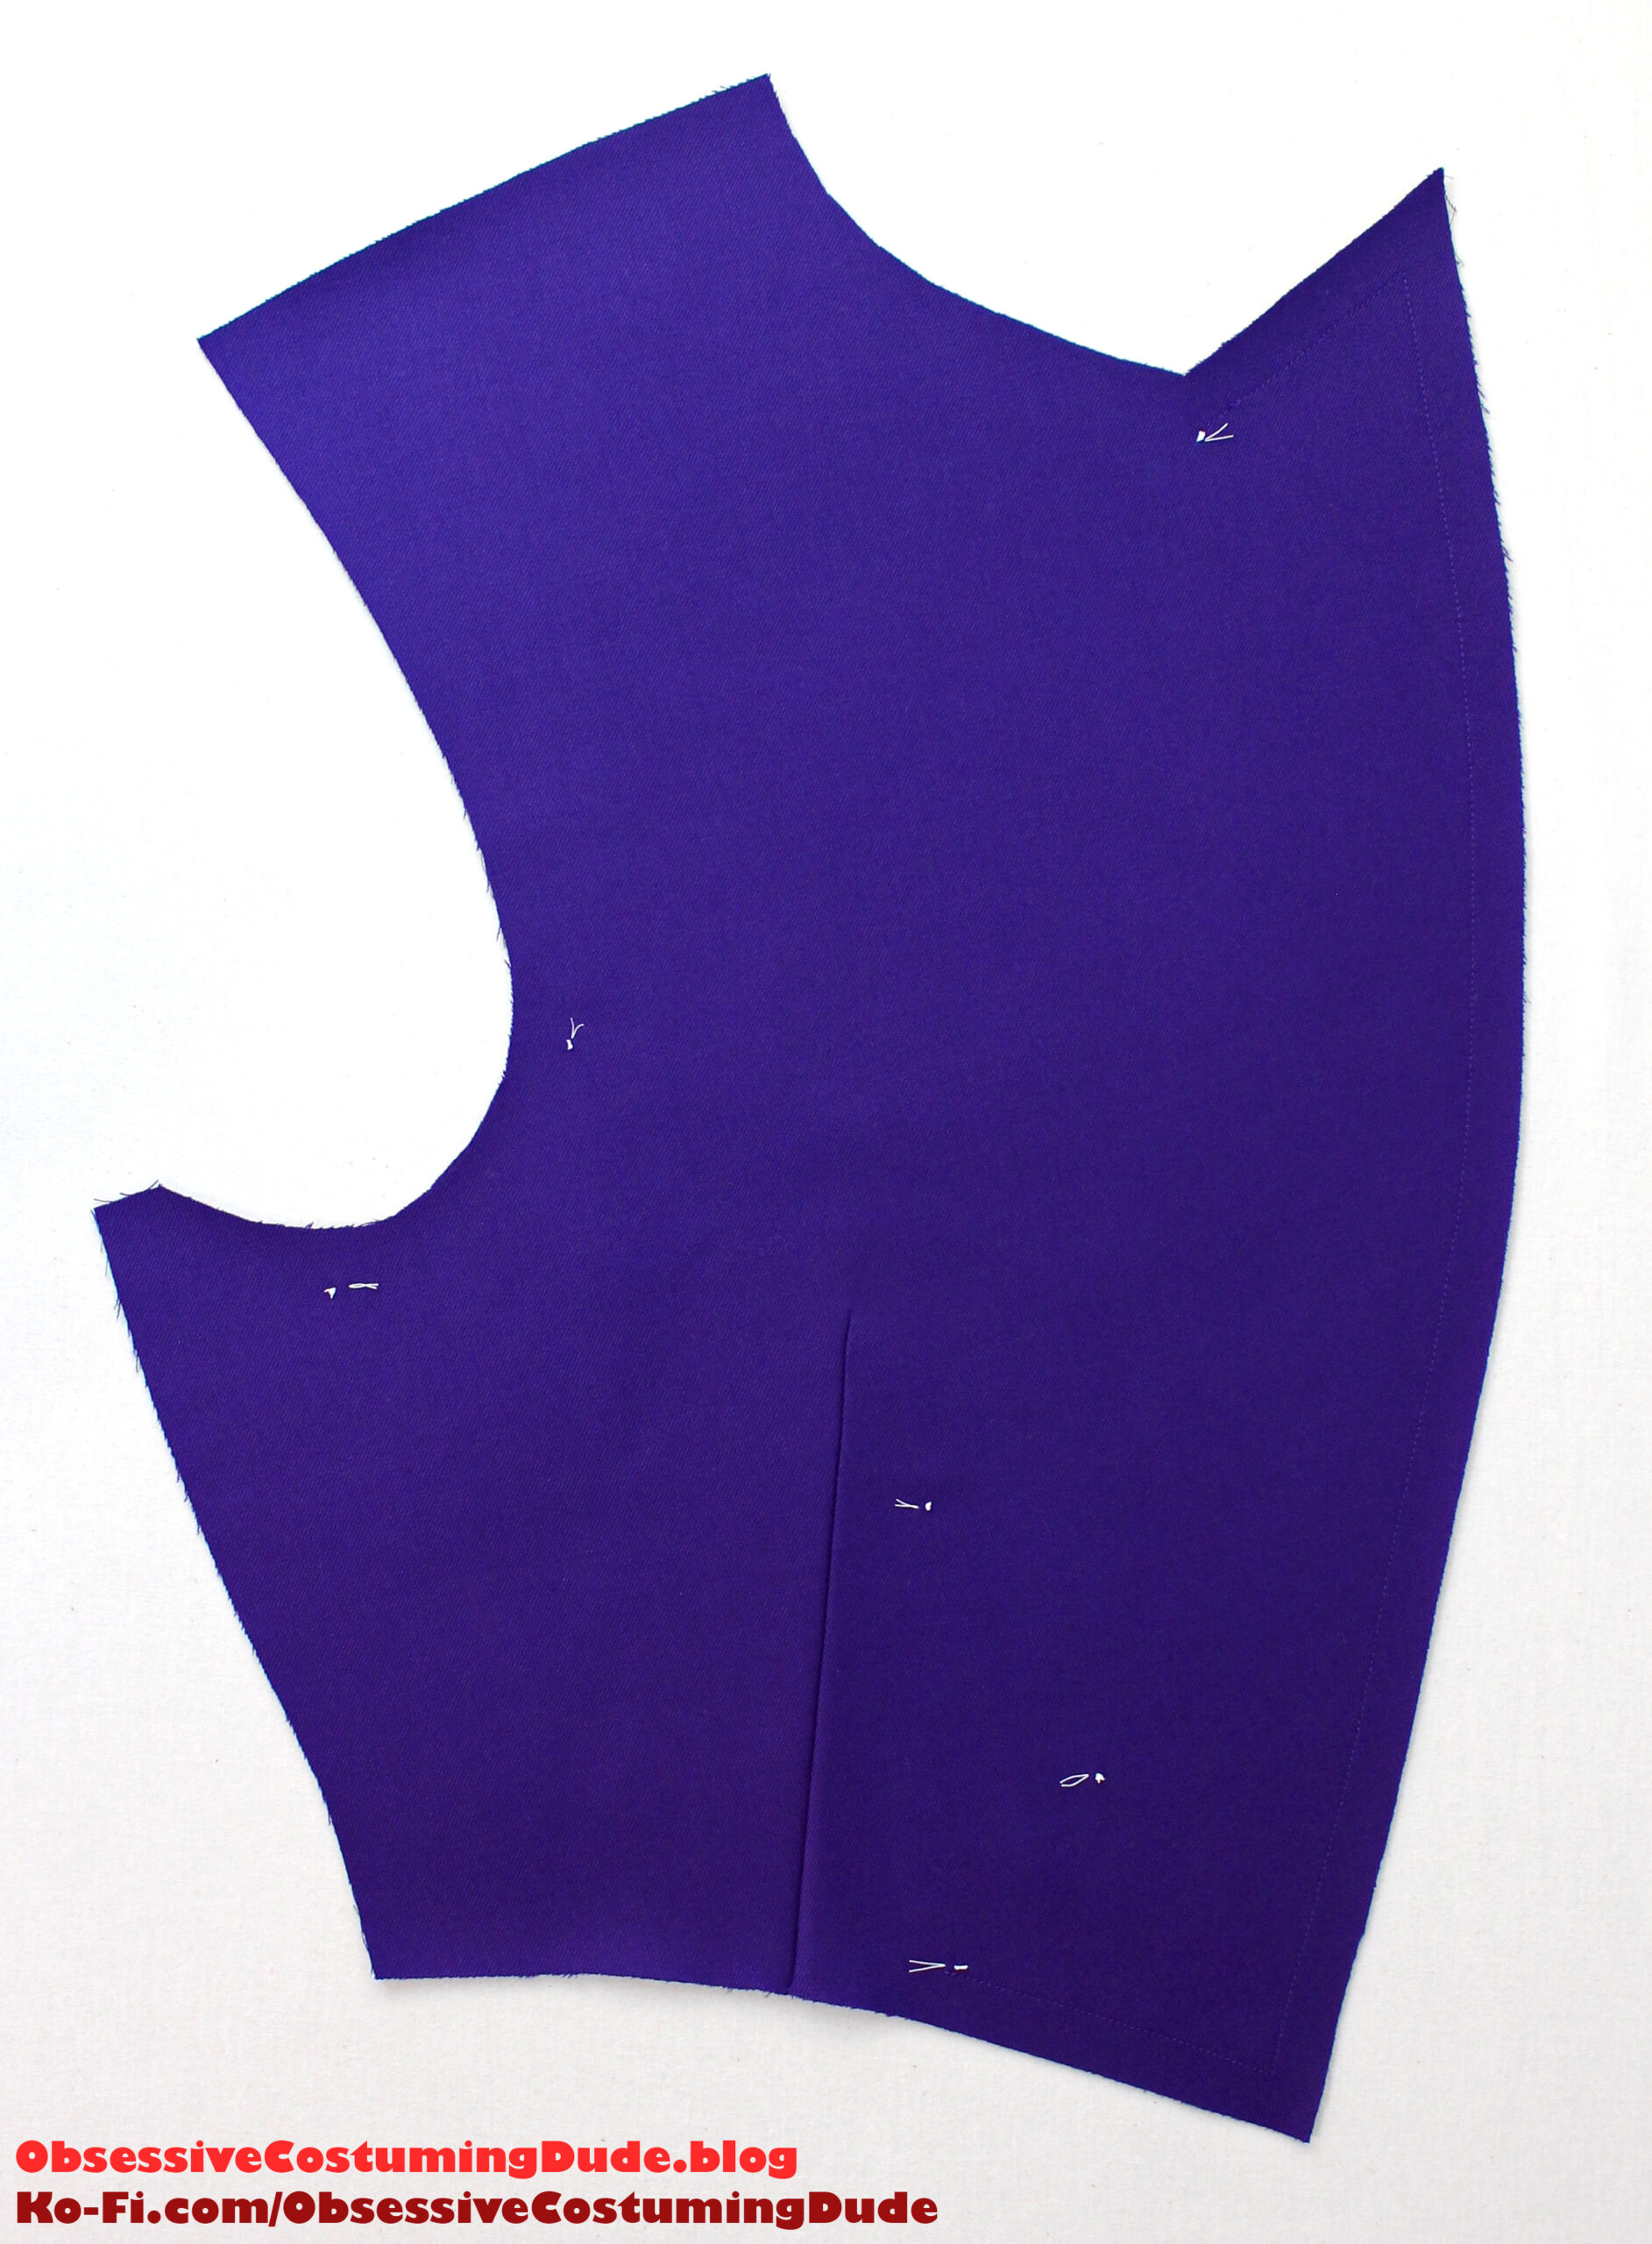
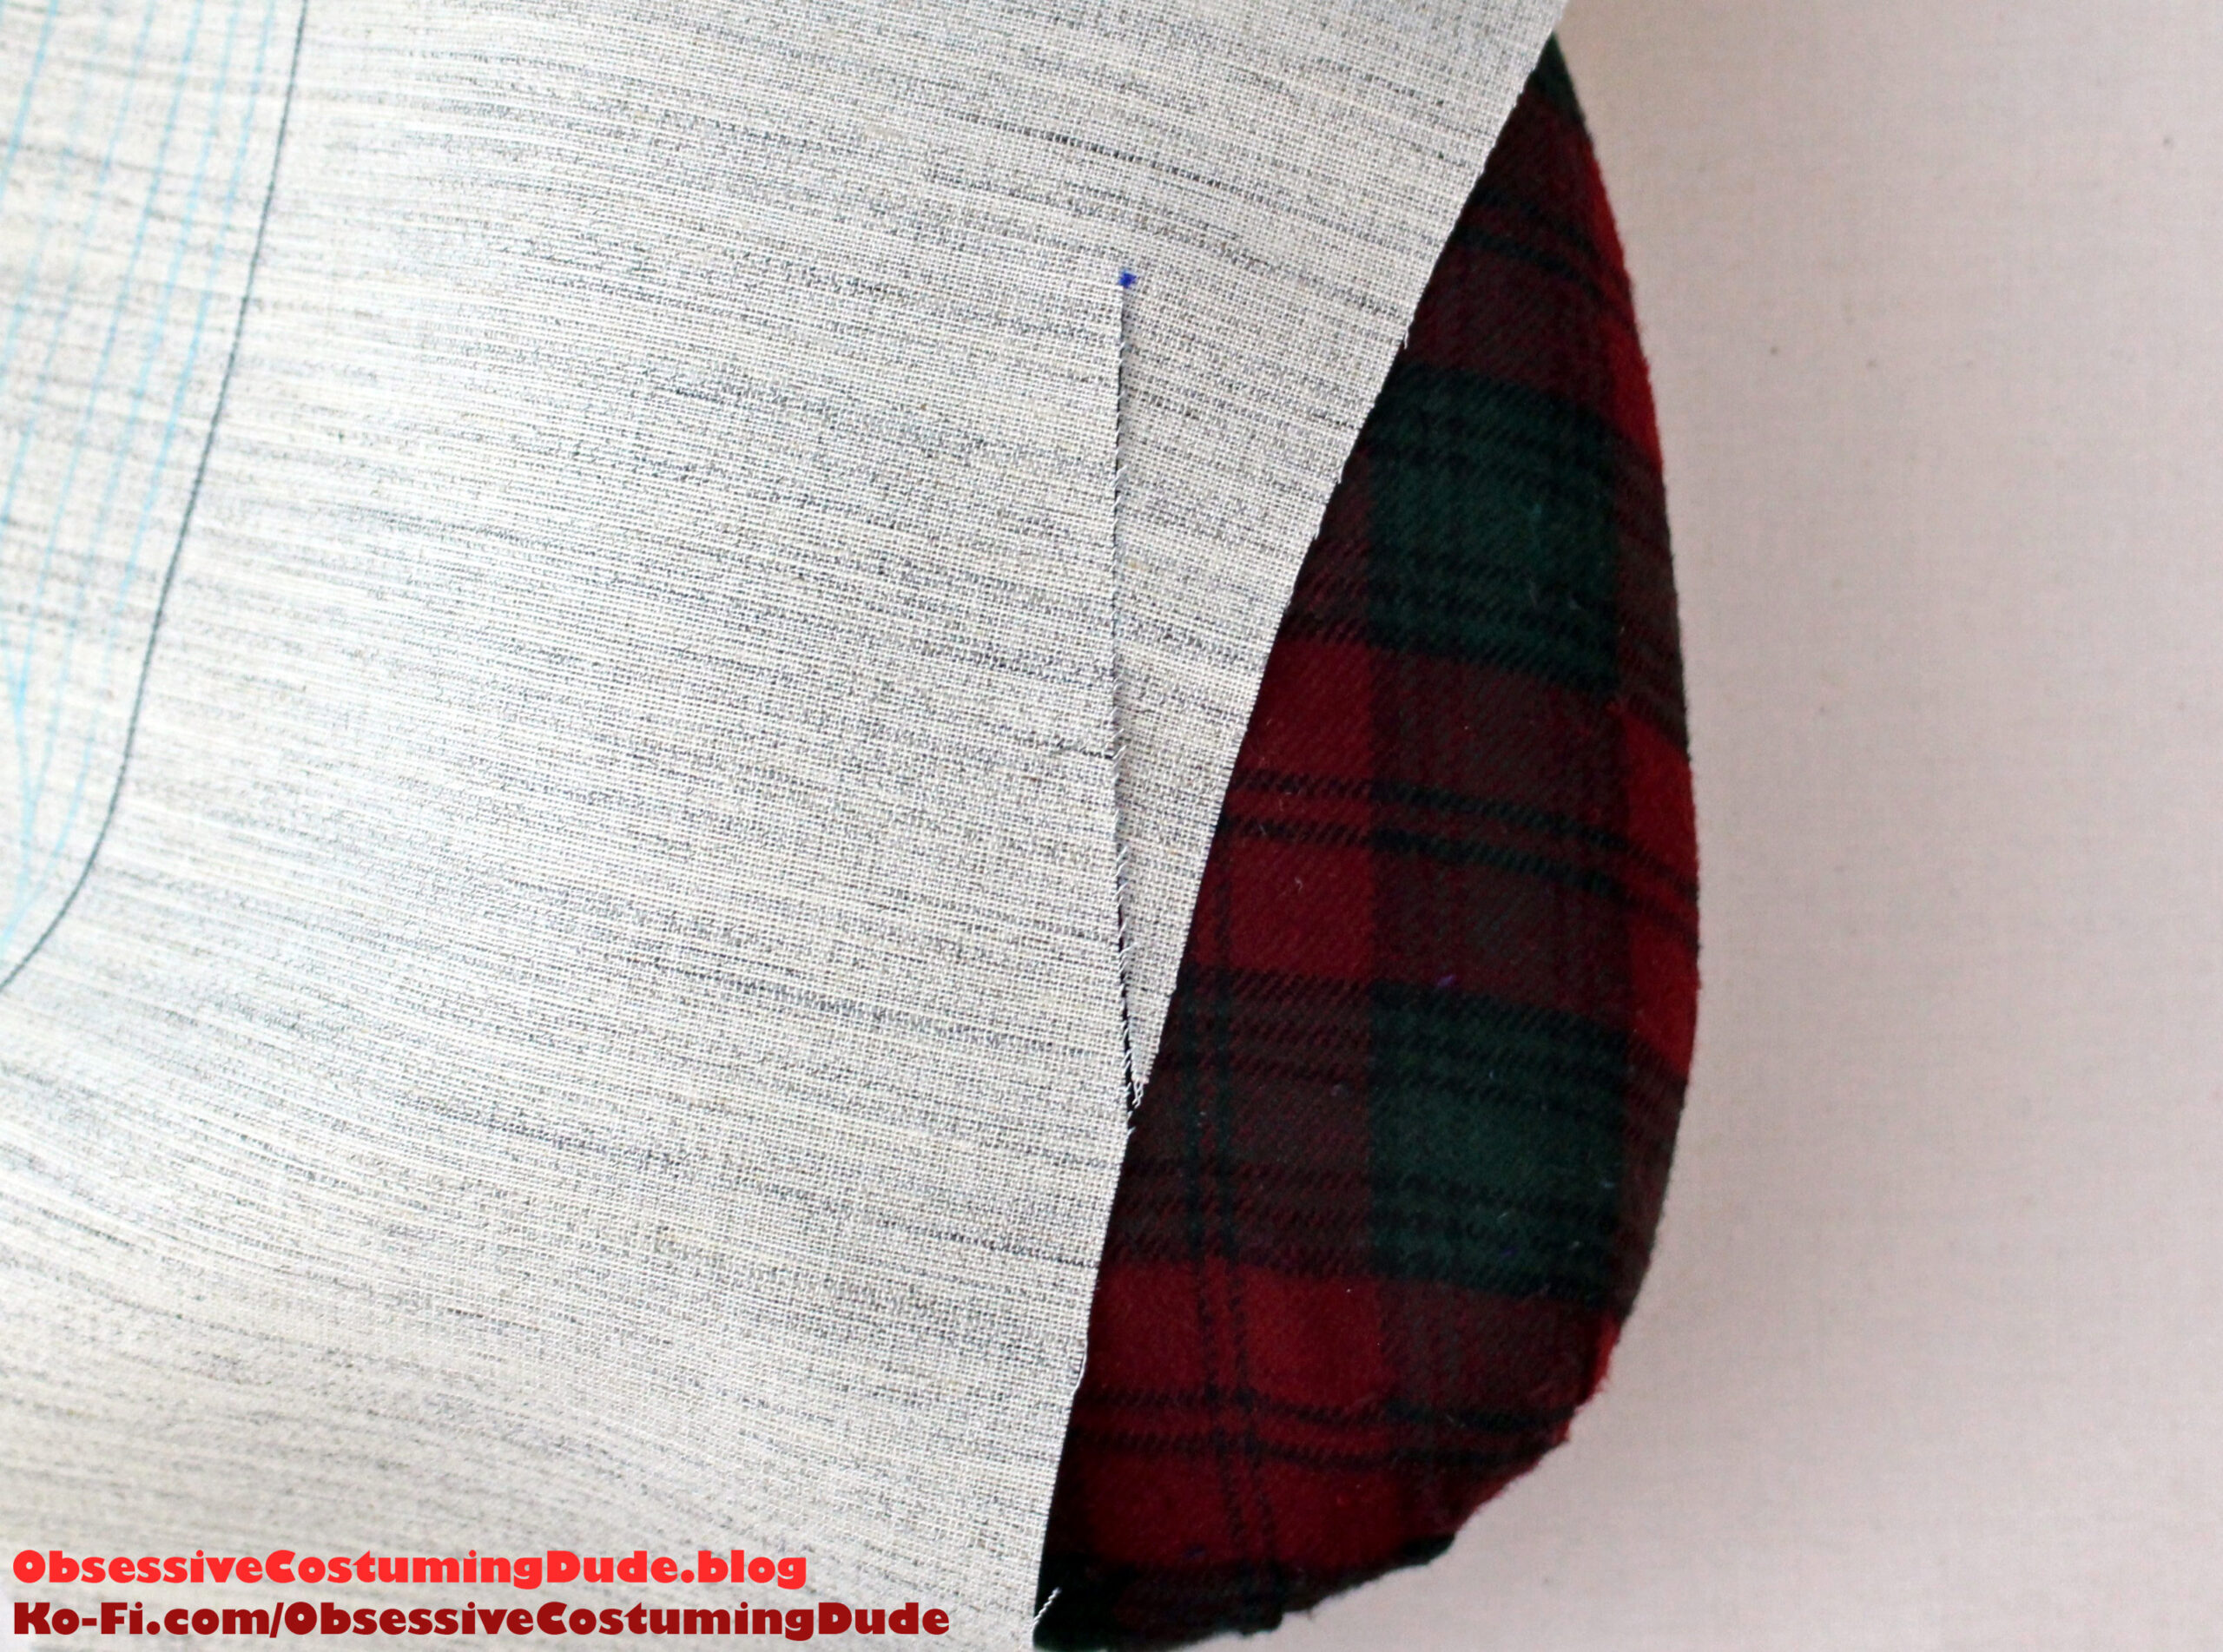
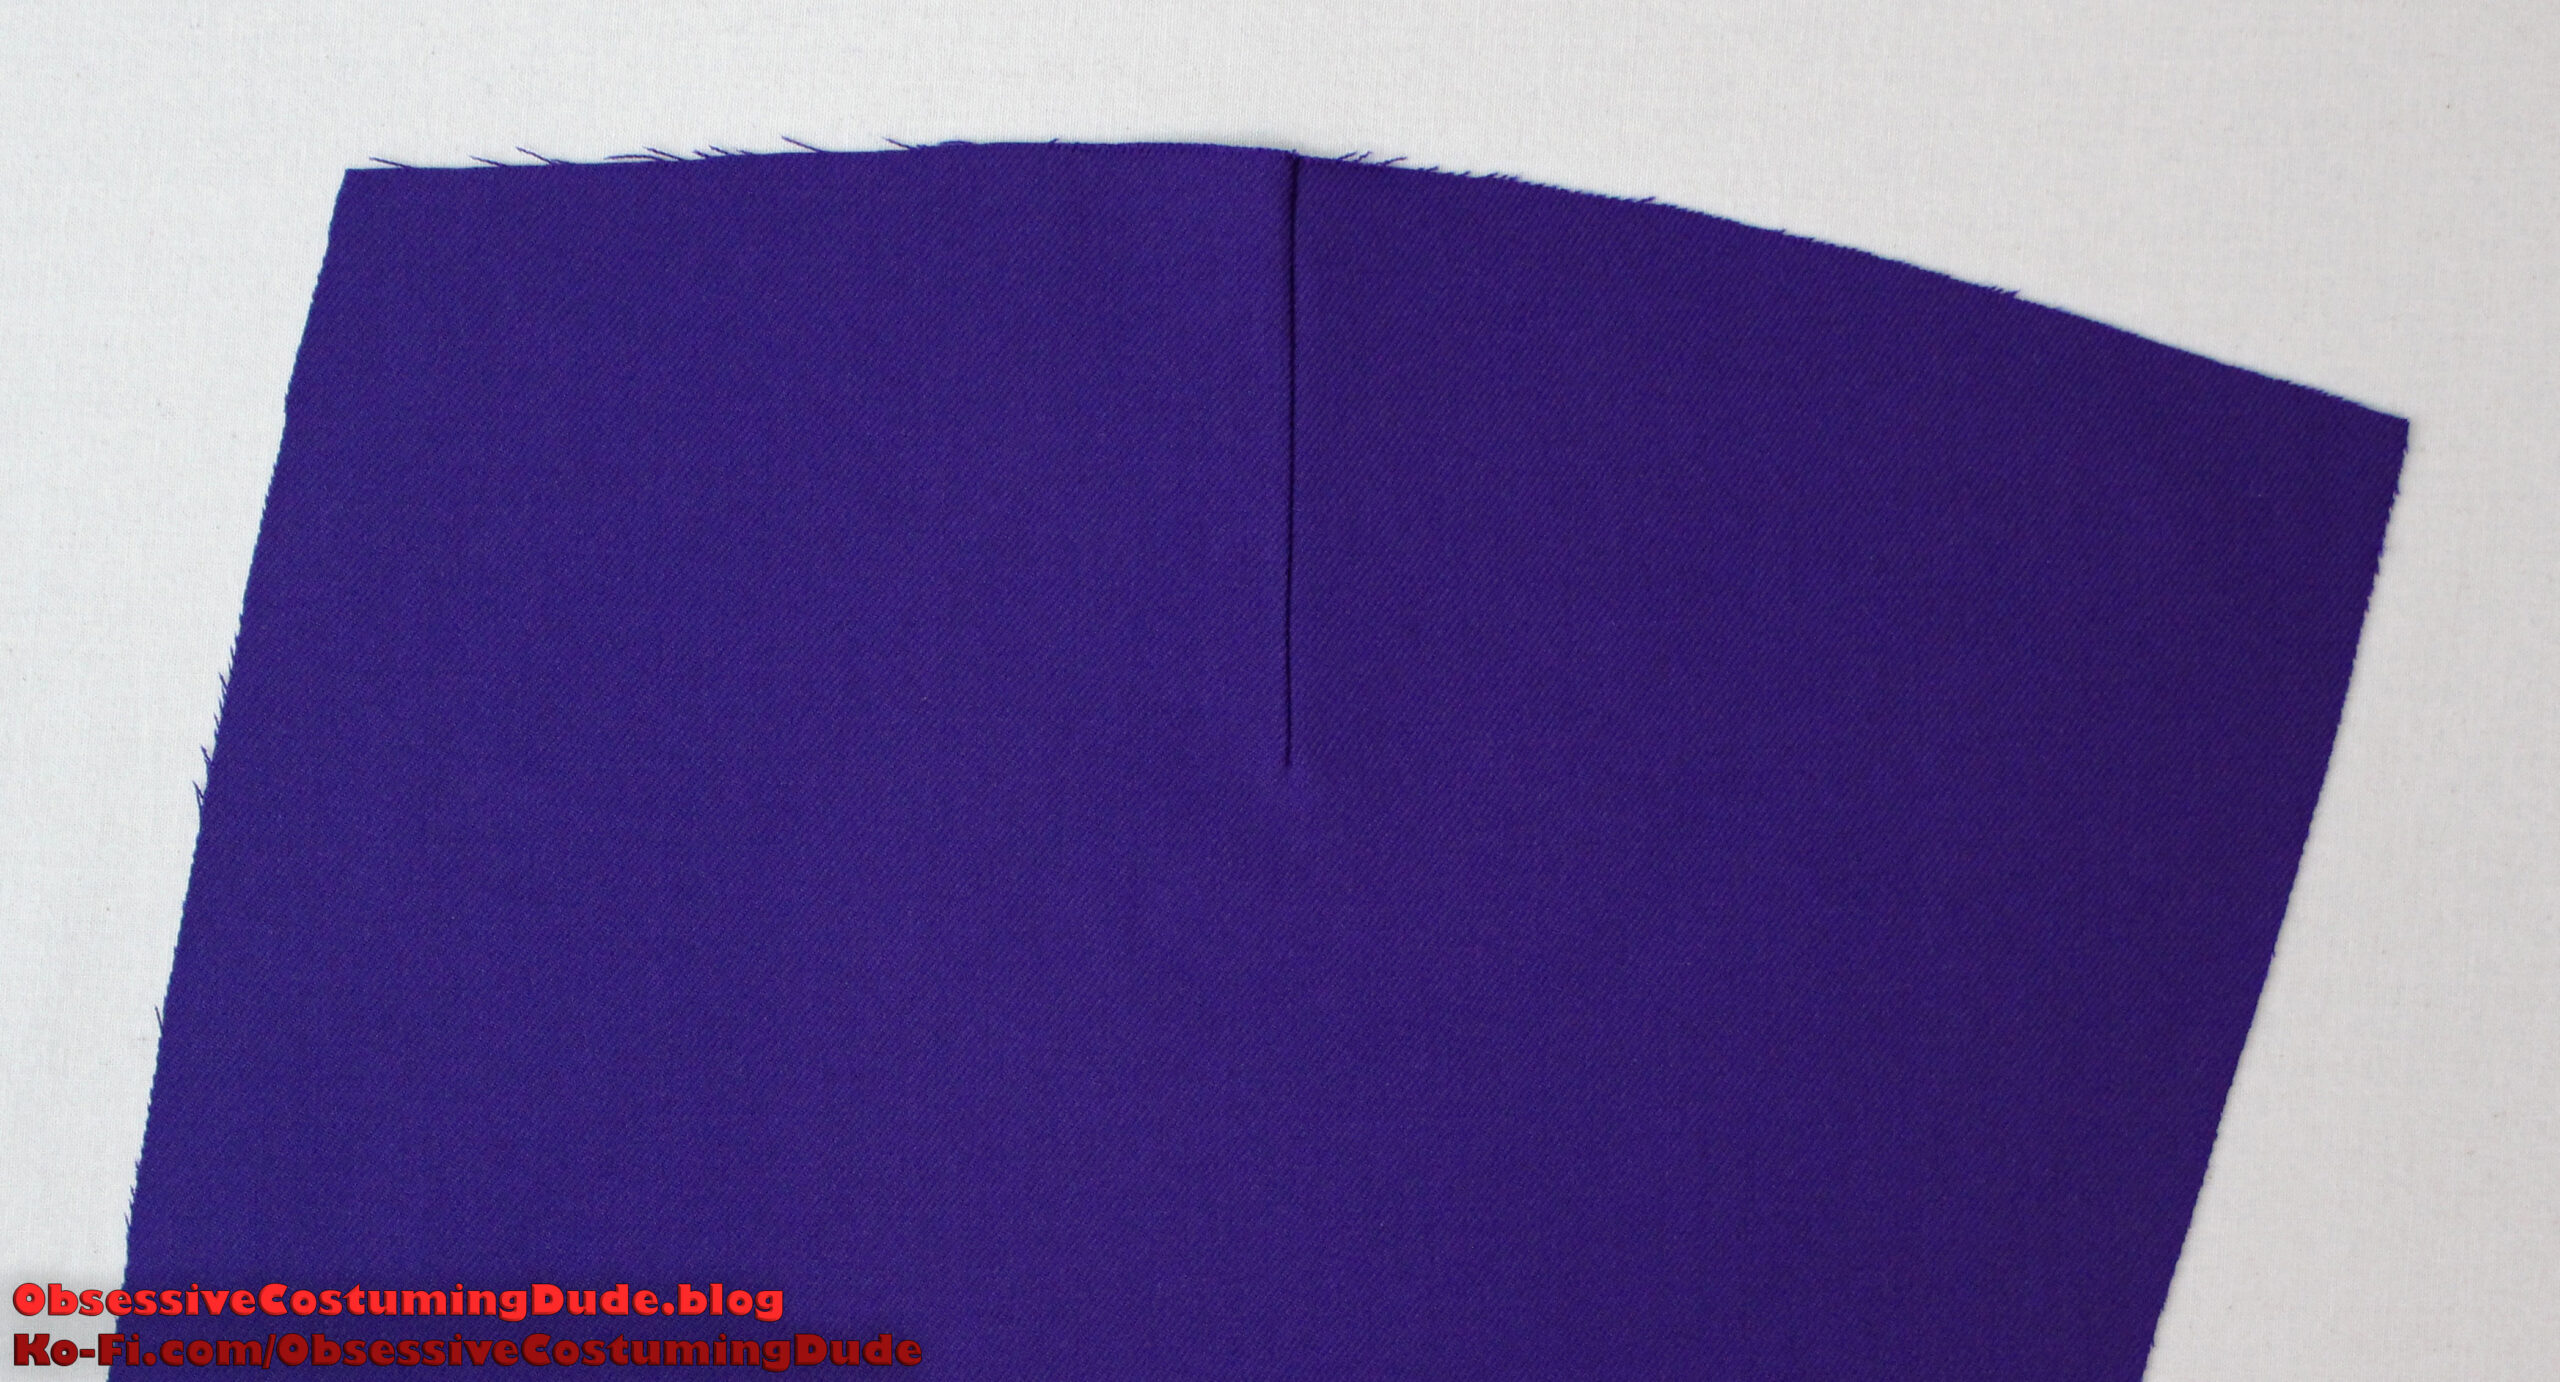
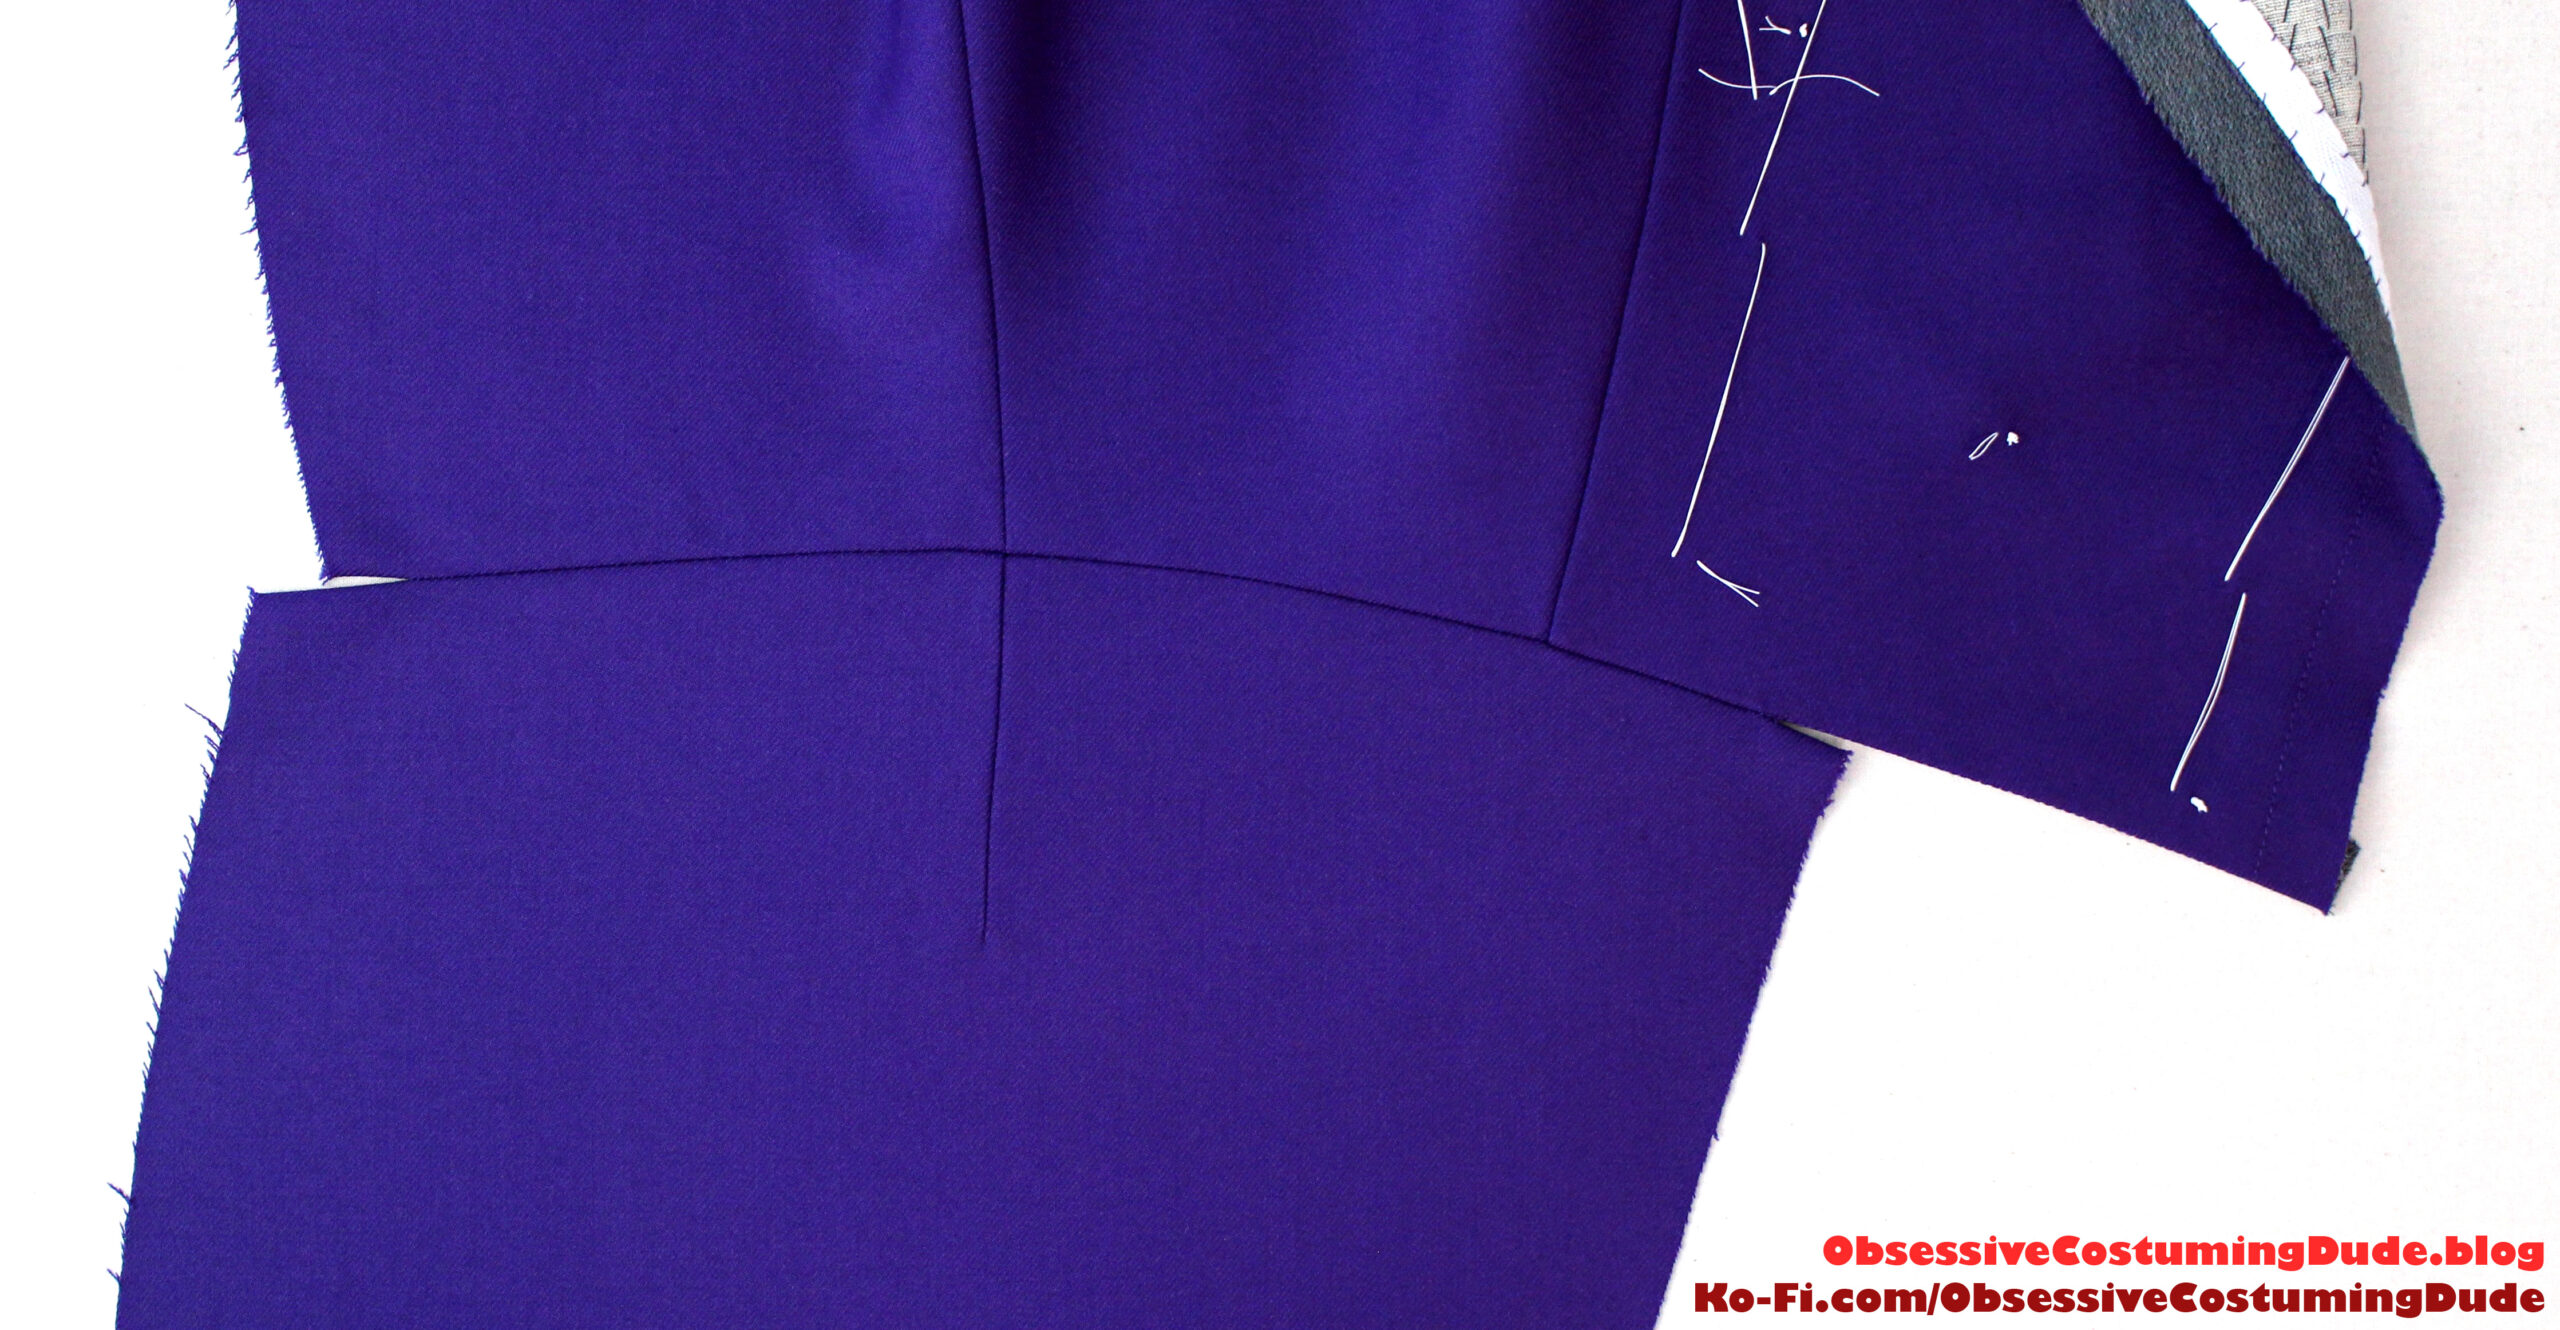
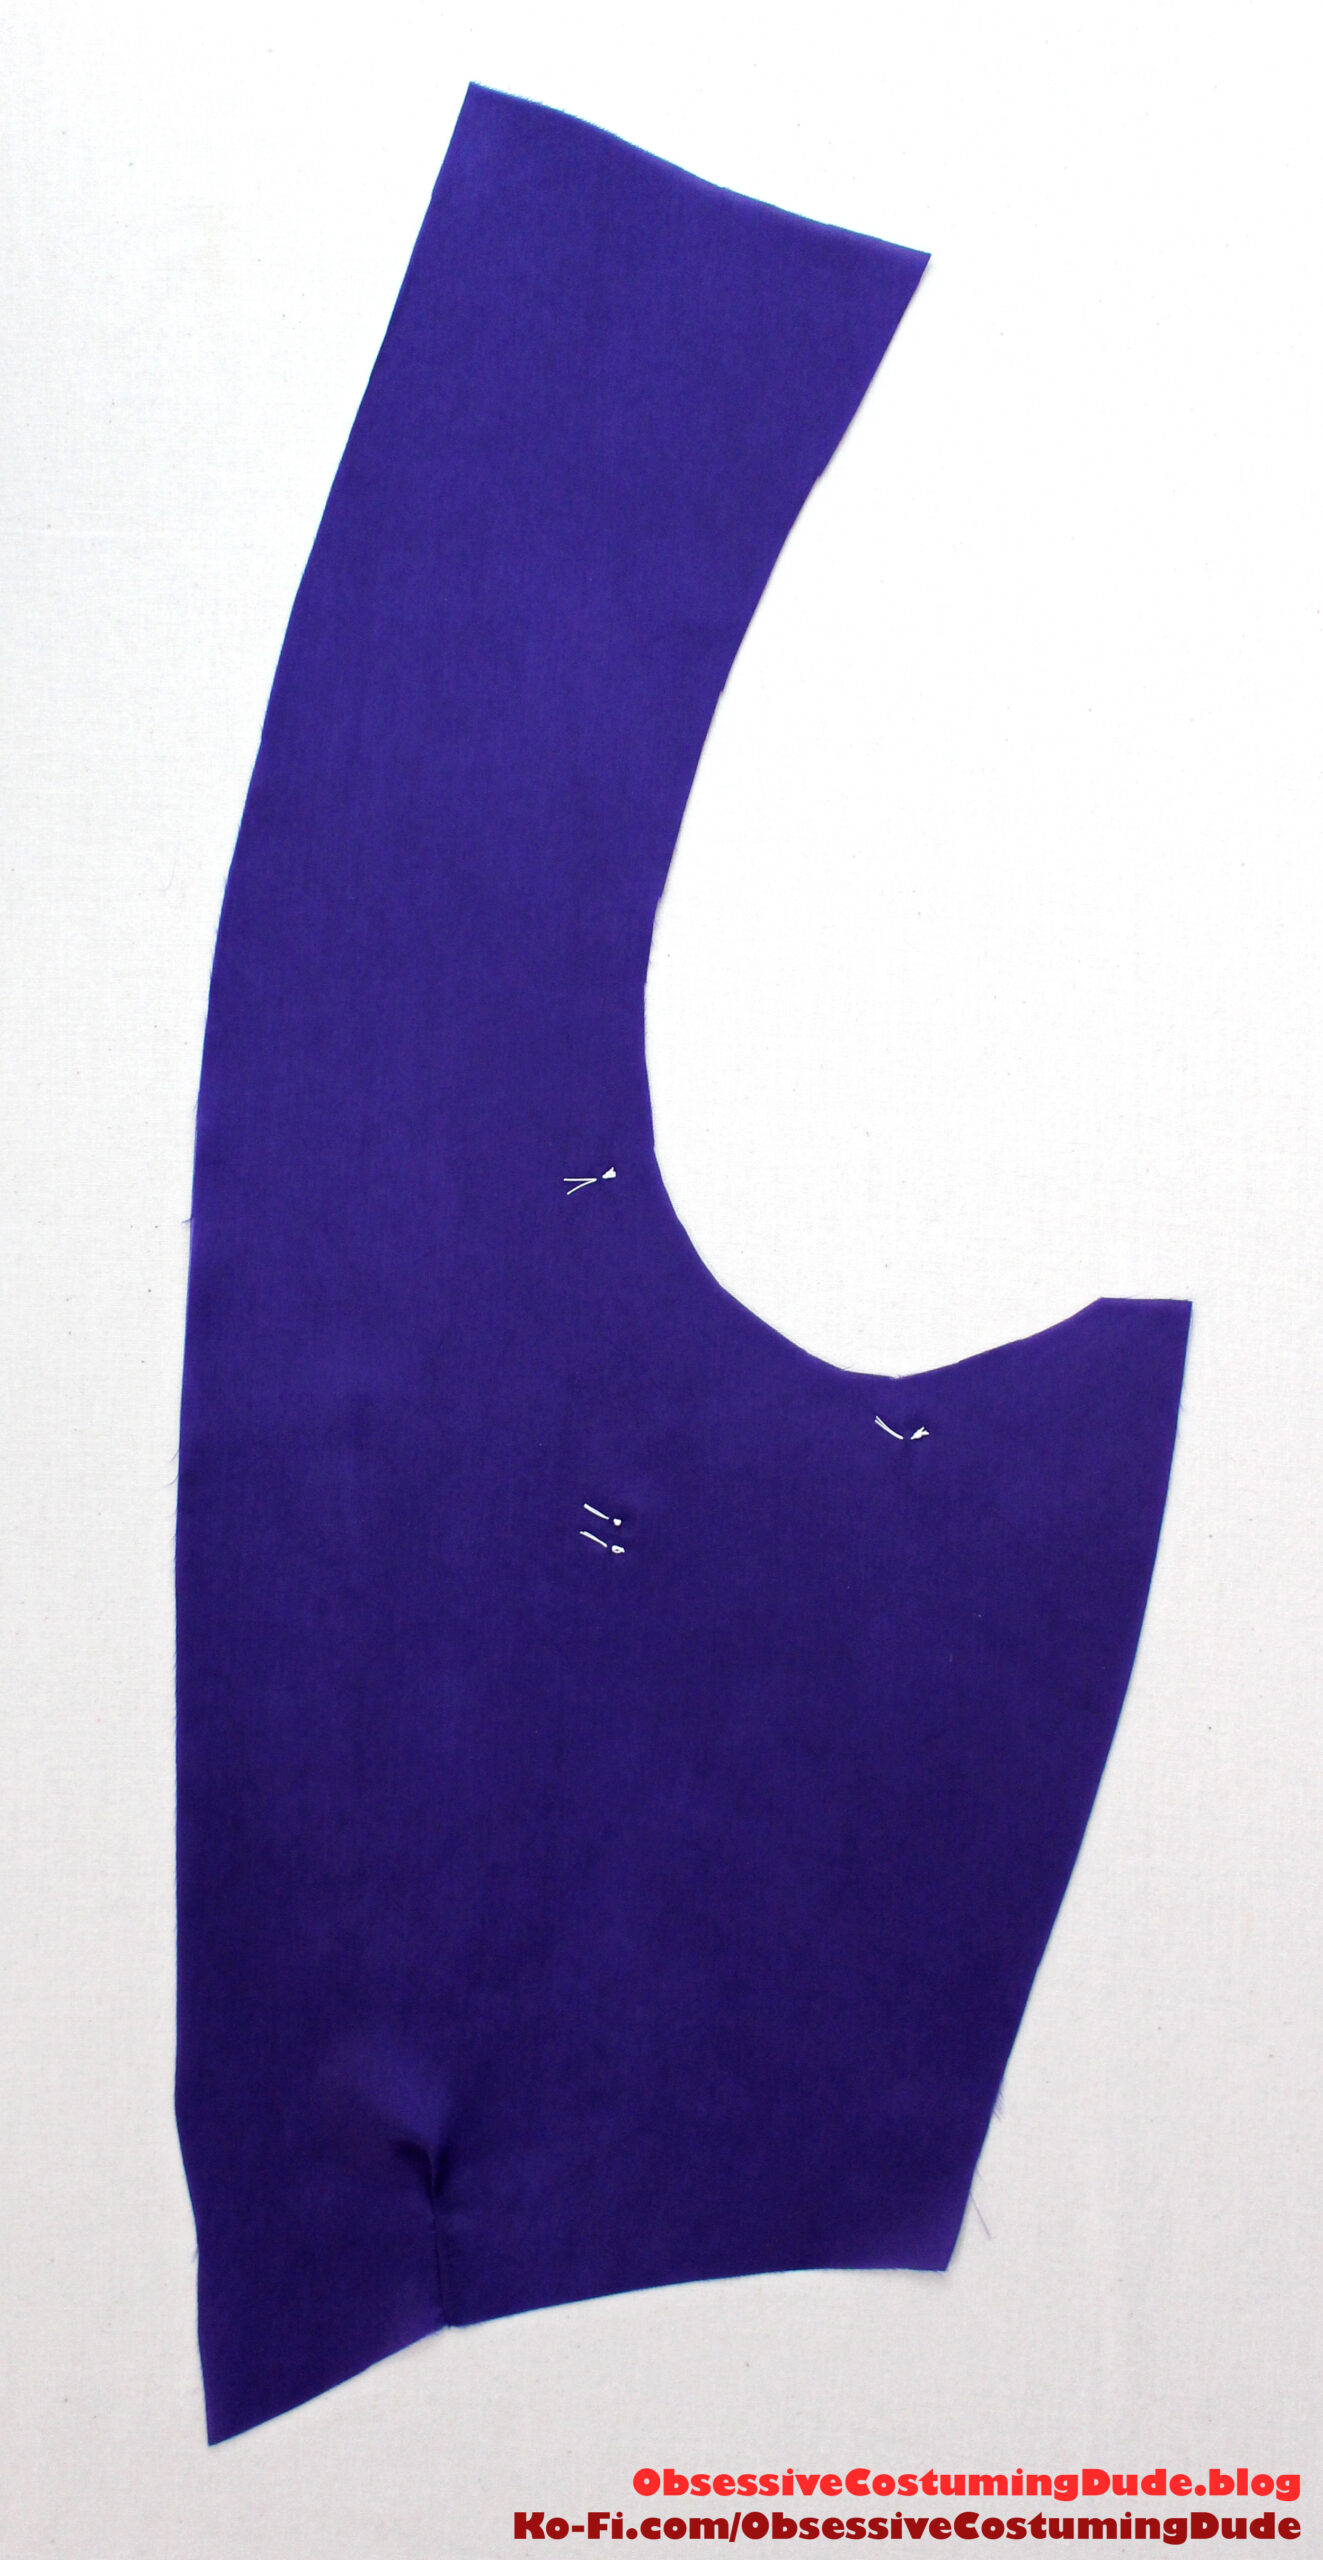
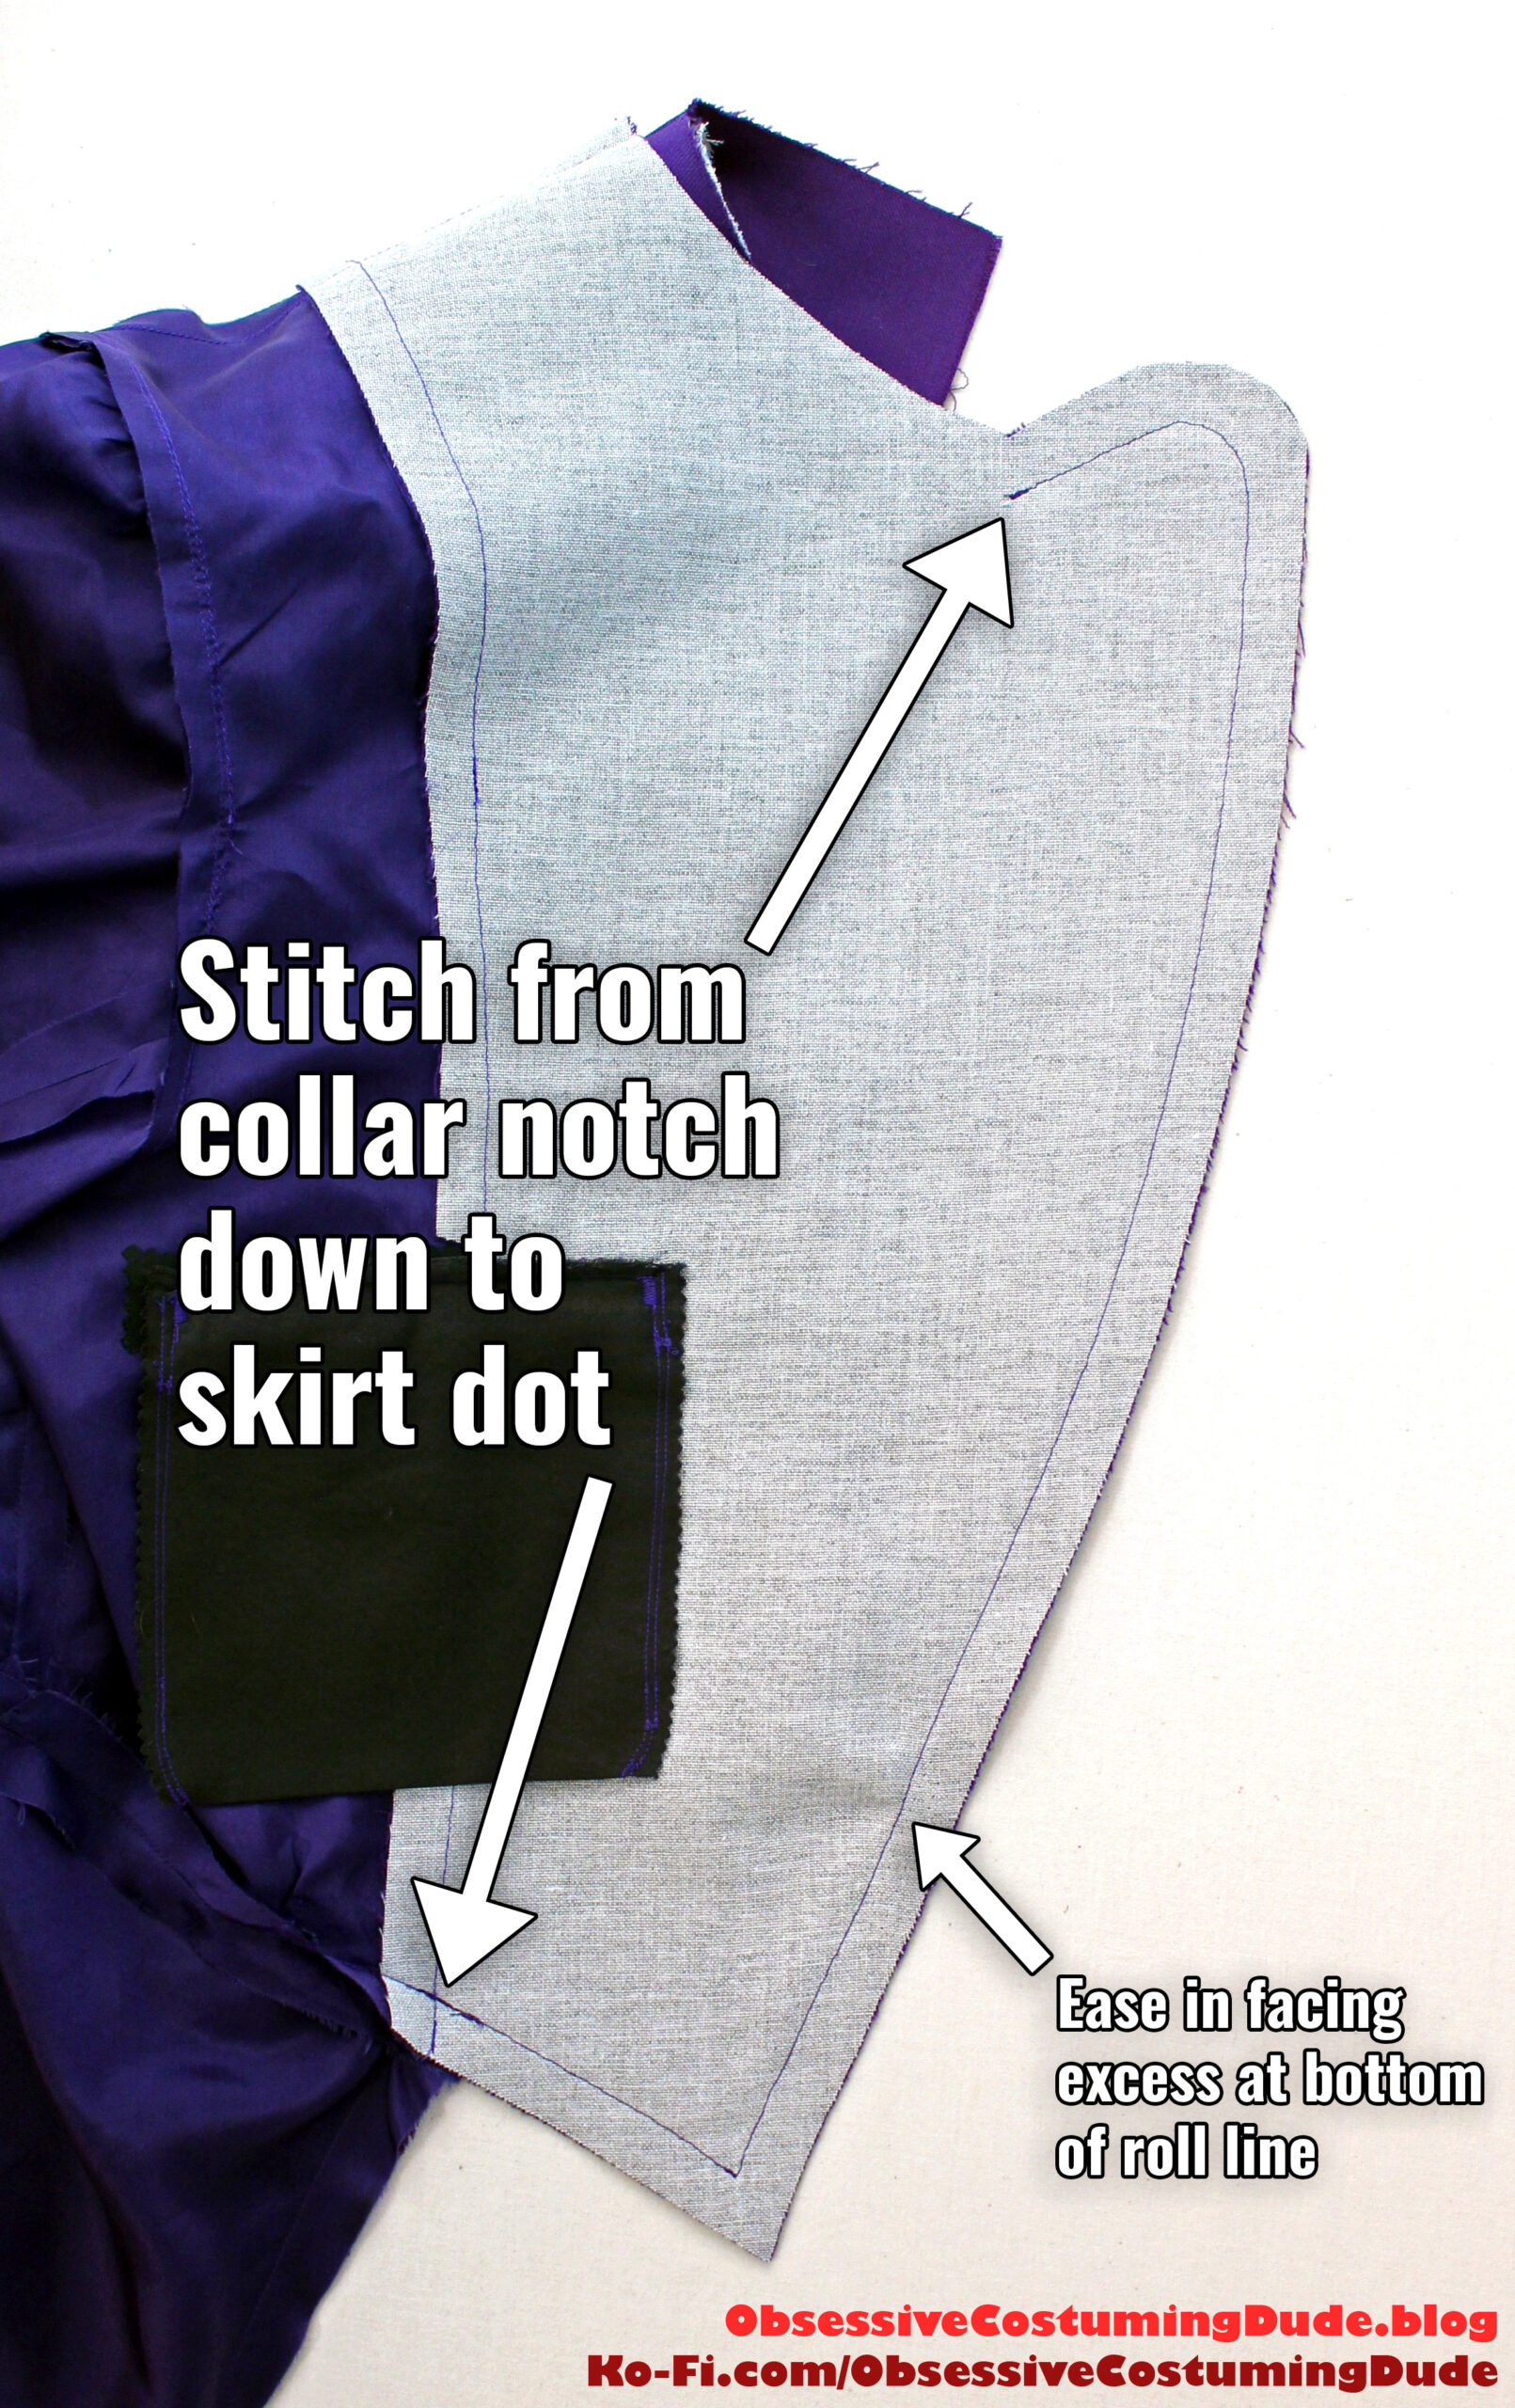
Stay-stitch the tailcoat front (piece A) from the collar notch to the lower “skirt” dot.
Sew the front dart closed.
Press the dart toward the front.
Repeat for the other front.
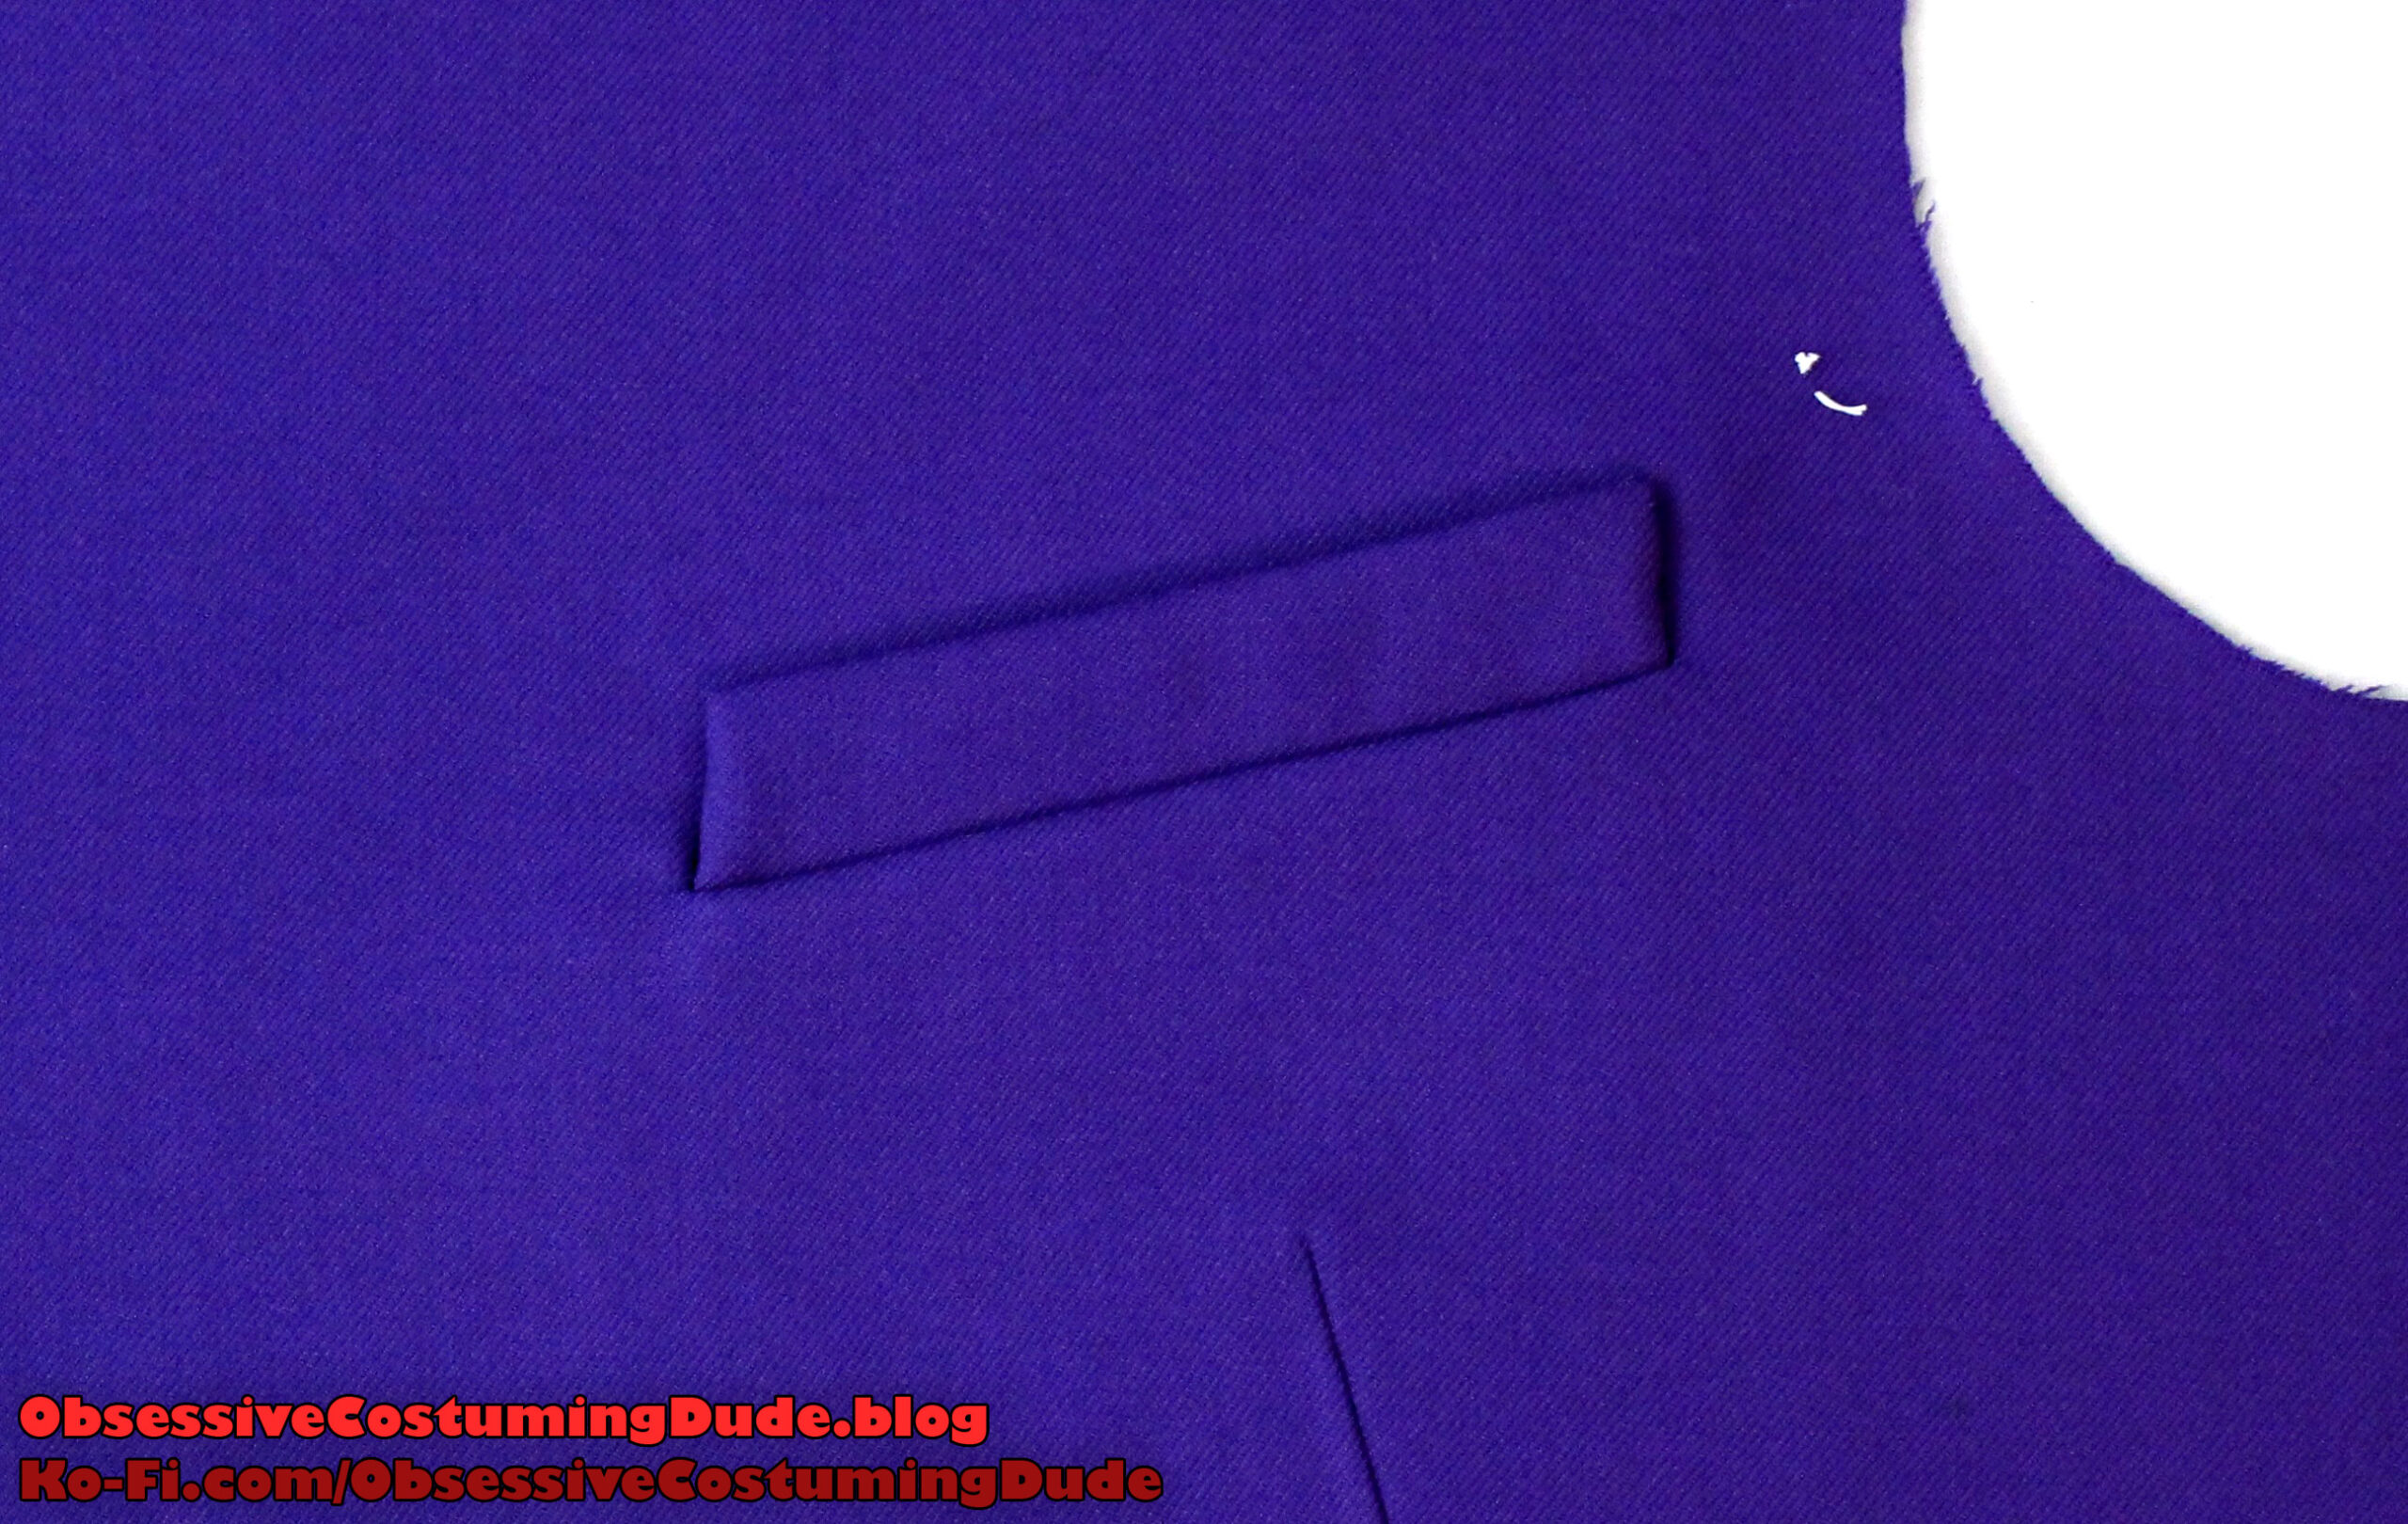
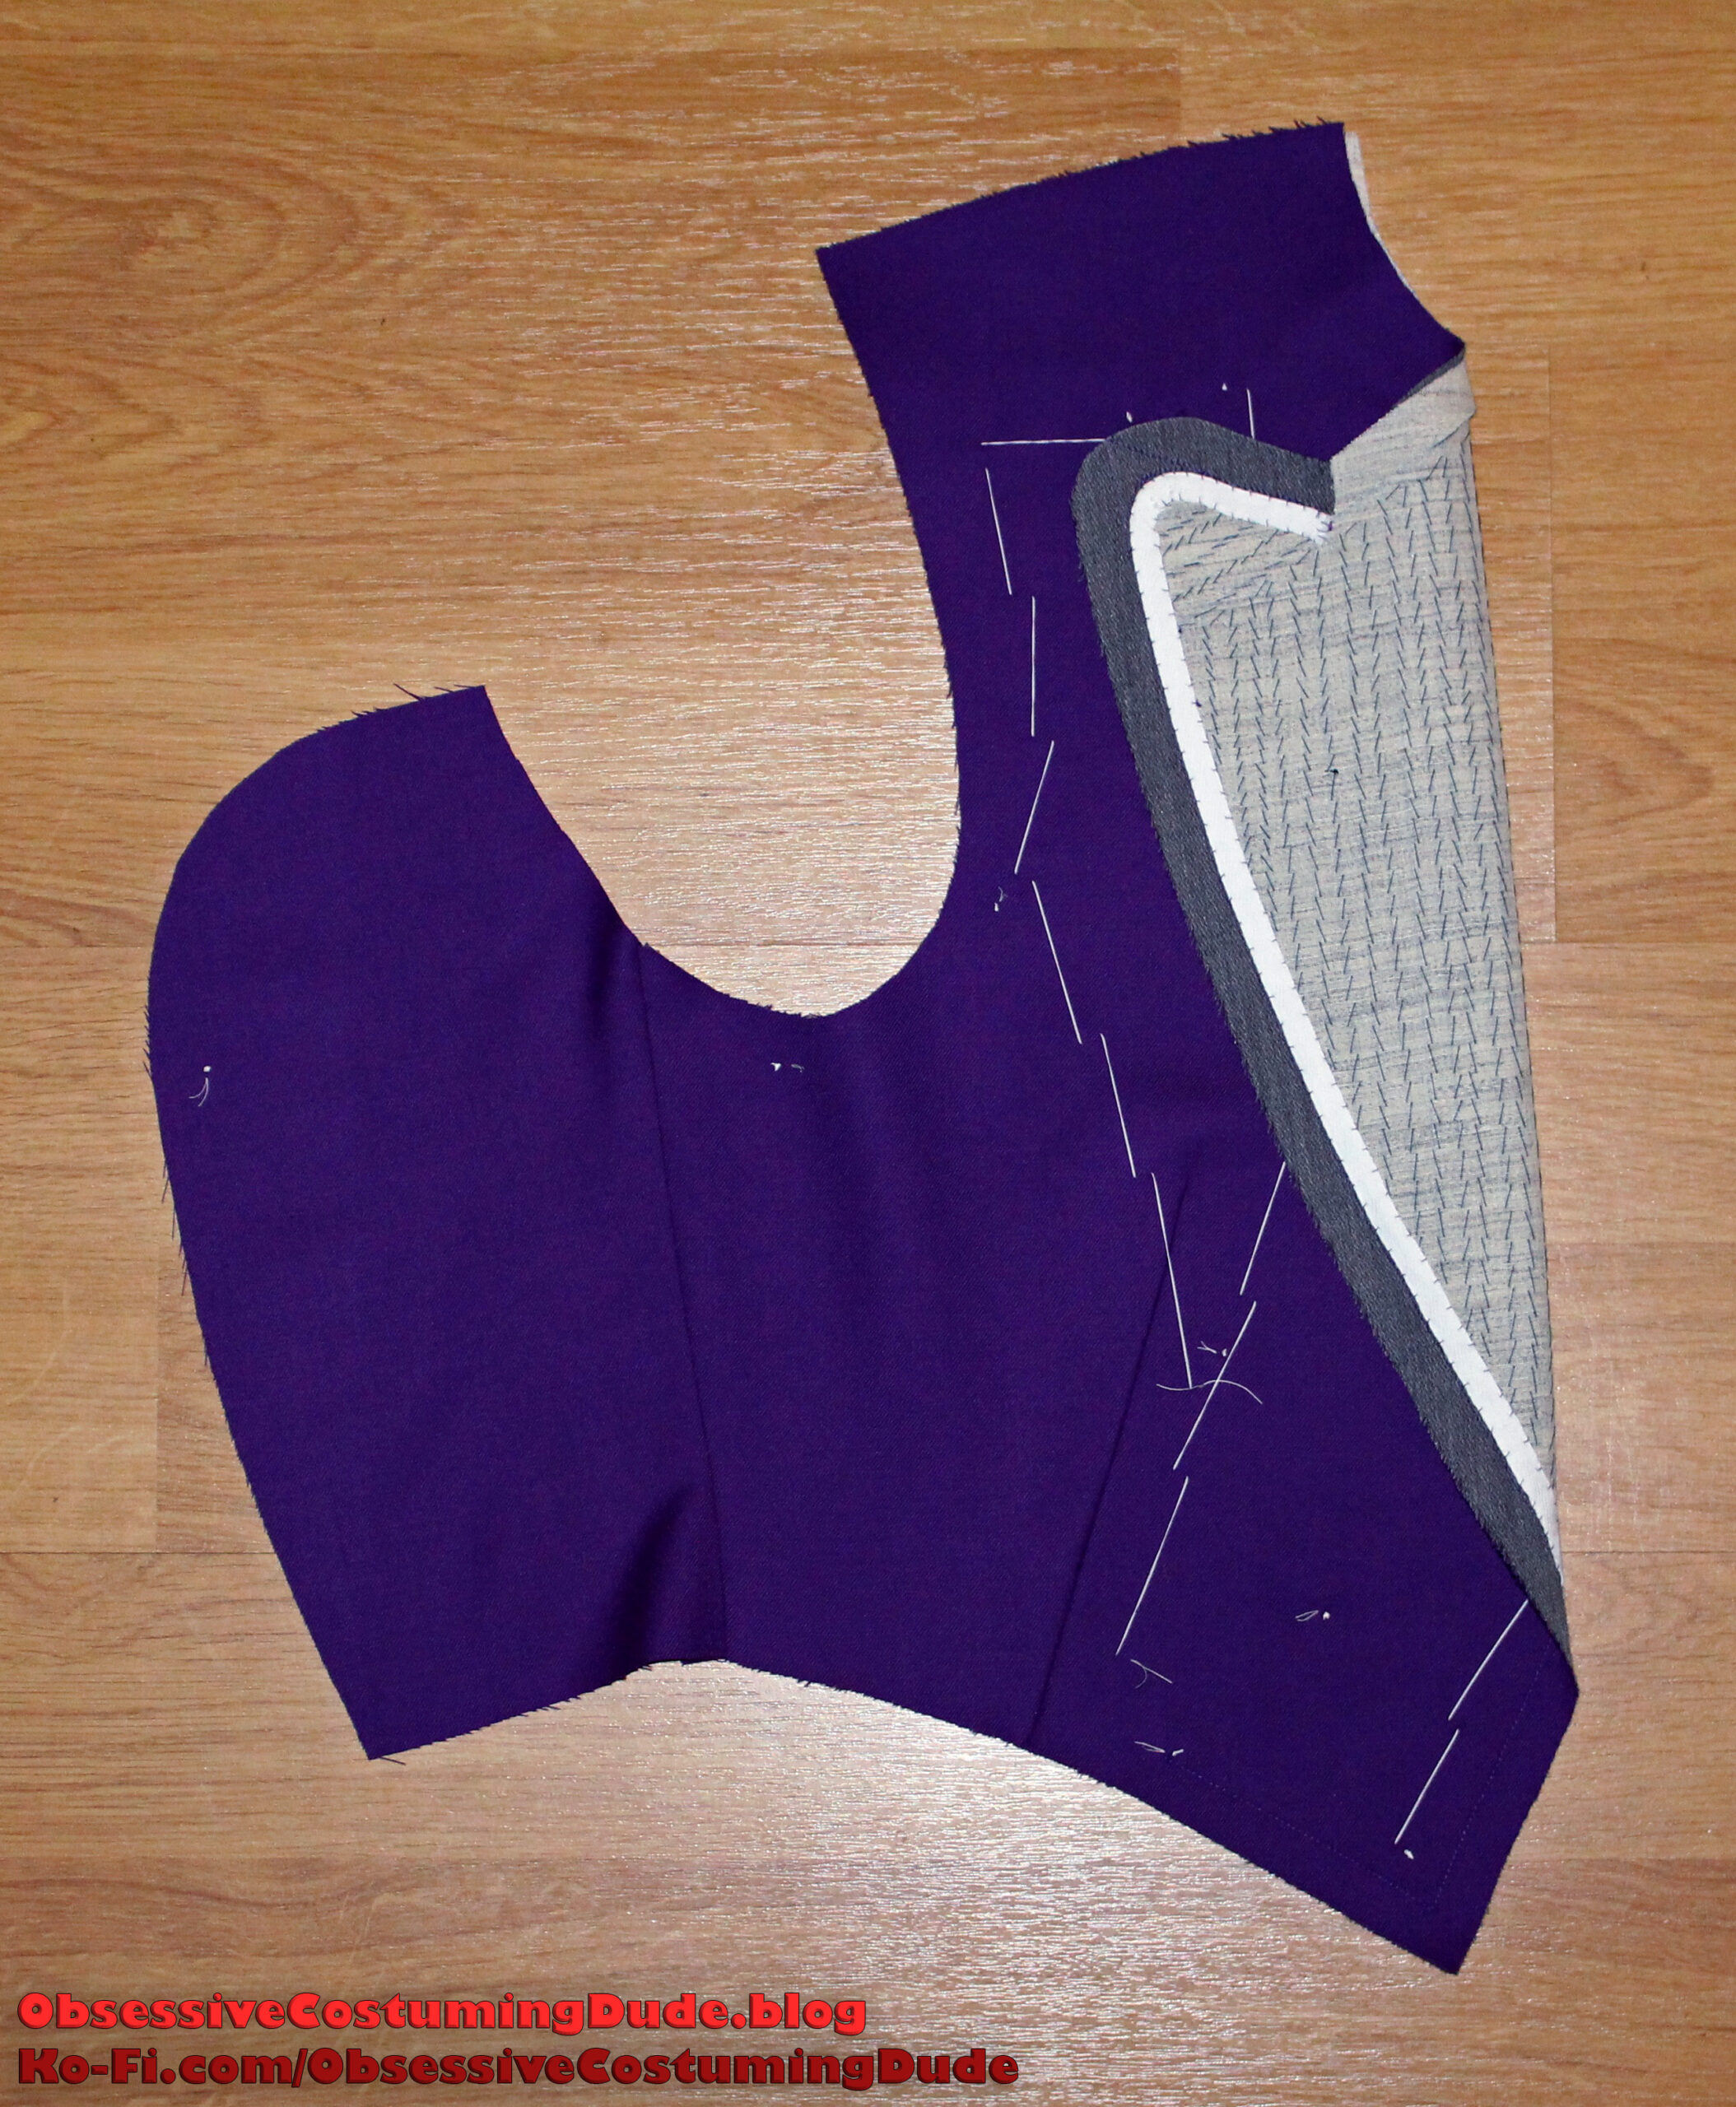
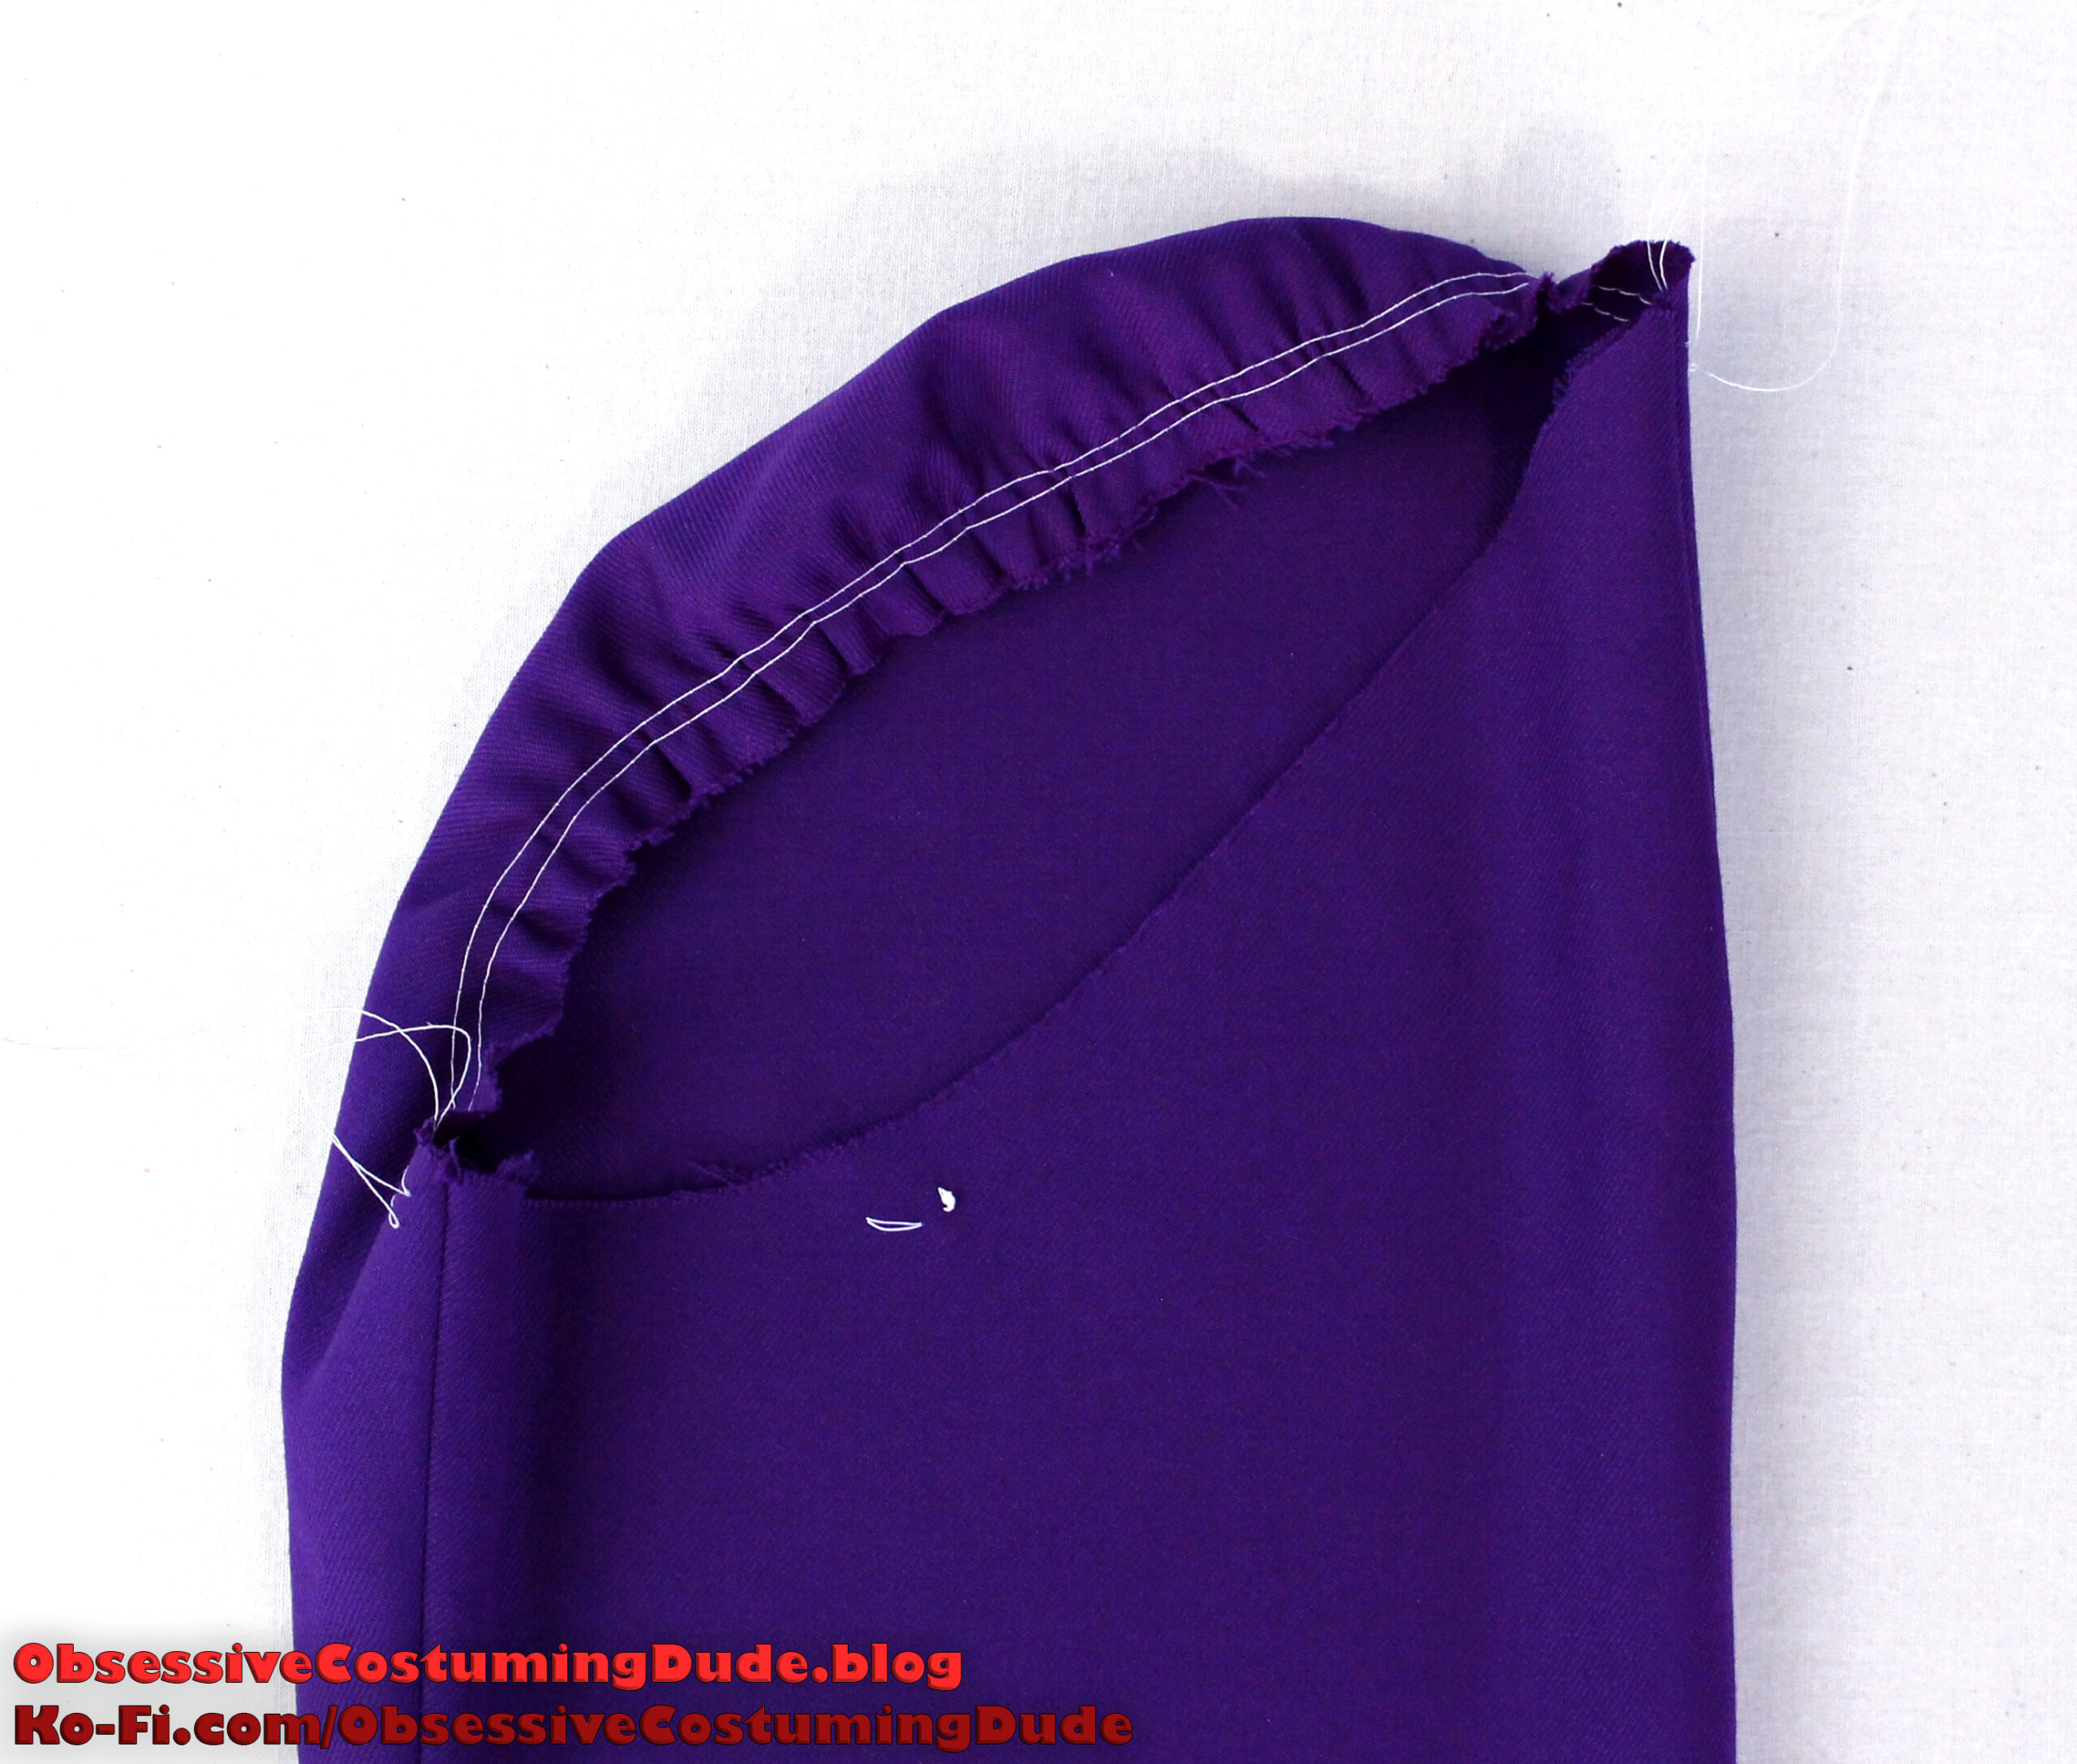
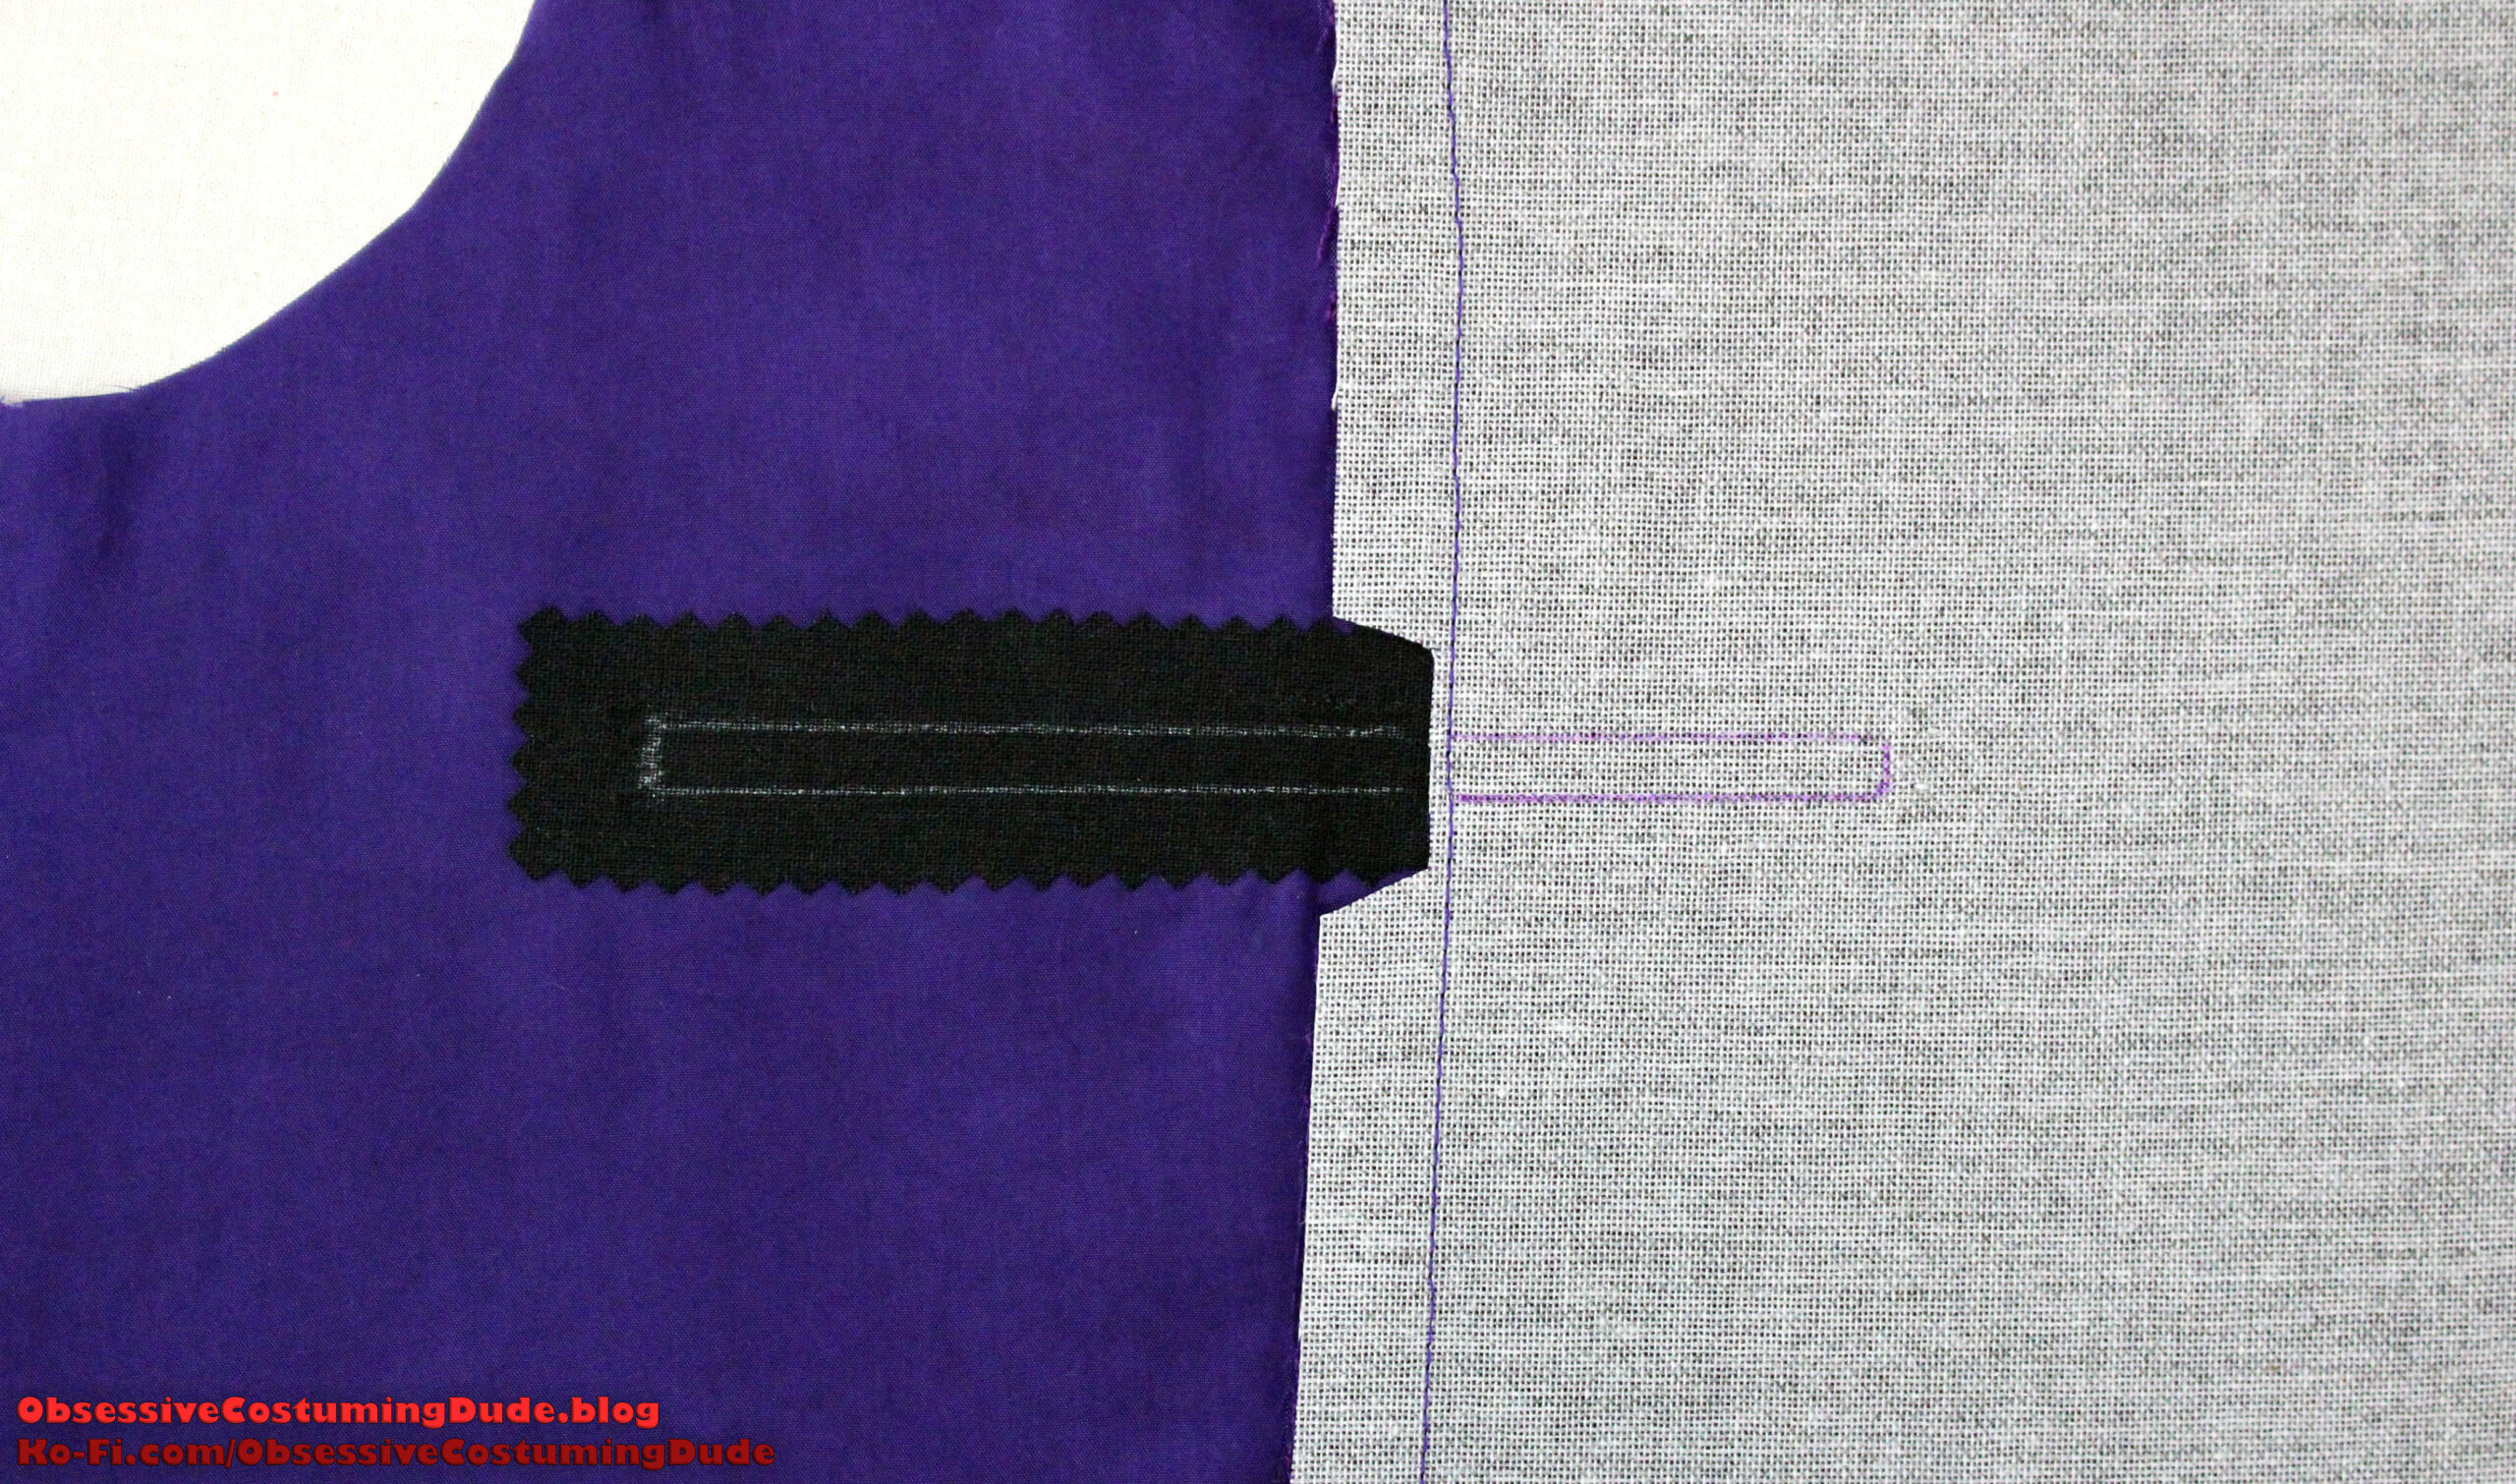
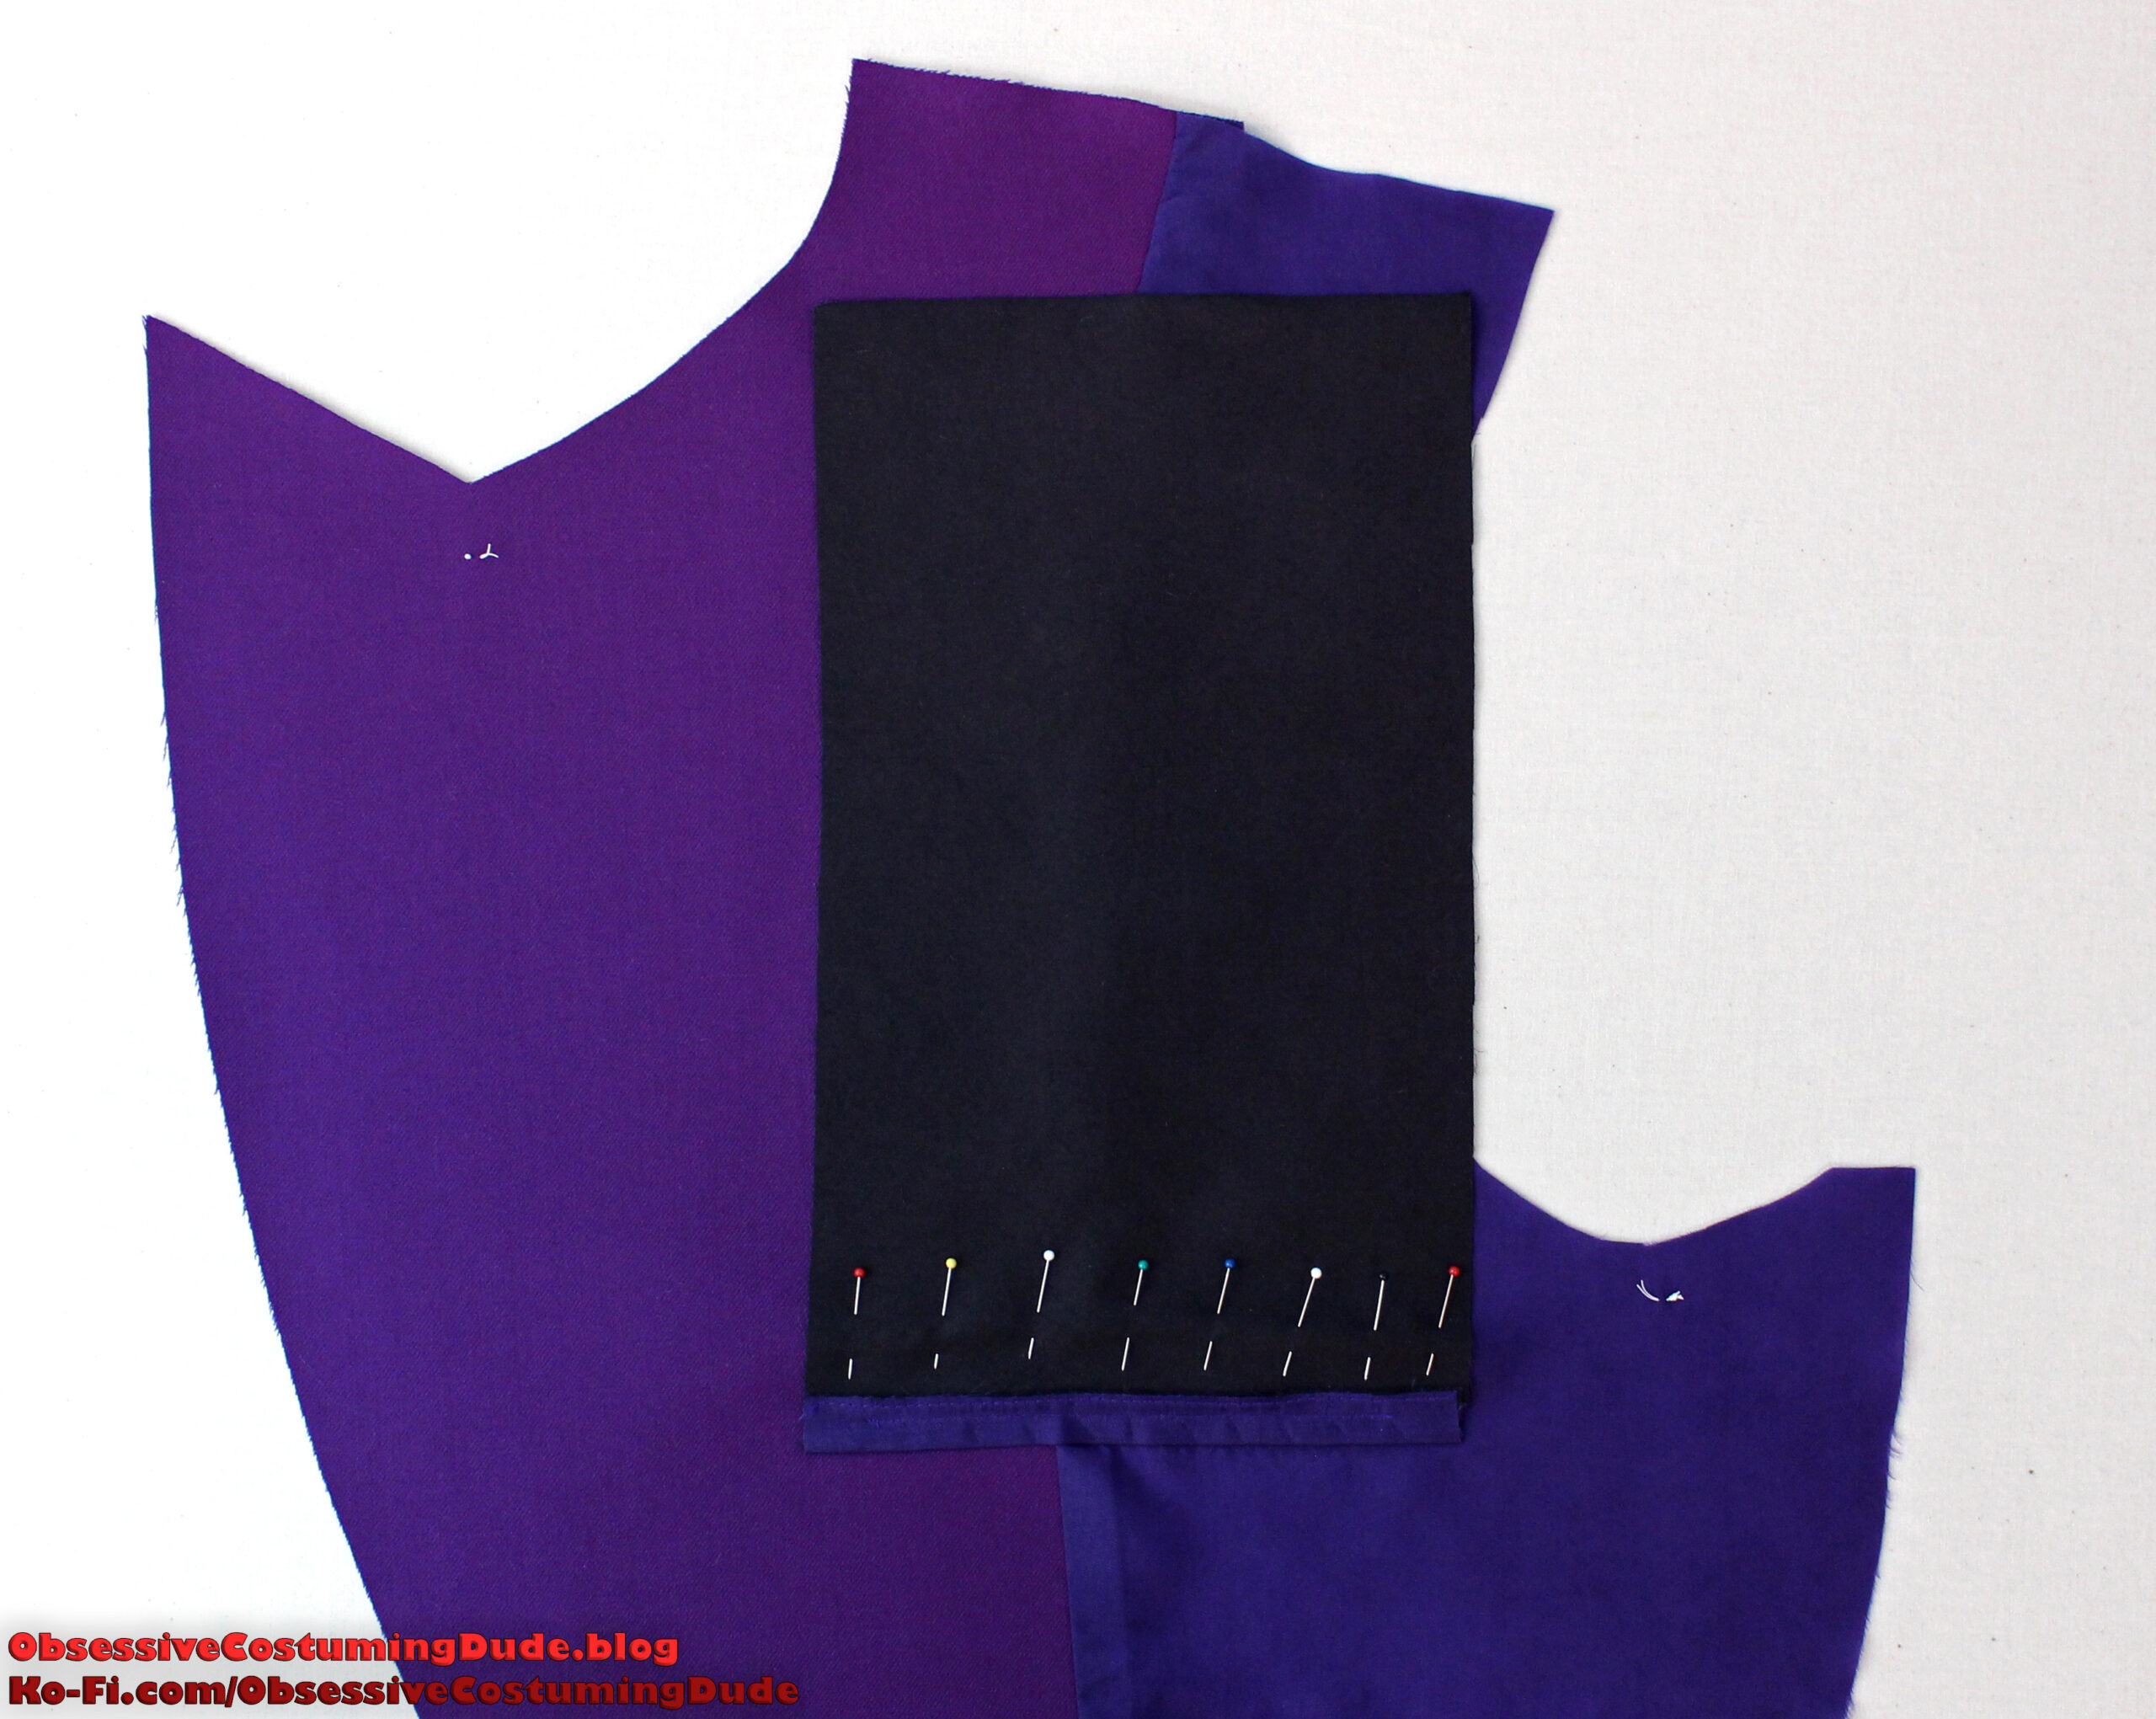
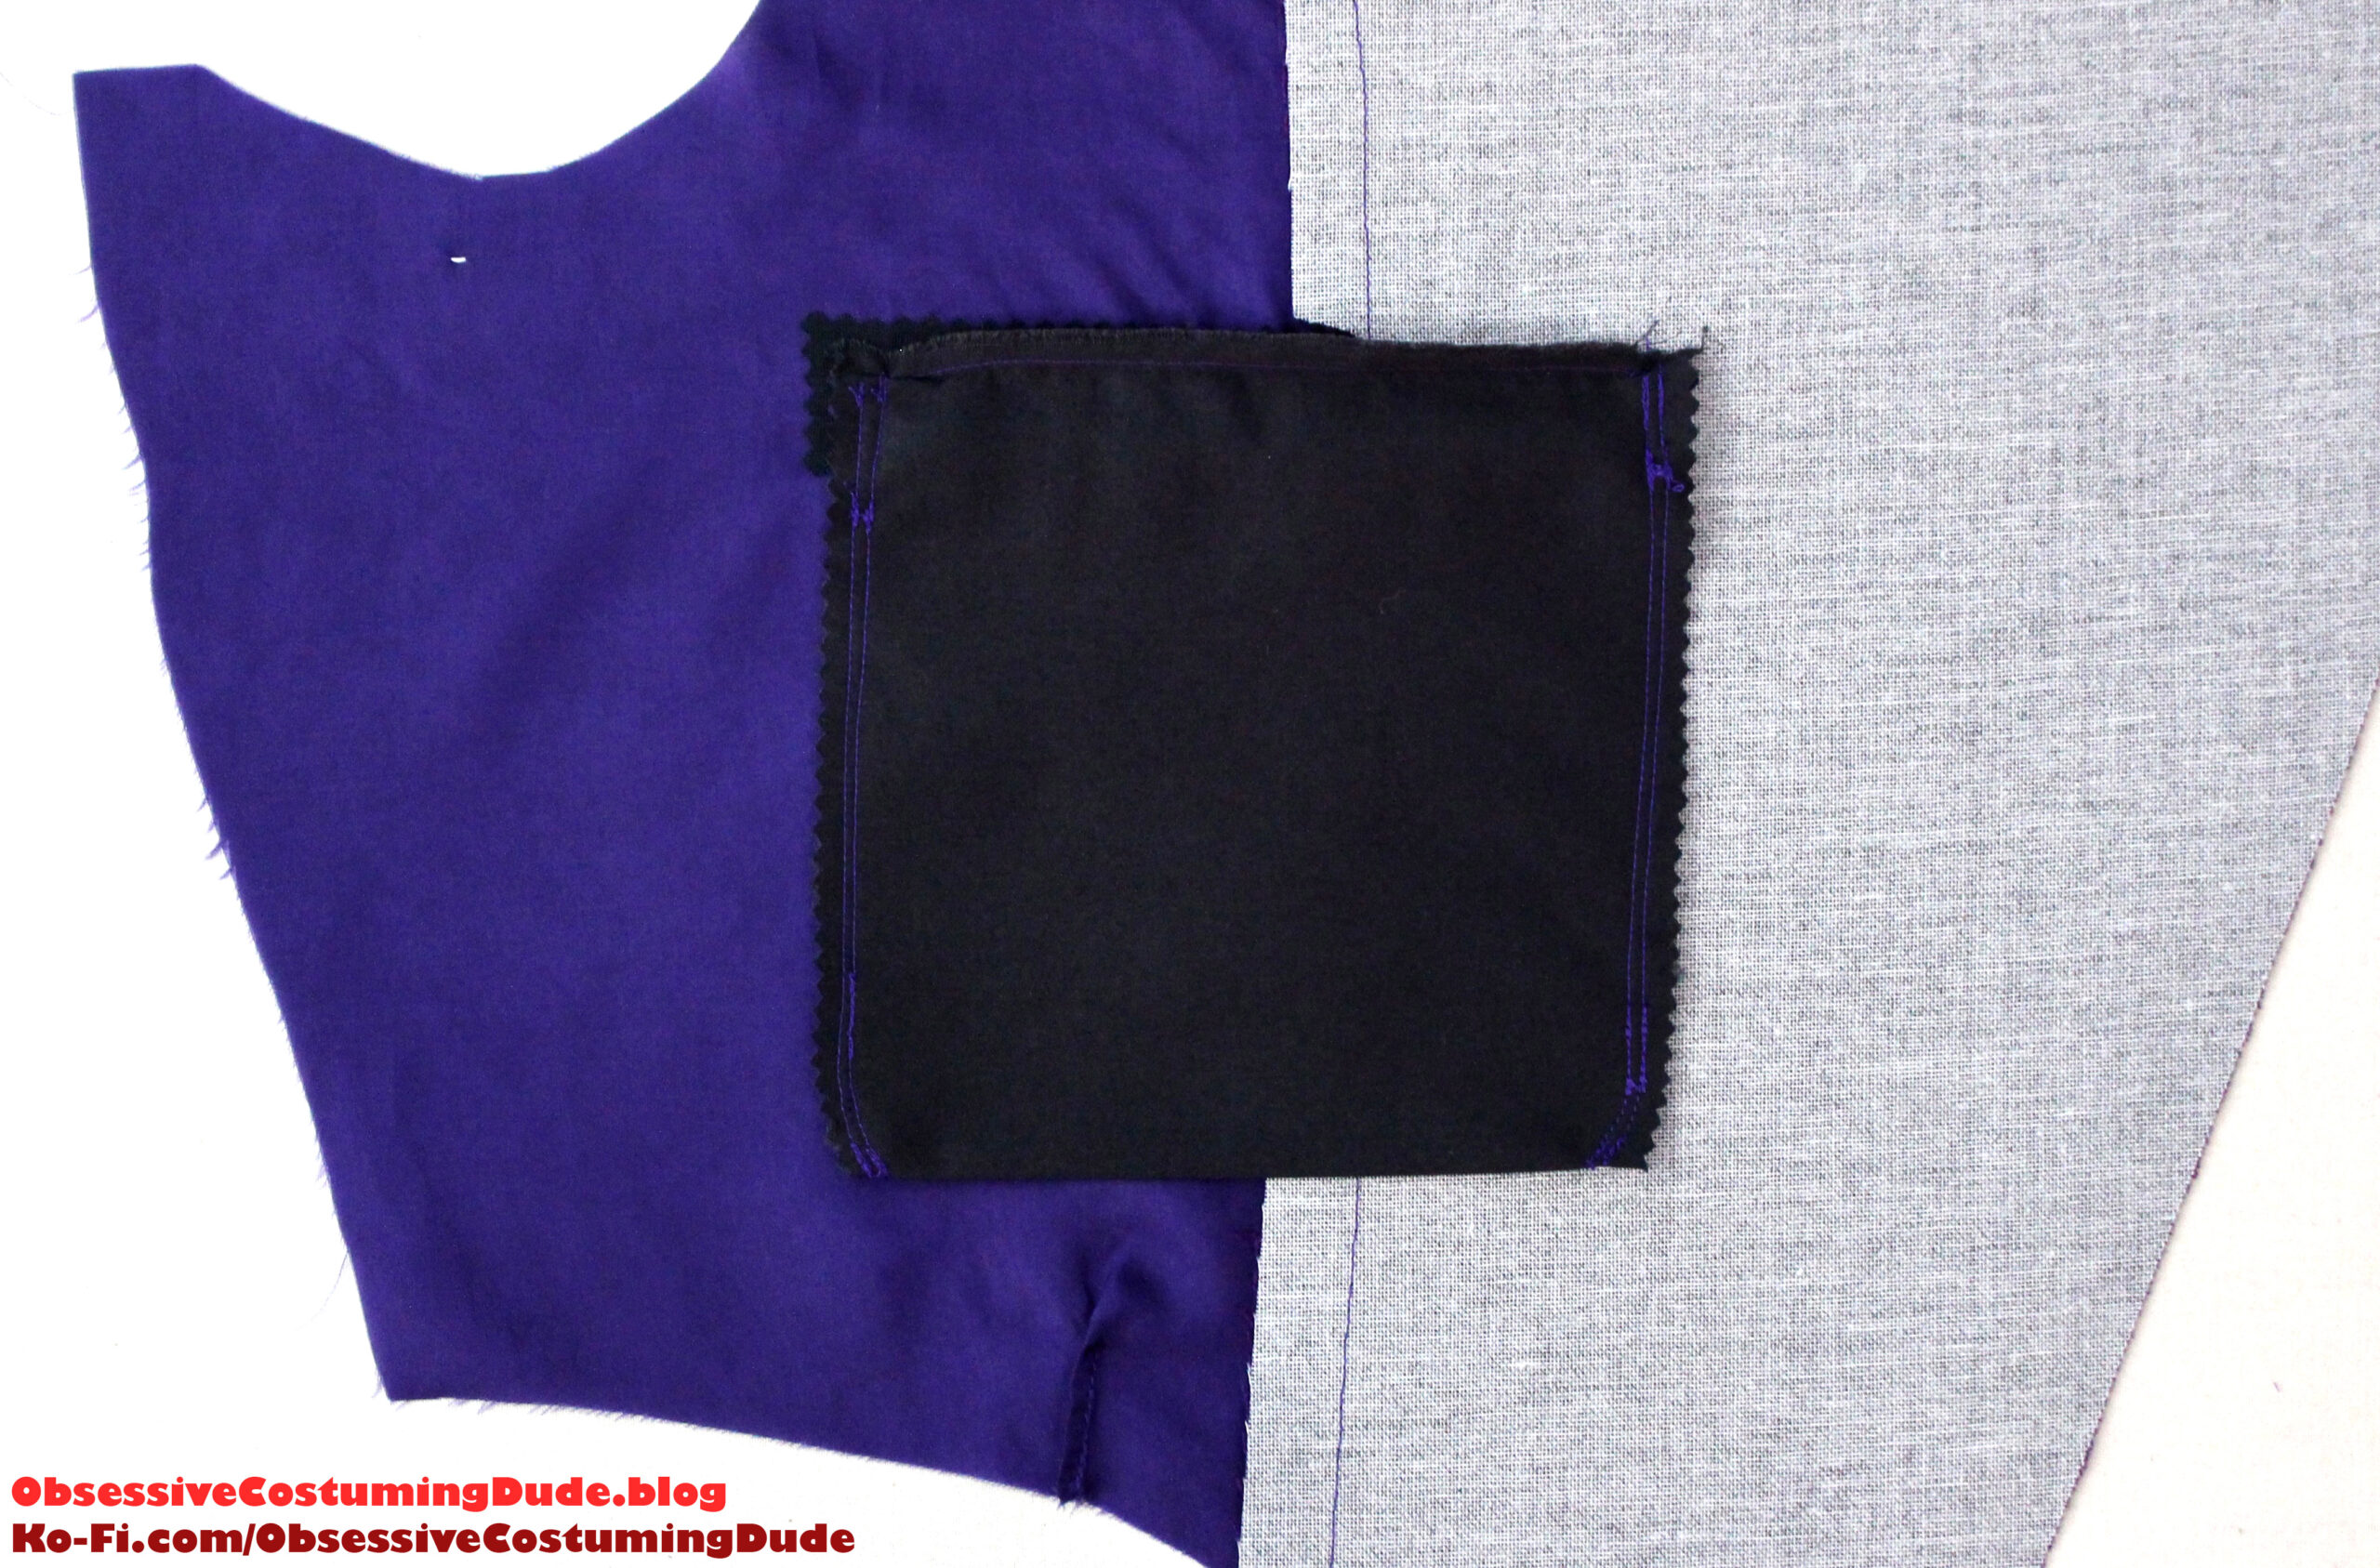
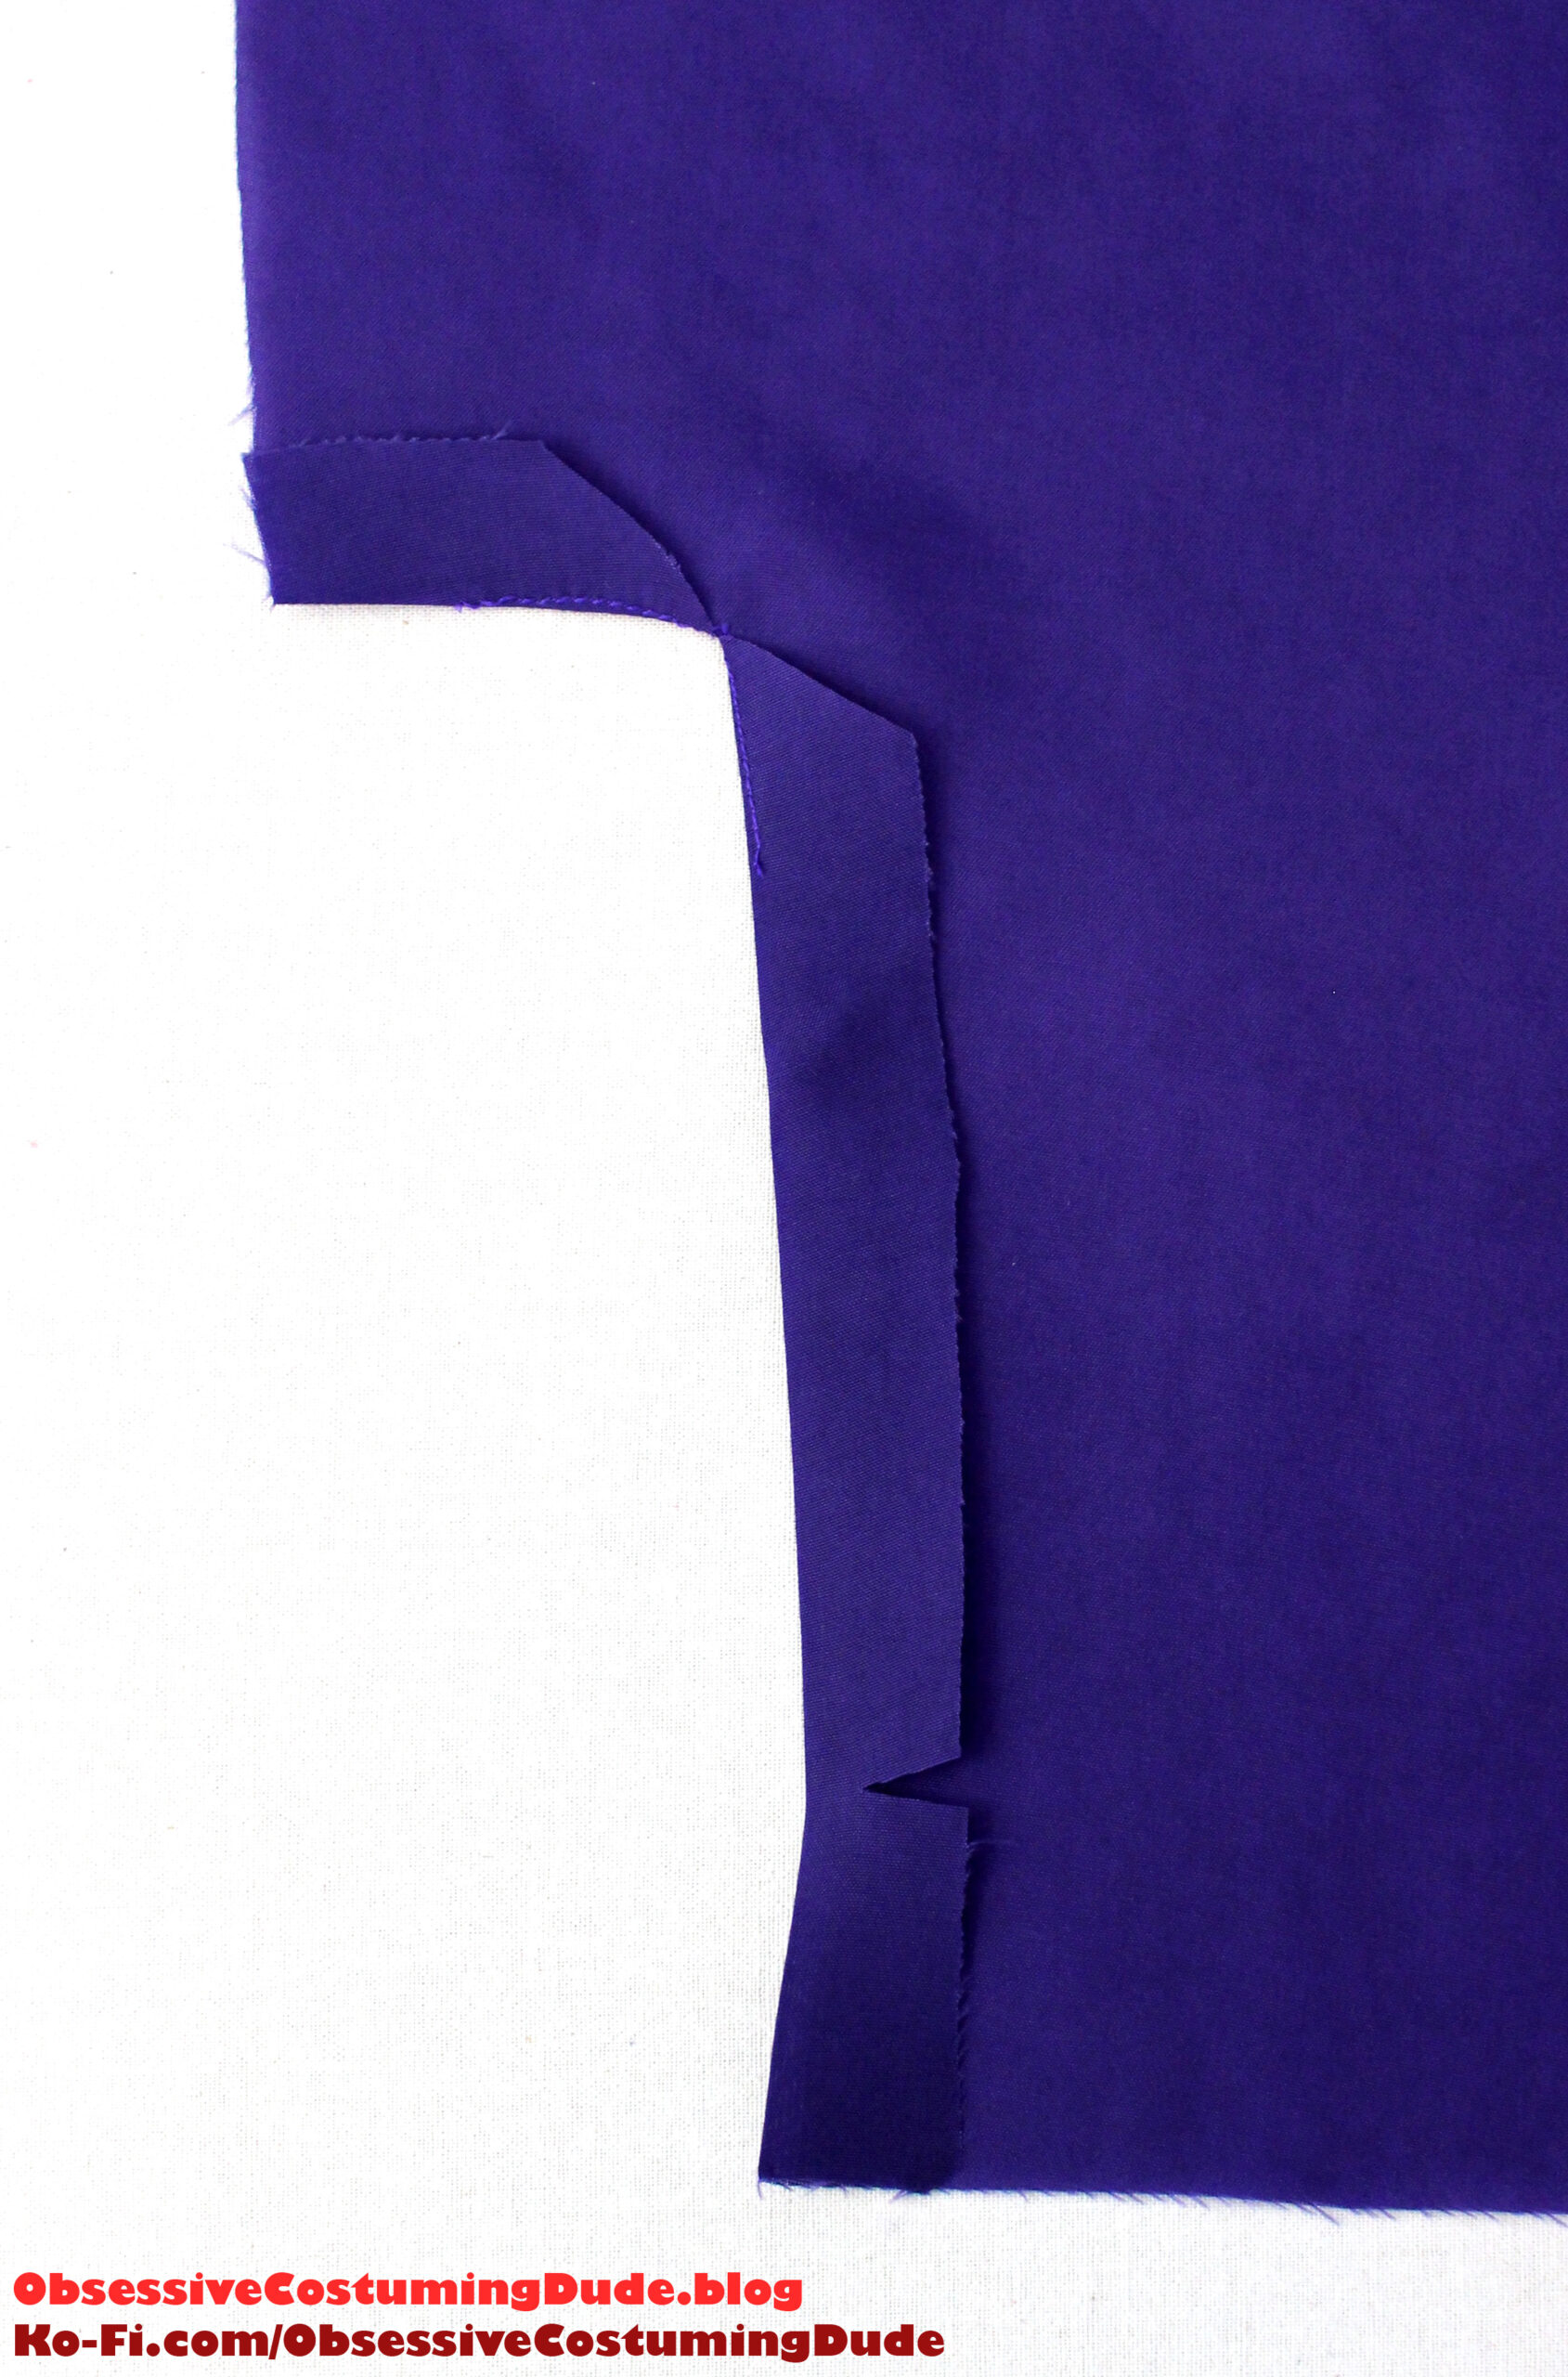
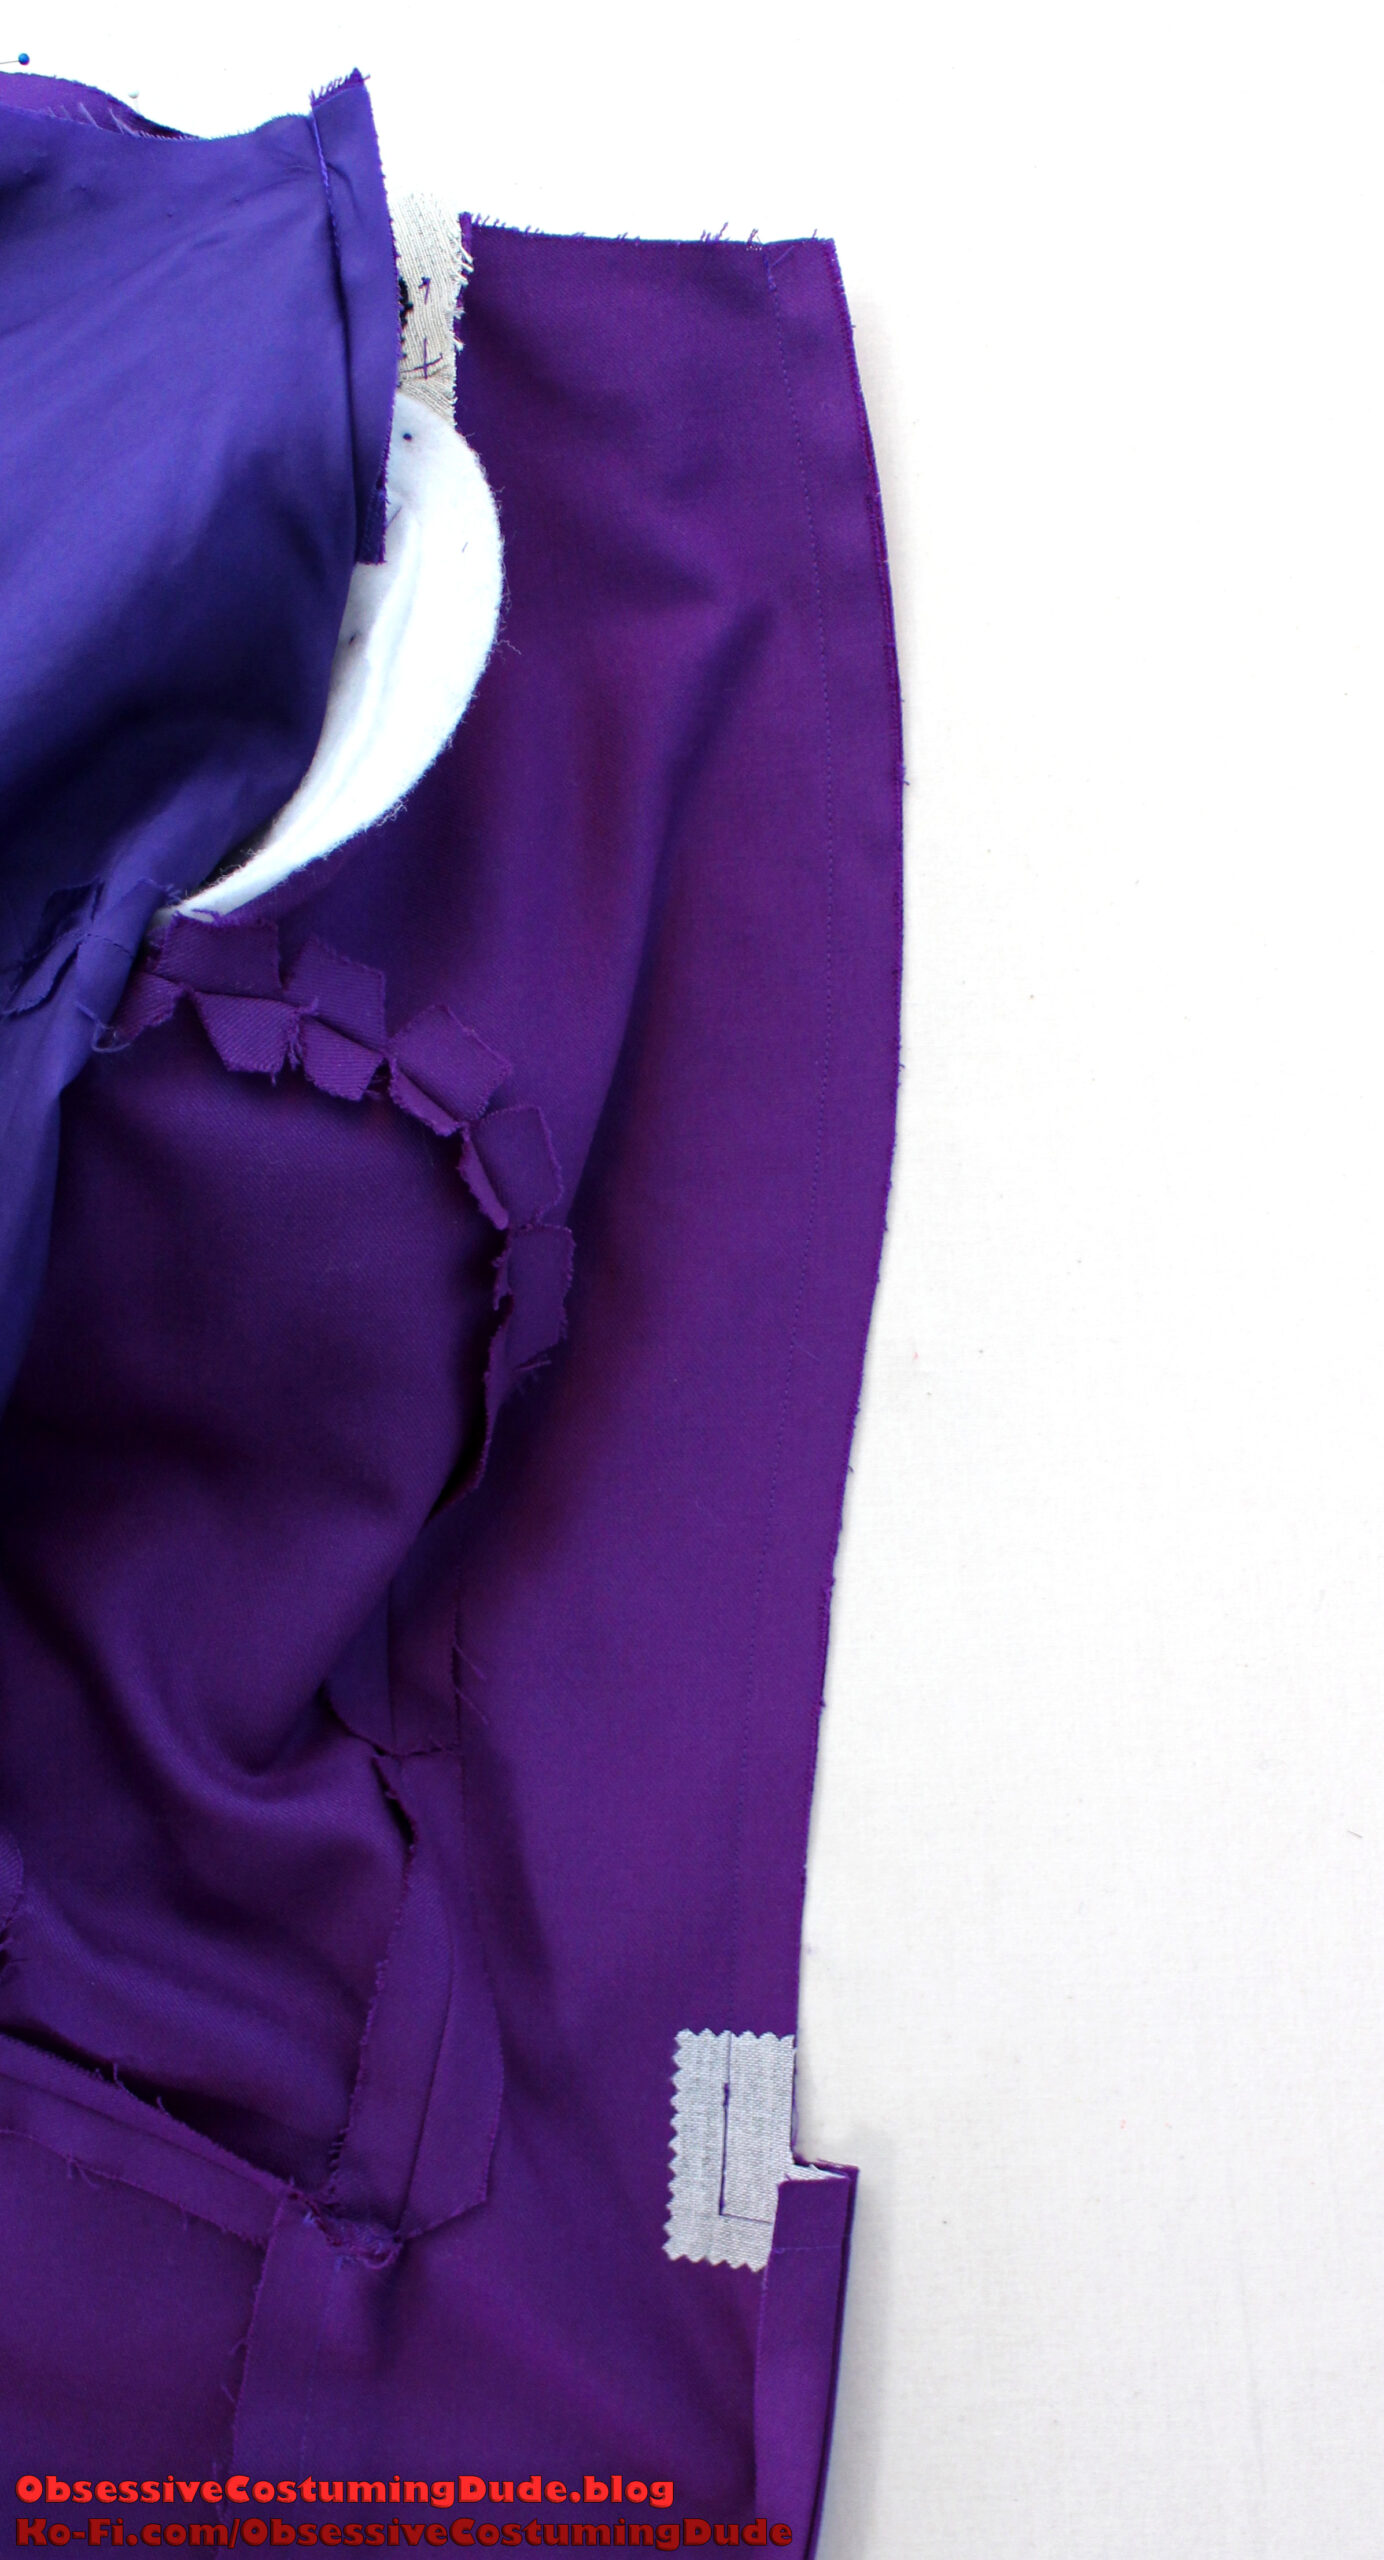
On the left front is a diagonal, welt-style breast pocket.
I suggest applying a lightweight fusible interfacing to the underside of the welt (piece O).
Fold the pocket welt in half along the diagonal center, right sides together, matching outer and lower edges.
Sew the outer (short) edges closed.
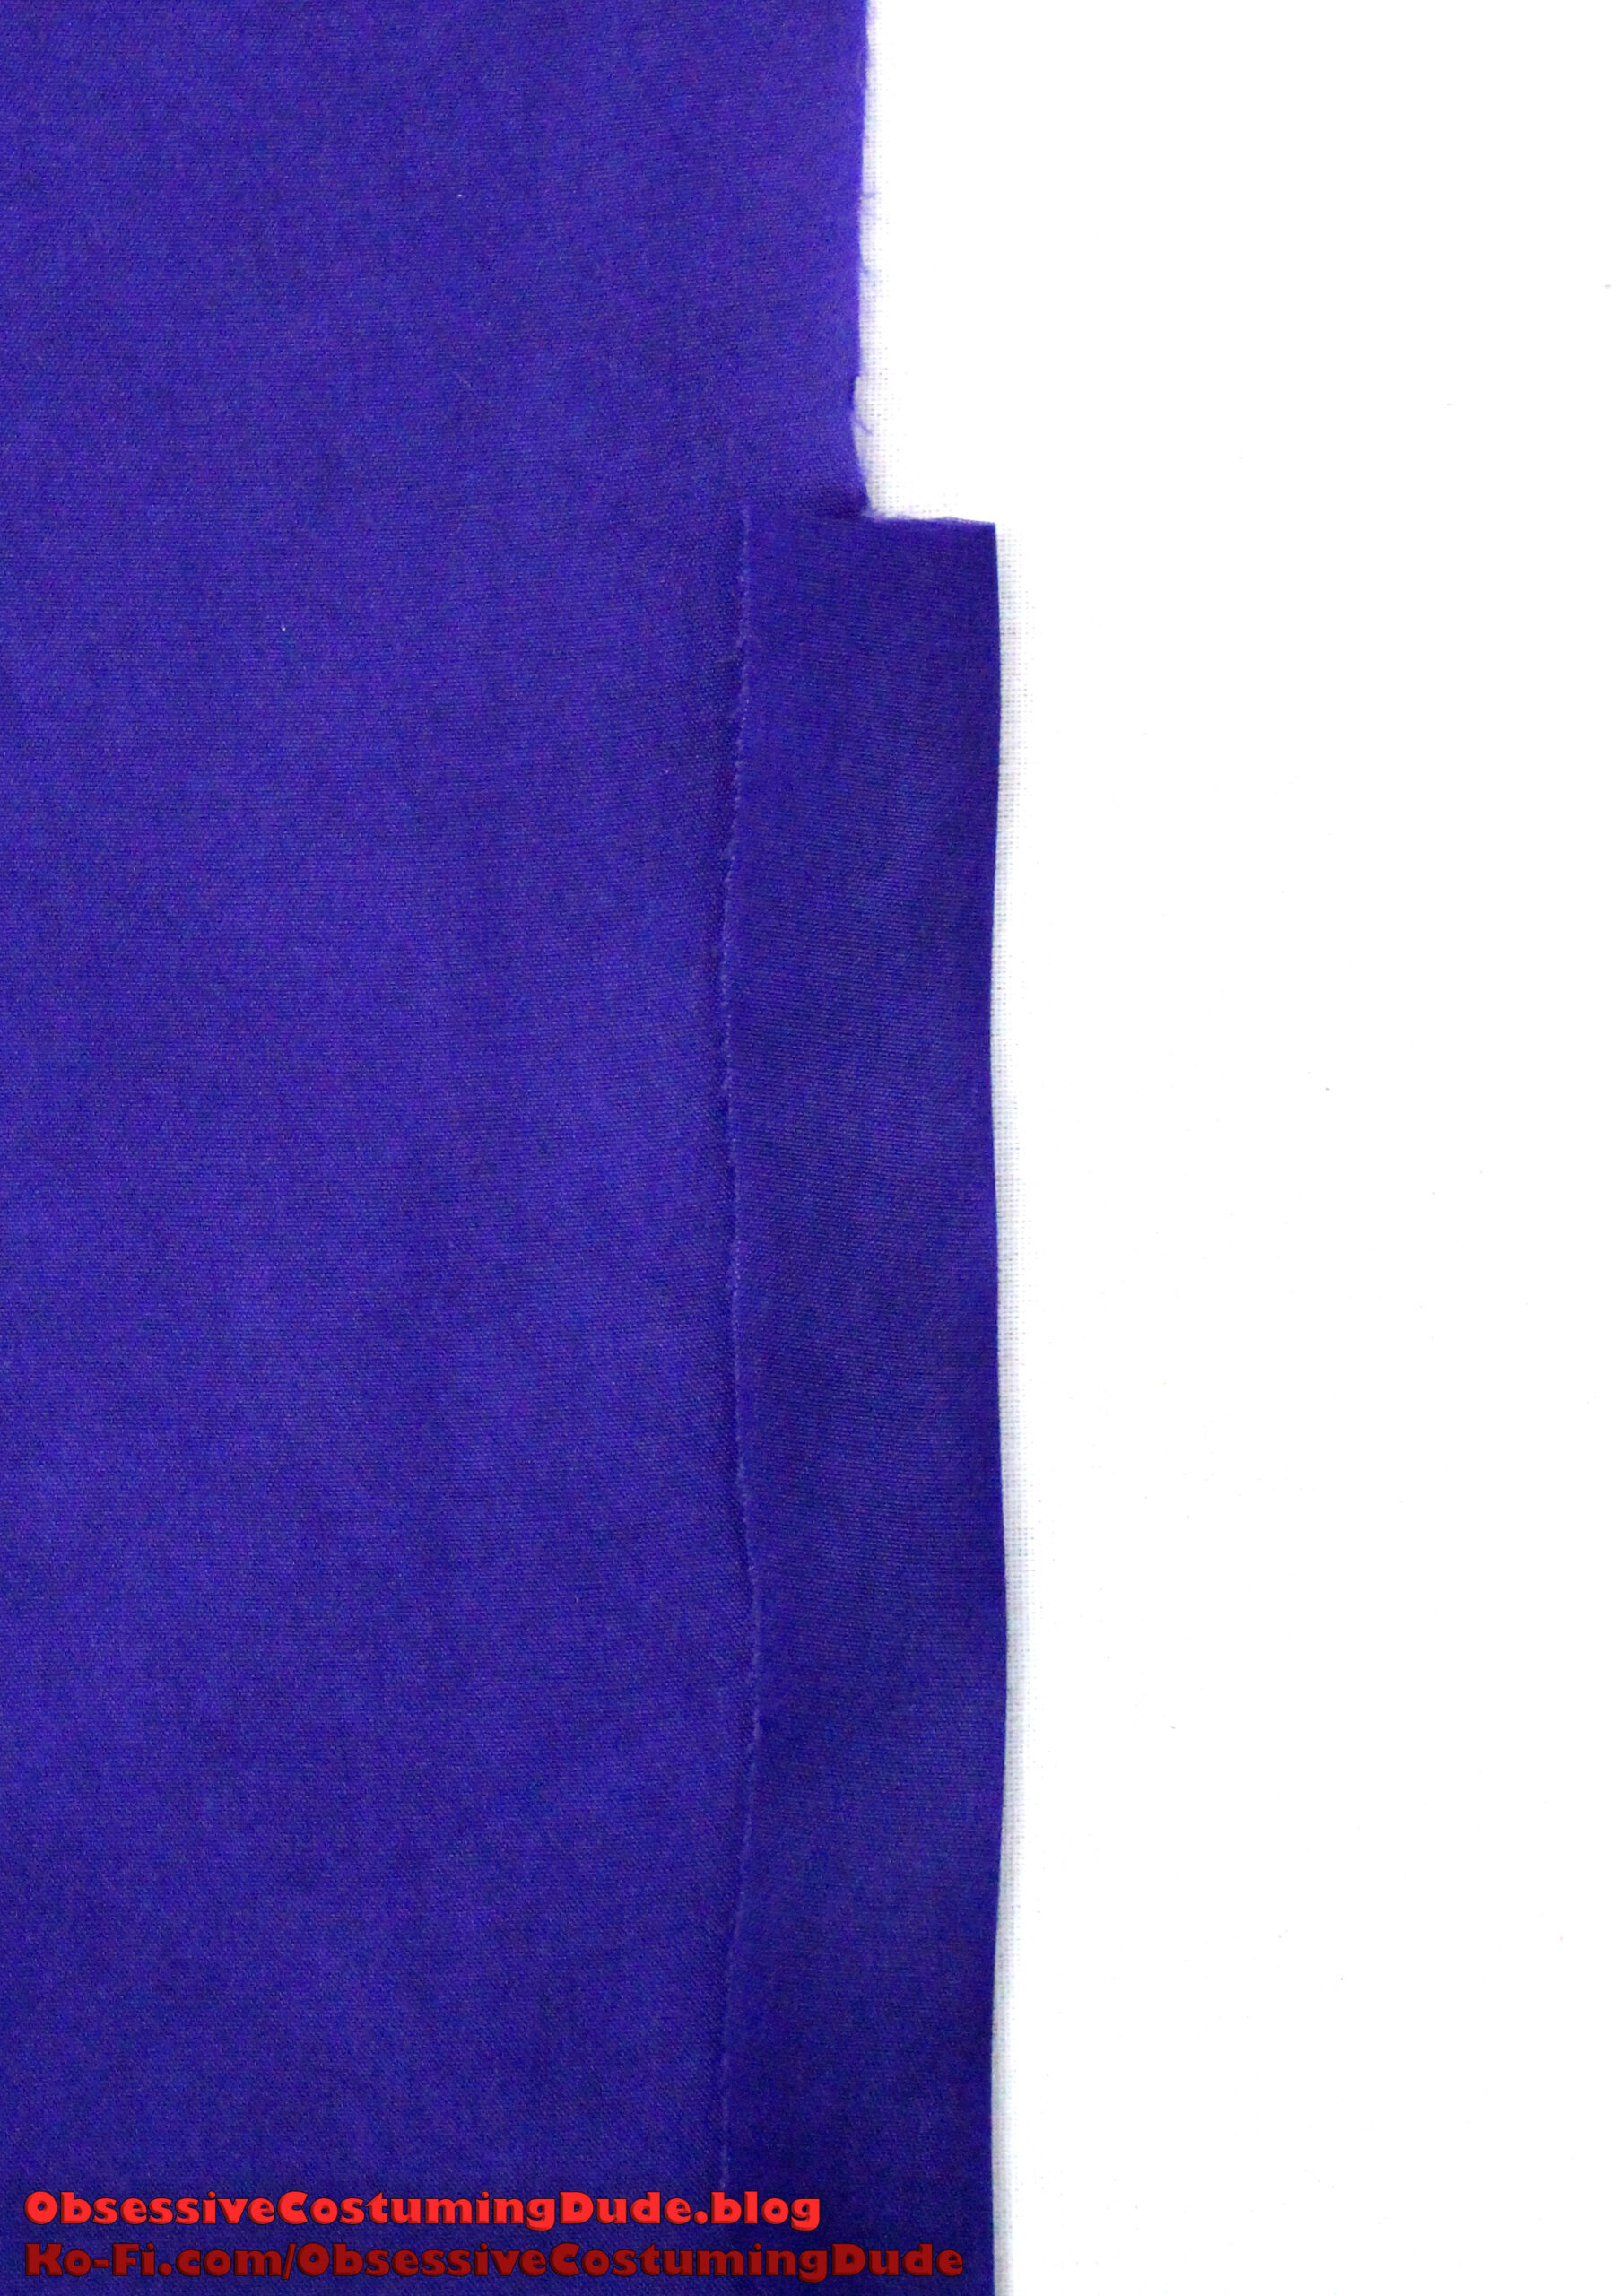
Trim the outer seam allowances down to ¼”, turn the pocket welt back right-sides-out, and press.
Baste or sew the welt closed ¼” from the lower edge.
Trim the outer seam allowances down to ¼”, turn the pocket welt back right-sides-out, and press.
Baste or sew the welt closed ¼” from the lower edge.
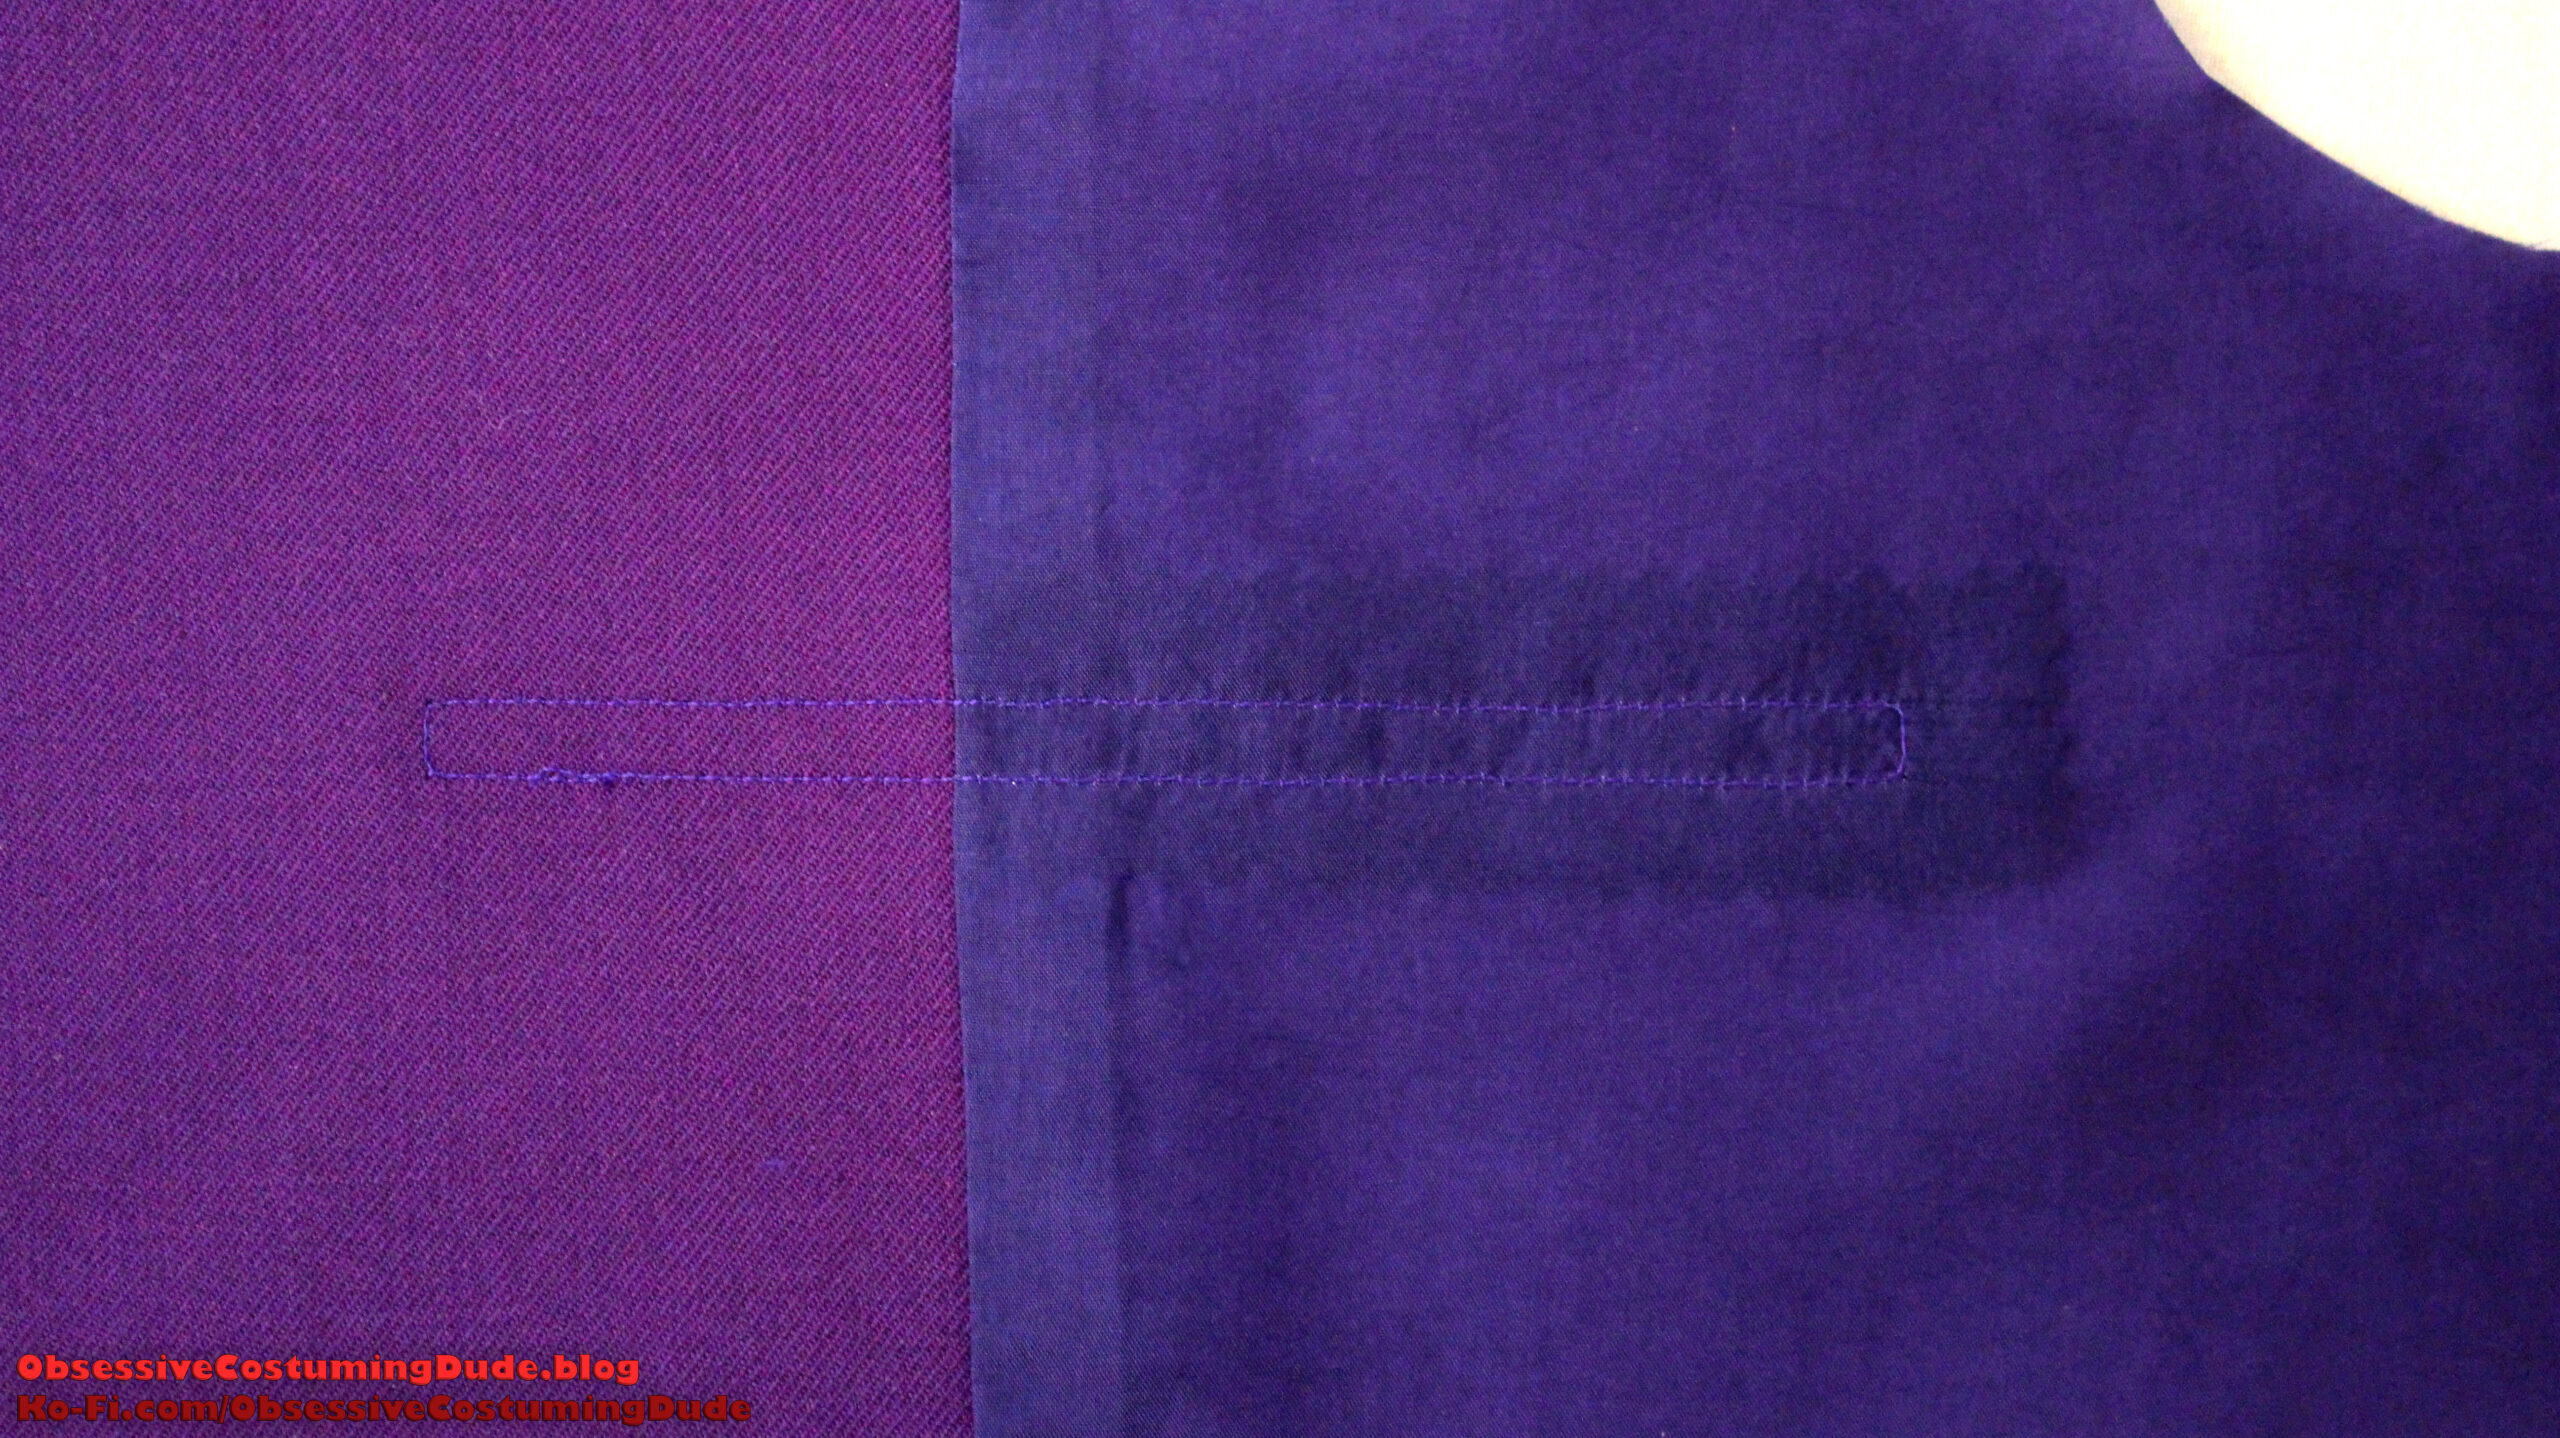
Sew the pocket welt to the coat front along the alignment guide (⅜” from the raw ends of the pocket welt), beginning and ending your stitch exactly at the outer edges of the pocket welt and reinforcing at the ends.
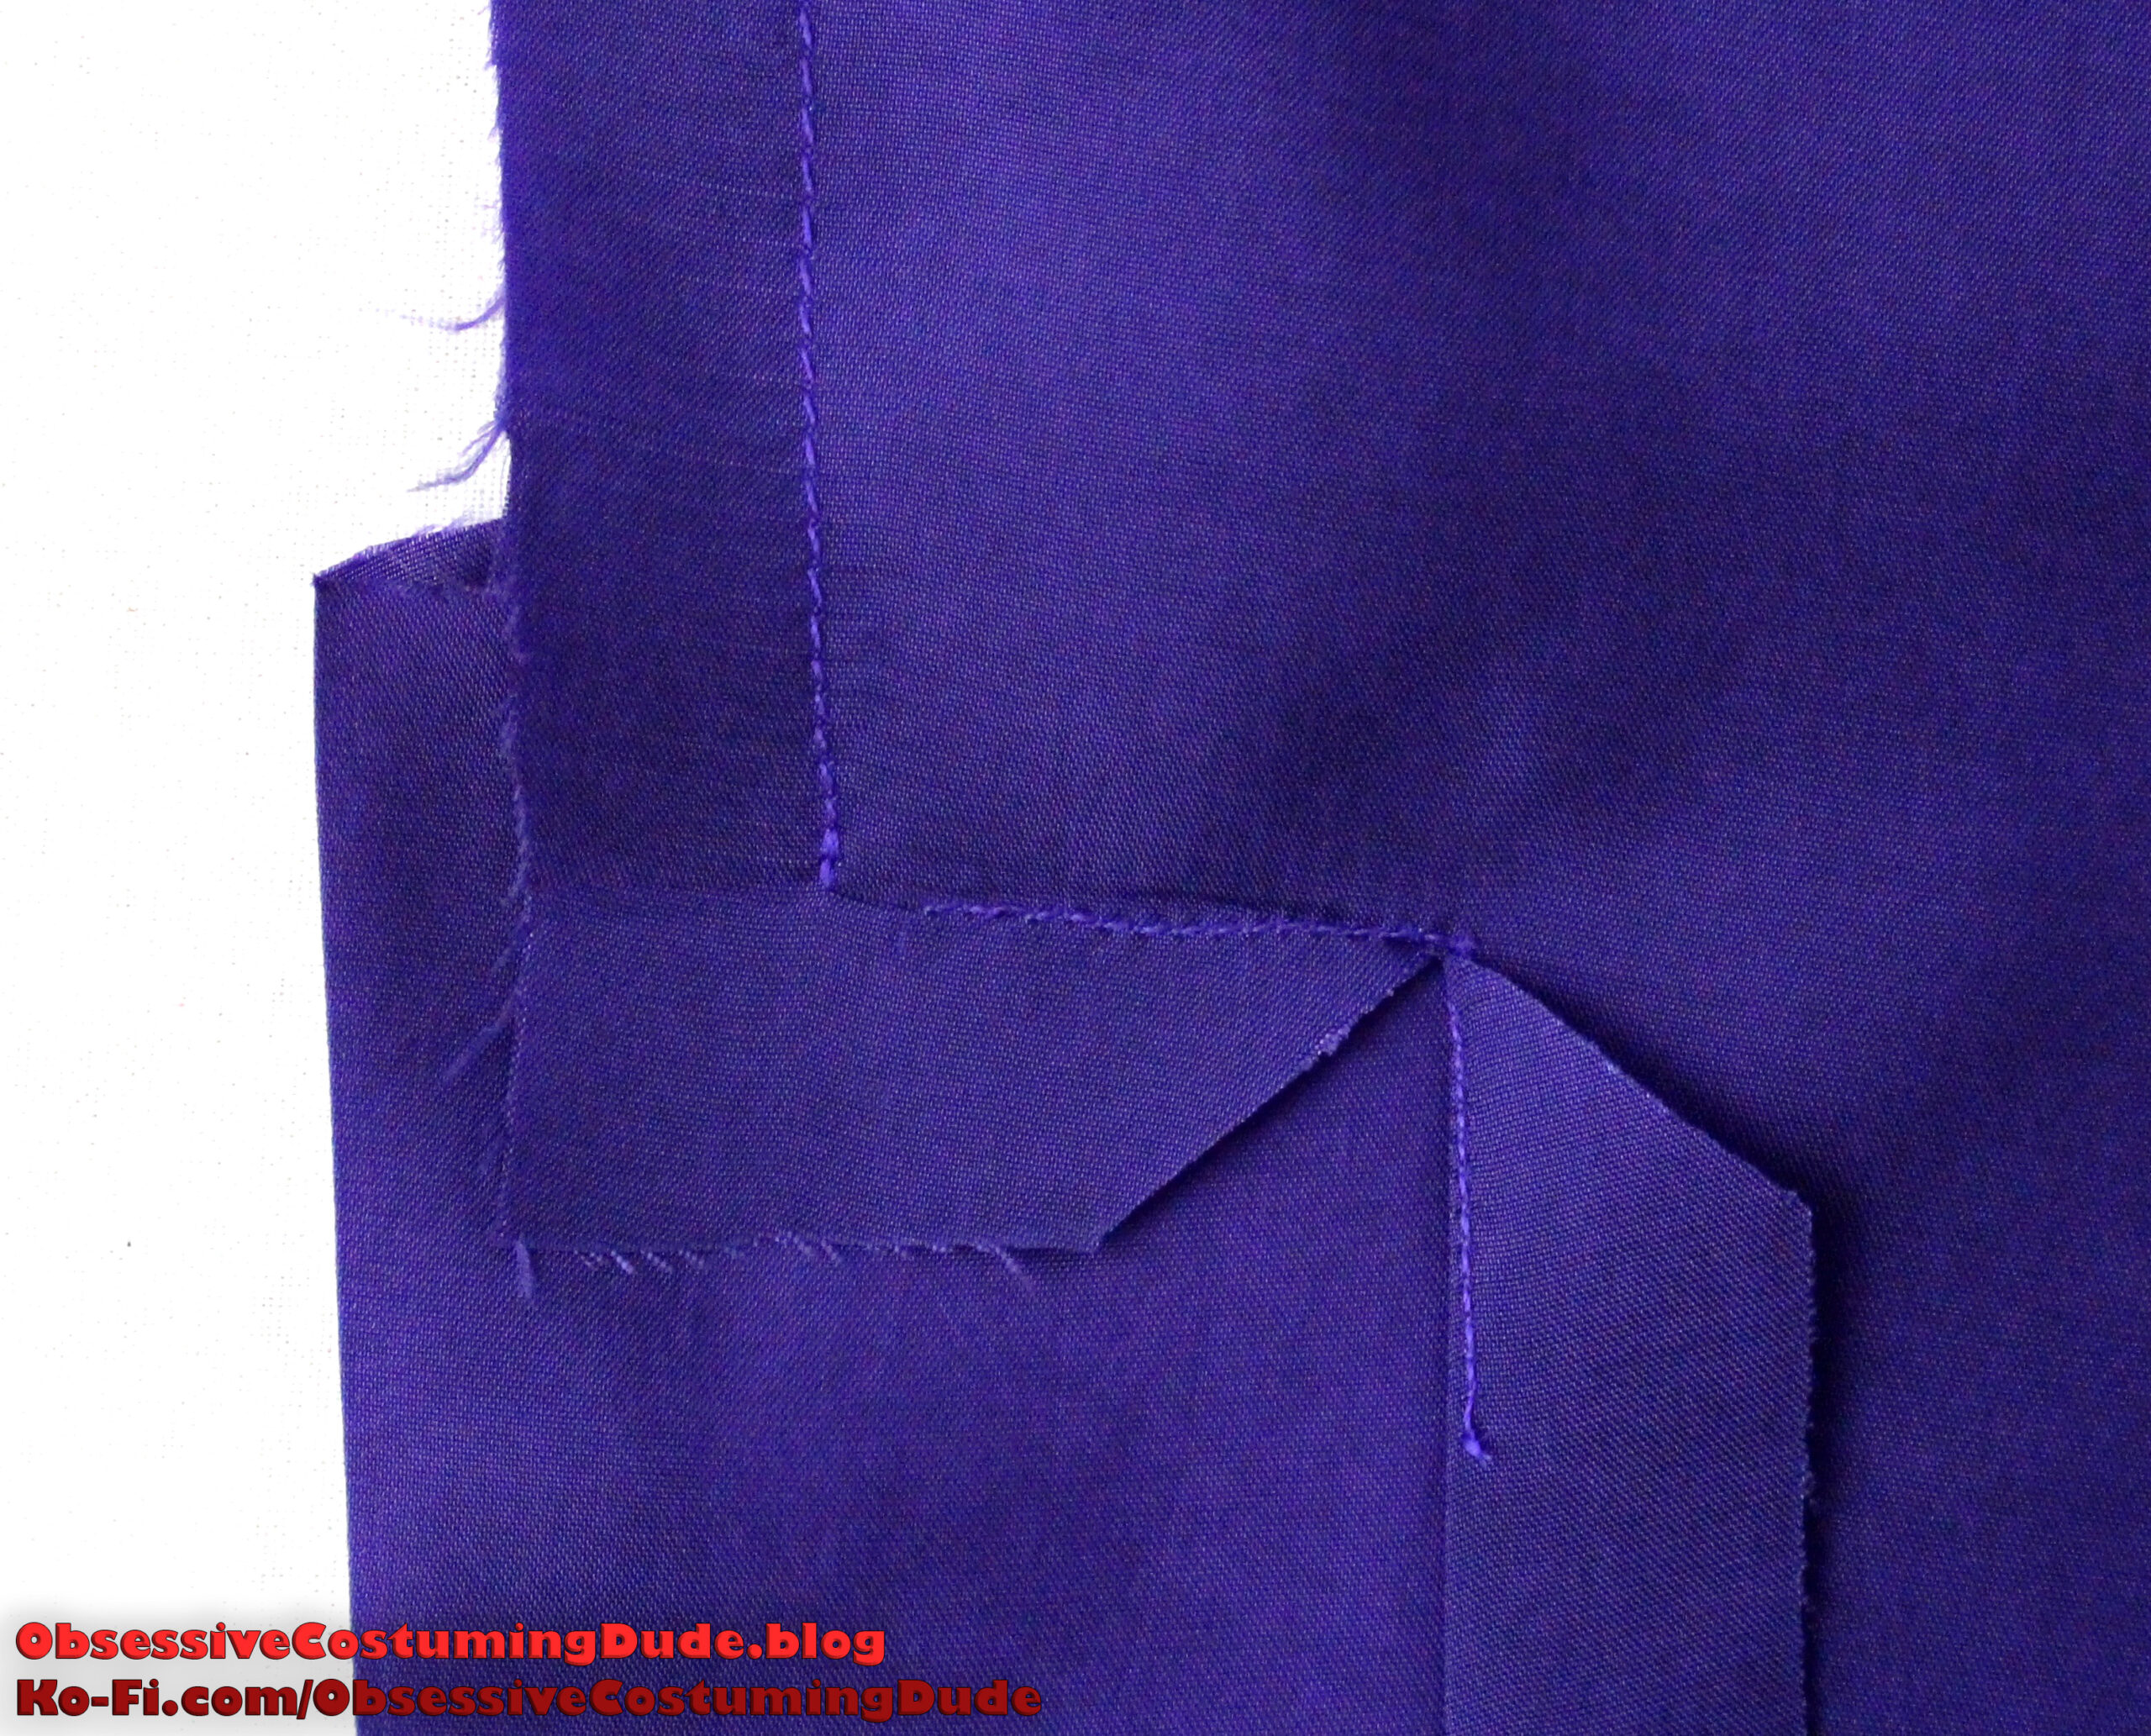
Turn one breast pocket bag (piece P) upside down, horizontally center it underneath the welt, and slide it underneath the welt allowance as close to the stitching as you can manage.
Stitch the pocket bag to the tailcoat front along the edge of the welt, beginning and ending your stitching ⅜” from the ends of the welt.
Trim away ⅜” from the upper edge of the second pocket bag.
Position the second pocket bag over the welt so its upper edge is flush with the raw ends of the welt.
Pin the second piece of pocketing to the pocket welt’s seam allowance, then fold the upper front of the tailcoat out of the way.
Sew the second pocket bag to the welt allowance as close to the first stitch line as you can (⅜” from the edges), across the entire welt this time (don’t leave ⅜” free on each end) and reinforcing your stitching at the ends.
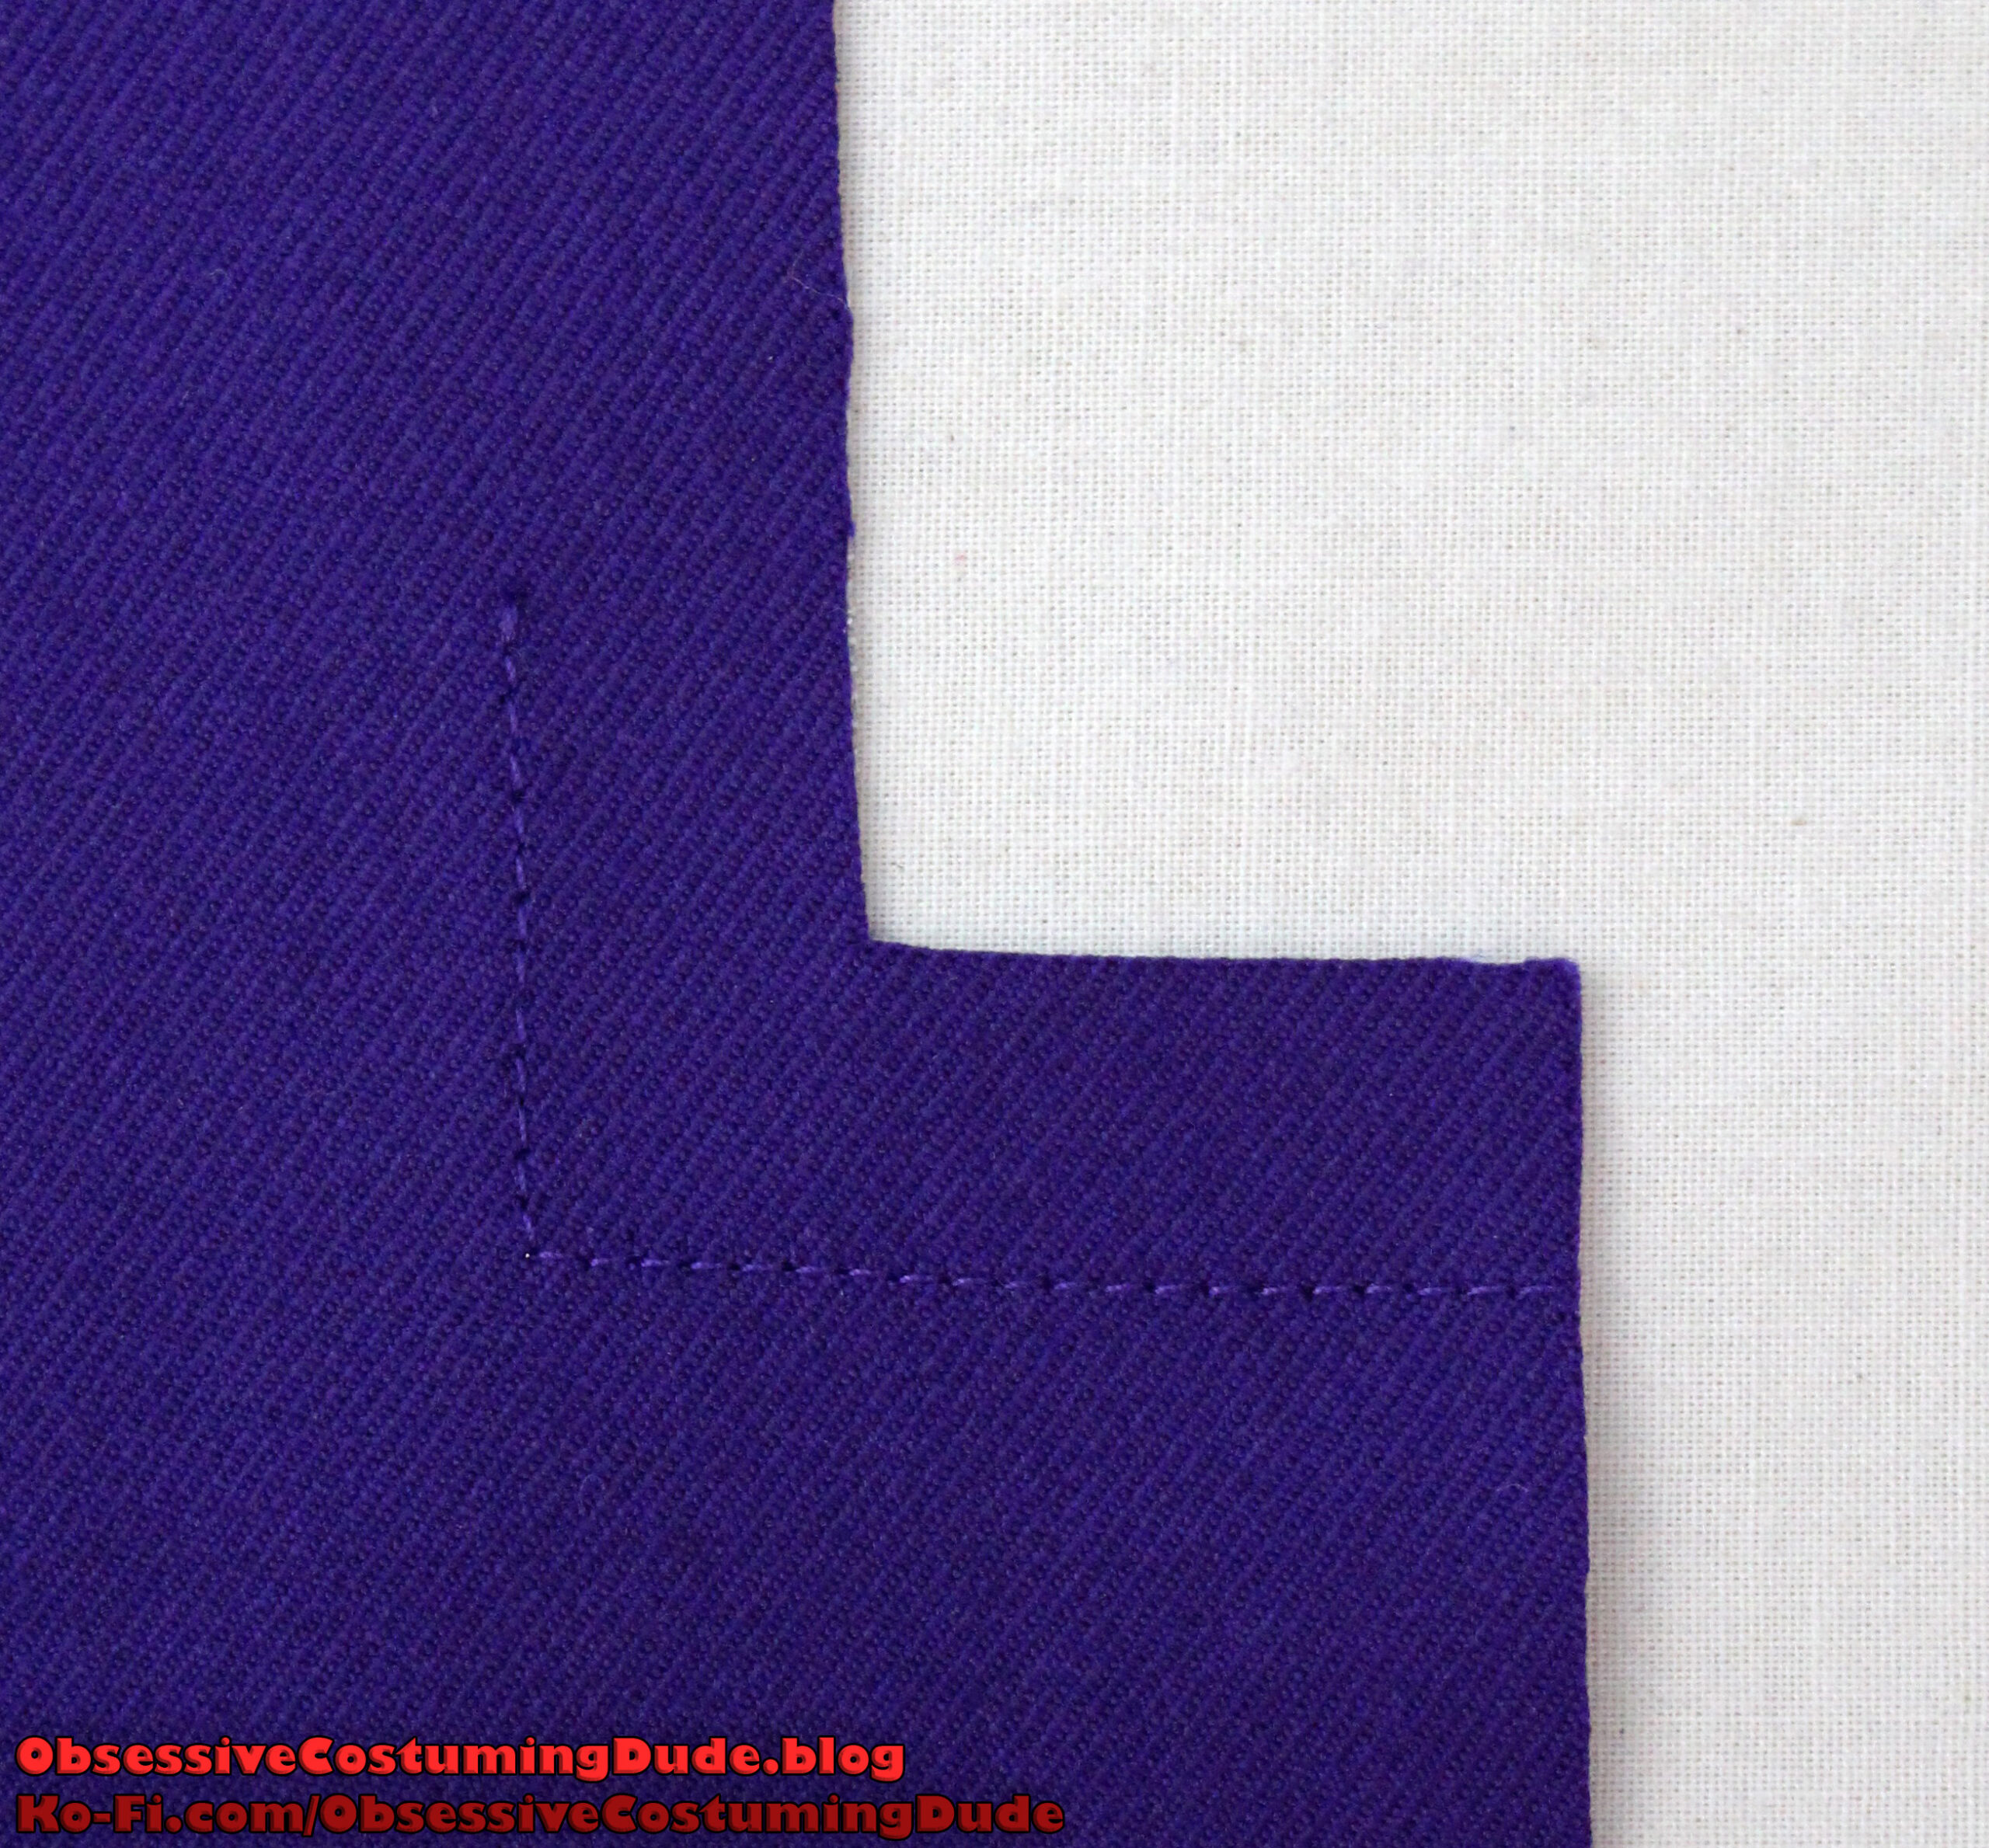
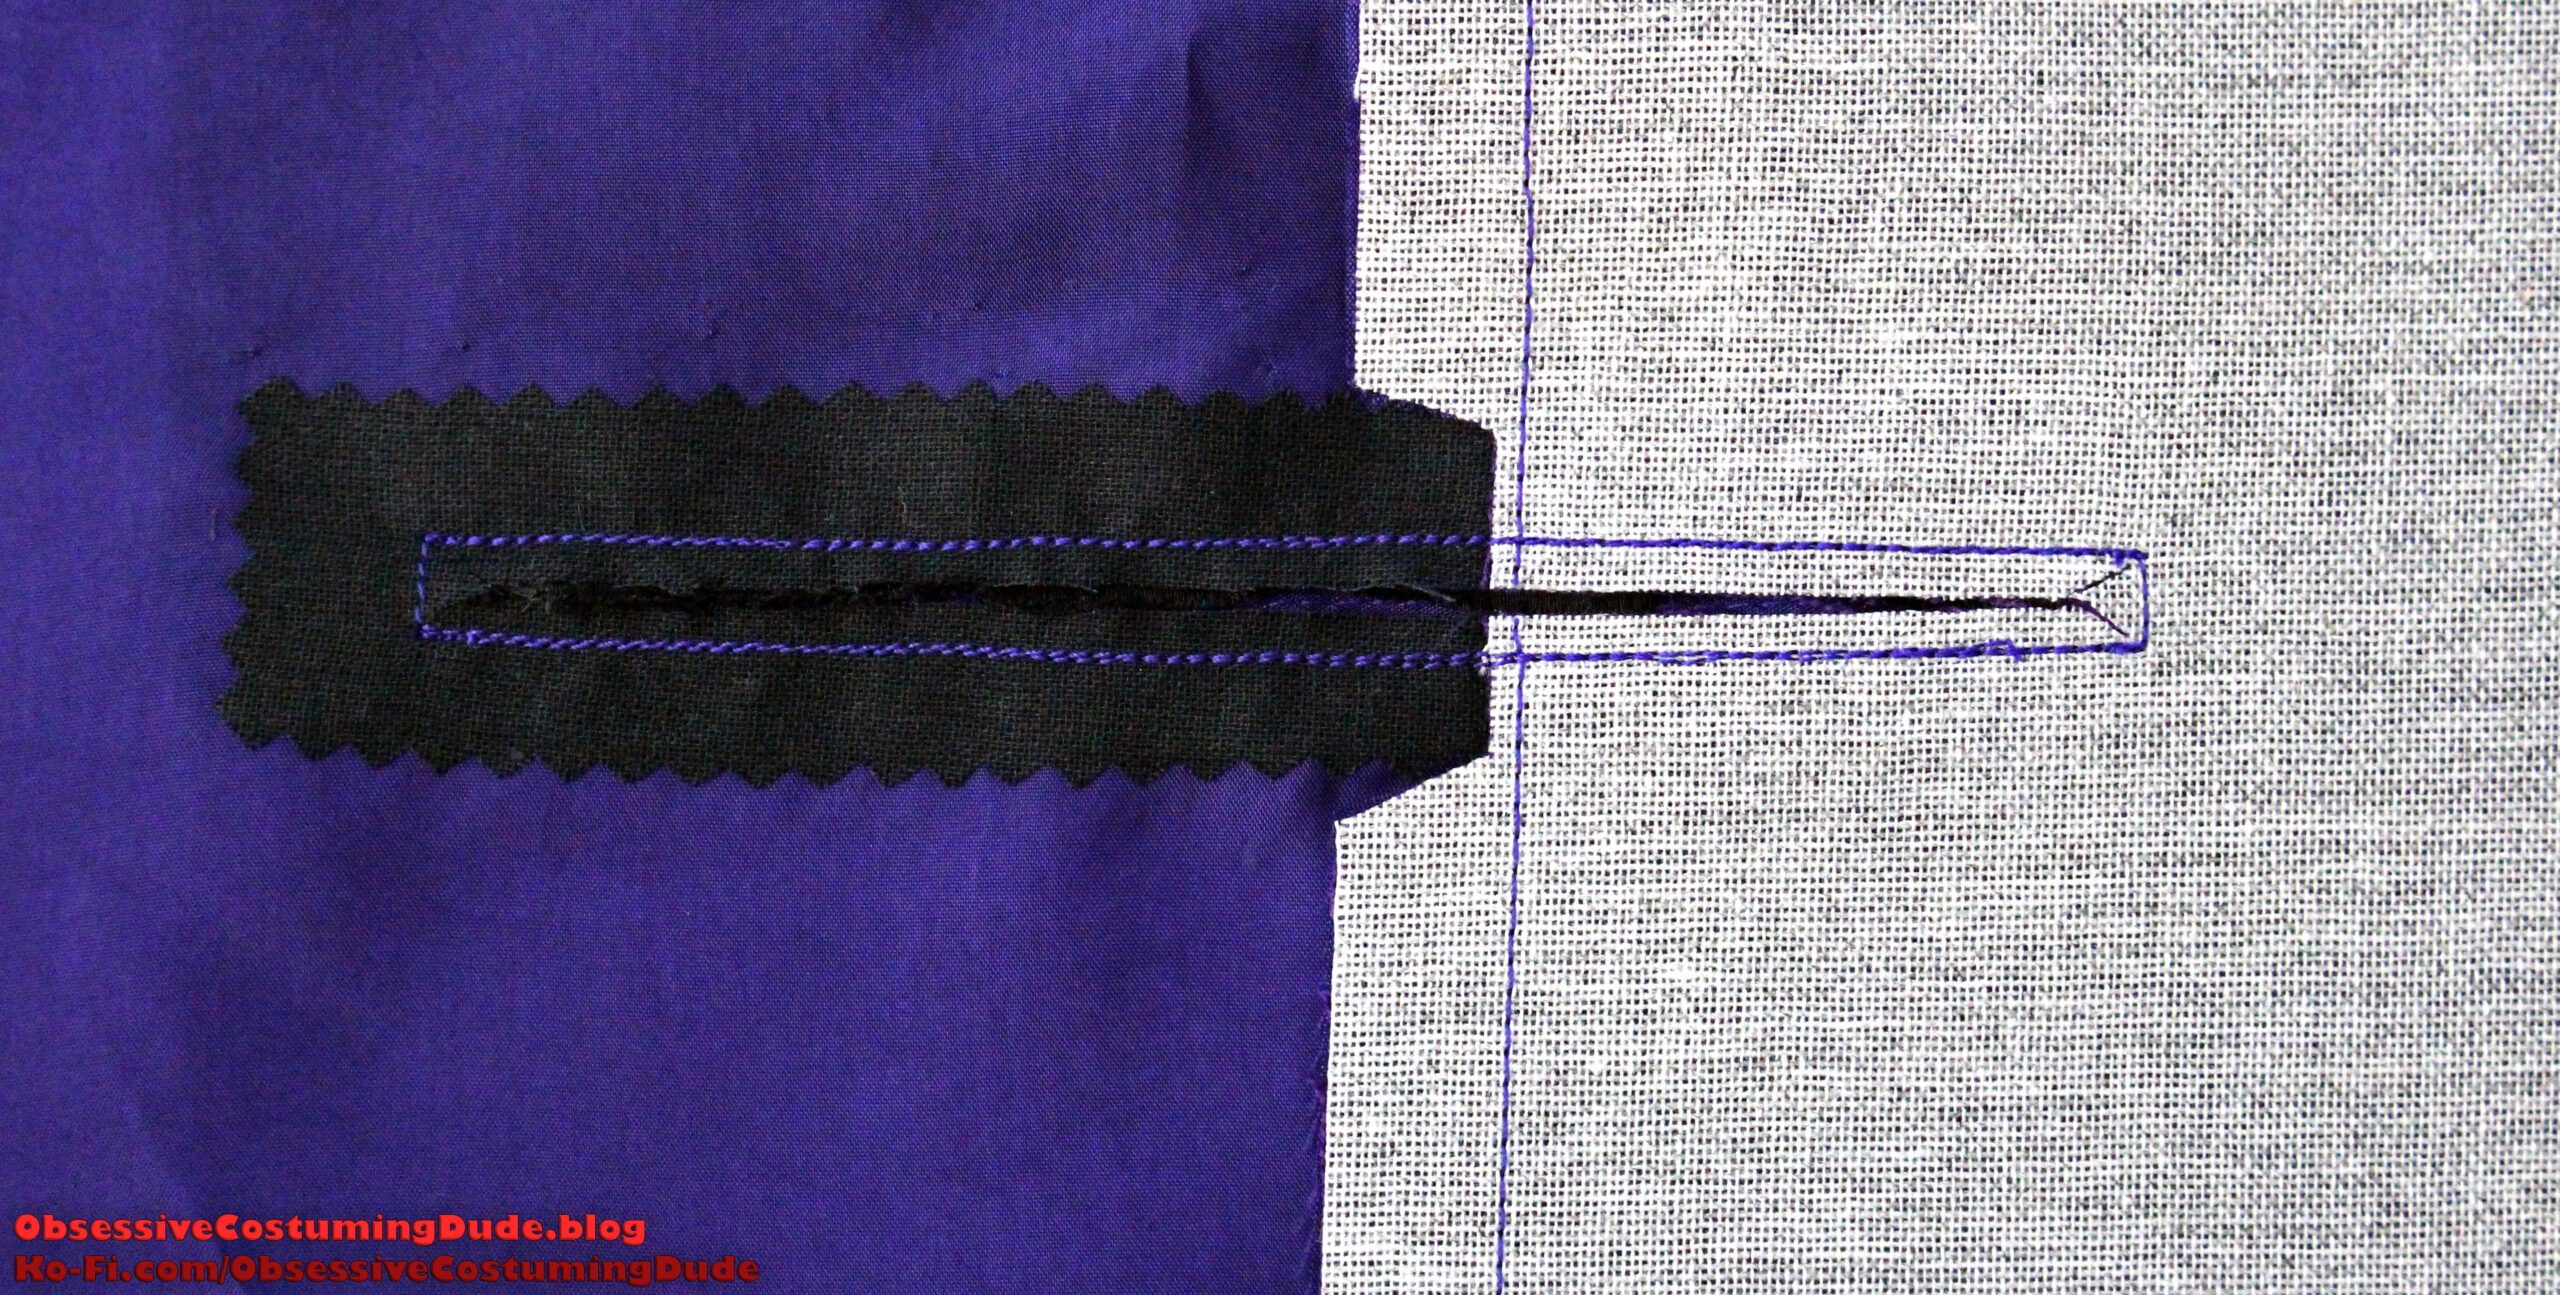
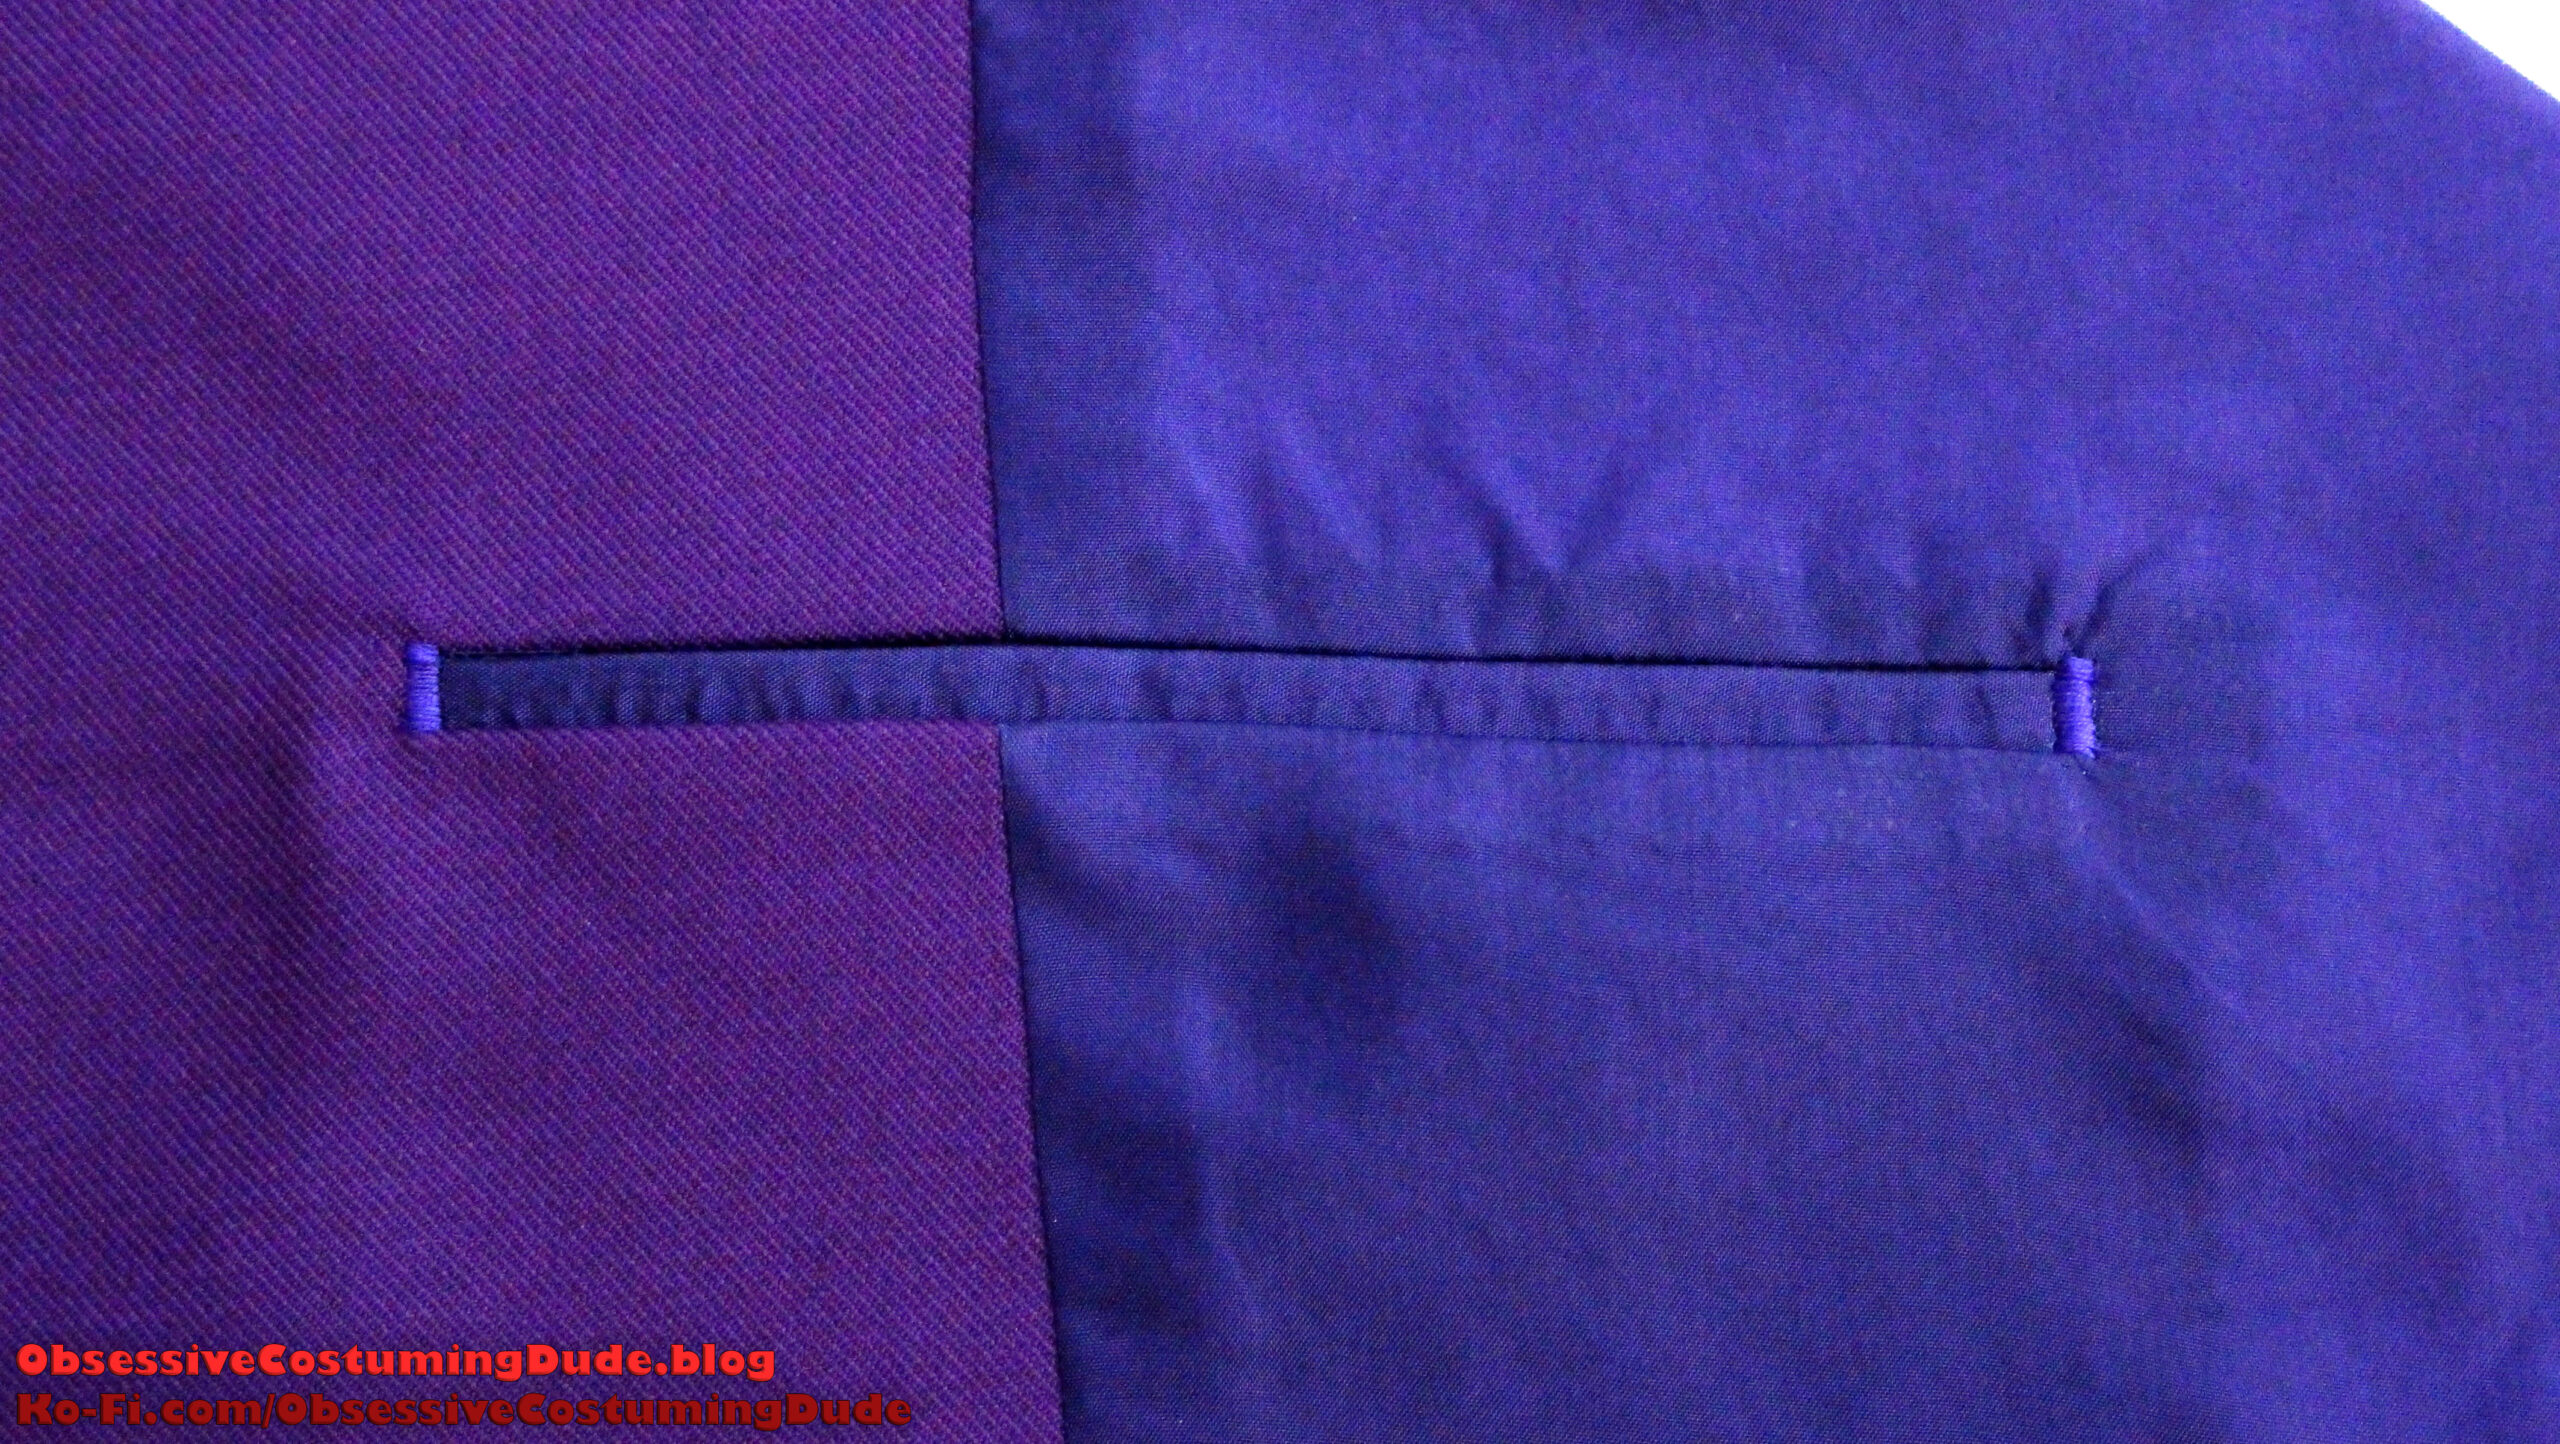
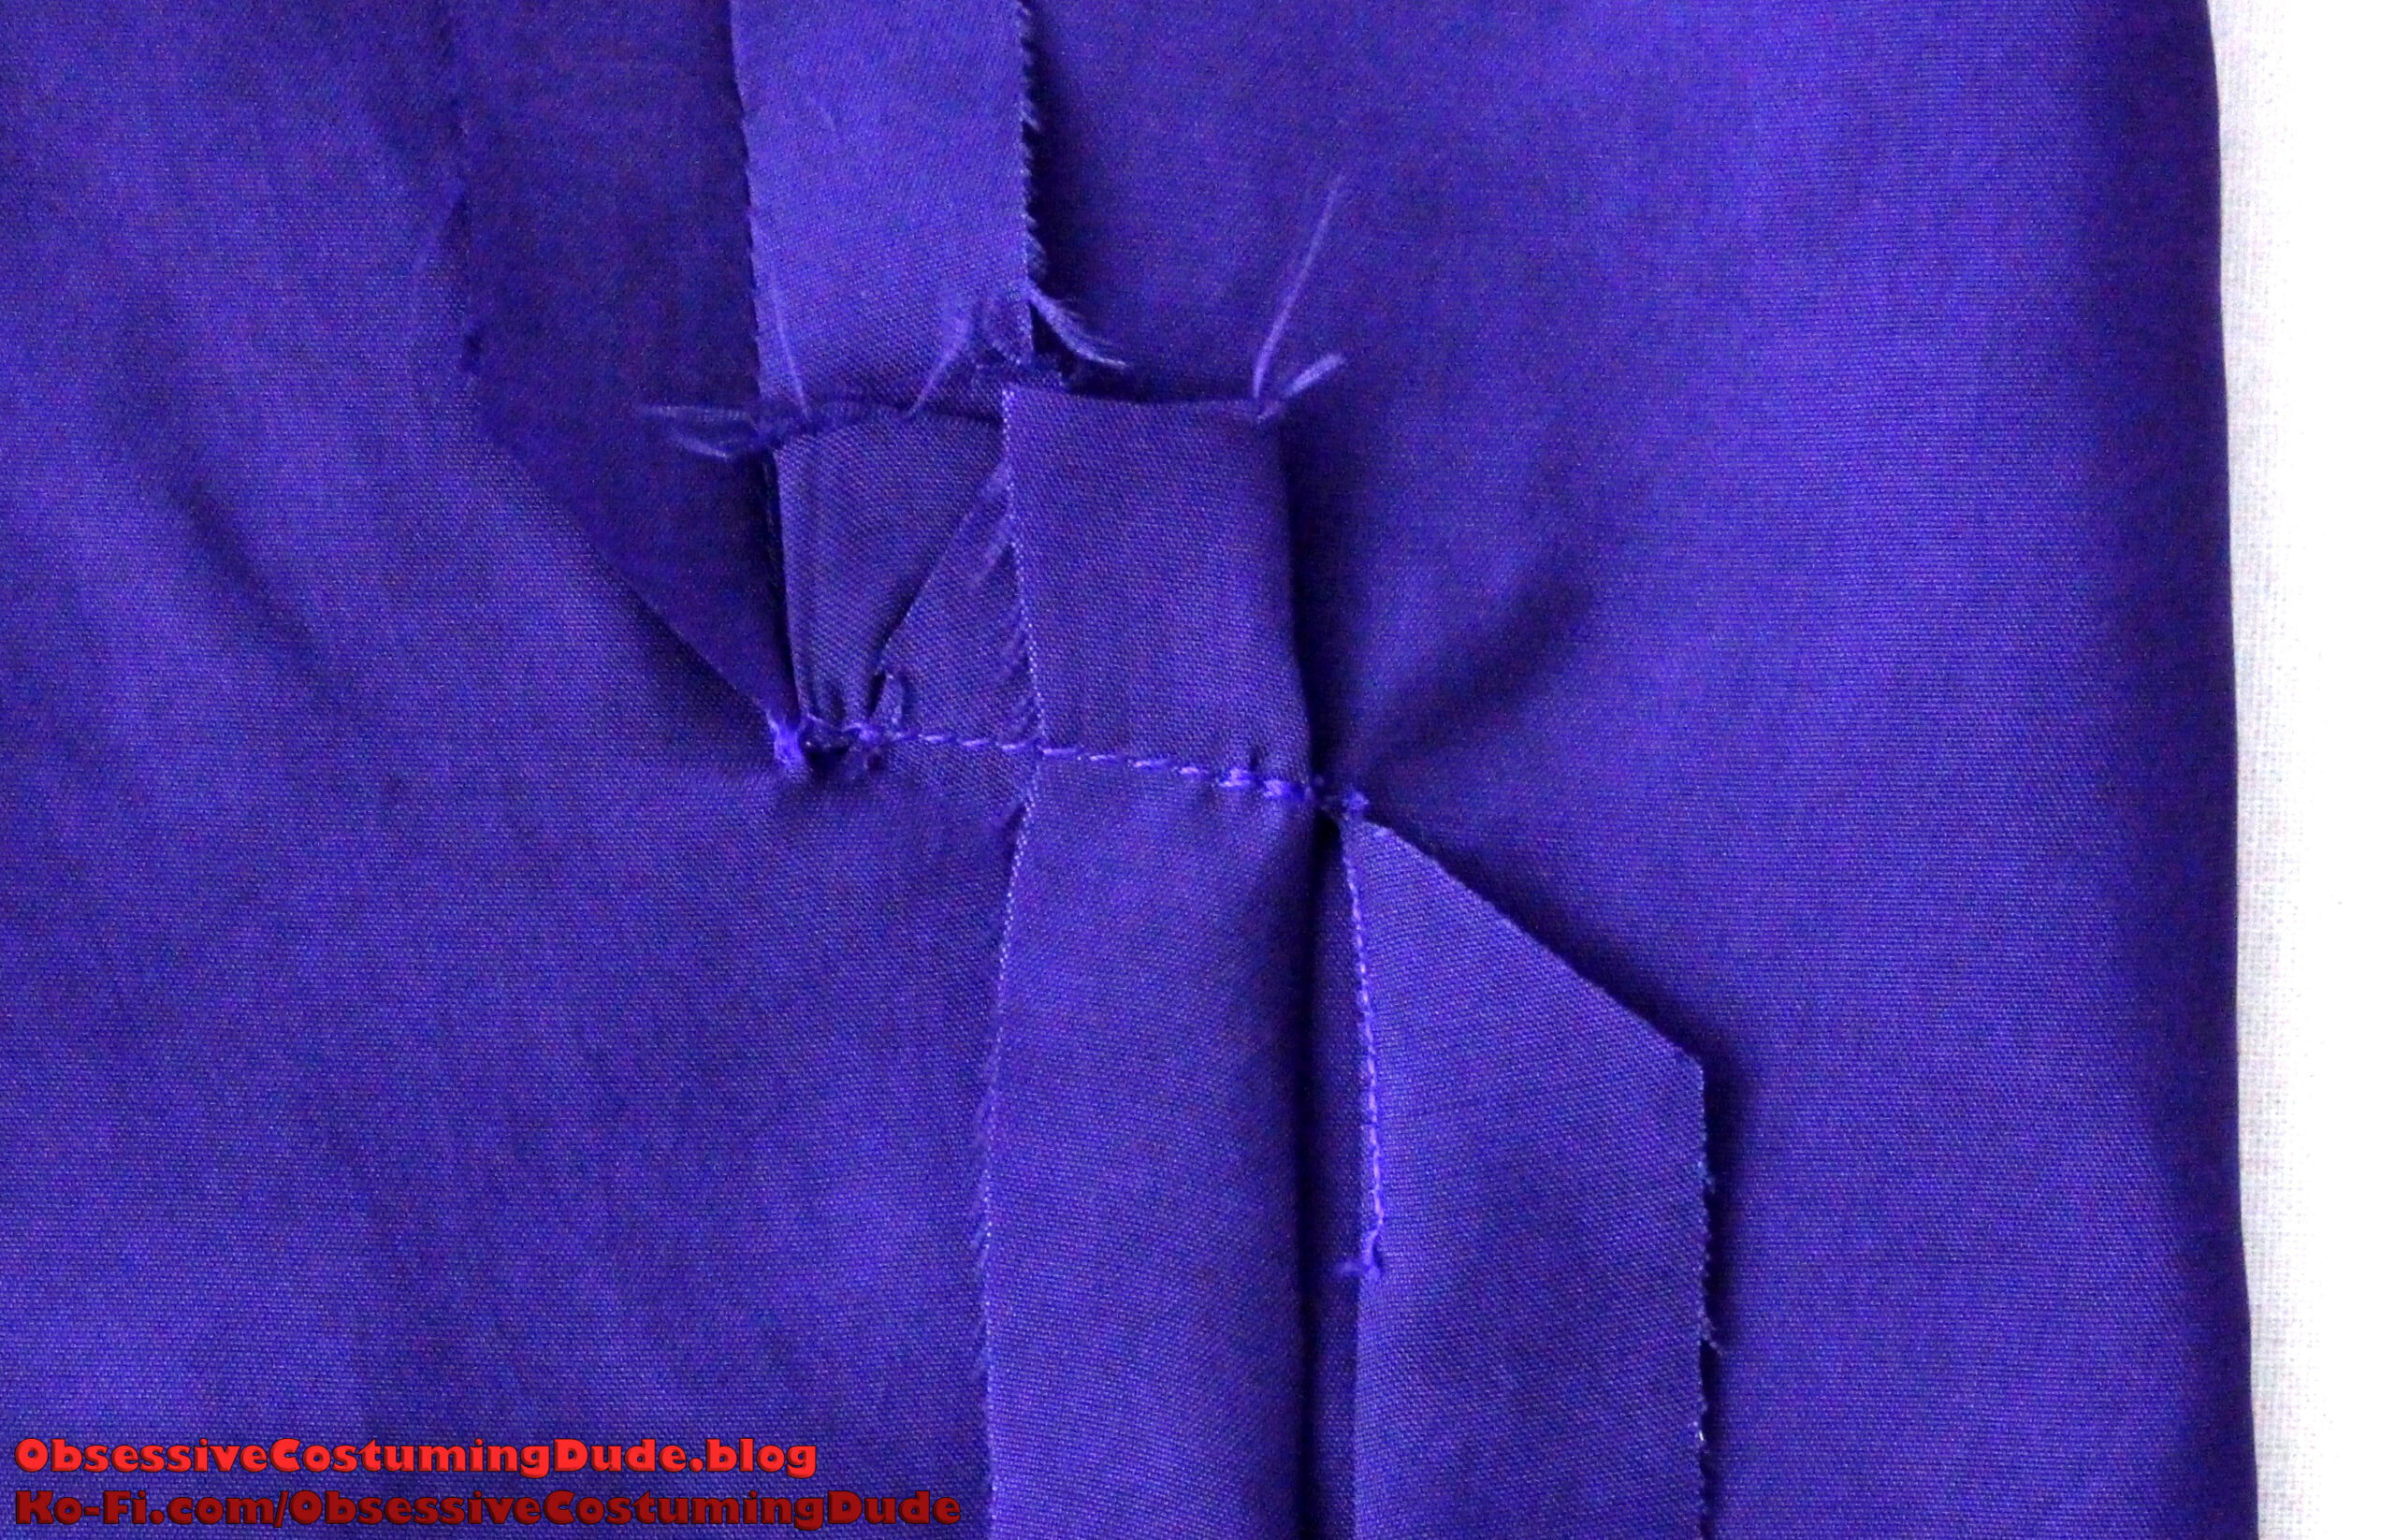
Slash the pocket open halfway between the two stitch lines, take care to only cut through the shelf fabric (and not the welt or pocketing).
About ⅜” from the end of the shorter stitch line, pivot and clip exactly to (but not beyond!) the ends of the stitching.
Pull the pocket bags through the opening to the underside.
Press the pocket welt and lower seam allowances downward.
Press the front/upper pocketing seam allowances upward.
Turn the little triangular “prongs” on the sides of the pocket opening to the underside (I find tweezers helpful for this) and press.
Pin the pocket bag closed along, matching side and lower edges.
Sew the pocket bag closed along the side and lower edges, catching the triangular “prongs” and reinforcing your stitching in the upper corners.
Stitch the pocket bag closed again ⅛” outside the previous stitching (½” from the edges).
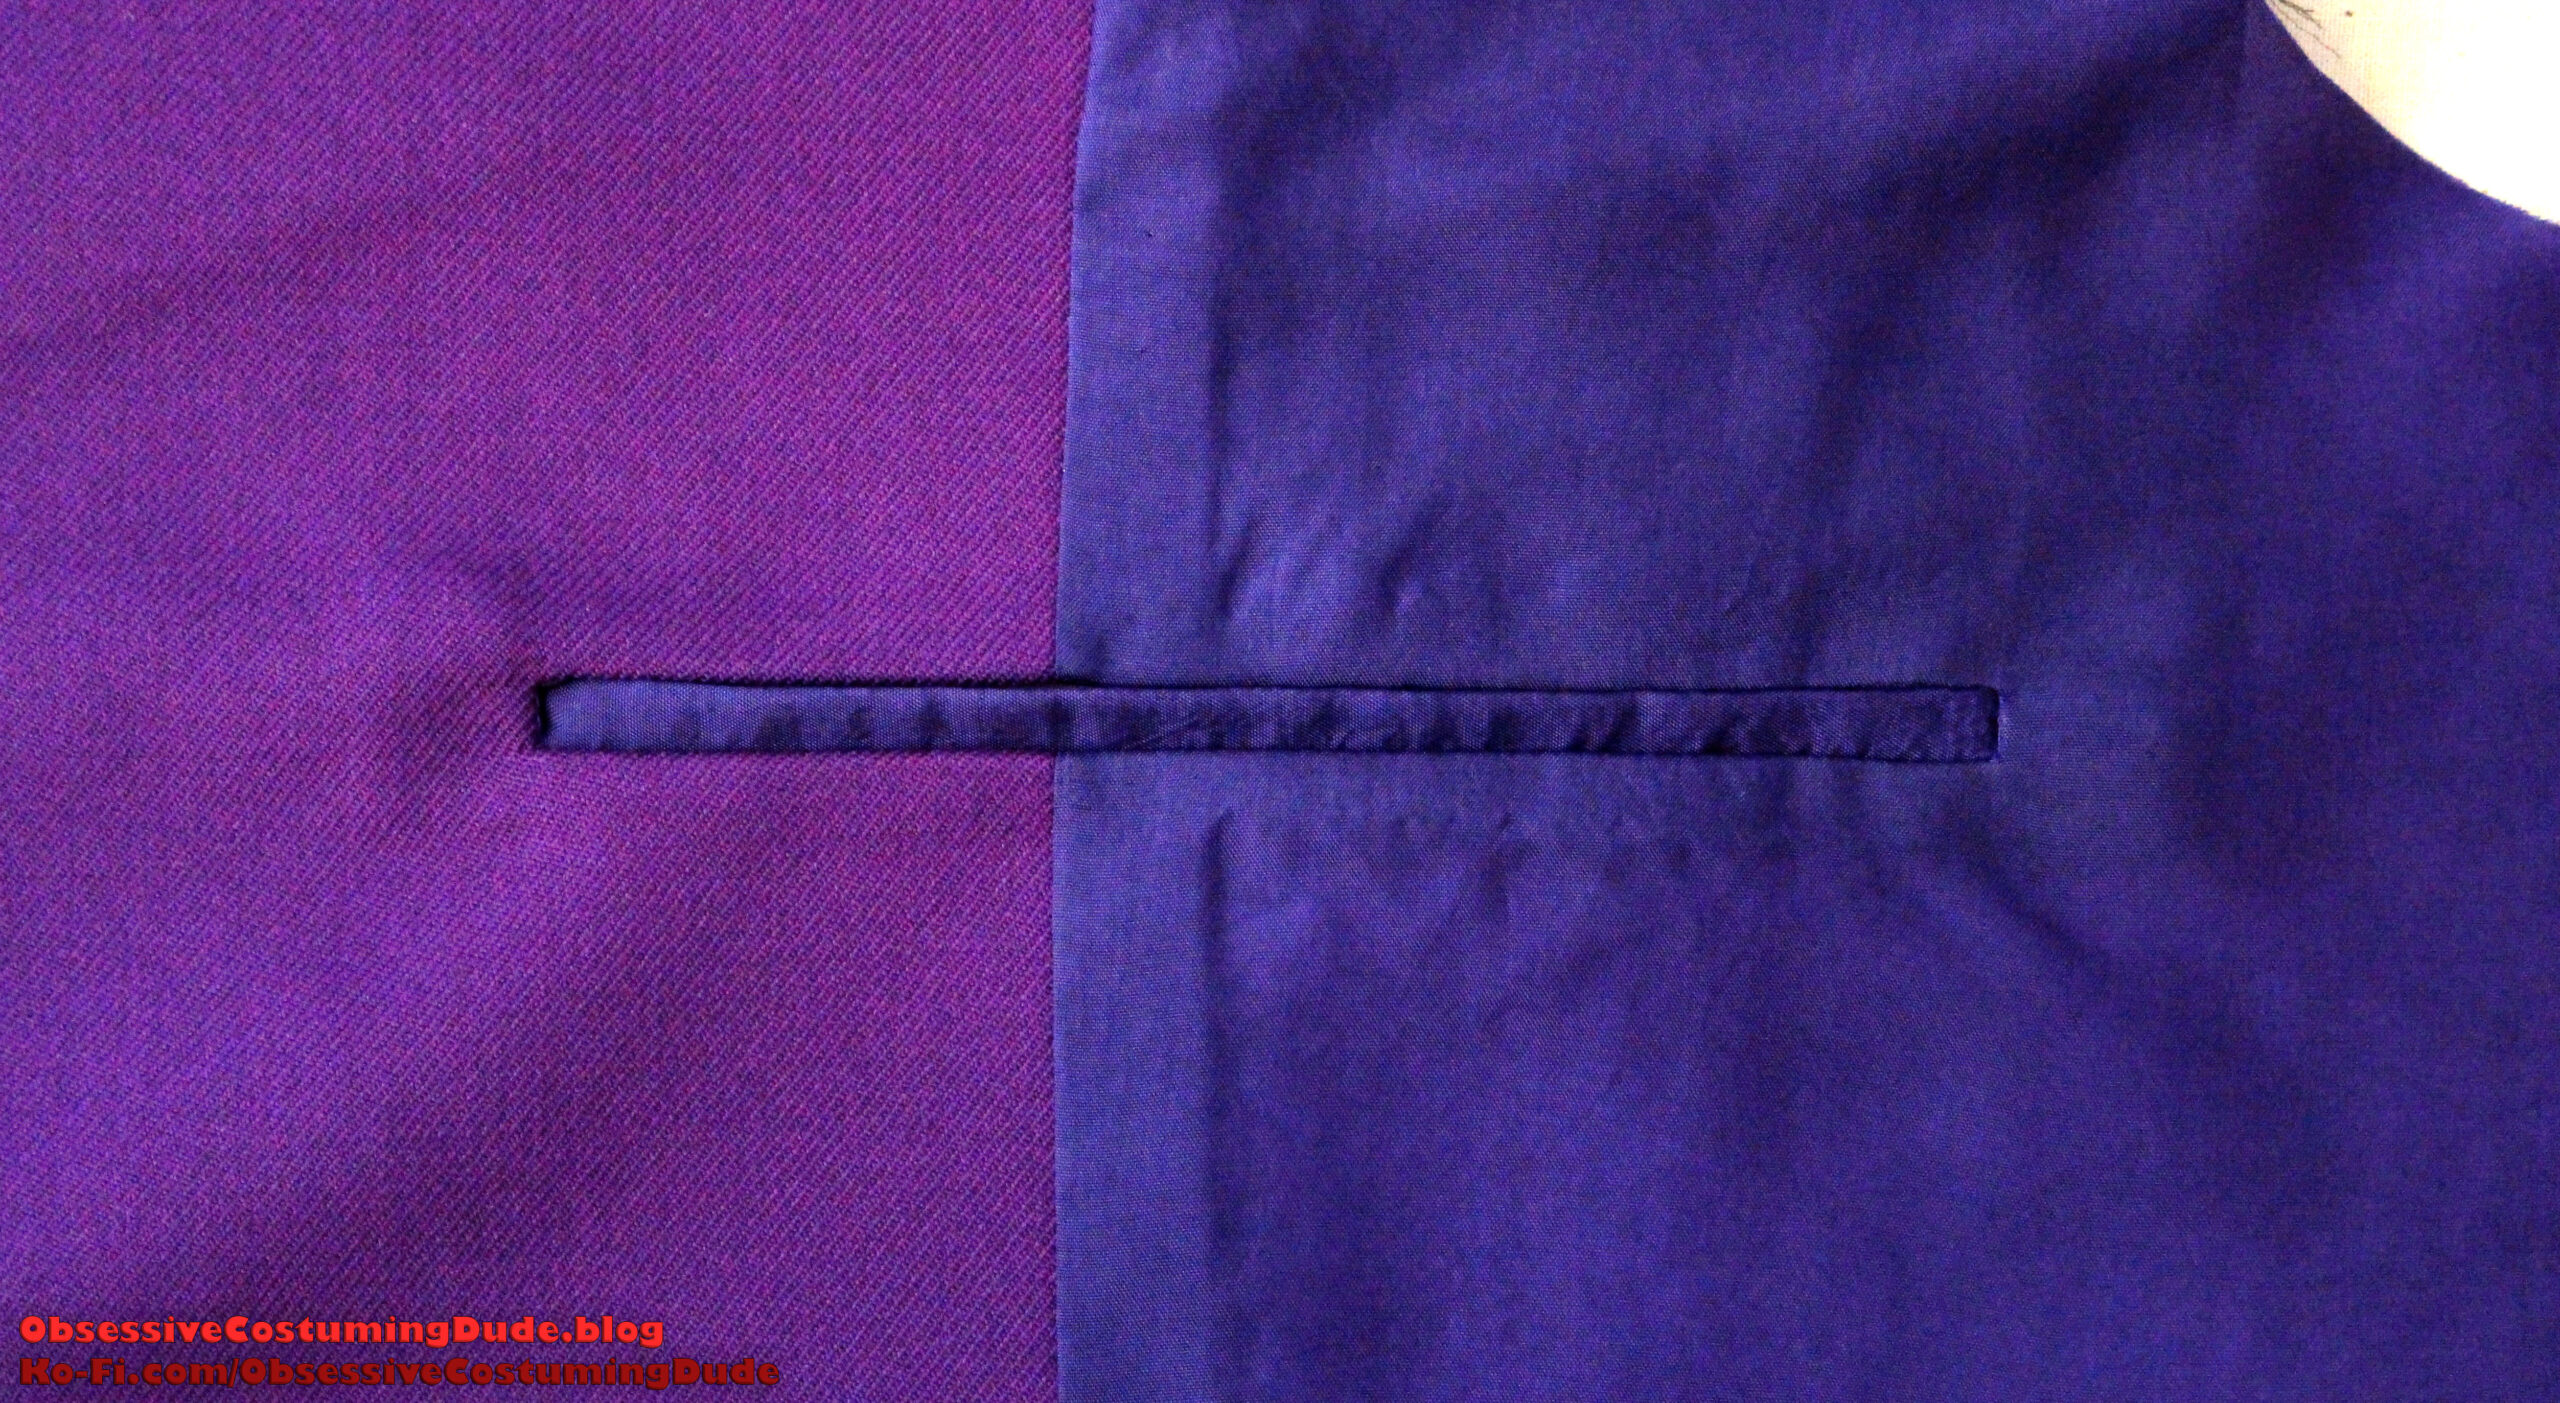
I also recommend trimming the outer edges of the pocket with pinking shears – both to avoid the bag making an impression on the right side of the coat, and to help prevent it from fraying.
Tack the sides of the pocket welt to the tailcoat front from the underside by hand.
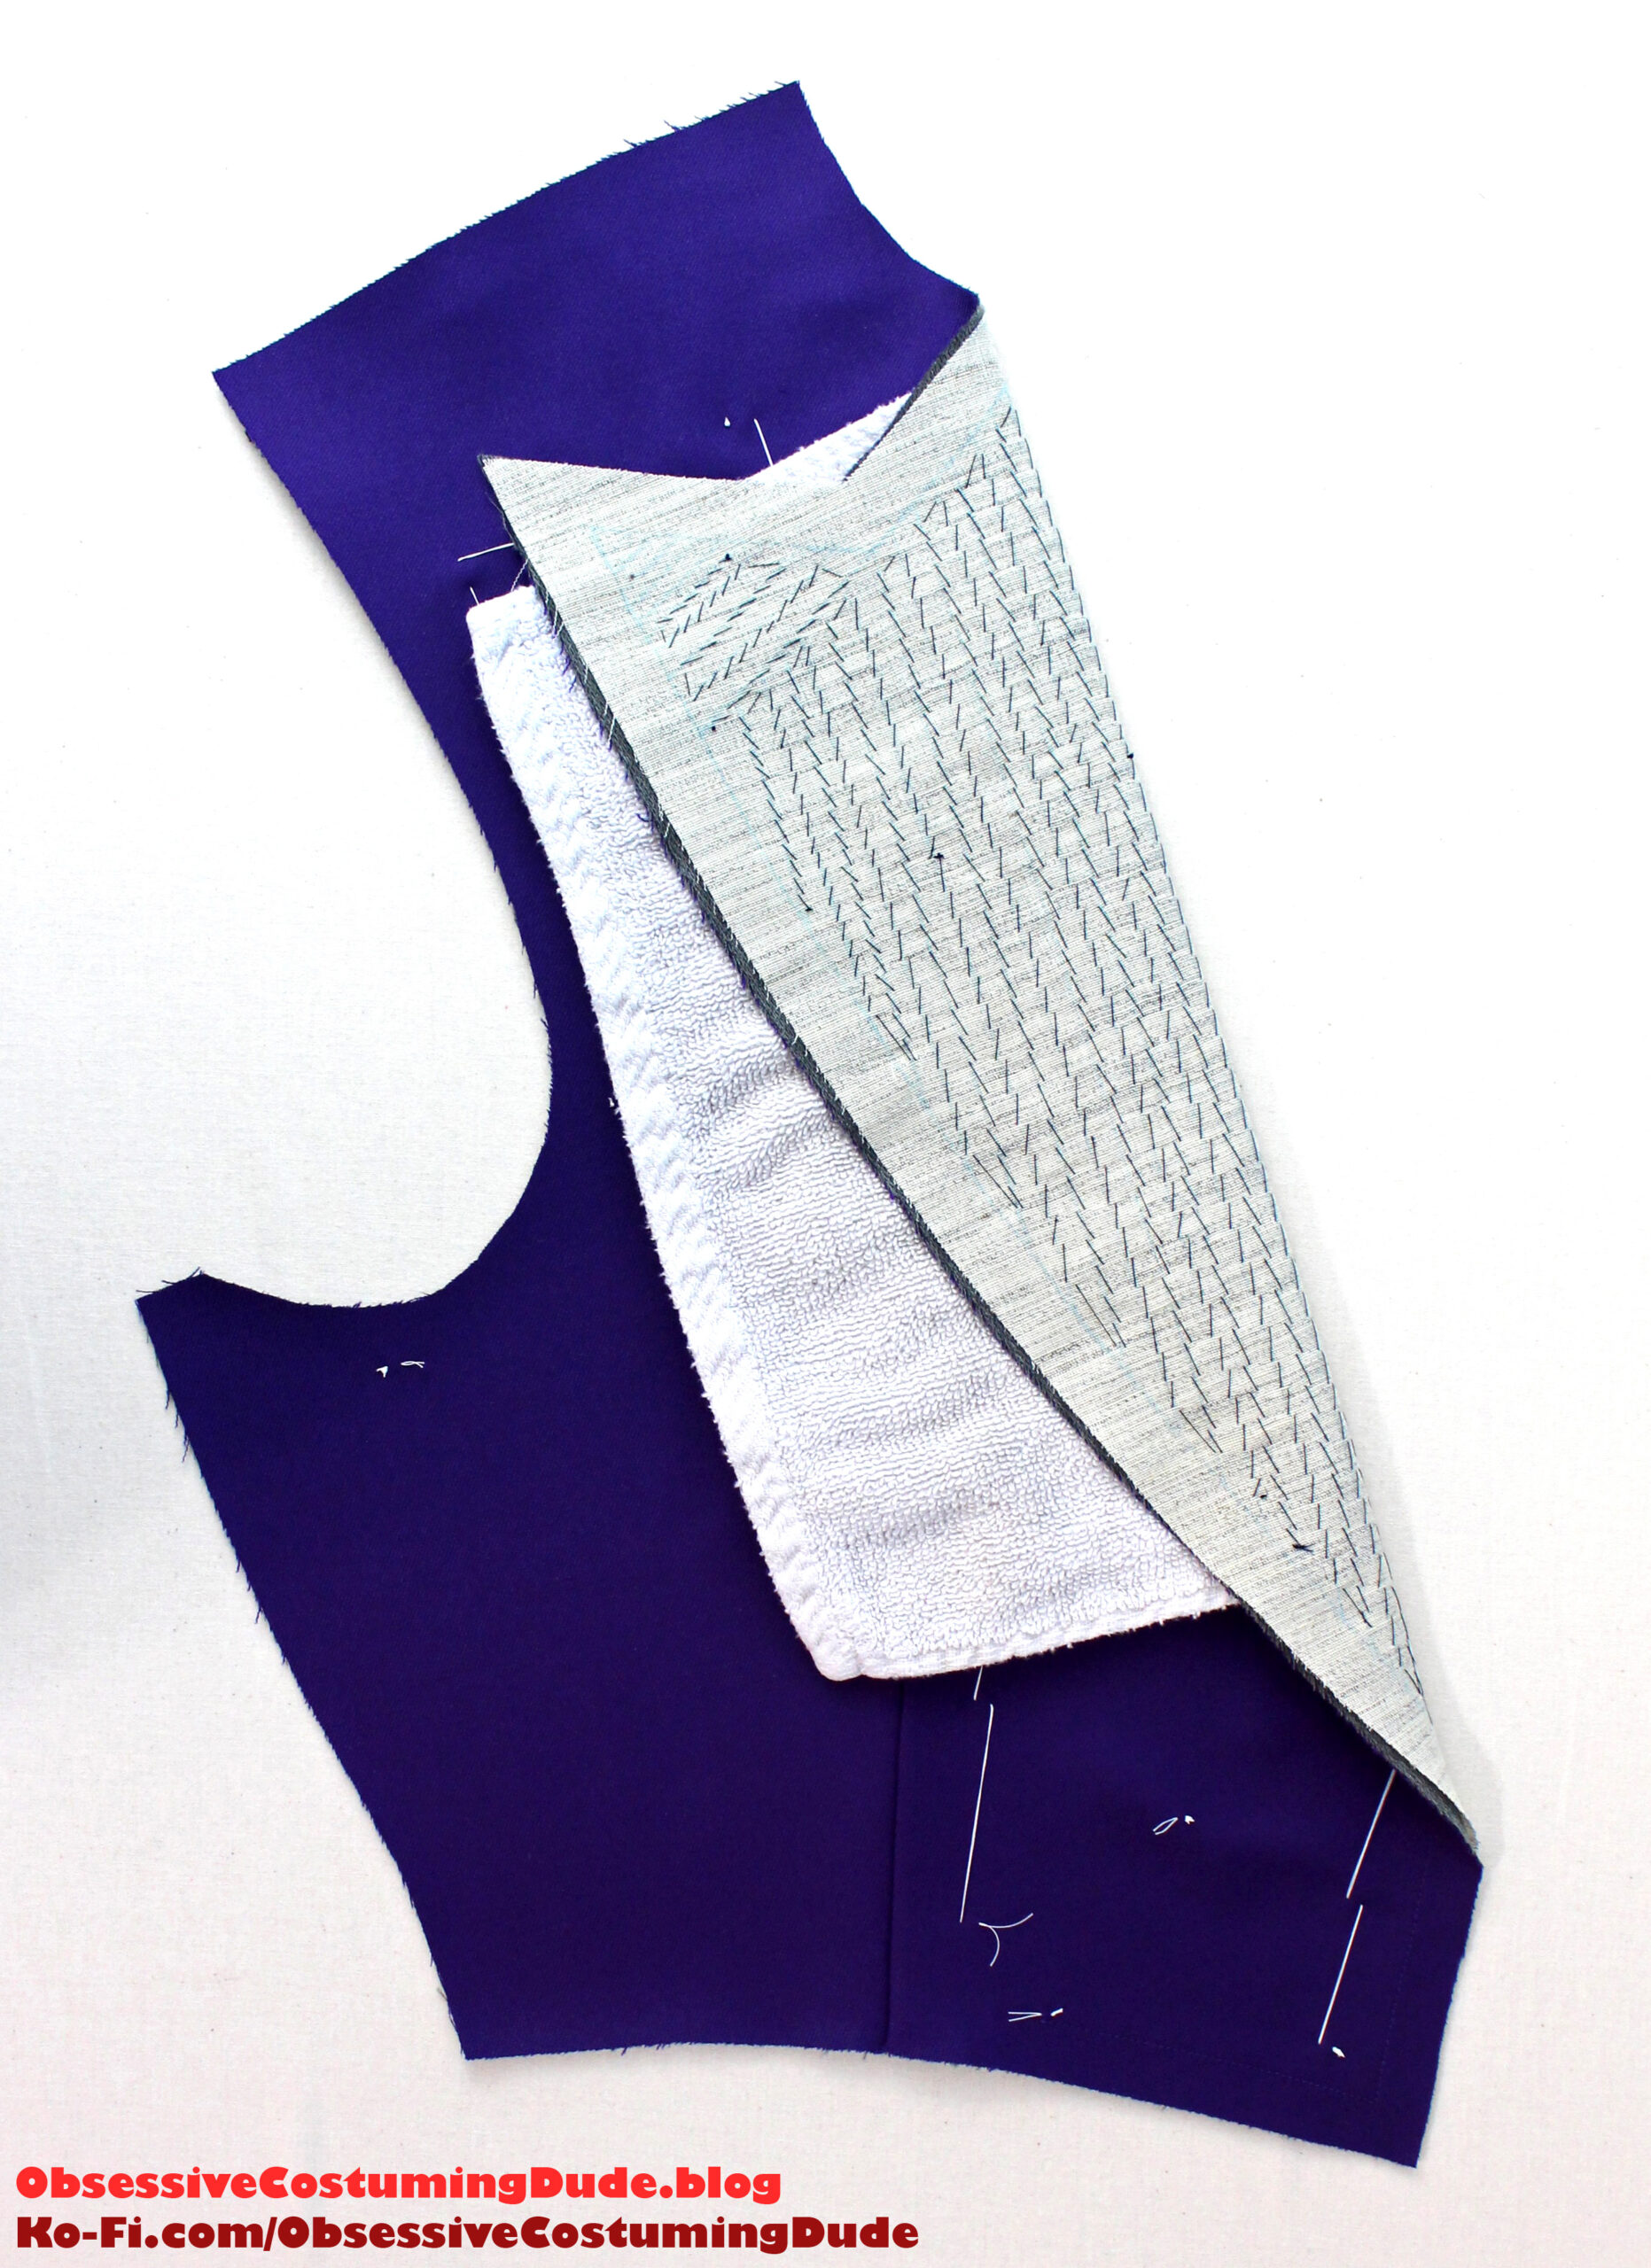
There are different schools of thought regarding the preparation of the canvas assembly and the resulting structure of the coat front.
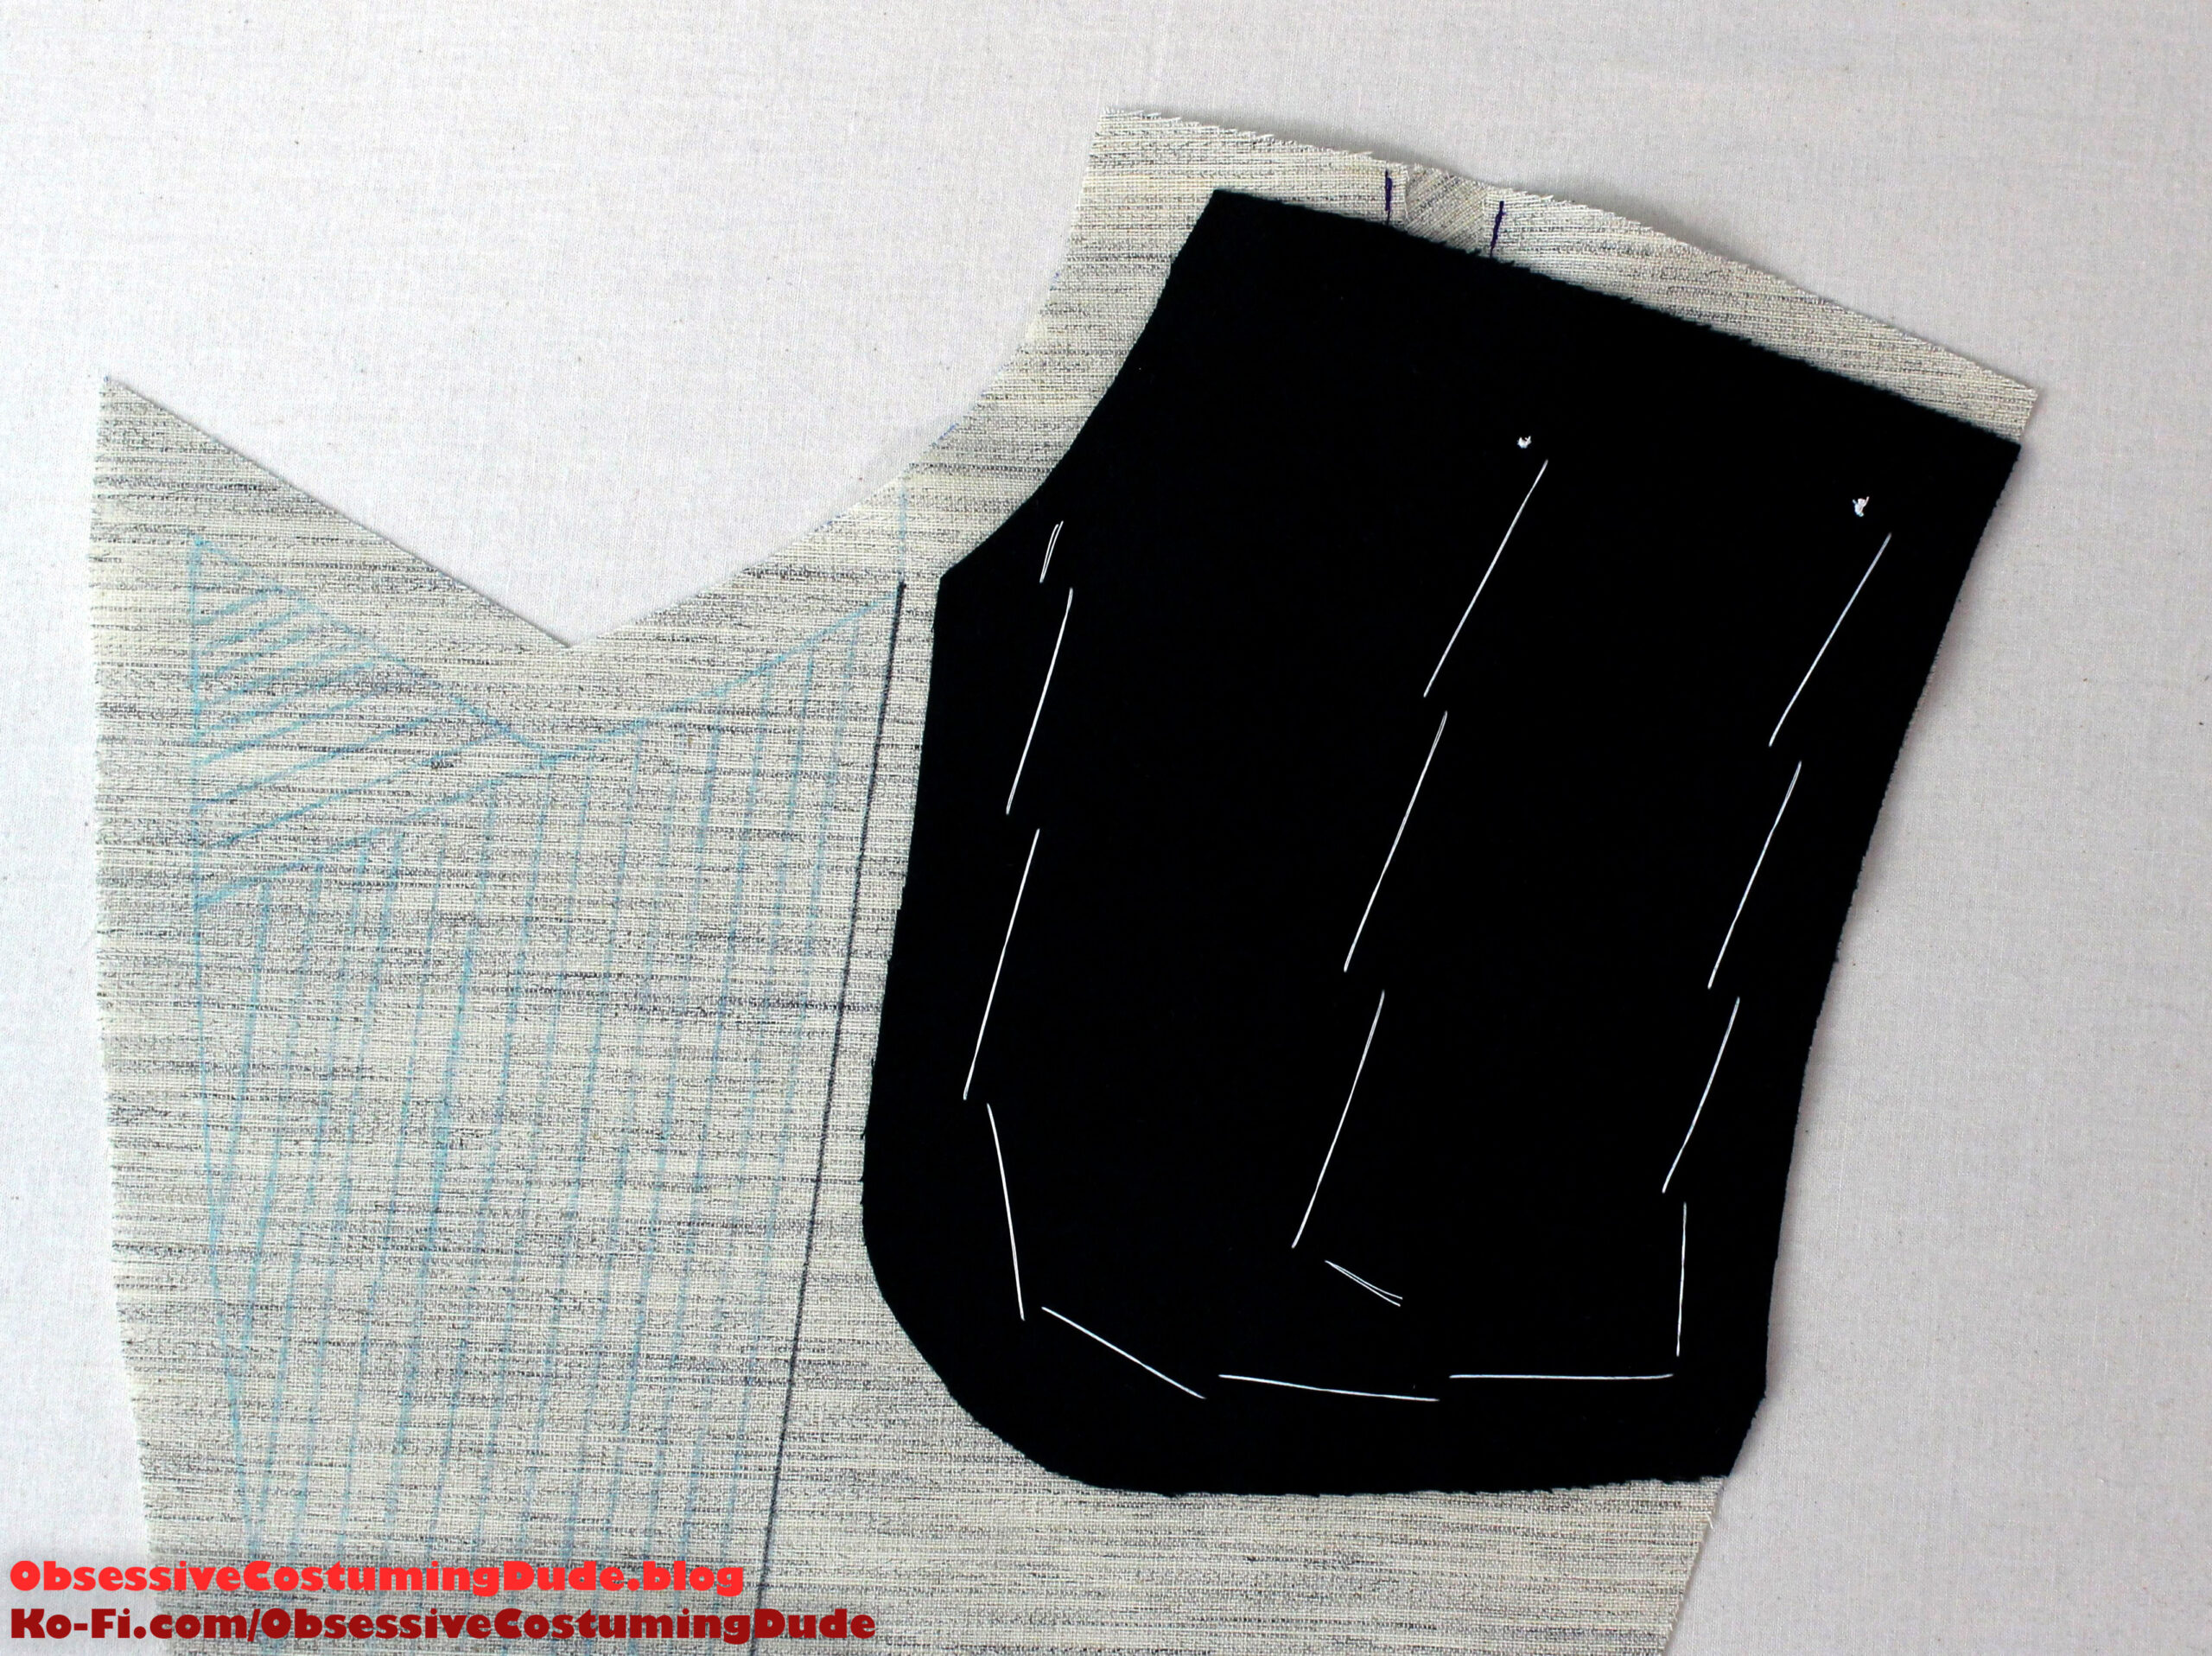
Begin by cutting your front interfacing (piece B).
I also like to mark the roll line, guides, notches, etc. on the canvas.
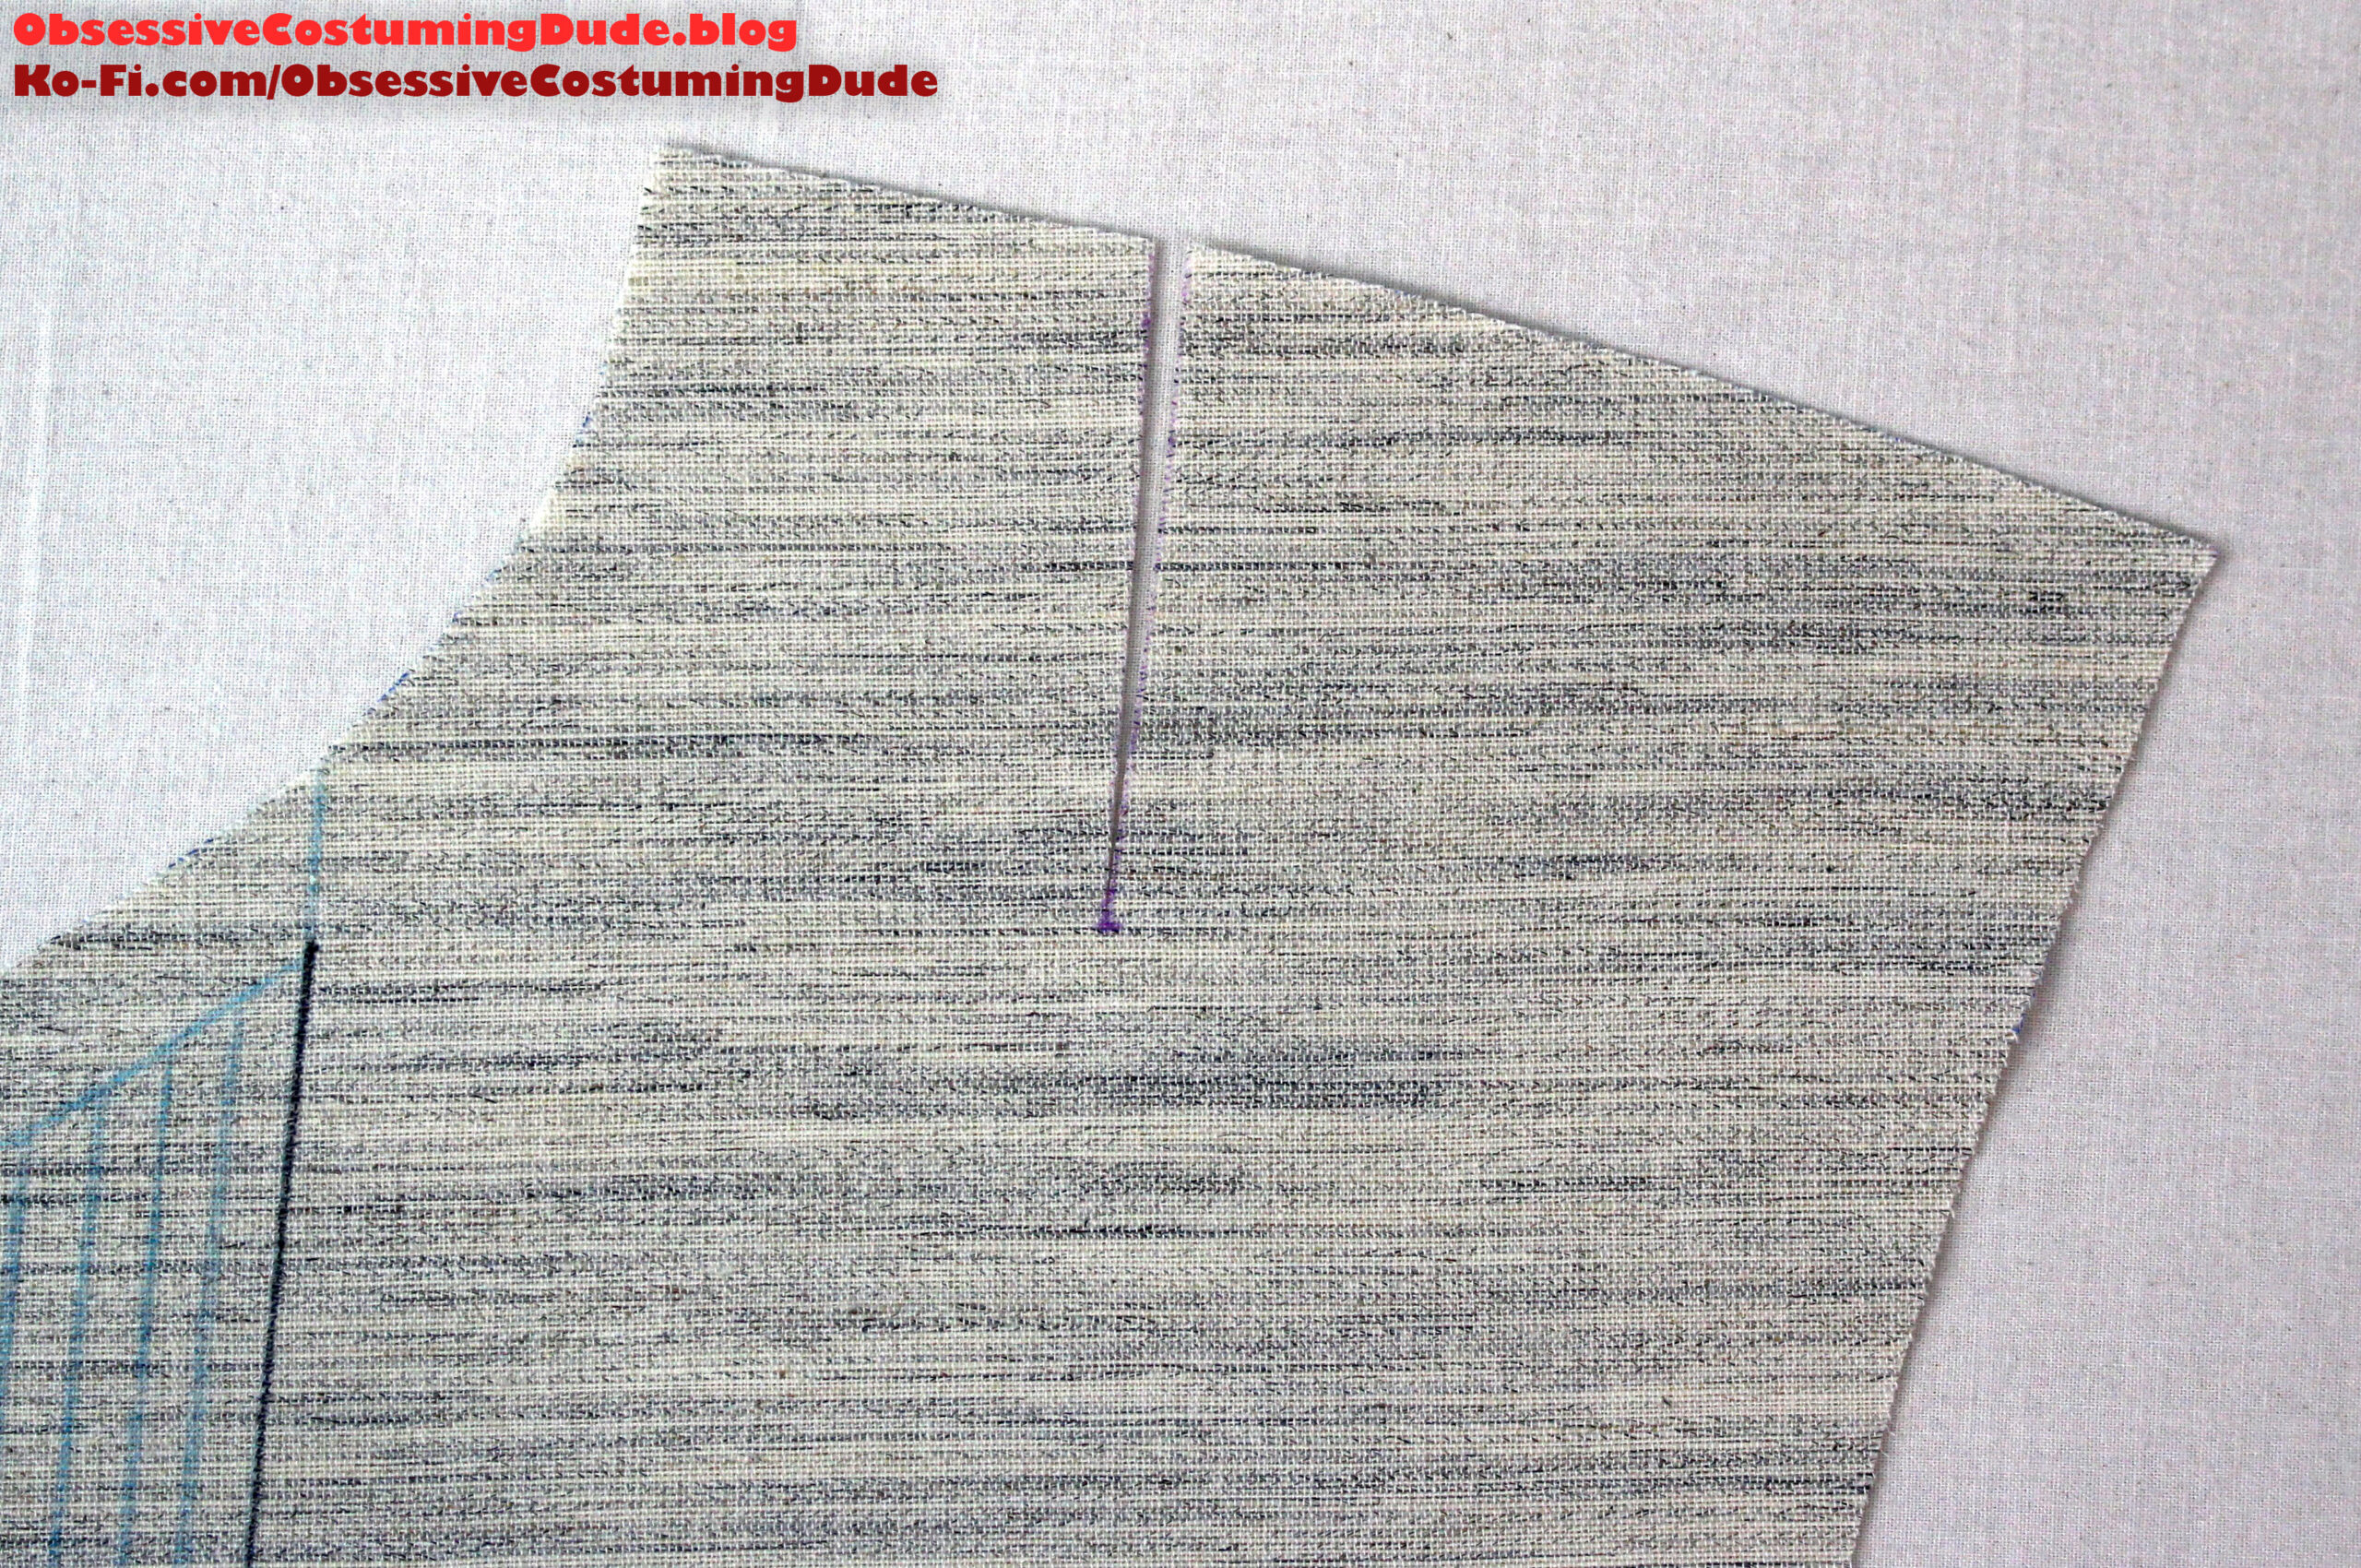
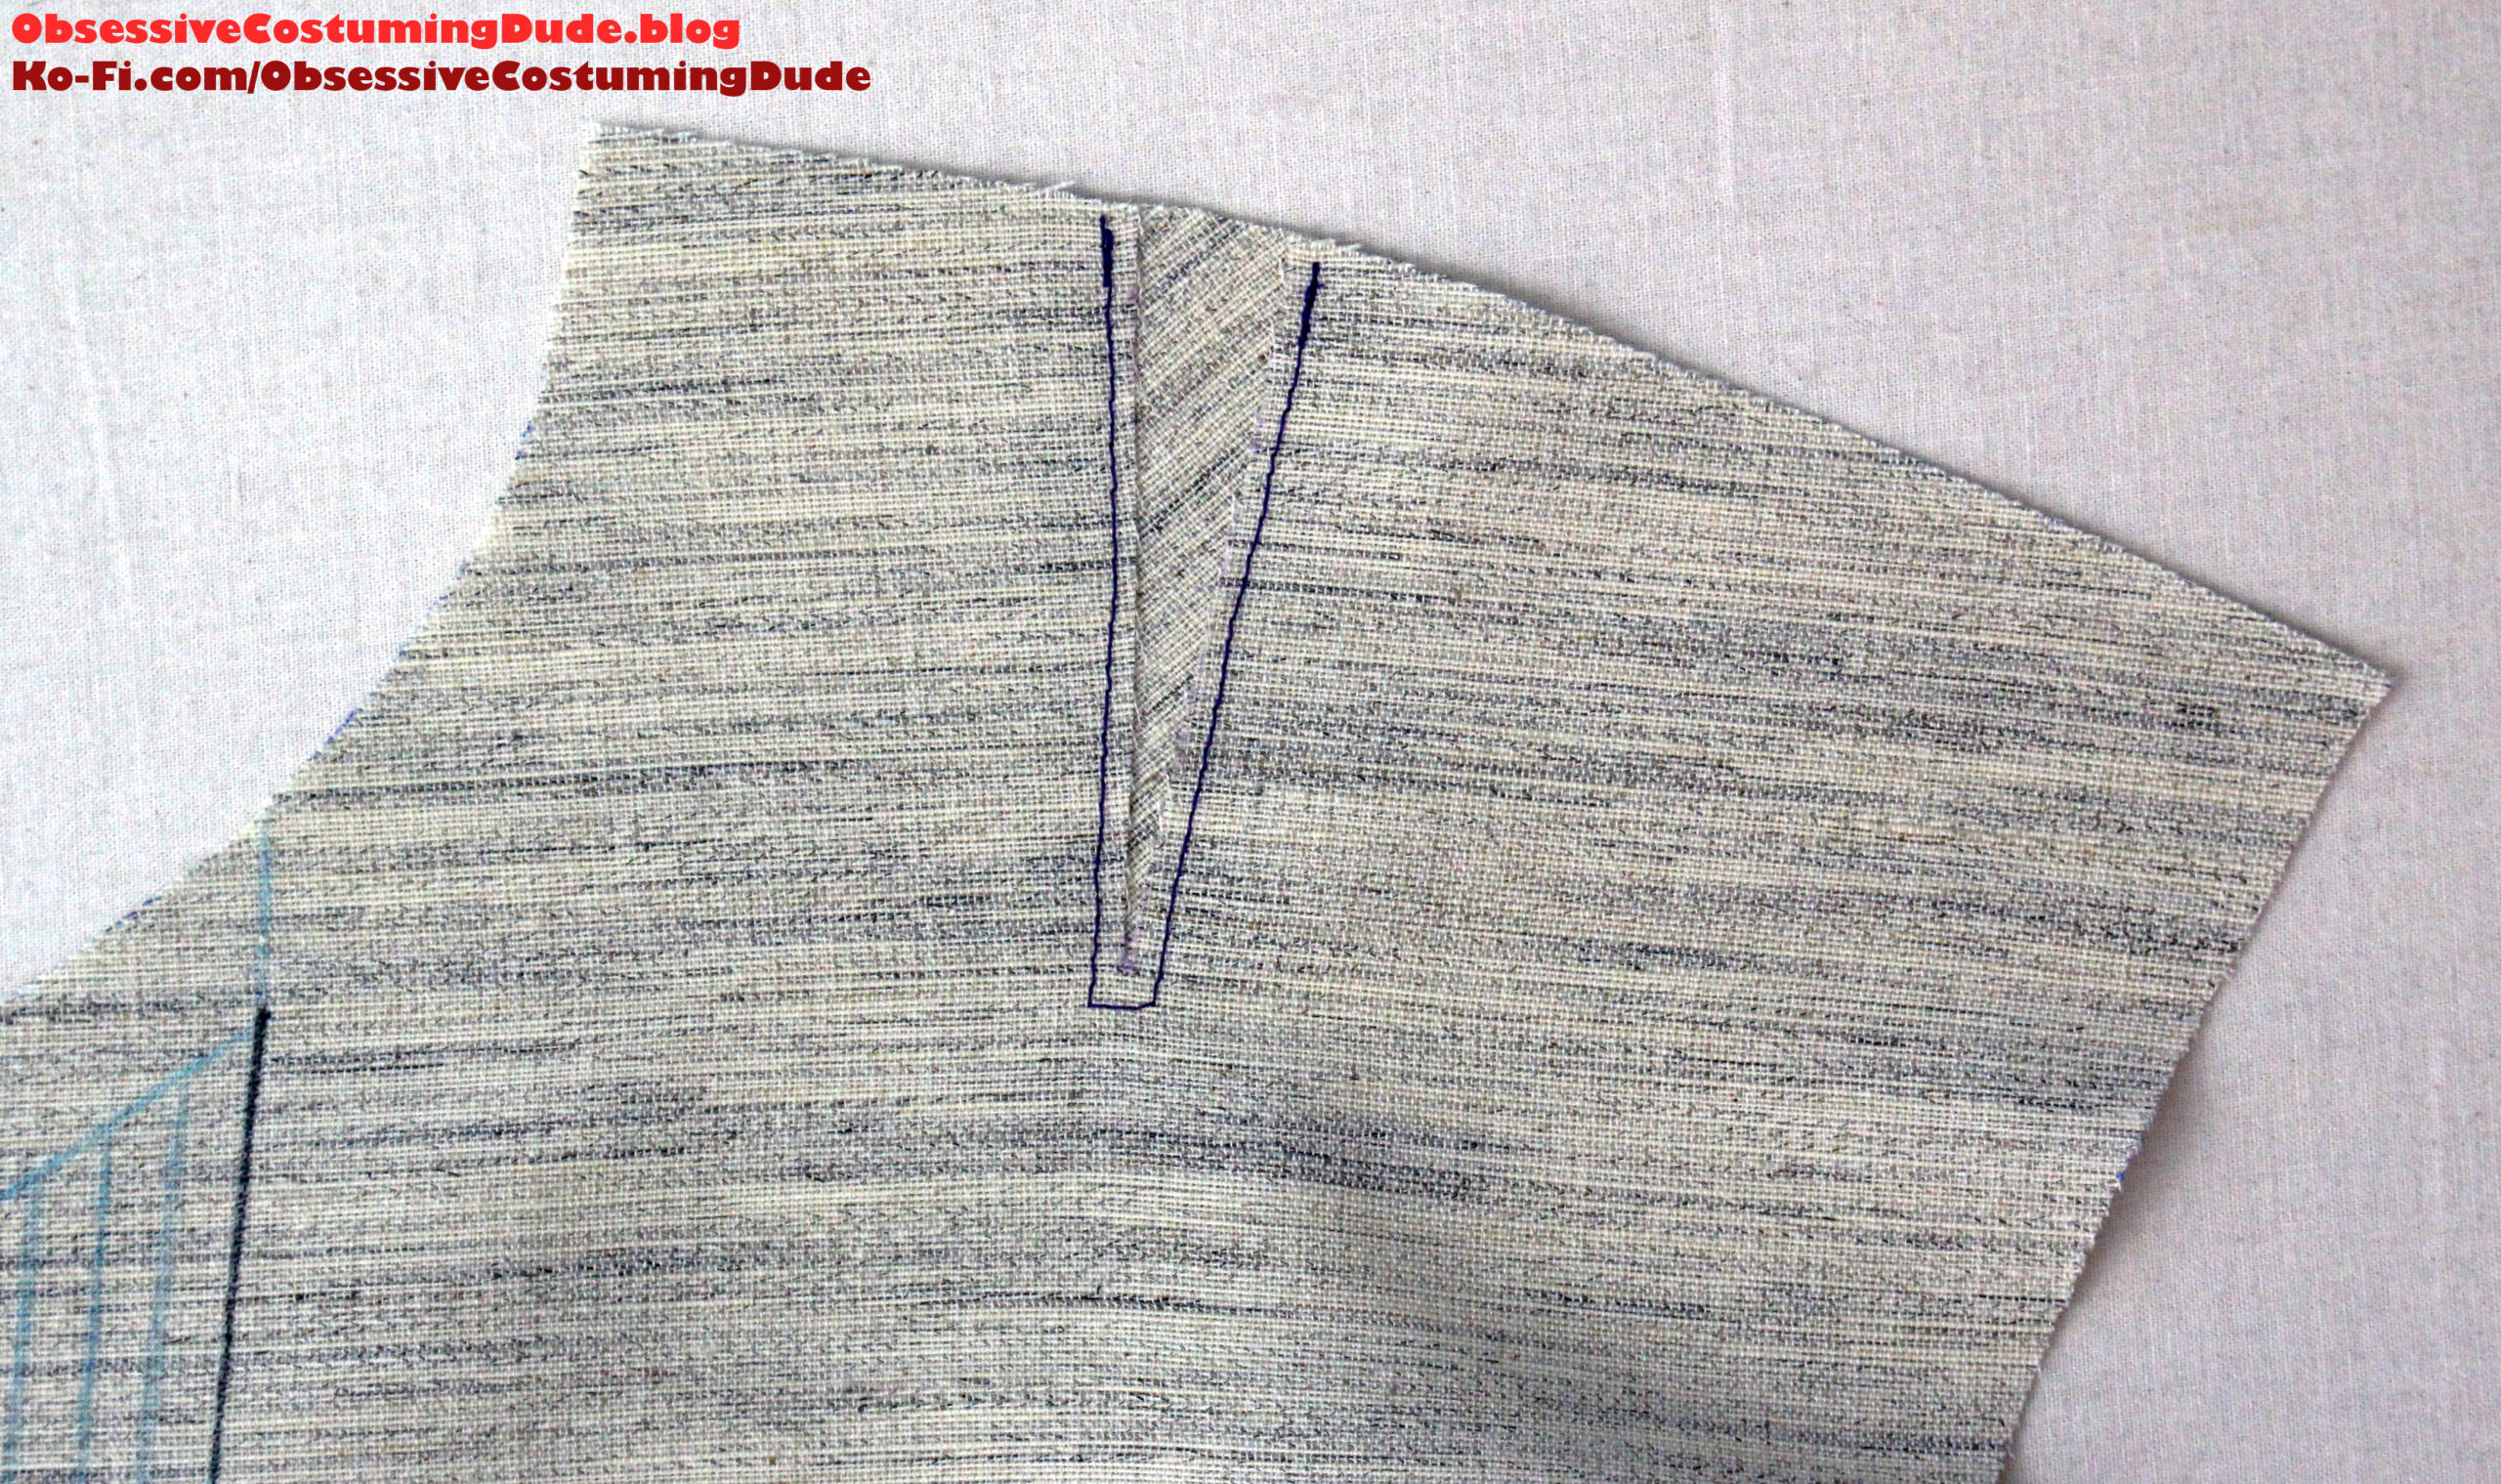
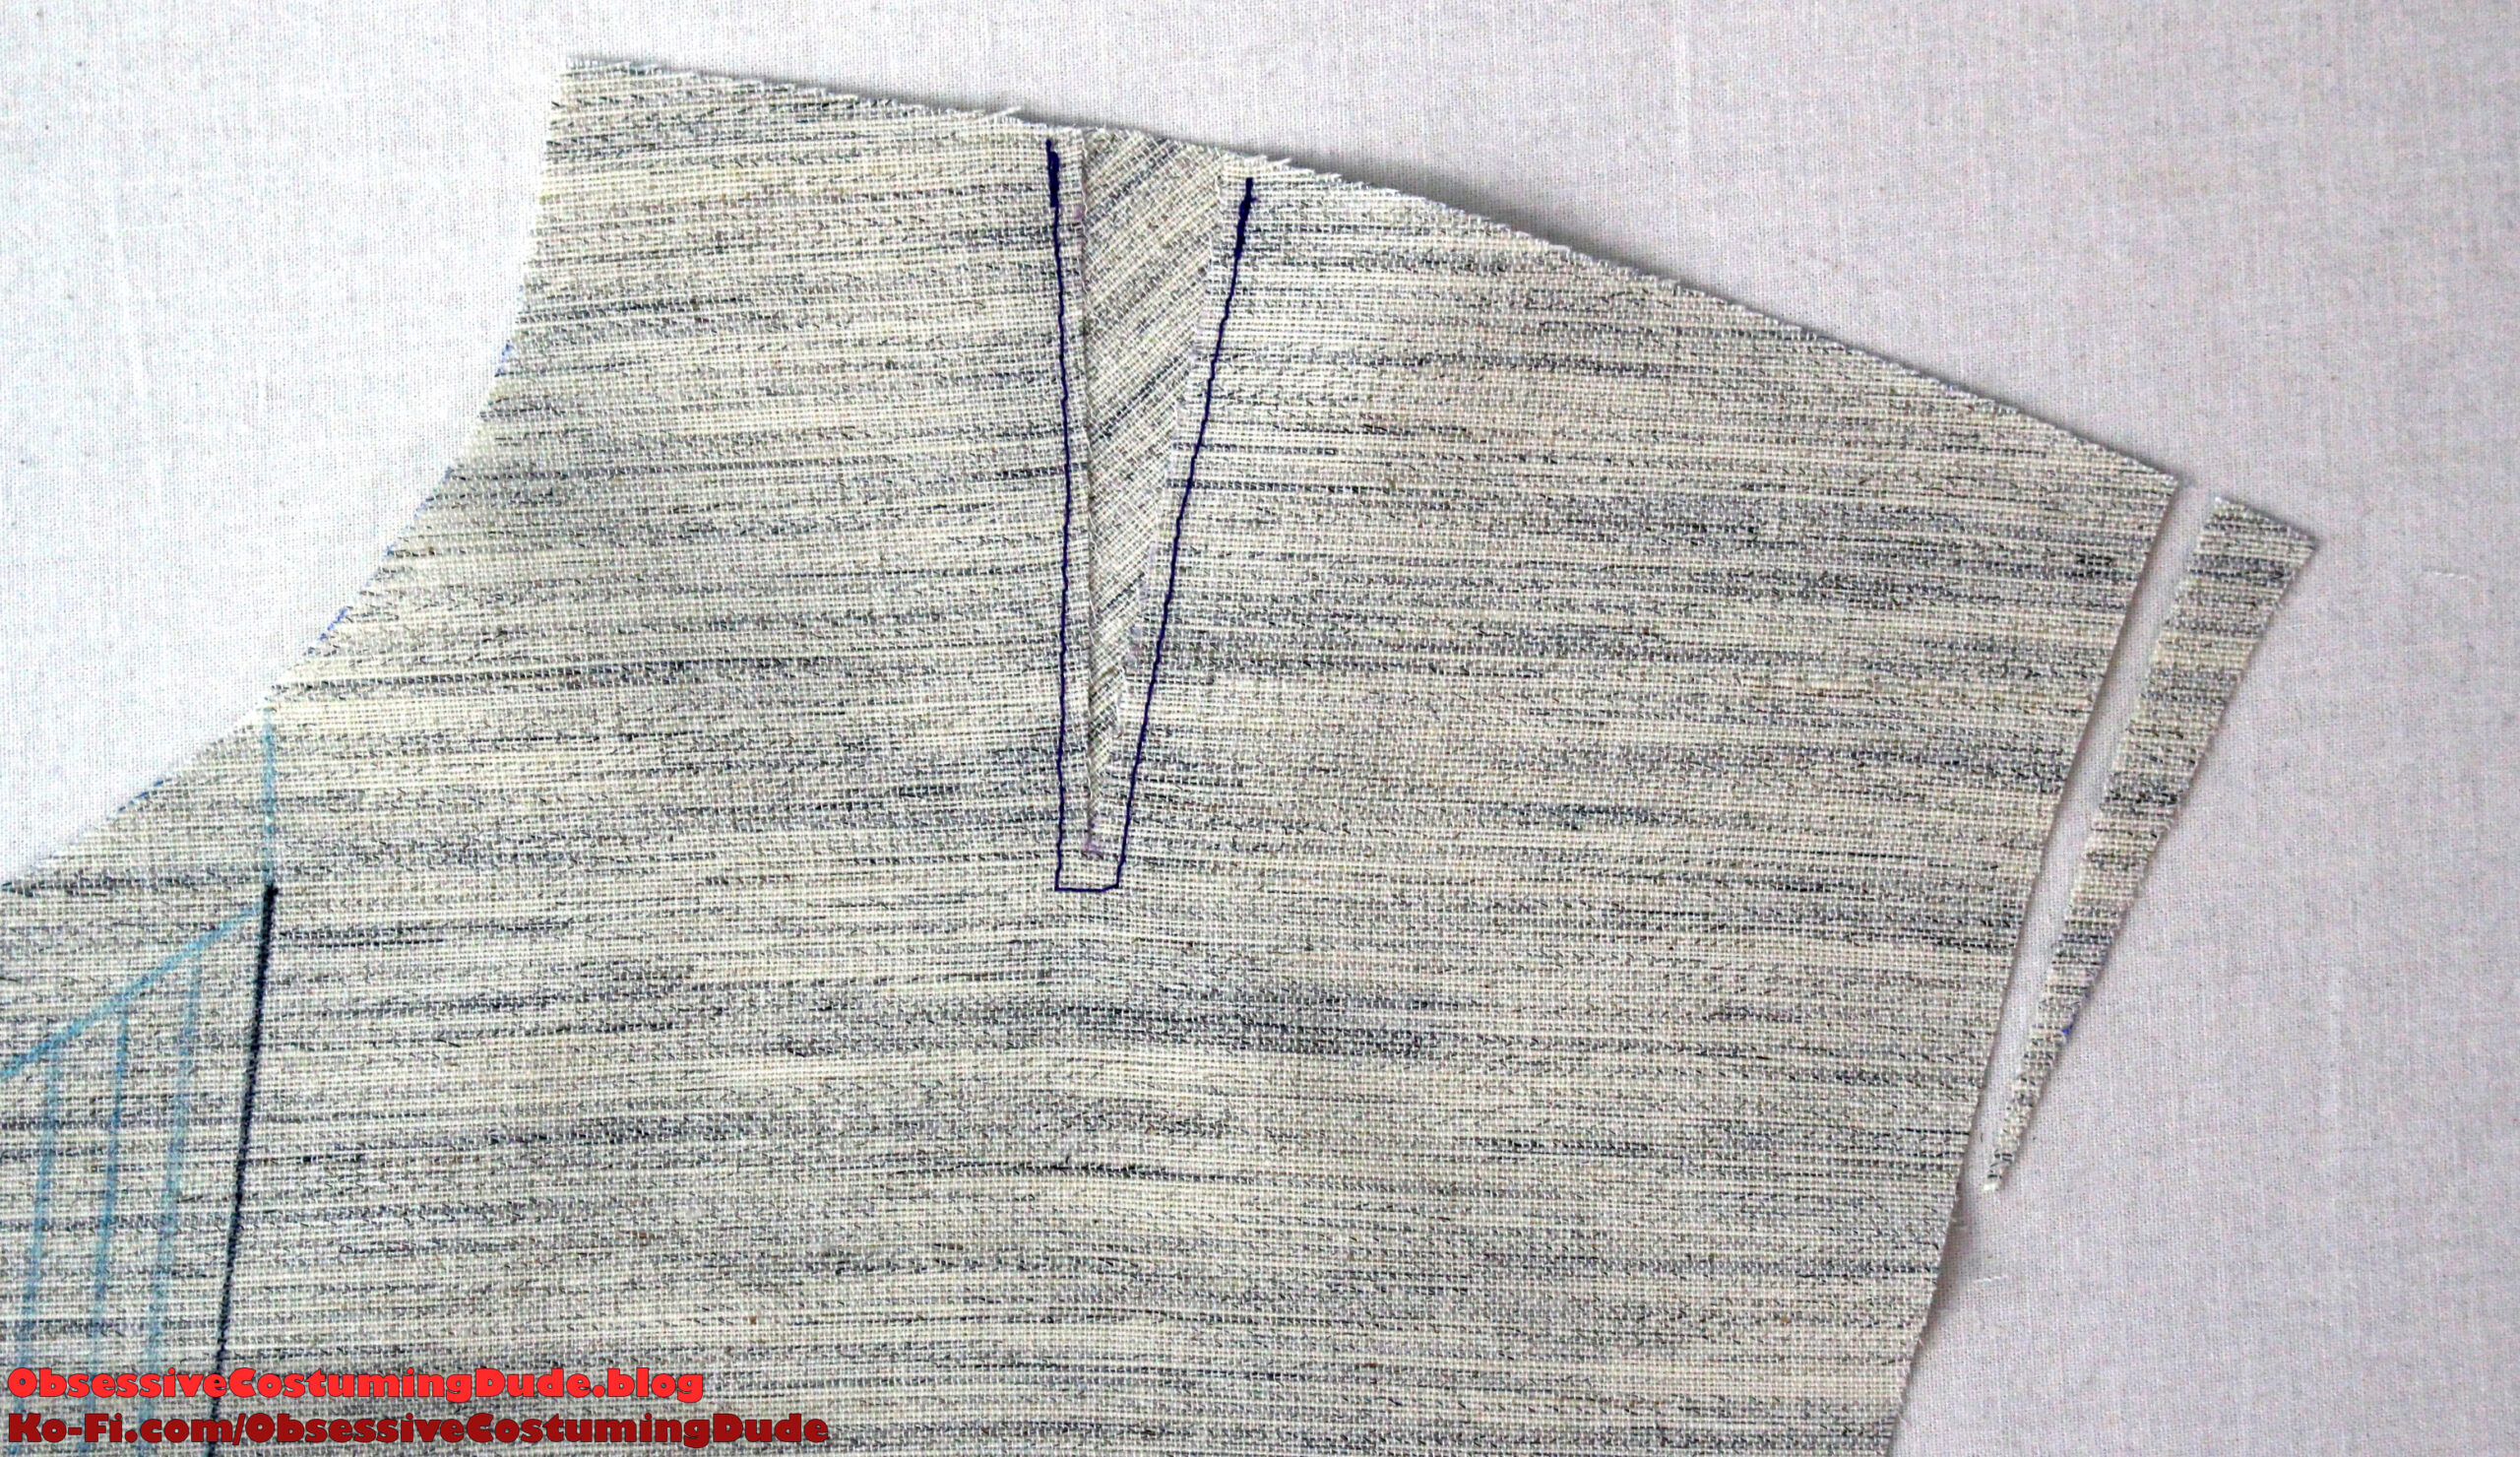
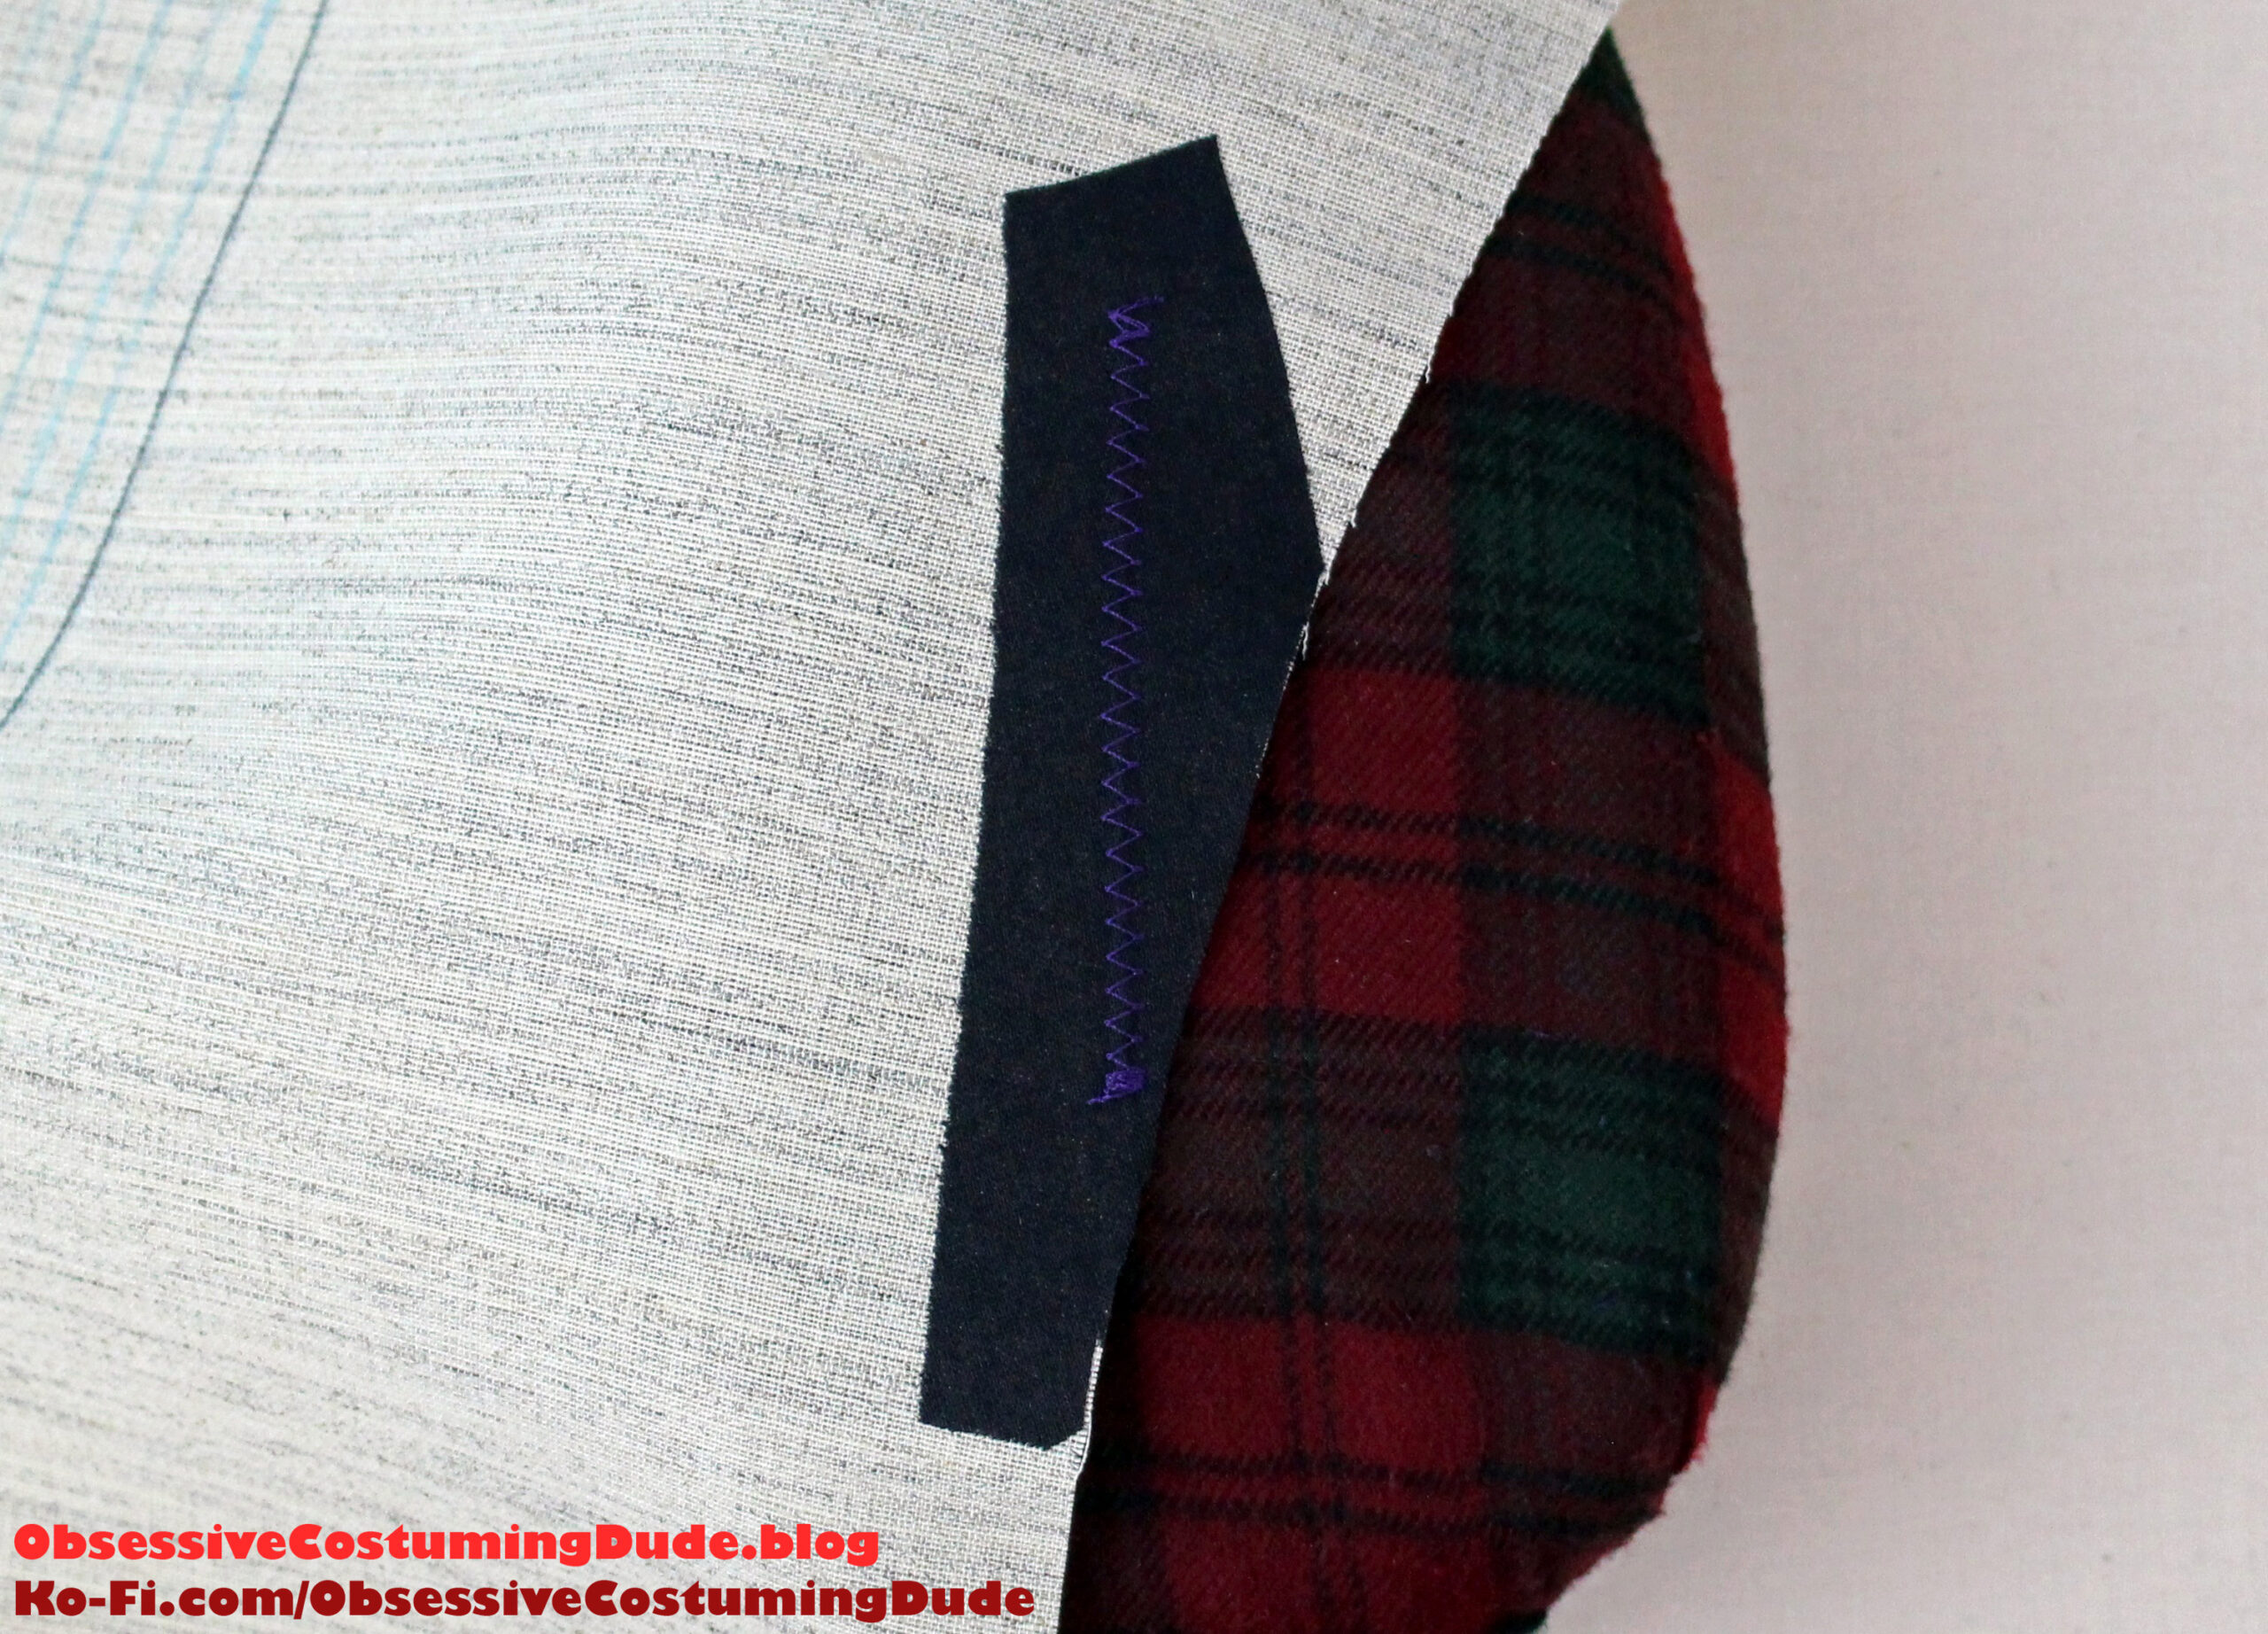
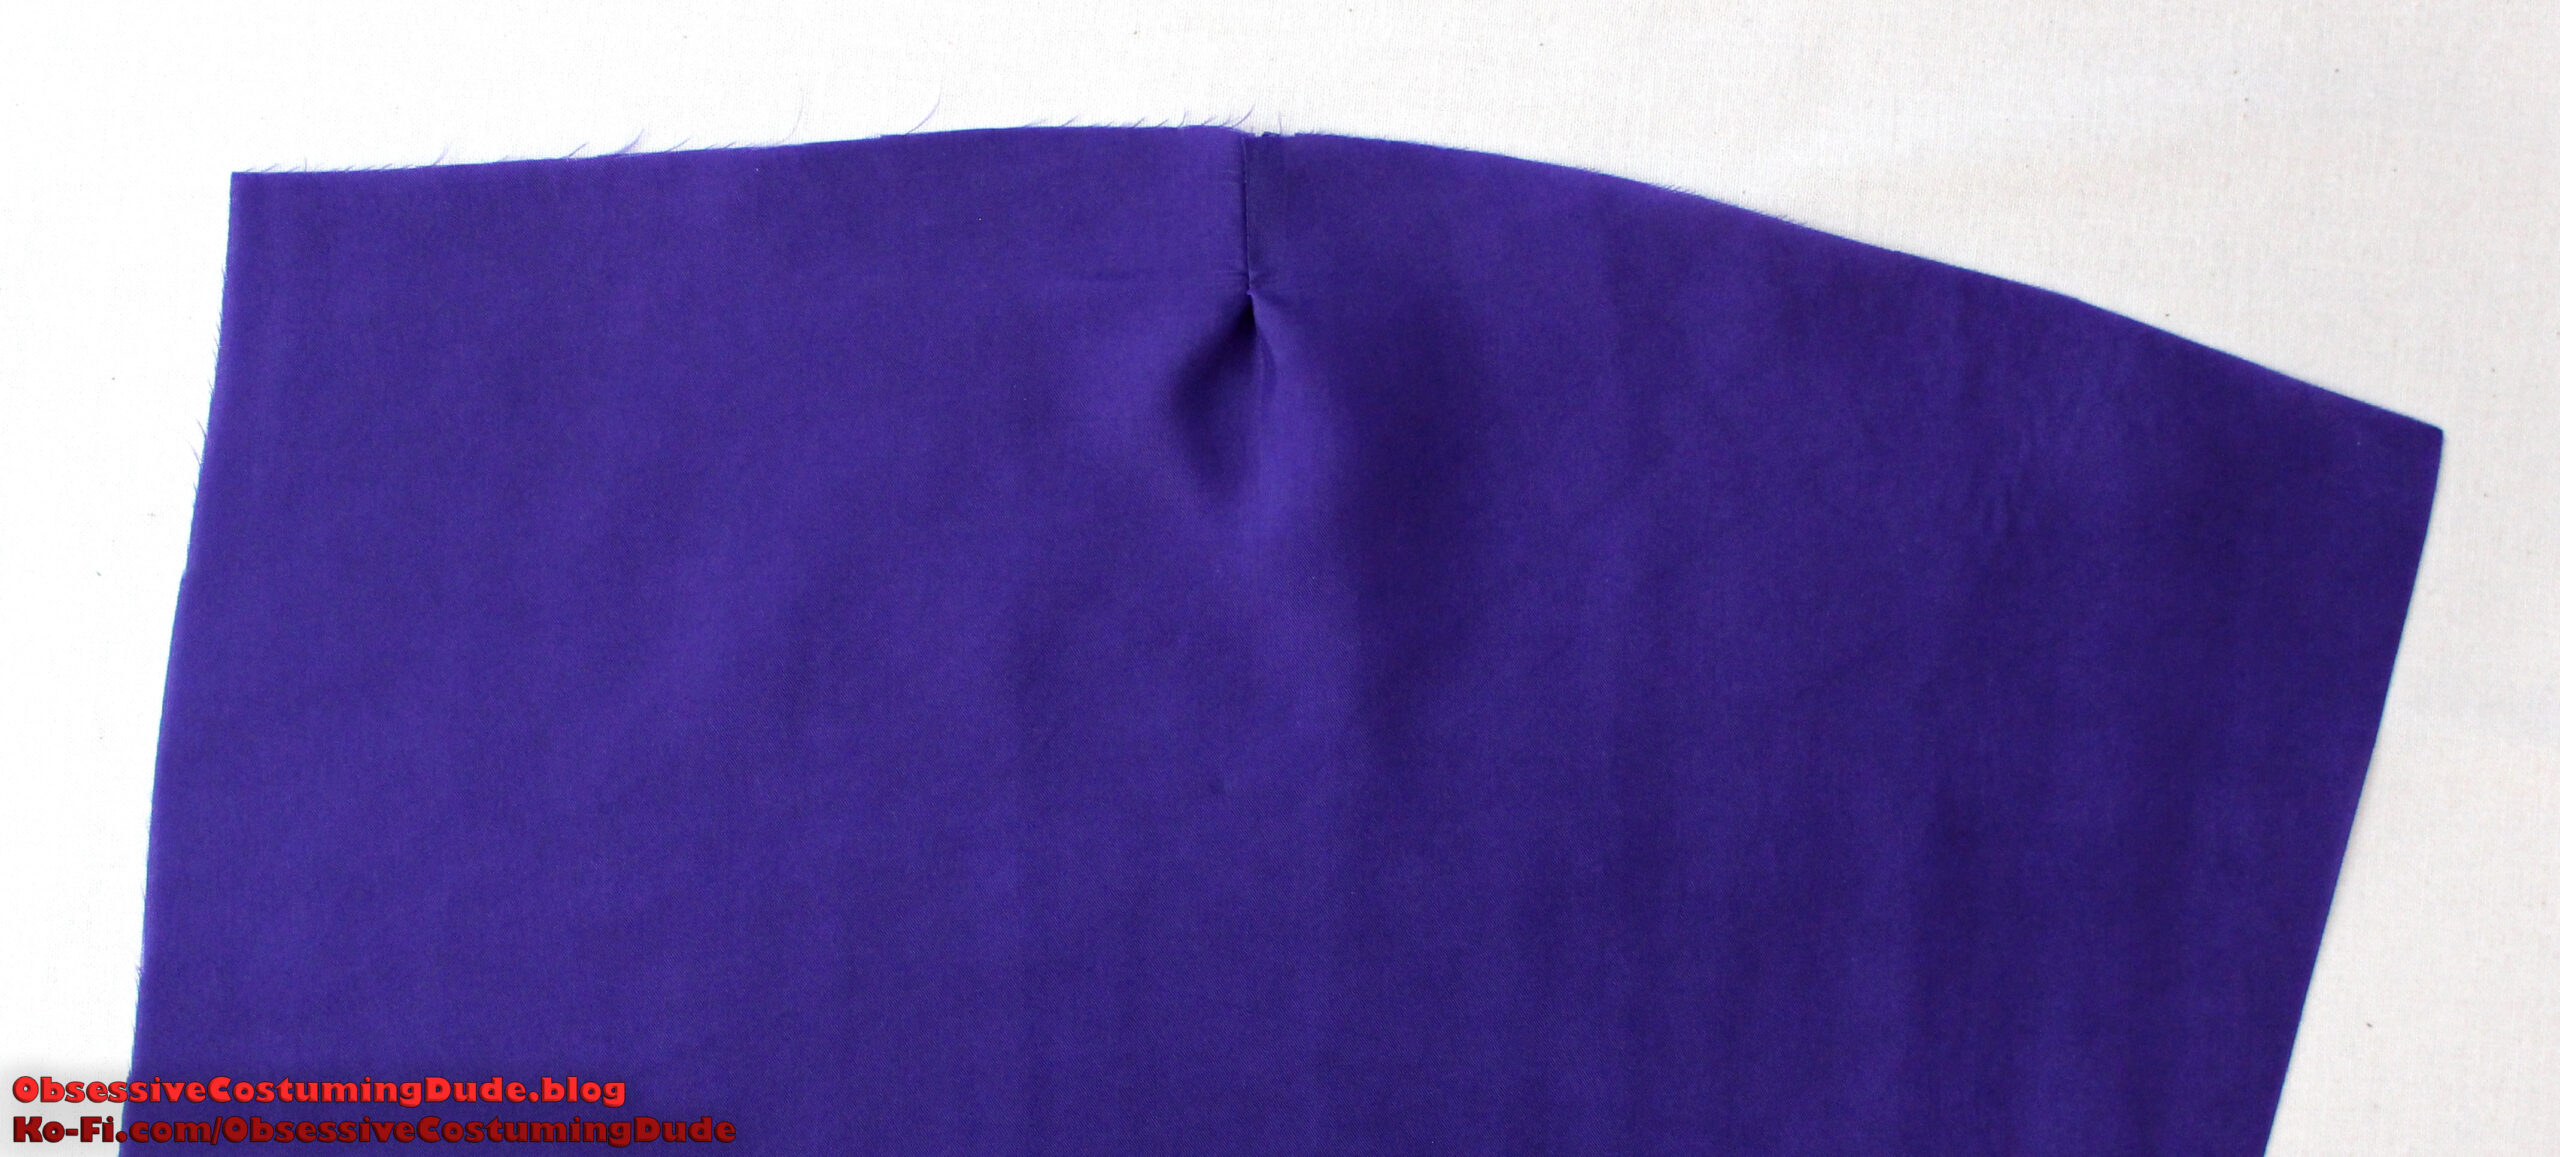
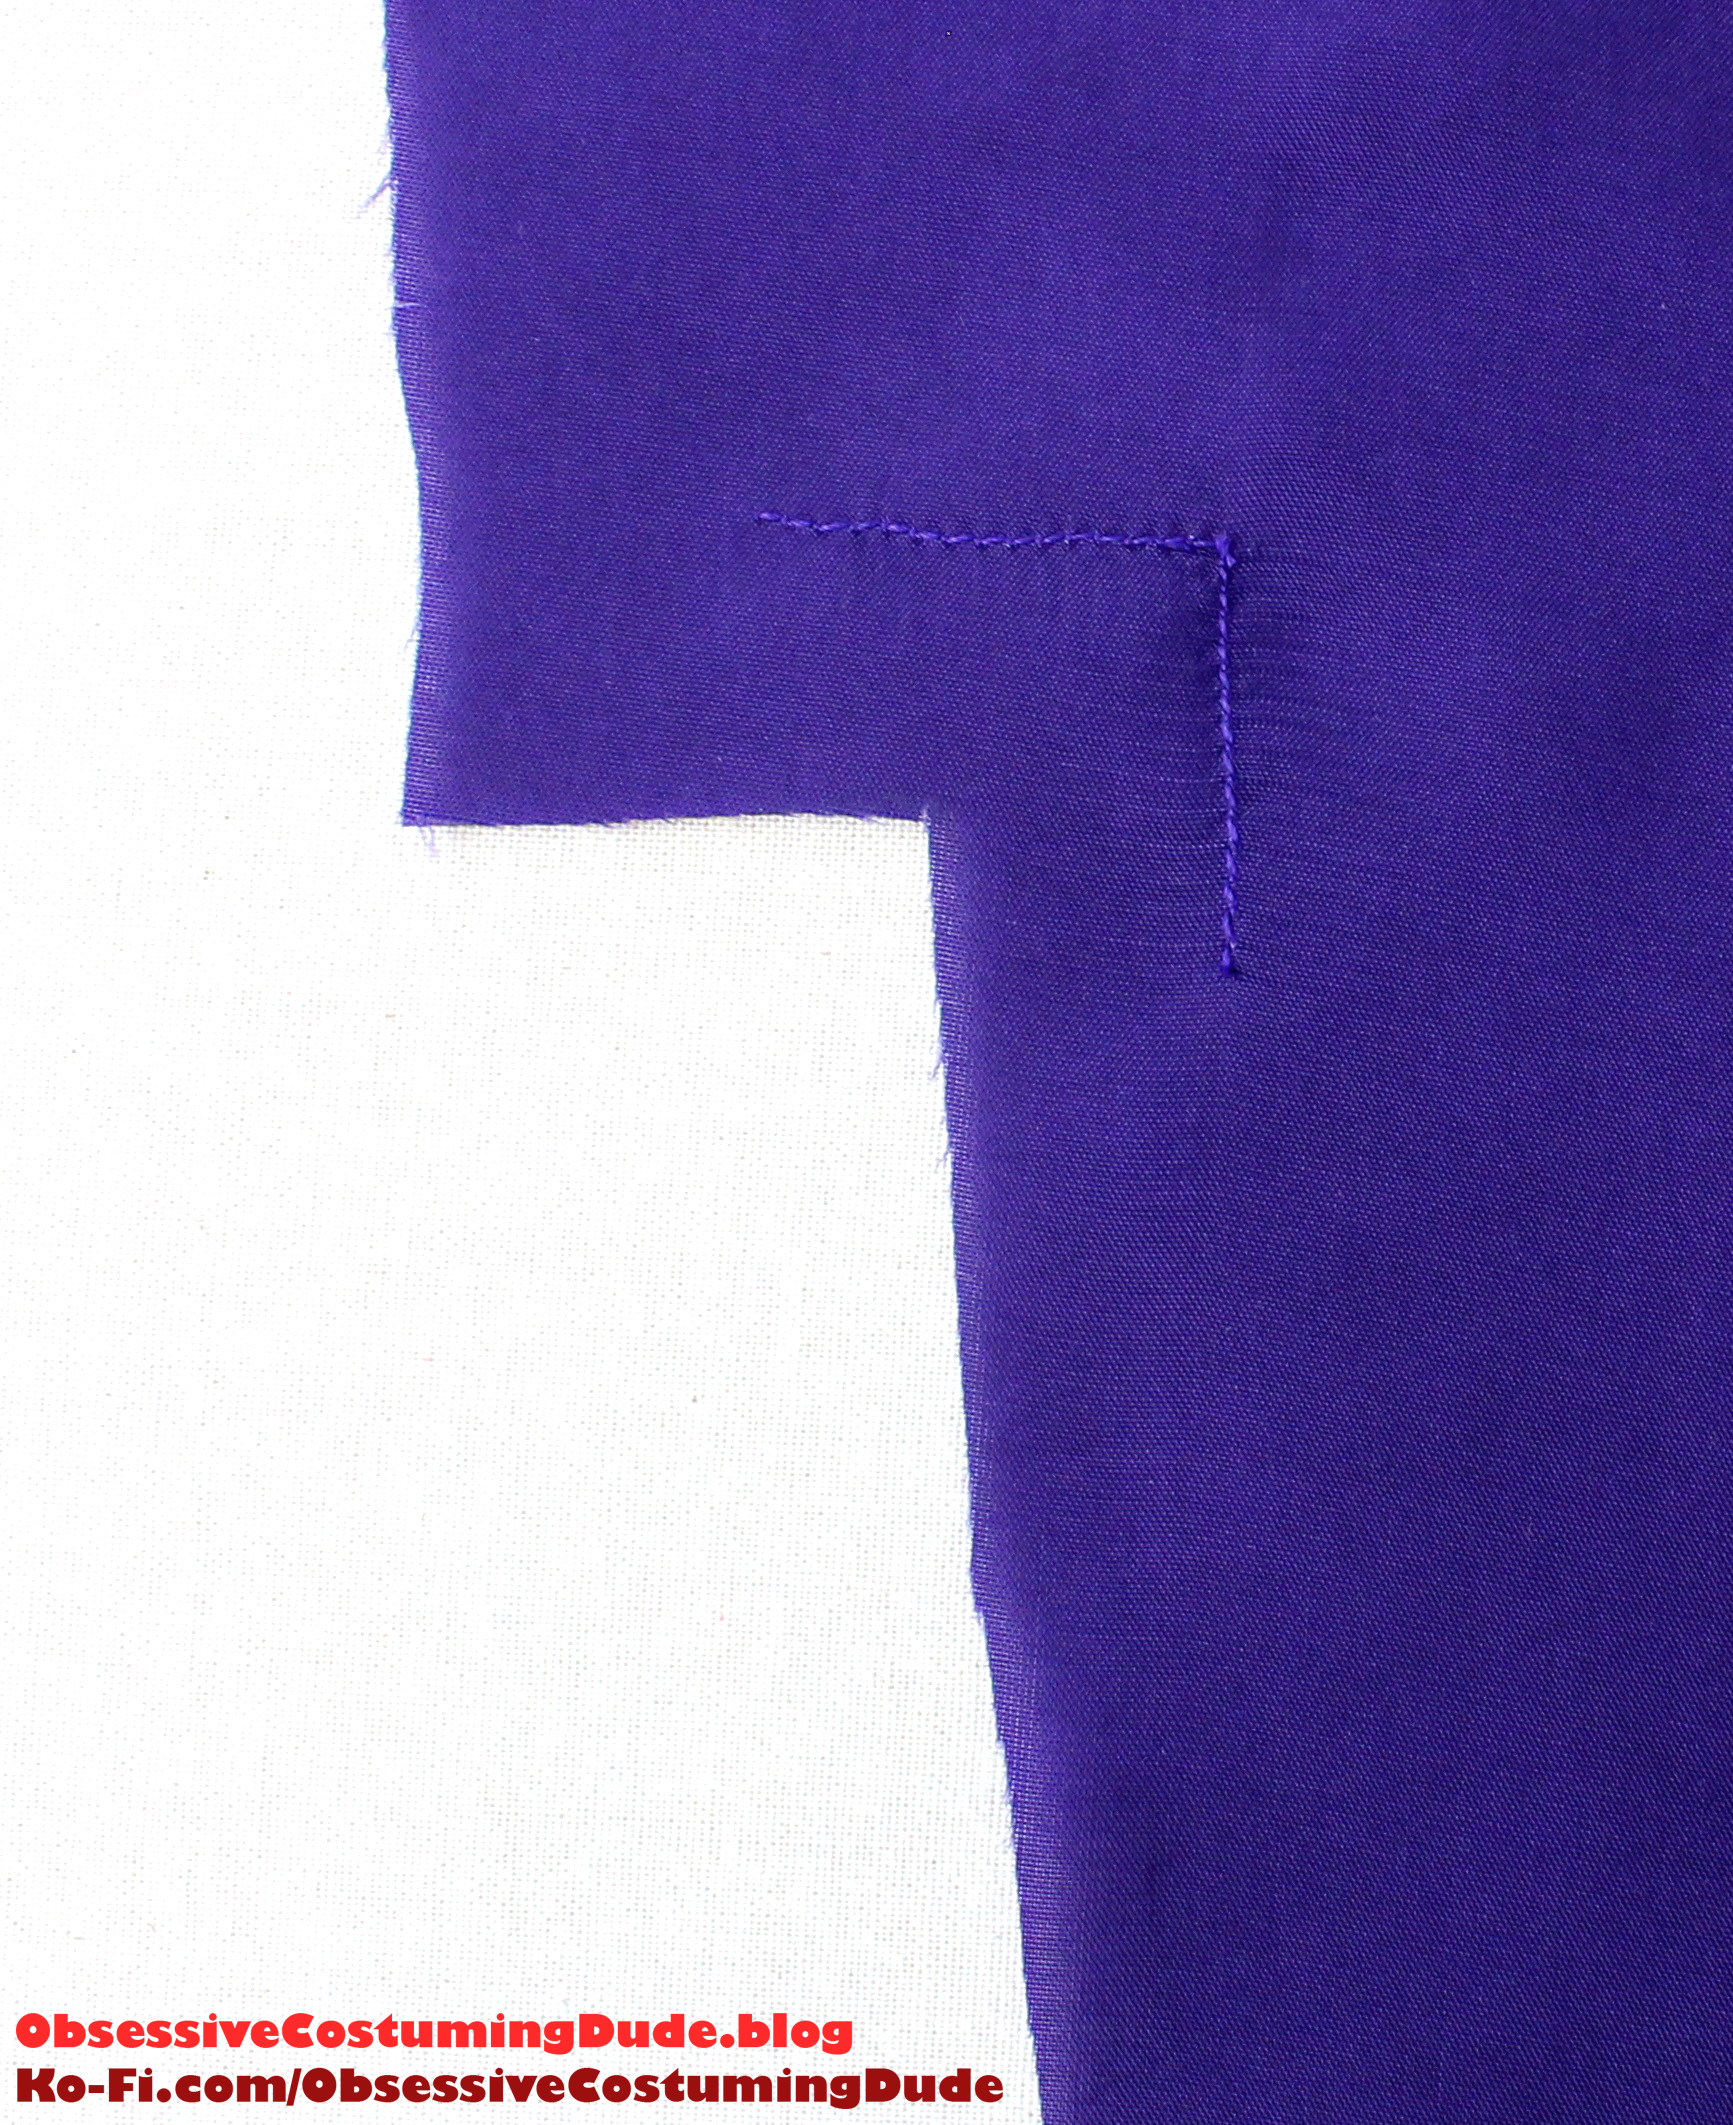
About a third of the way across the shoulder from the neckline, cut a slit into the canvas about 3” long and parallel to the roll line.
Cut a bias strip of canvas in a wedge shape, about 1 ½” wide at the top, ½” wide at the bottom, and about 4” long.
Spread the shoulder slit open slit open a bit. (Cabrera says ½”, but Nordheim says 1”, so just experiment and see what you prefer.)
Slide the insert underneath the split, and machine-stitch it into place.
Because we added a bit to the shoulder, it’s actually a little too wide now, so trim it back down to size along the upper/outer armscye area.
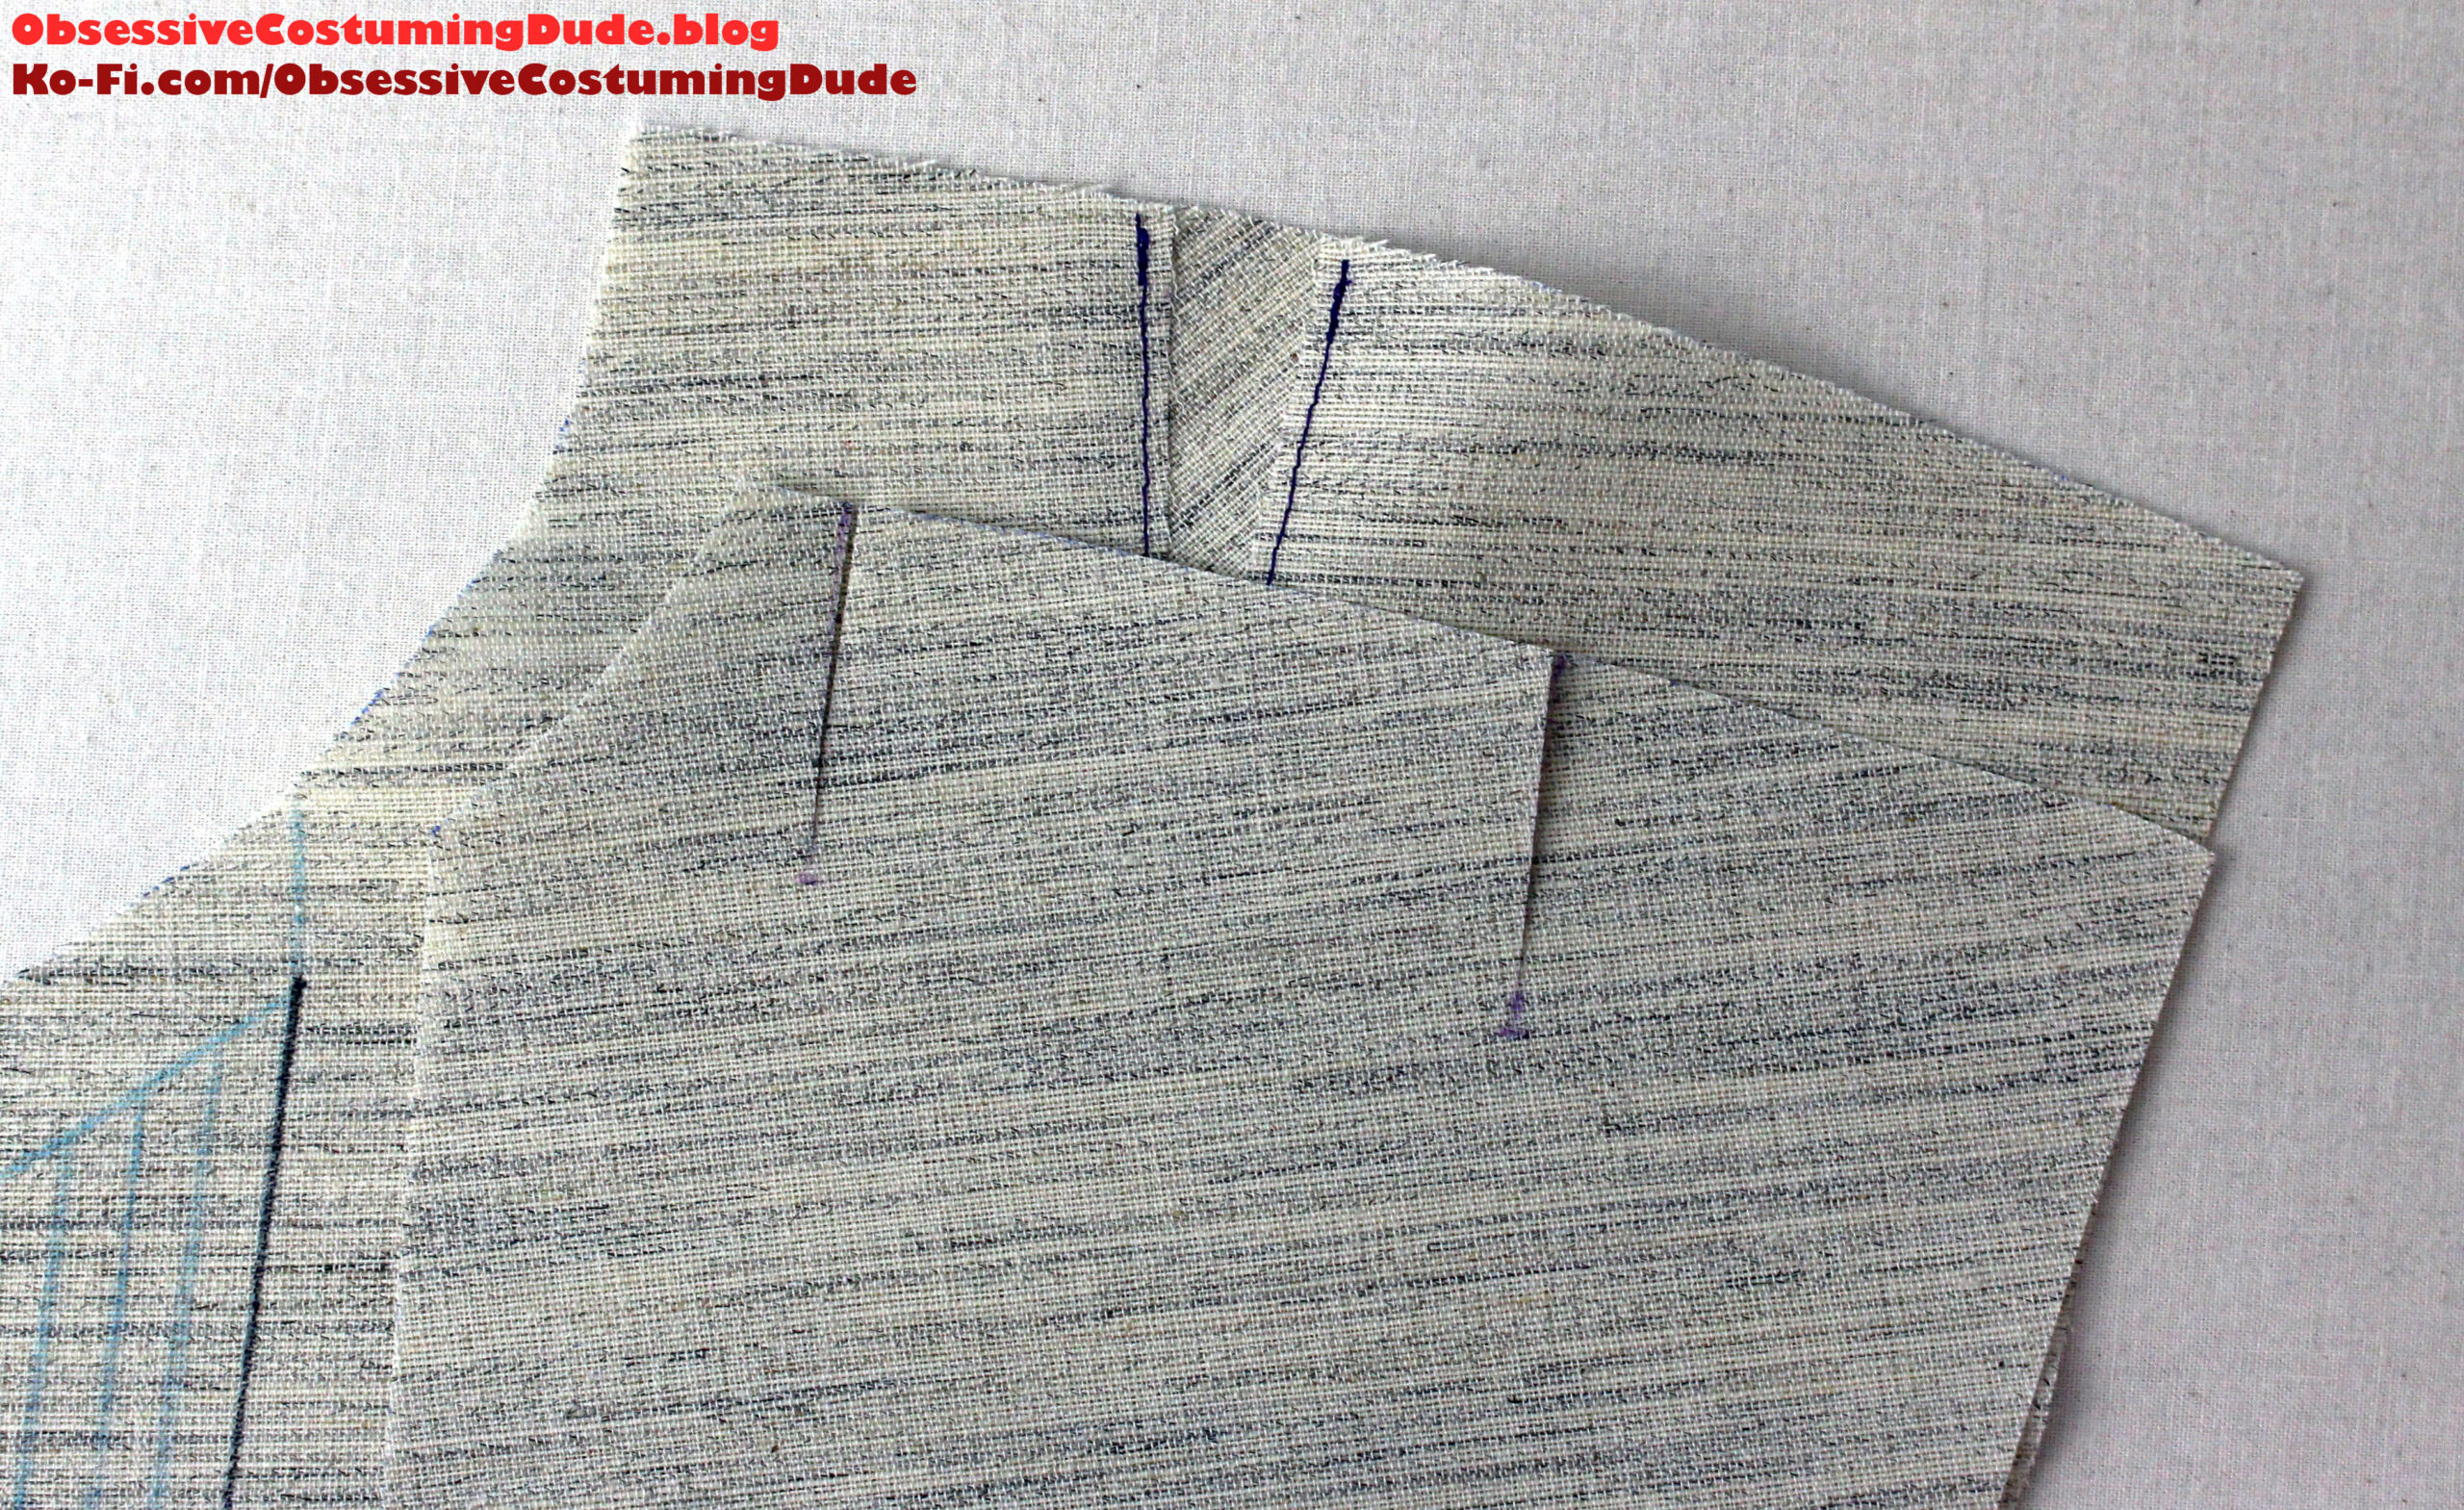
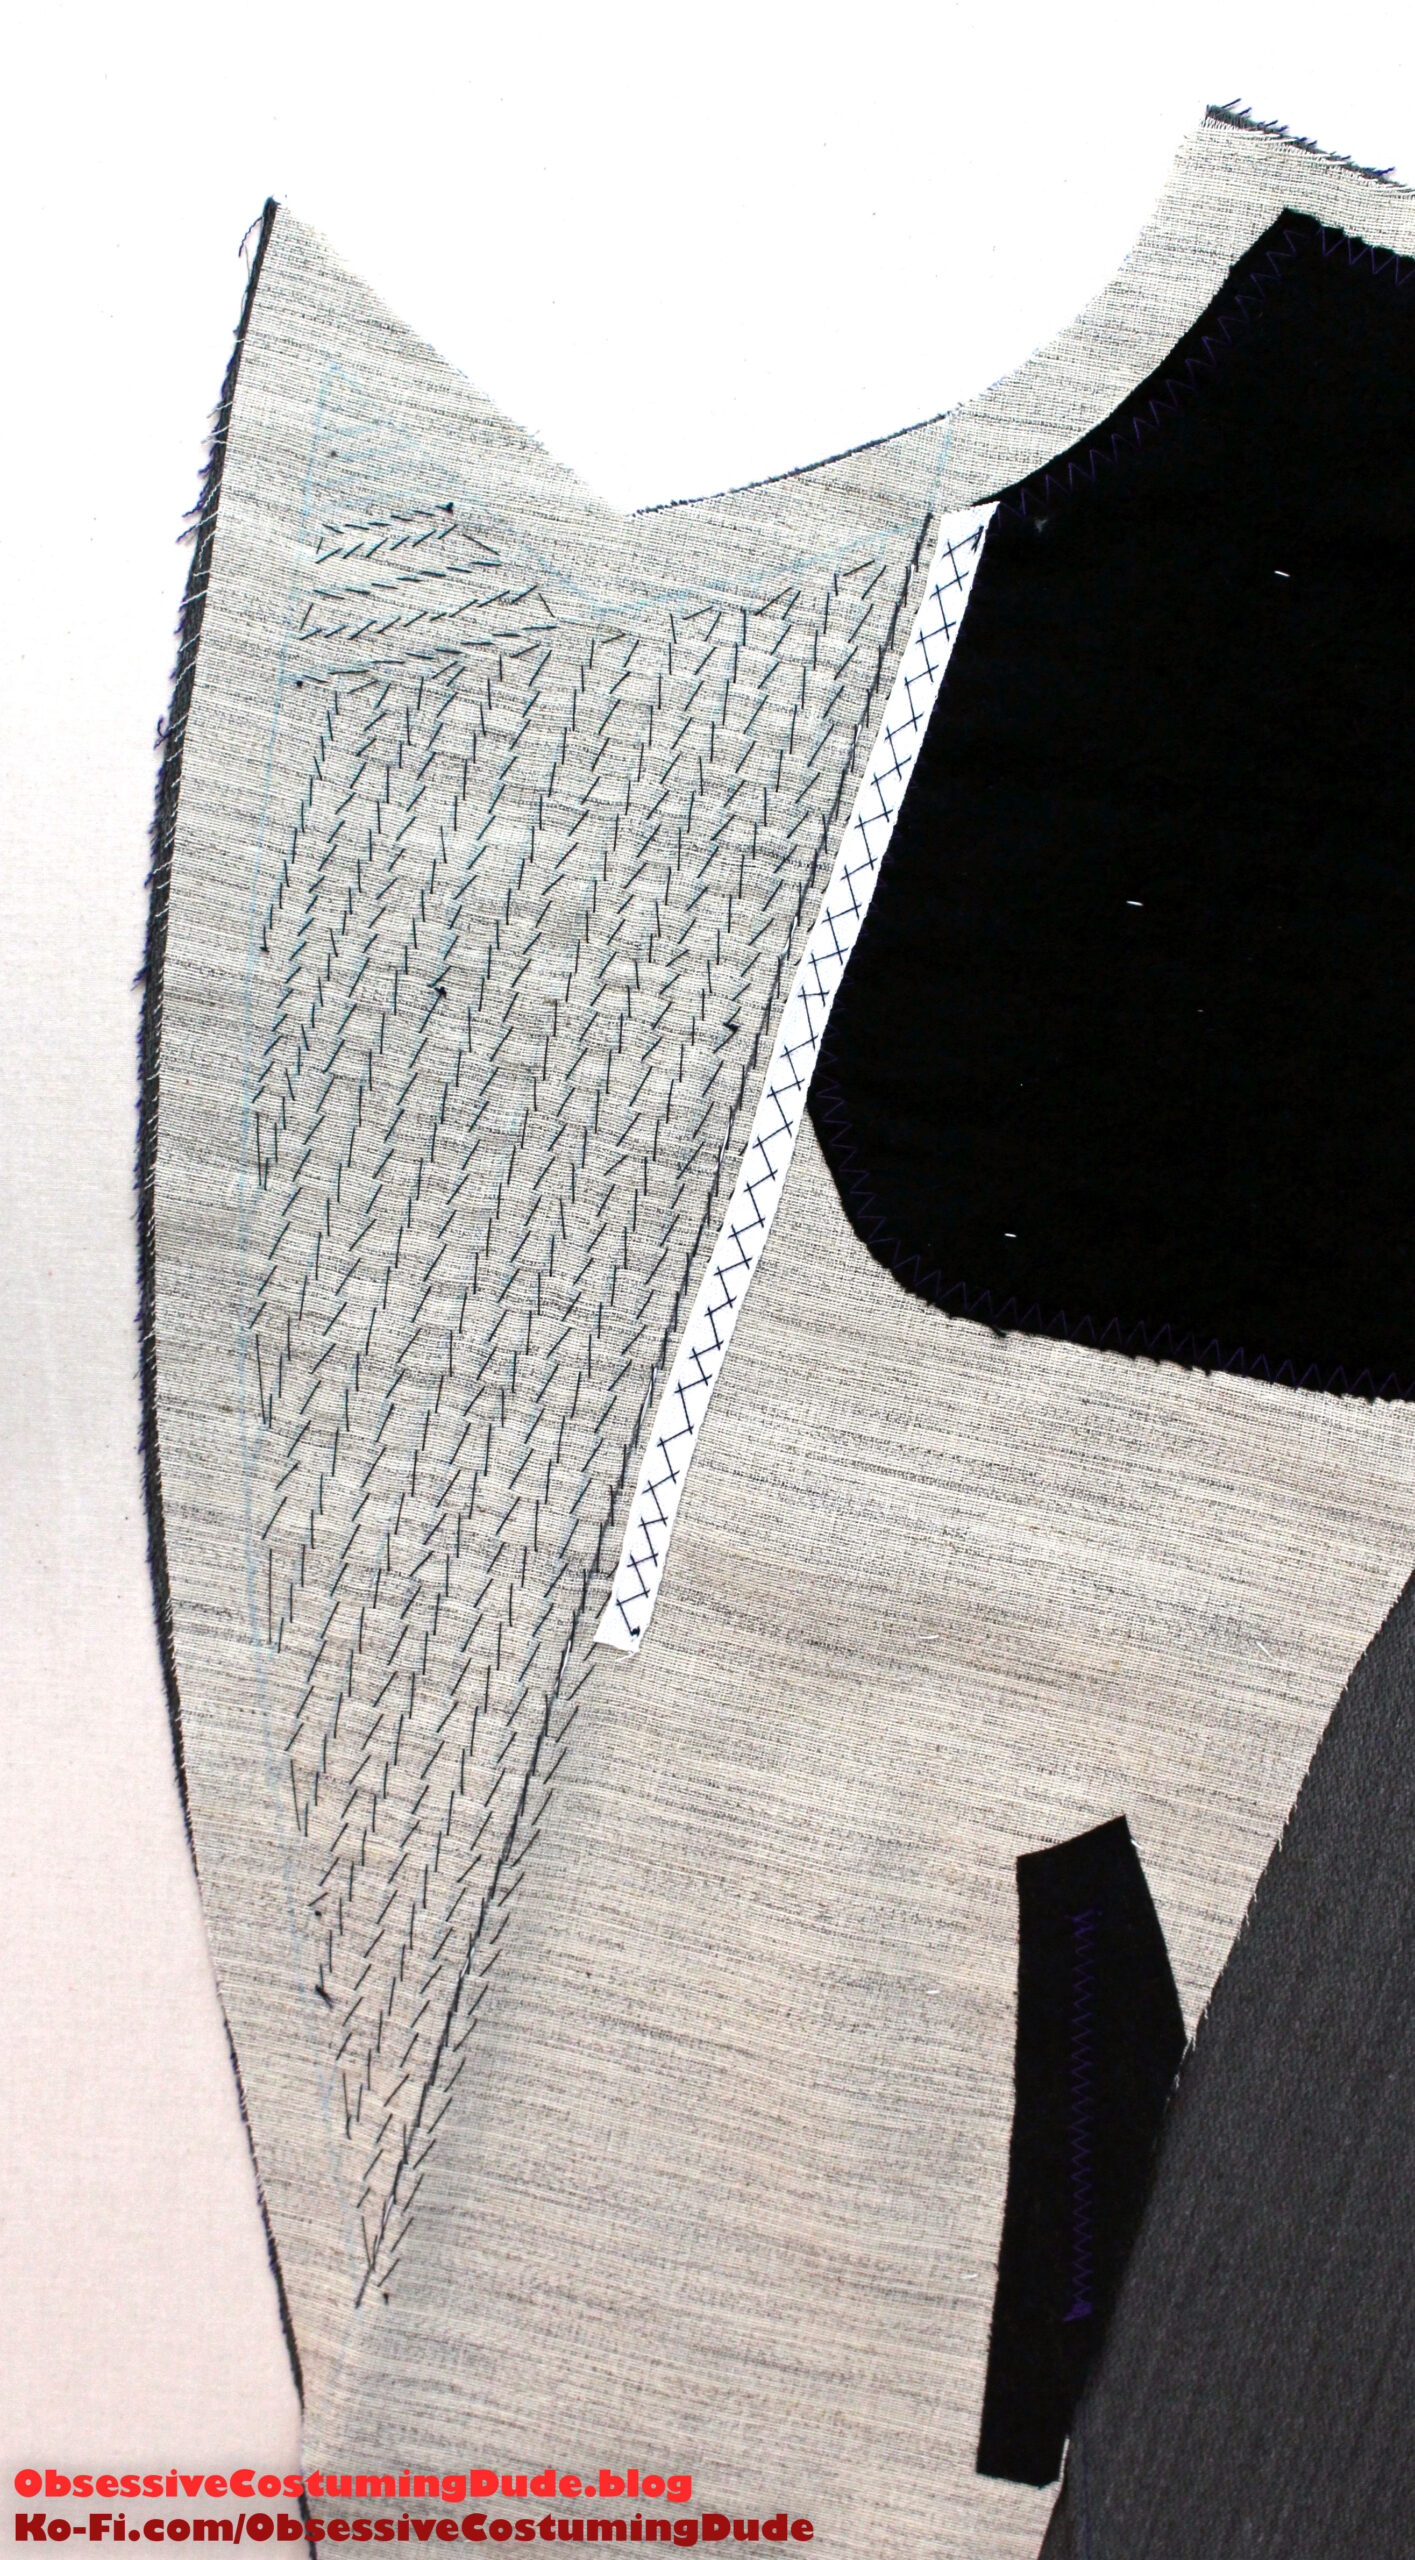
Sewing darts into the canvas would create an undesirable amount of bulk in the dart area, so suppression lines are used instead.
Trim out the canvas dart.
Place the canvas over a tailor’s ham and pull the edges of the waistline suppression together so they’re flush.
Trim the edge of the canvas so it flows smoothly across the dart area.
Cut a small strip of fusible interfacing and apply it over the suppression.
Then zig-zag stitch over the edges to secure them together.
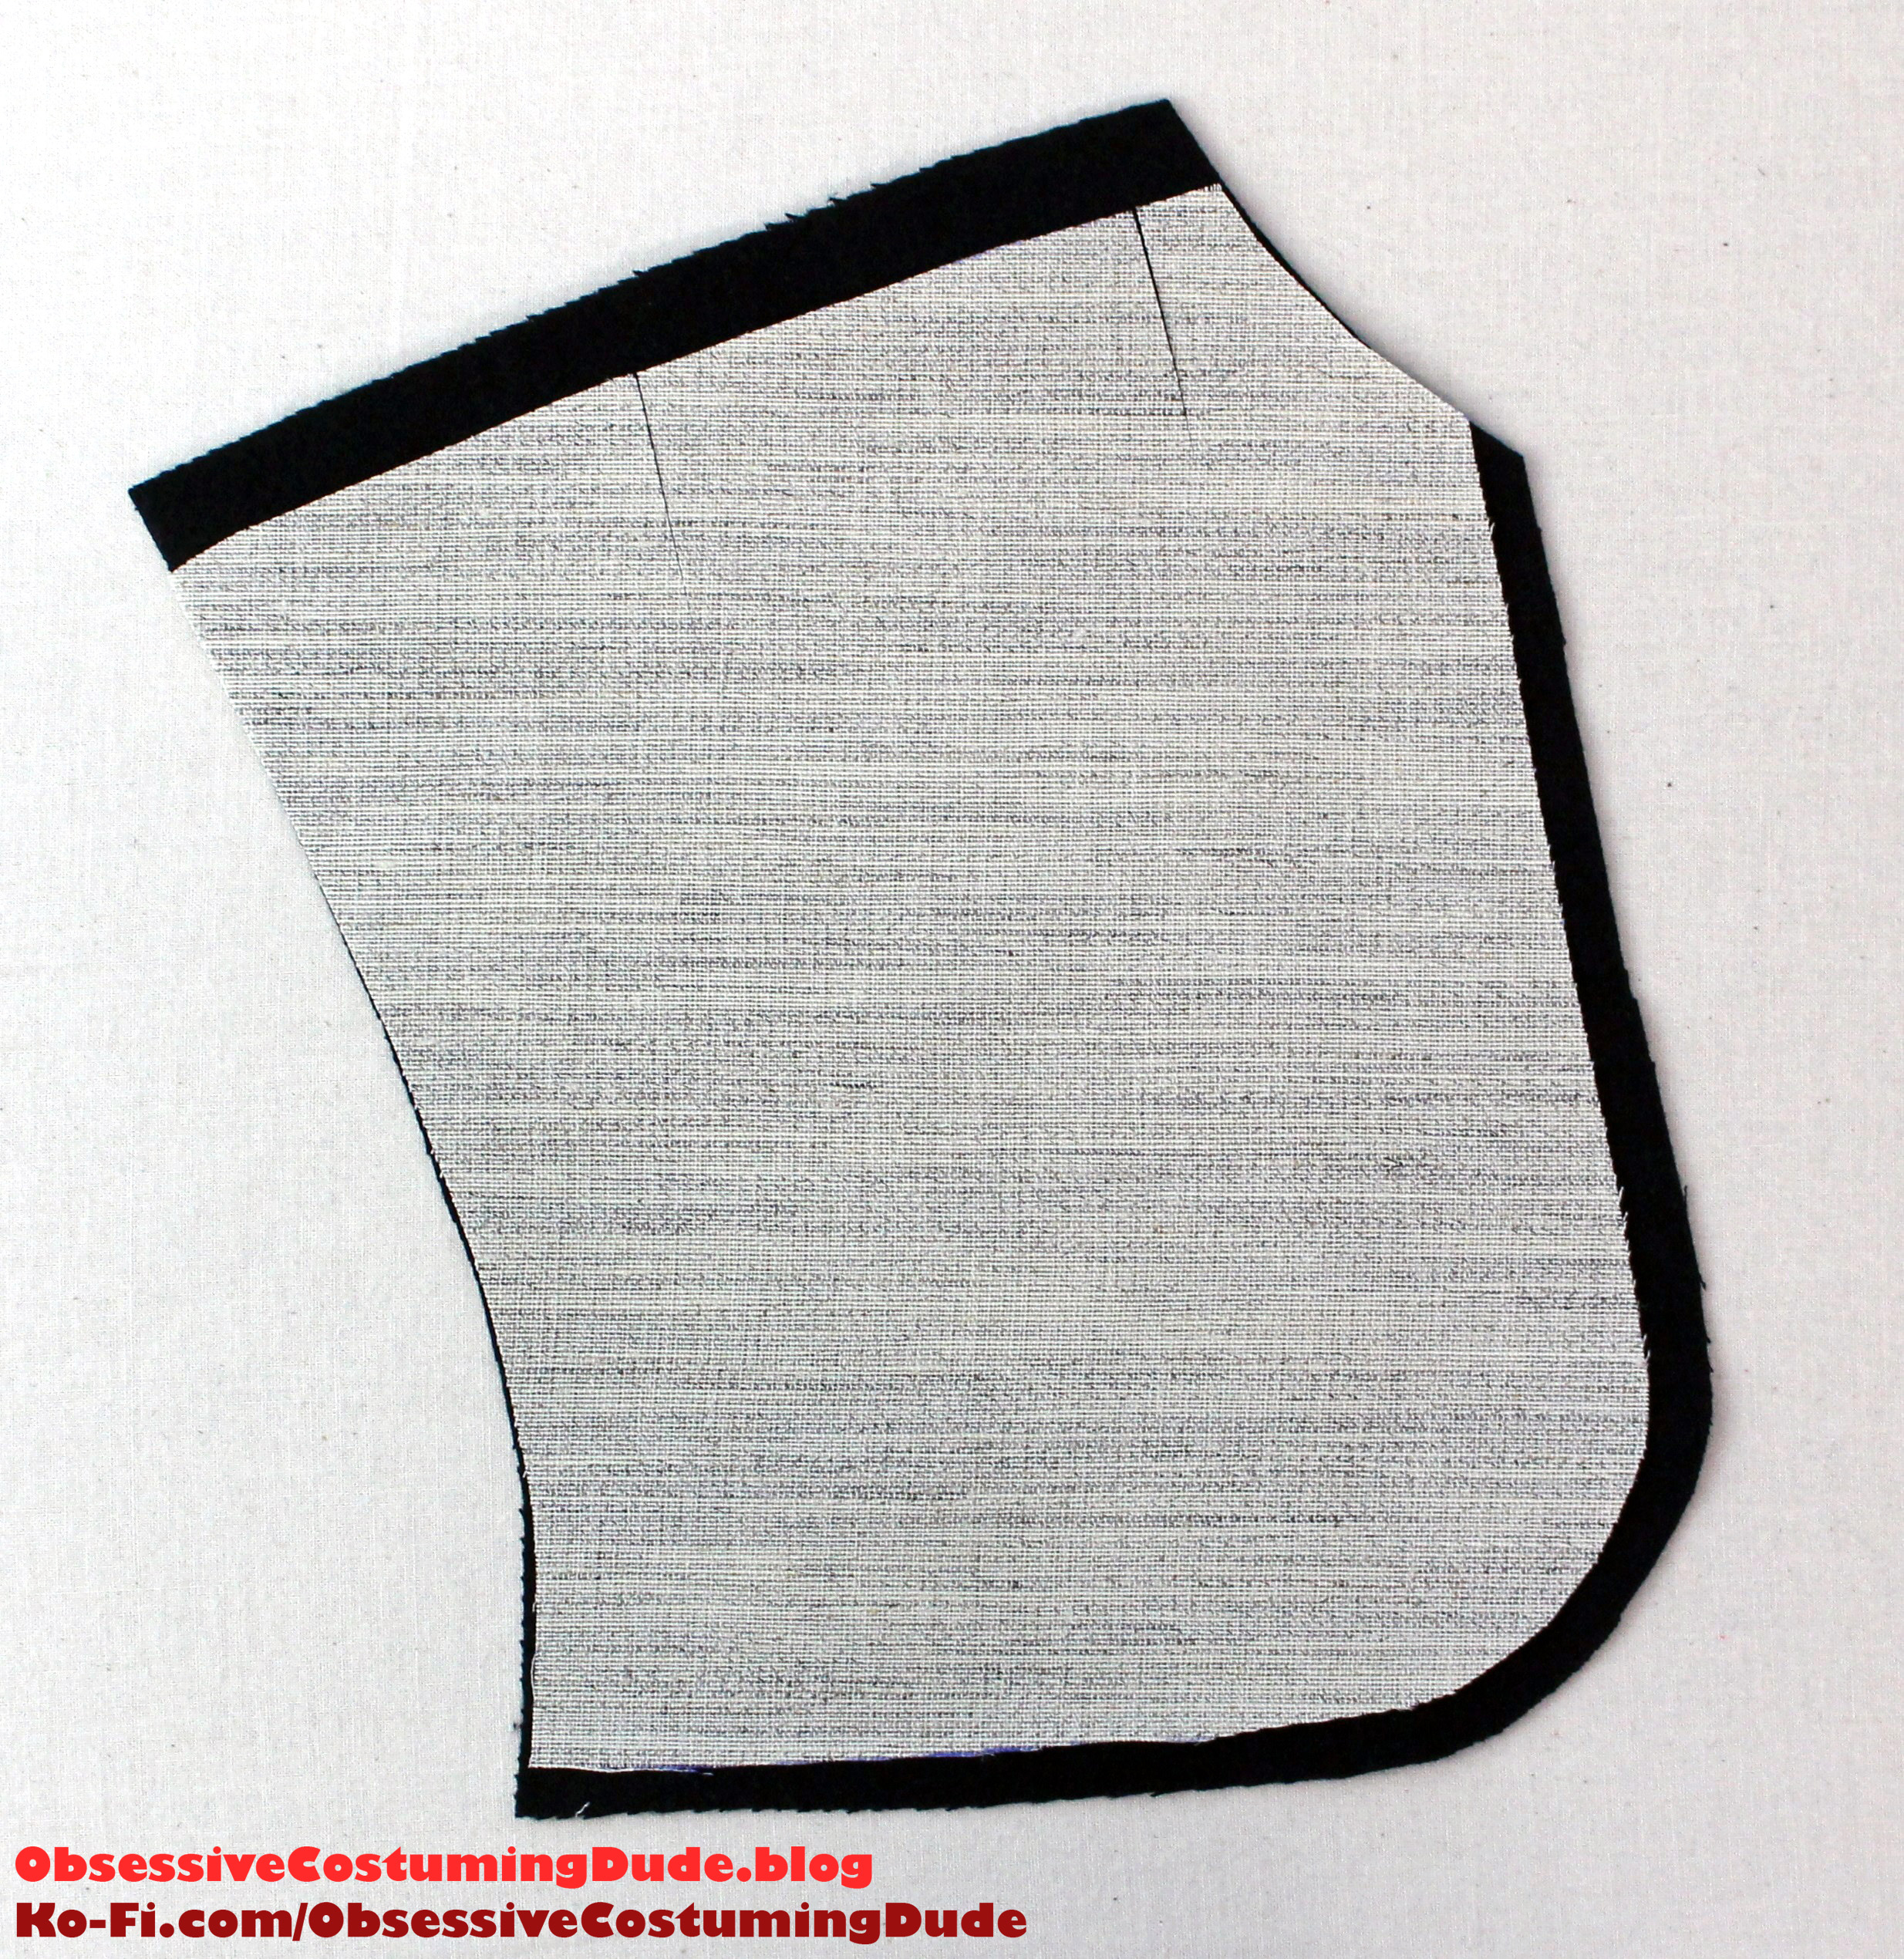
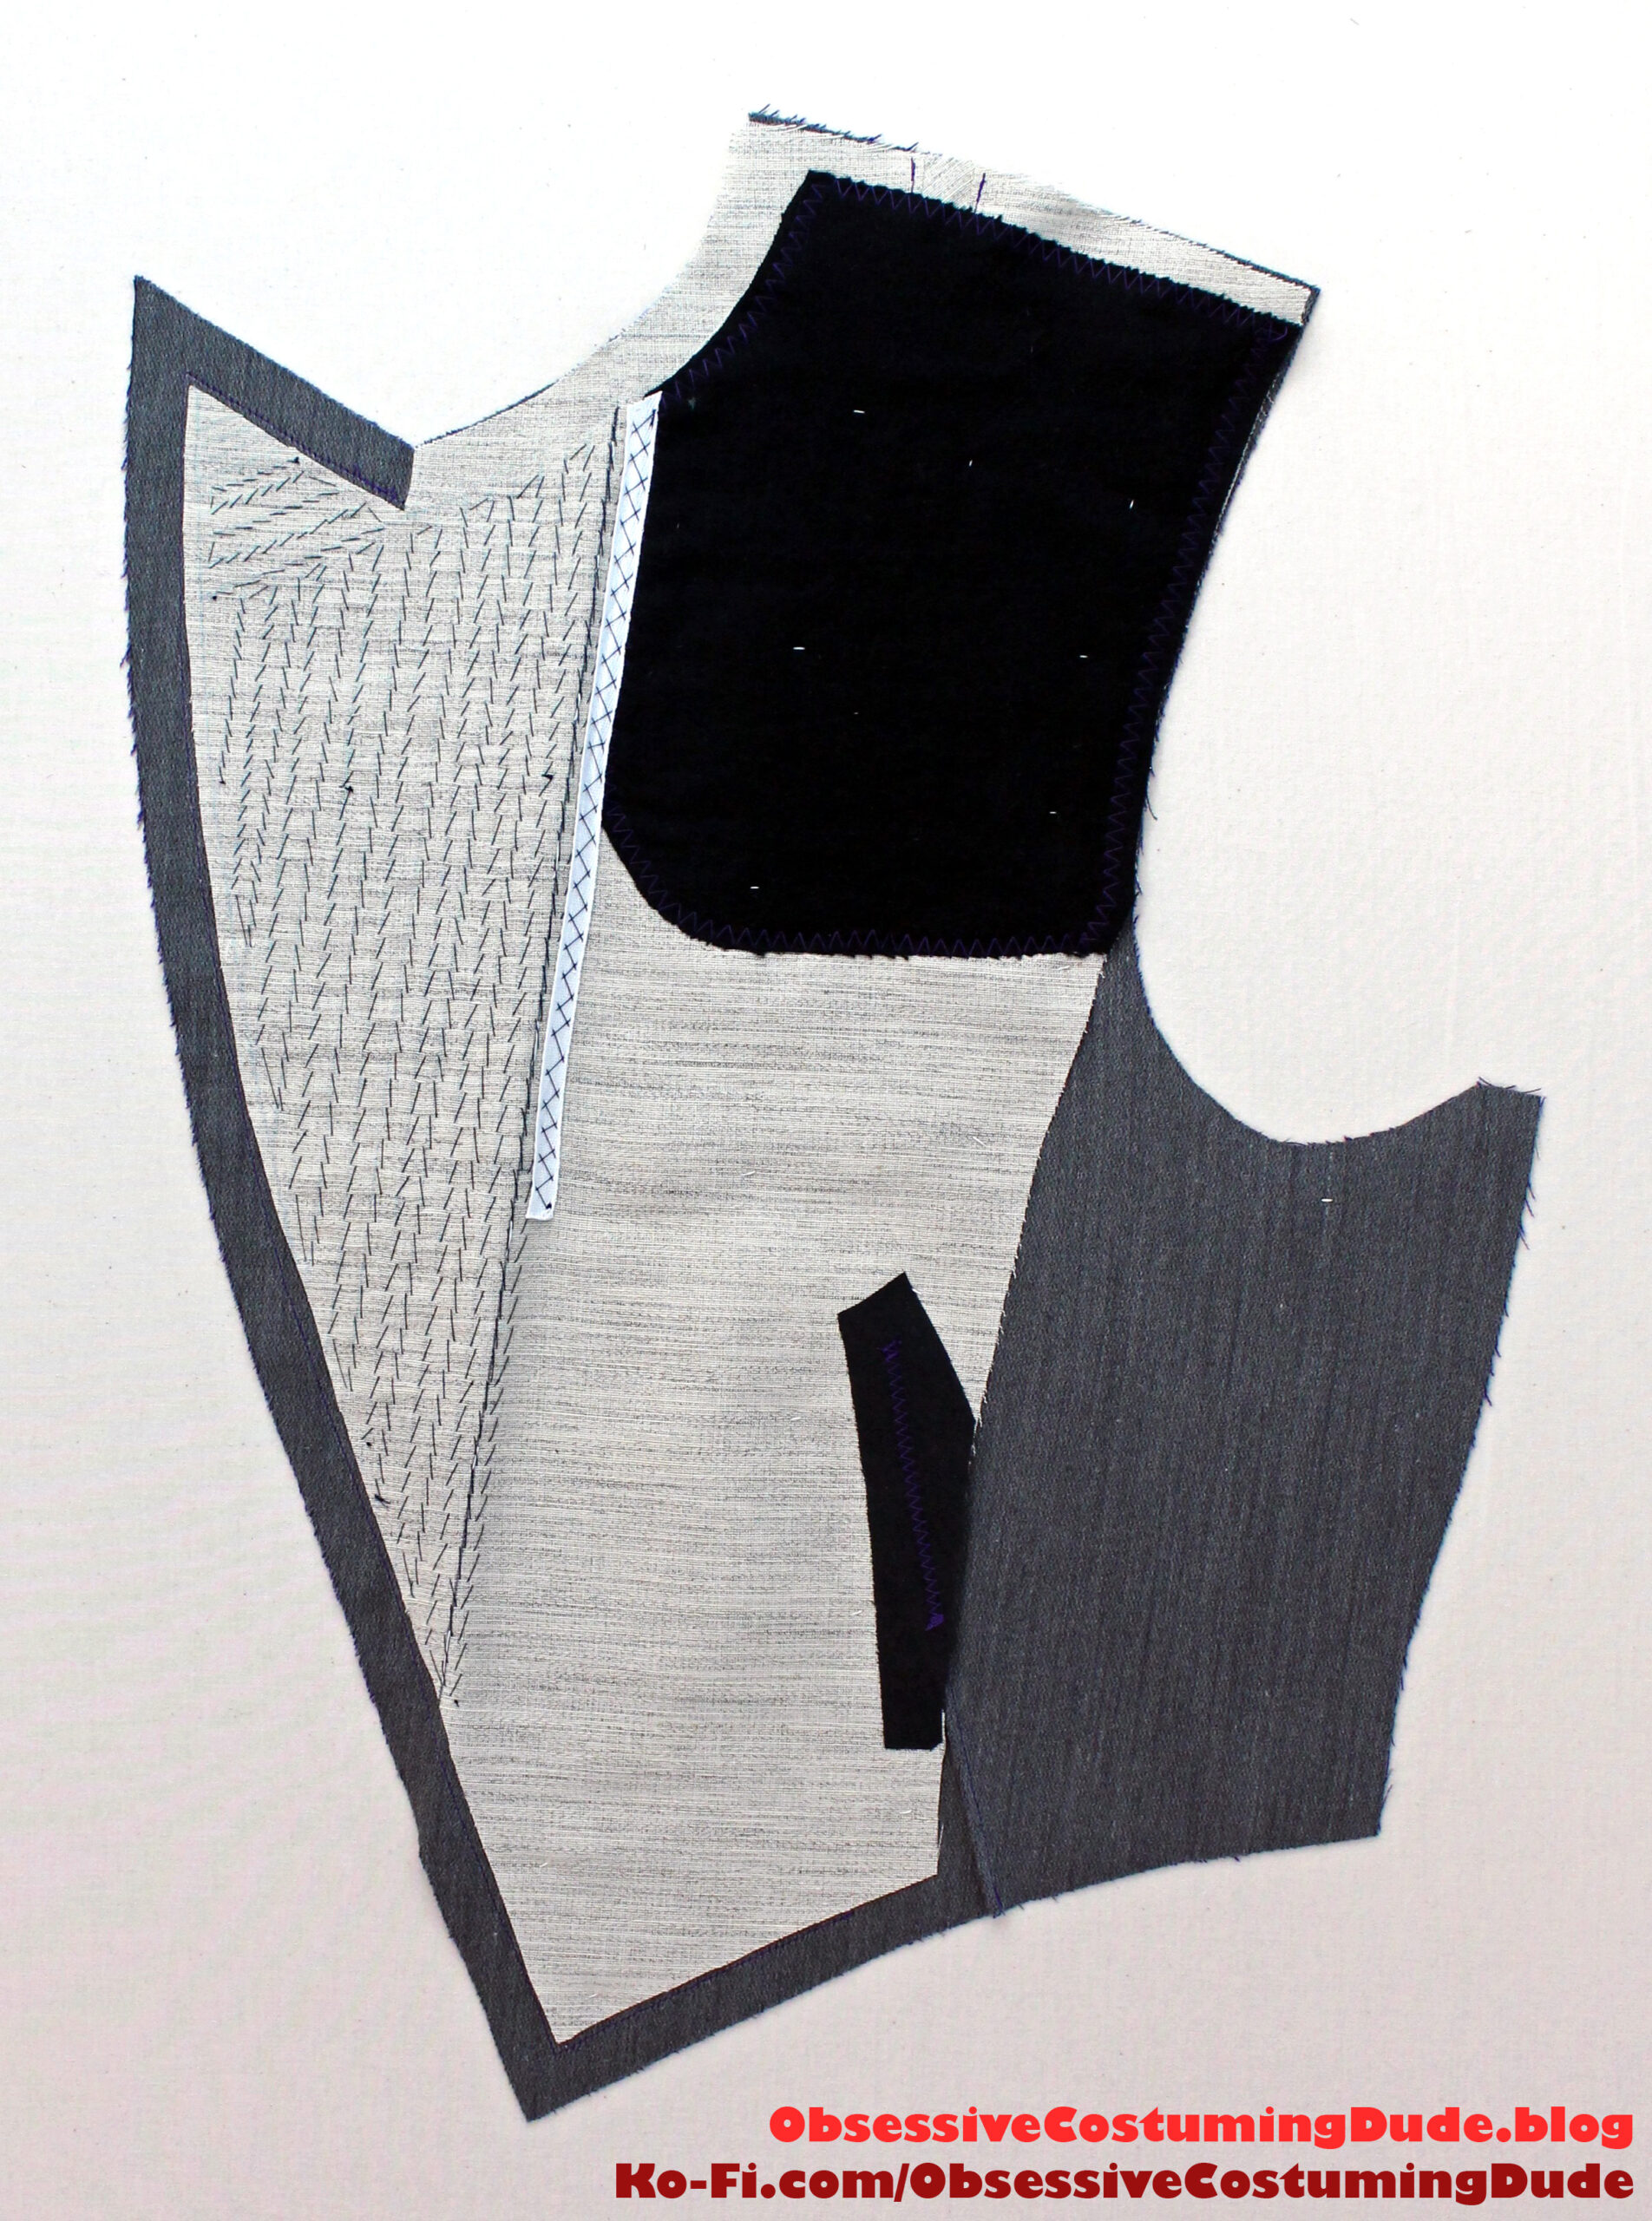
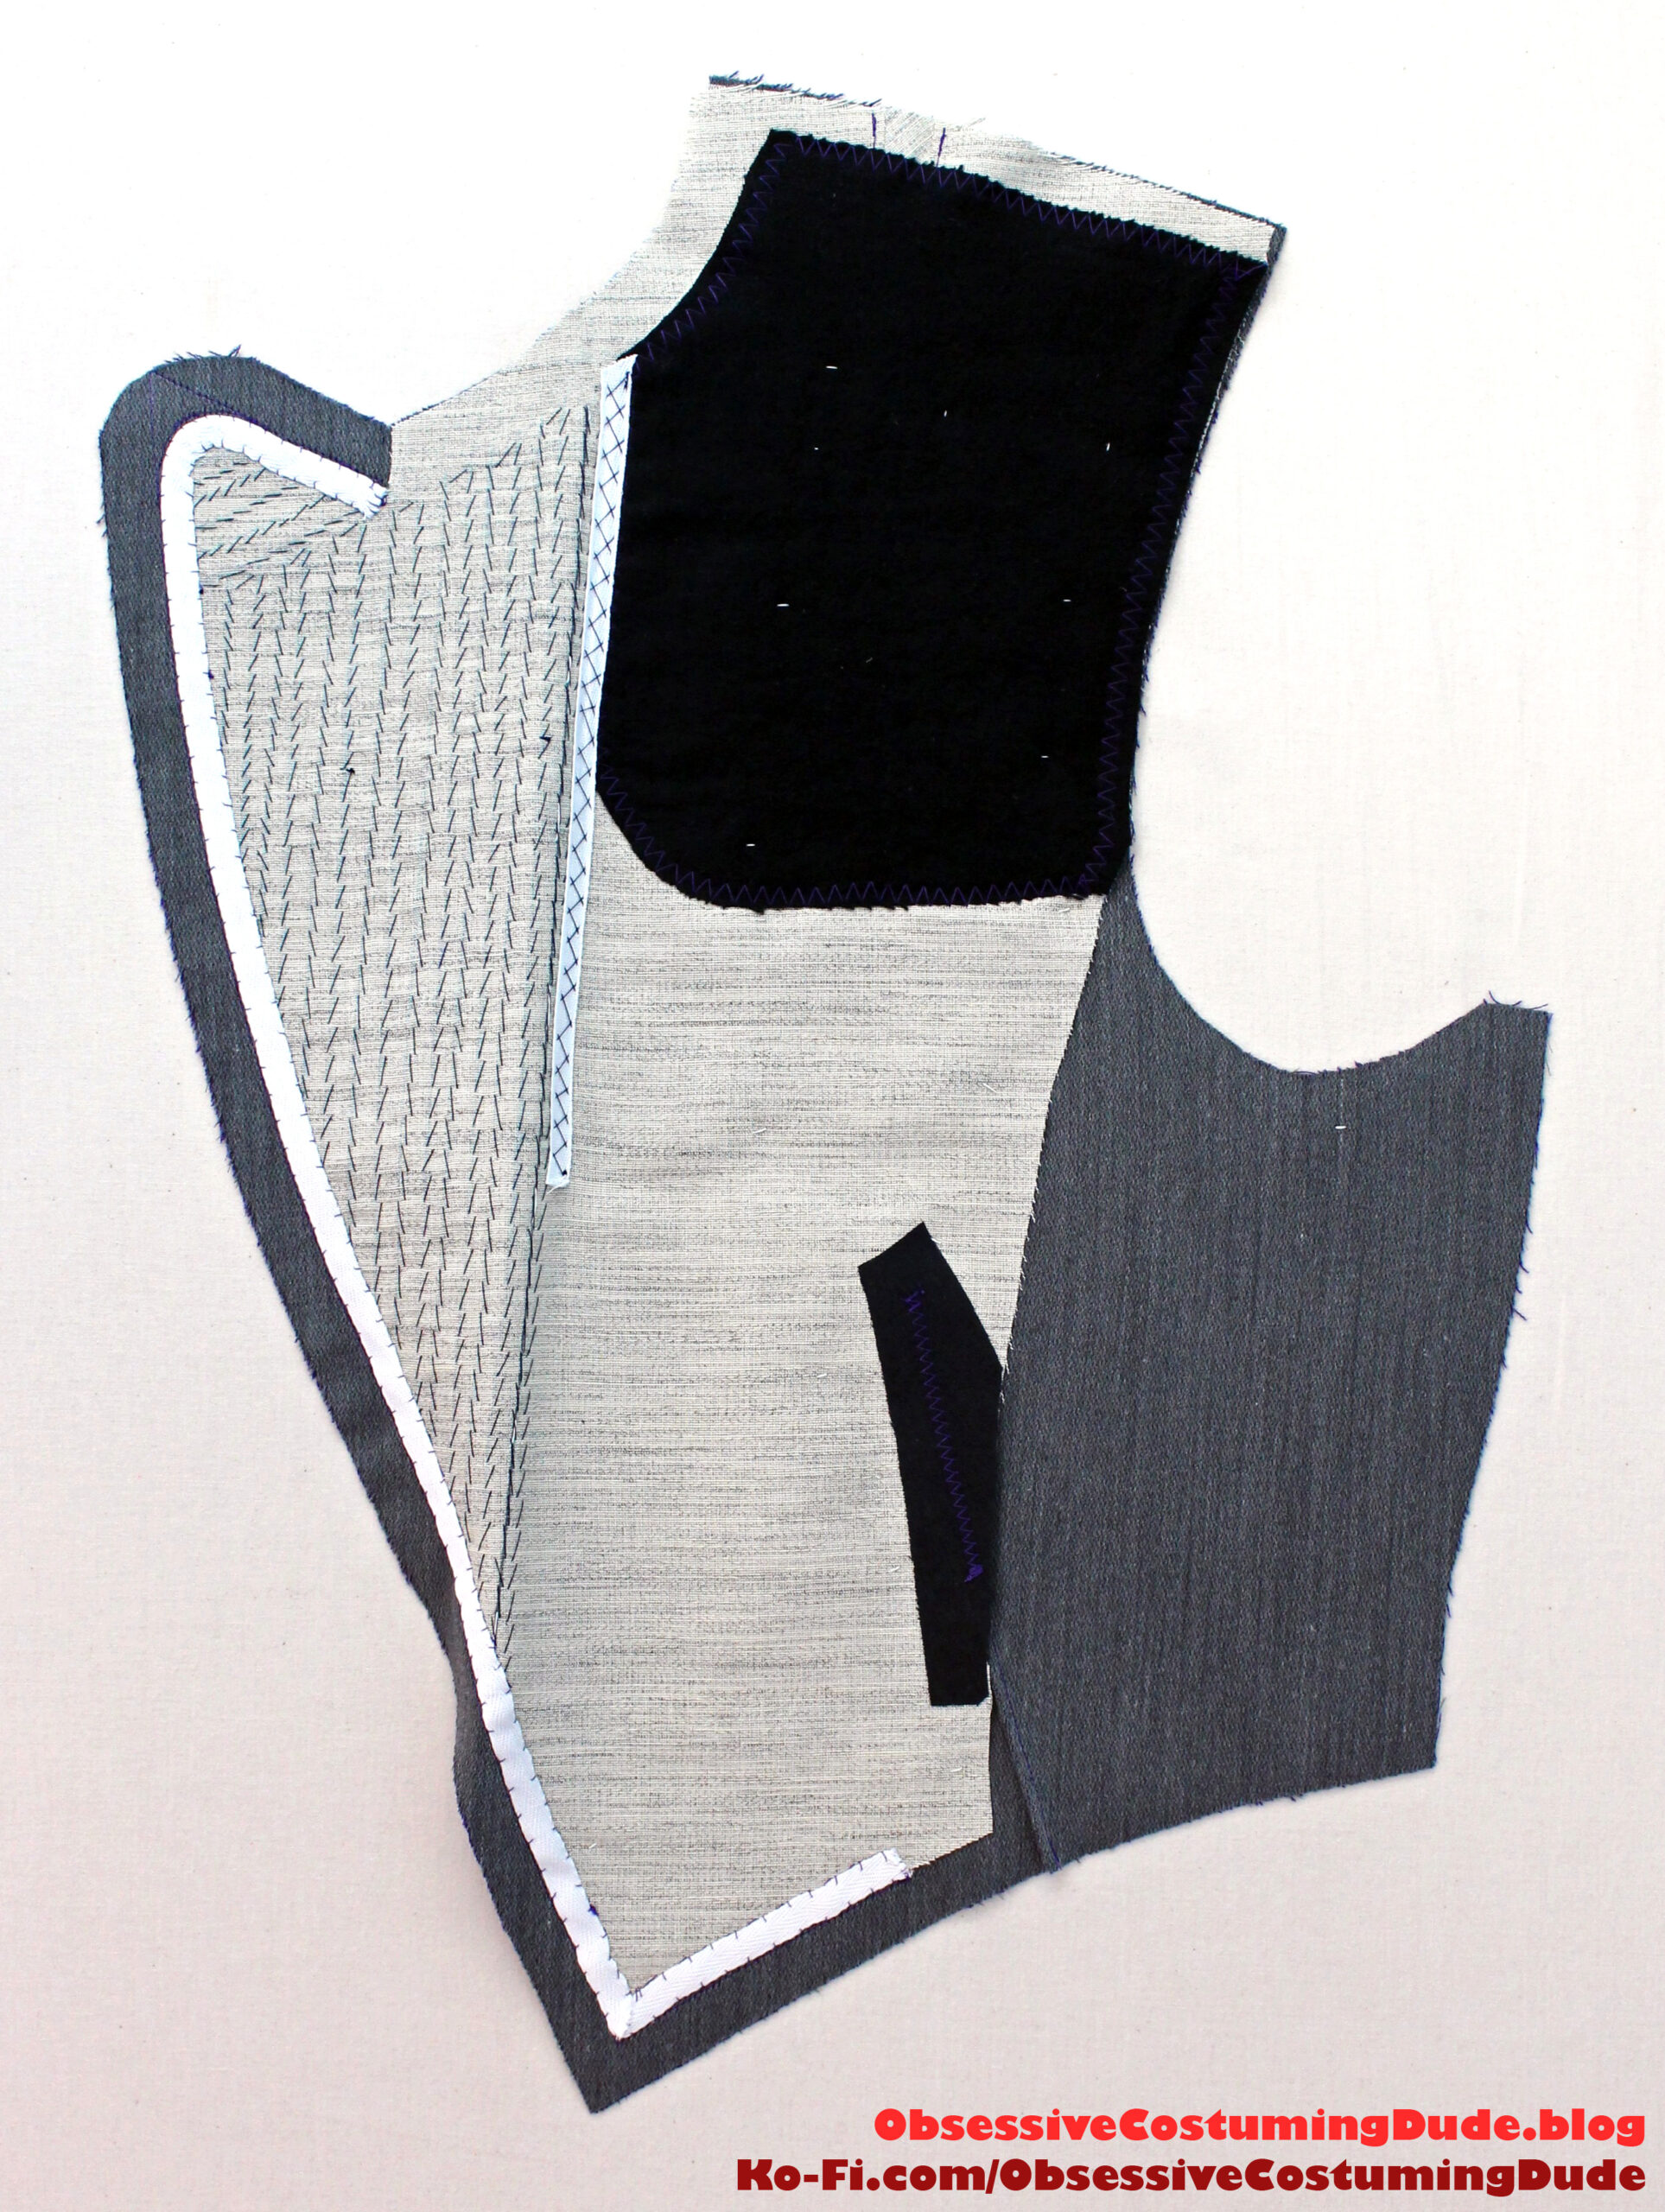
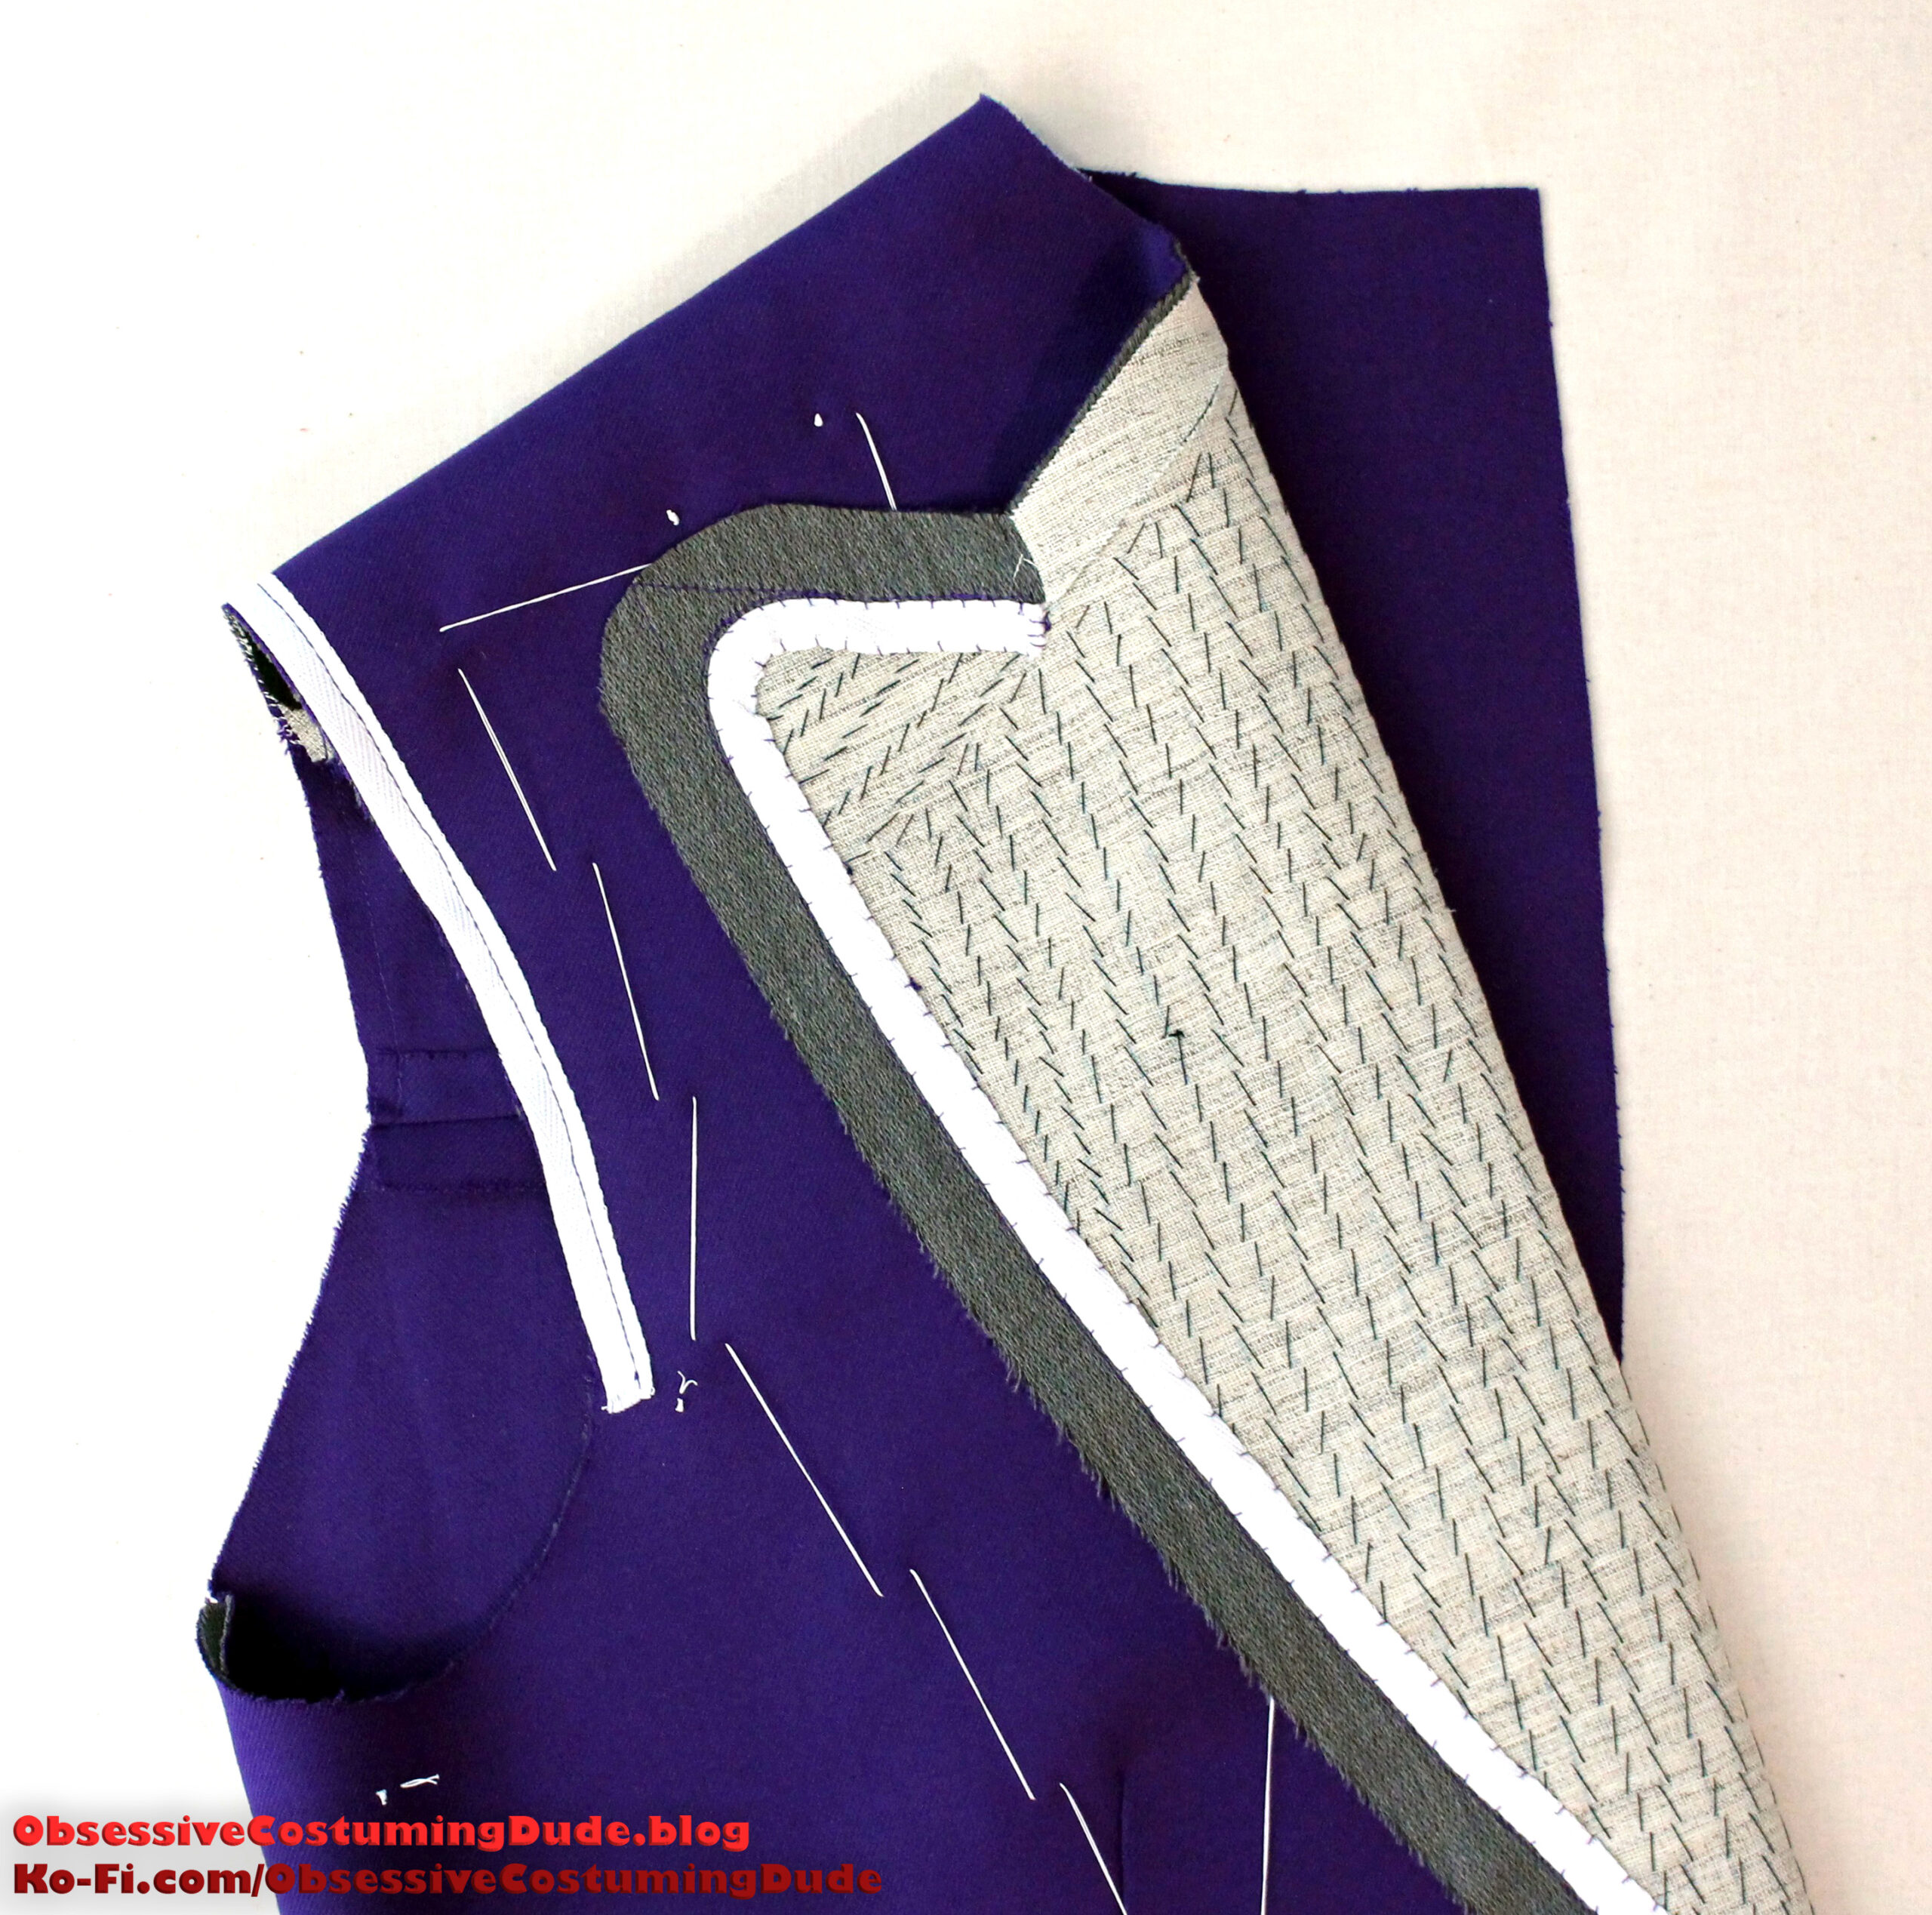
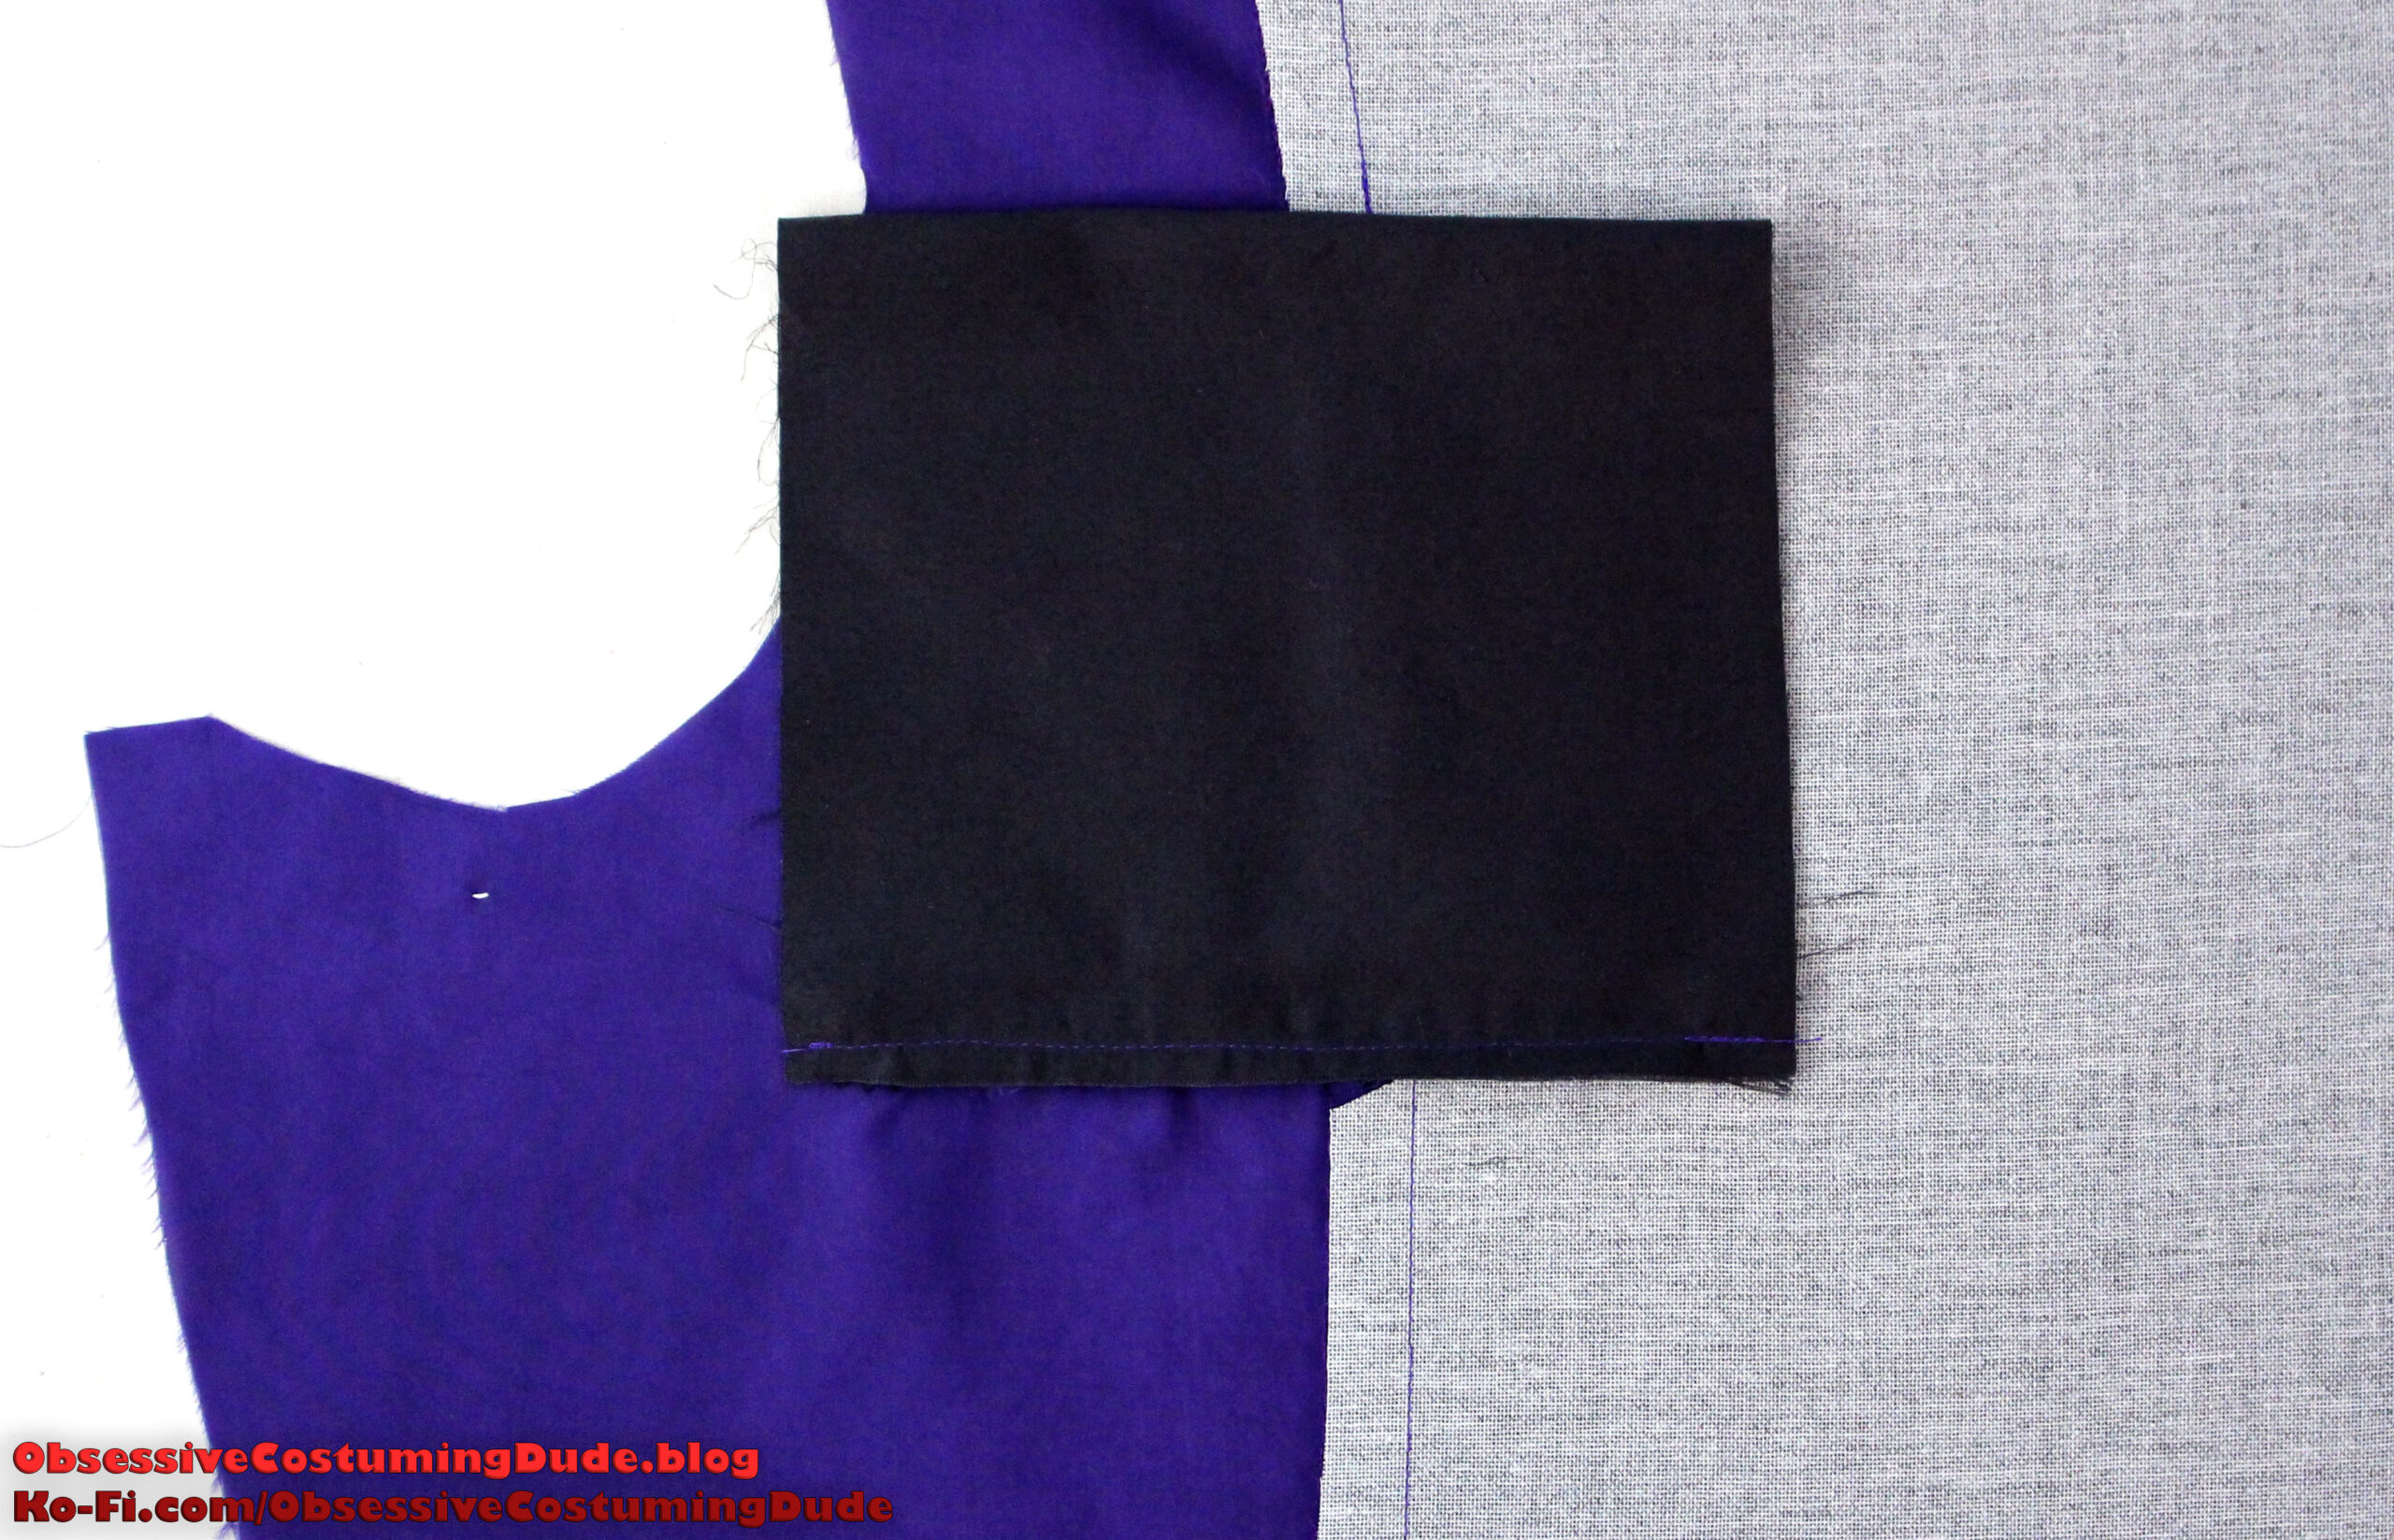
Cut another layer of hair canvas for the chest plastron (piece C).
Cut two slashes into the top of the chest plastron, about 1 ½” on each side of the shoulder insert, and 1 ½” deep.
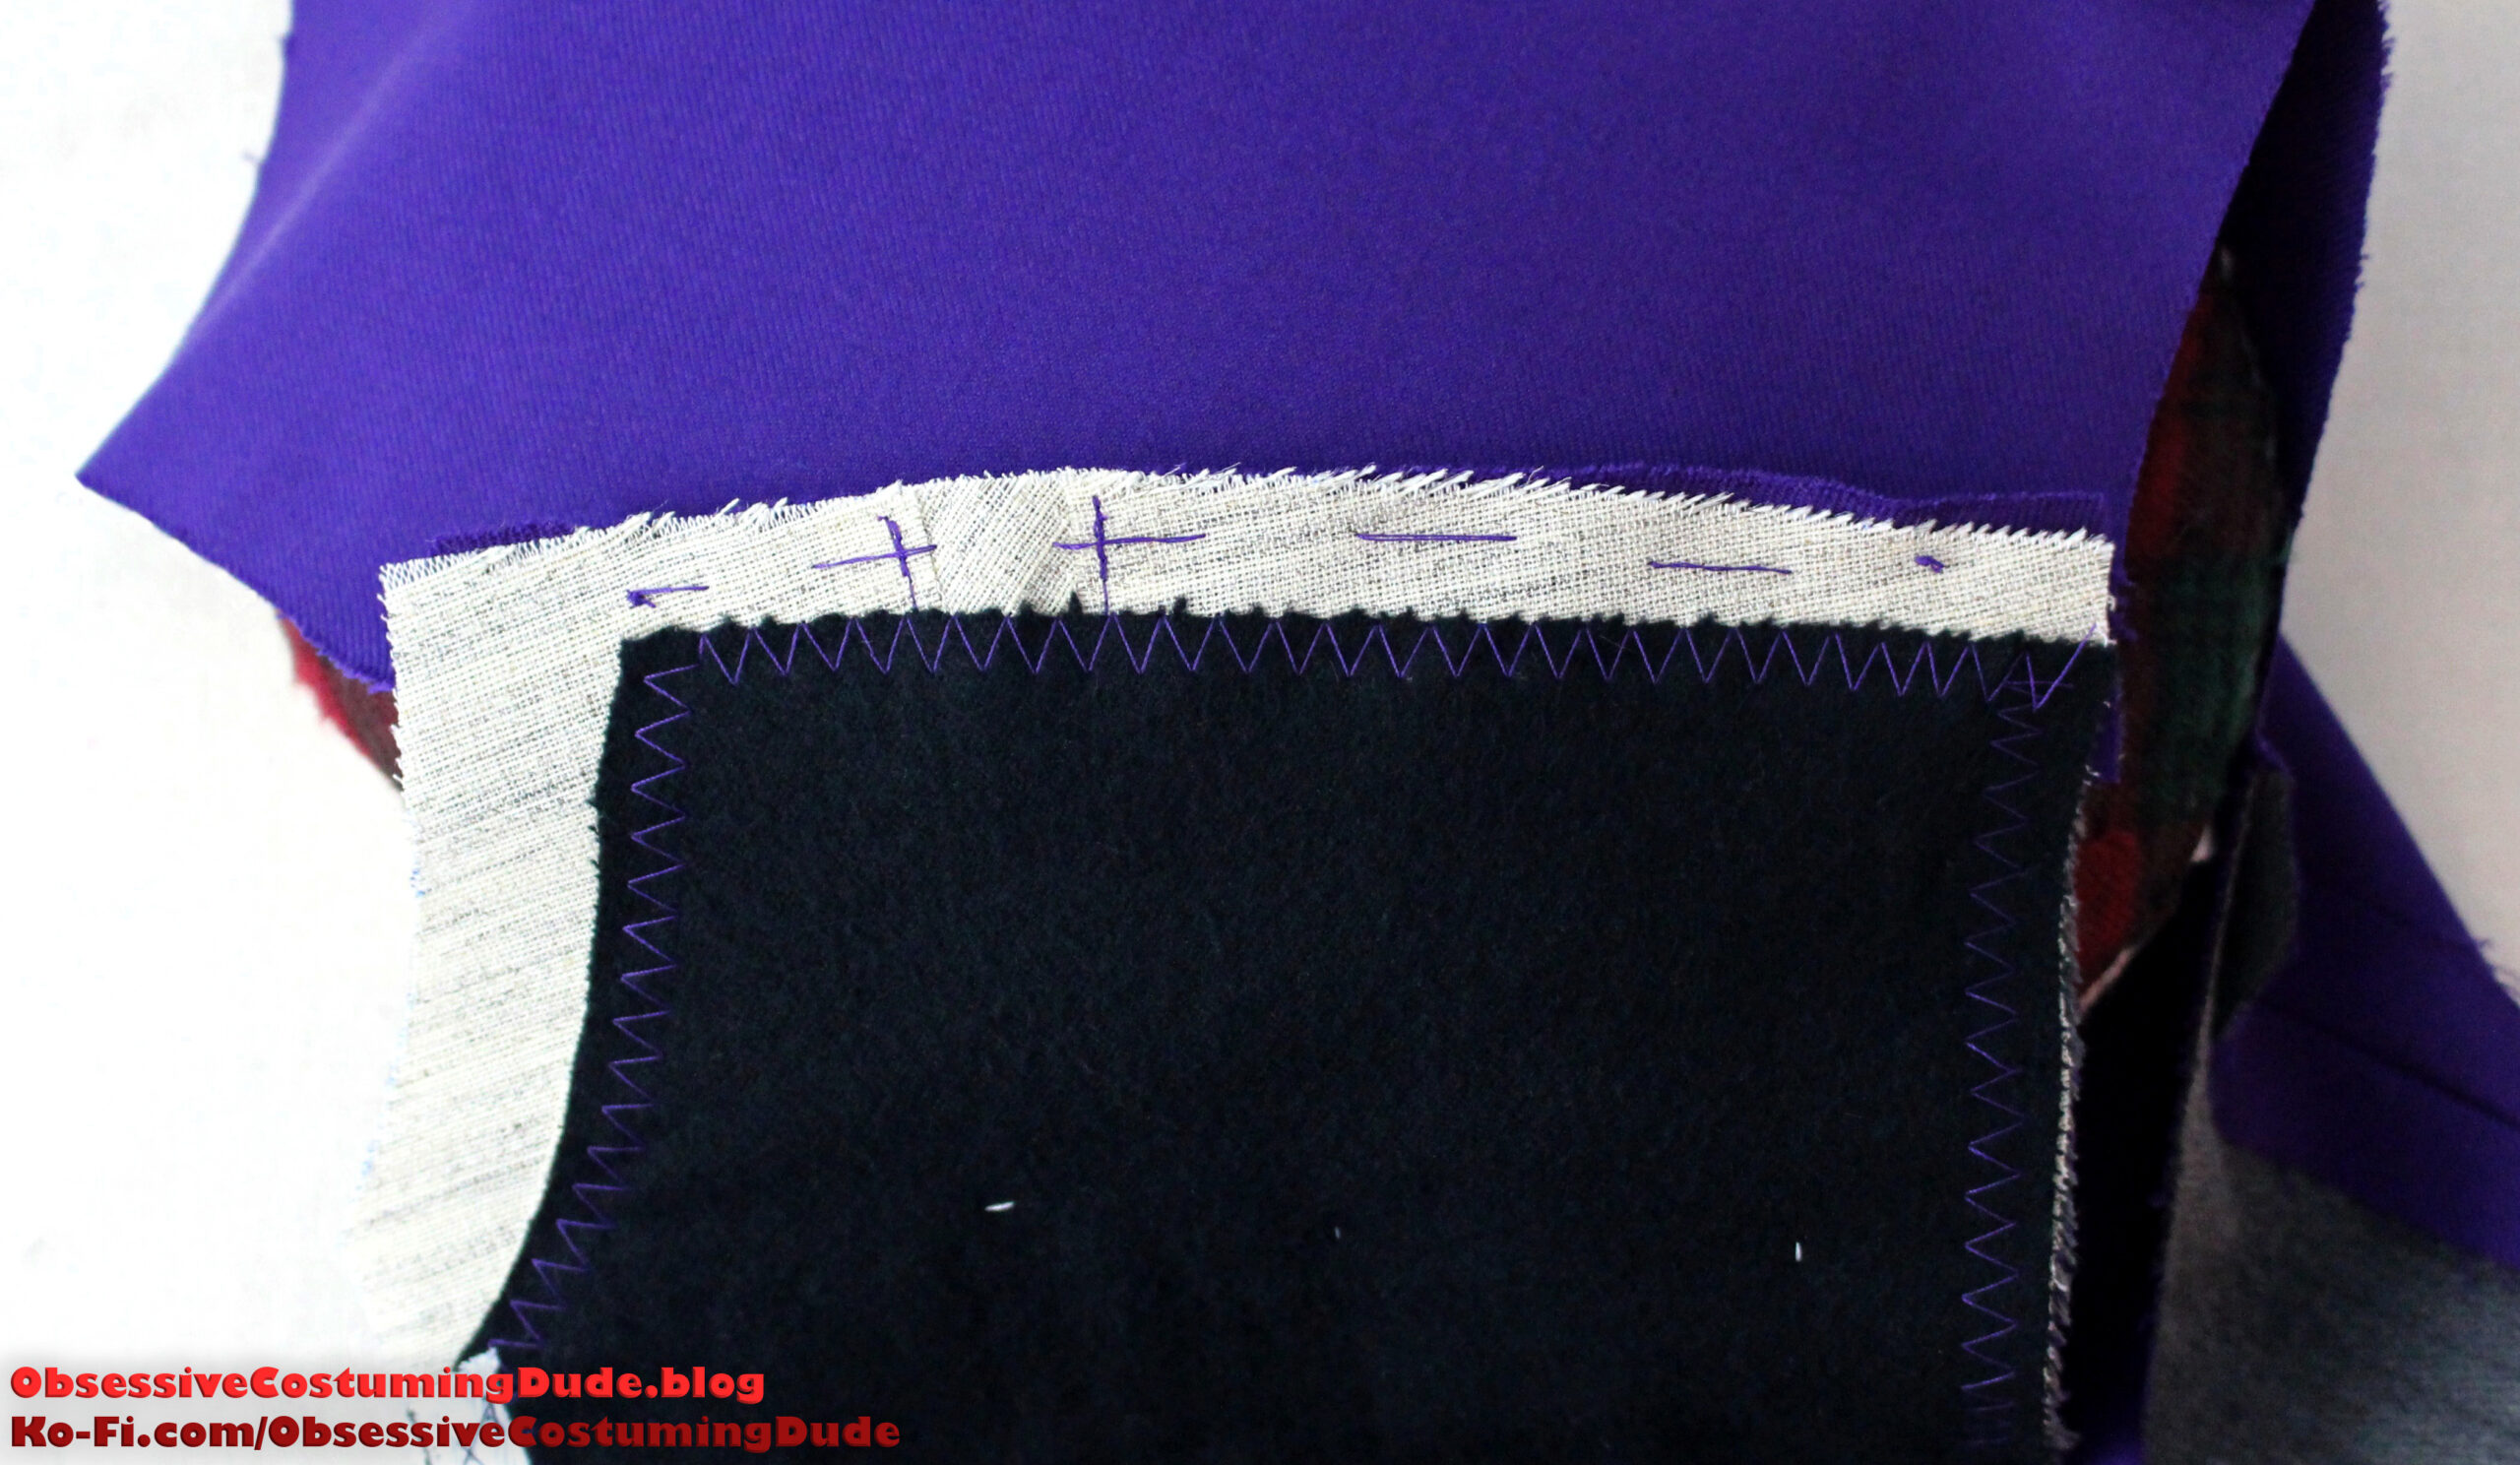
Place your chest flannel (piece D) under the plastron, with the neckline and armhole edges flush, the upper edge of the flannel extending ⅝” past the canvas, and the front/lower edges of the flannel extending ¼” past the canvas.
Tailor-baste the flannel/plastron to the underside of the front canvas assembly.
The upper edge of the flannel should be about ½” from the edge of the canvas, the flannel neckline should not extend into the seam allowance, the front edge should be about ¼” away from the roll line, and the armscye edges should be flush.
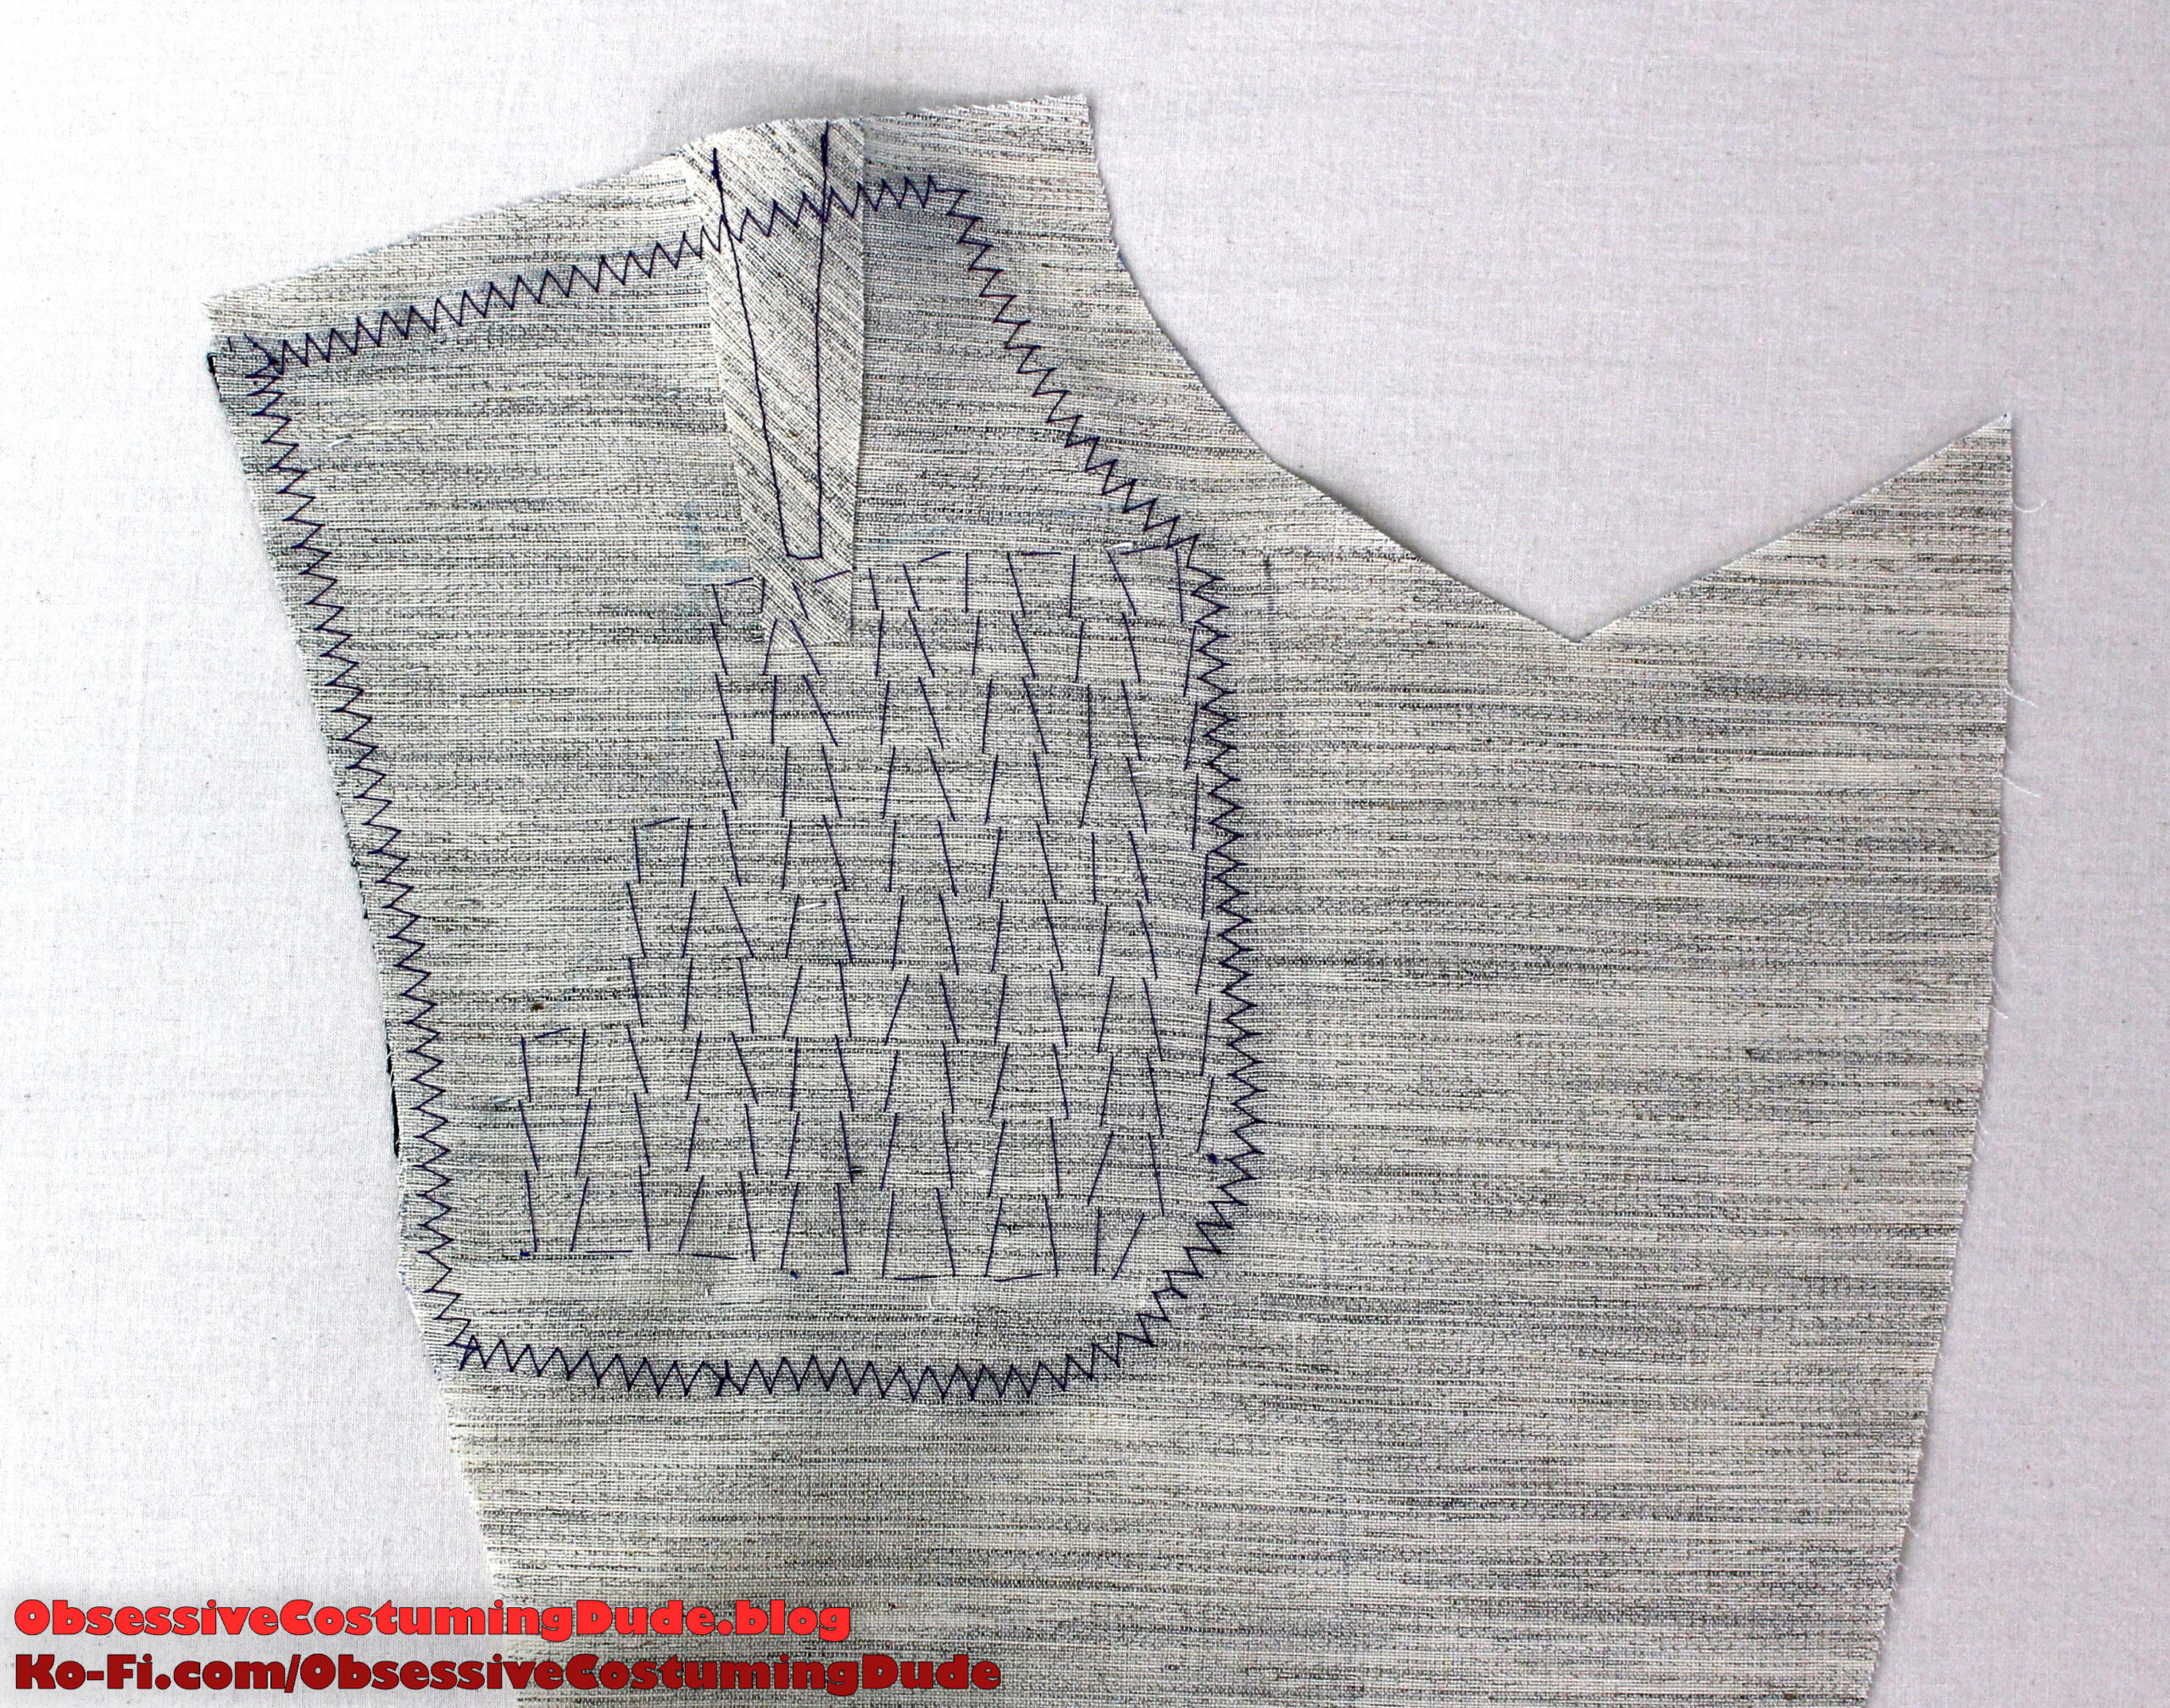
From the outside of the canvas assembly (the side without the flannel), padstitch the layers together, parallel to the roll line.
These stitches can be larger than “normal” padstitches (e.g. those on a collar and lapel), and you can grab as much of the layers as you like, since the stitching won’t be seen on the finished coat.
Padstitch the entire lower area, except for the uppermost 2 ½” or so from the shoulder and 3” from the armhole. Taper the upper curve toward the armhole. (This helps contour the canvas assembly toward the wearer’s body.)
On the wrong side, secure the edges of the flannel to the canvas with a zig-zag stitch.
The front canvas assembly and the coat front must now be “married” so they can be handled as a single unit.
Using cotton basting thread, tailor-baste the layers together about 1” from the lower front edge, then pivot and baste them together along the roll line up to the neckline.
For the second stitch, start just in front of the dart (near the edge of the canvas assembly) and tailor-baste upward toward the shoulder area, ending your stitch about 3” beneath the shoulder.
And for the third stitch, tailor-baste about 3” below (and parallel to) the shoulder, rotate and baste downward about 1” inside (and parallel to) the armscye, then back toward the second stitch along the edge of the canvas assembly.
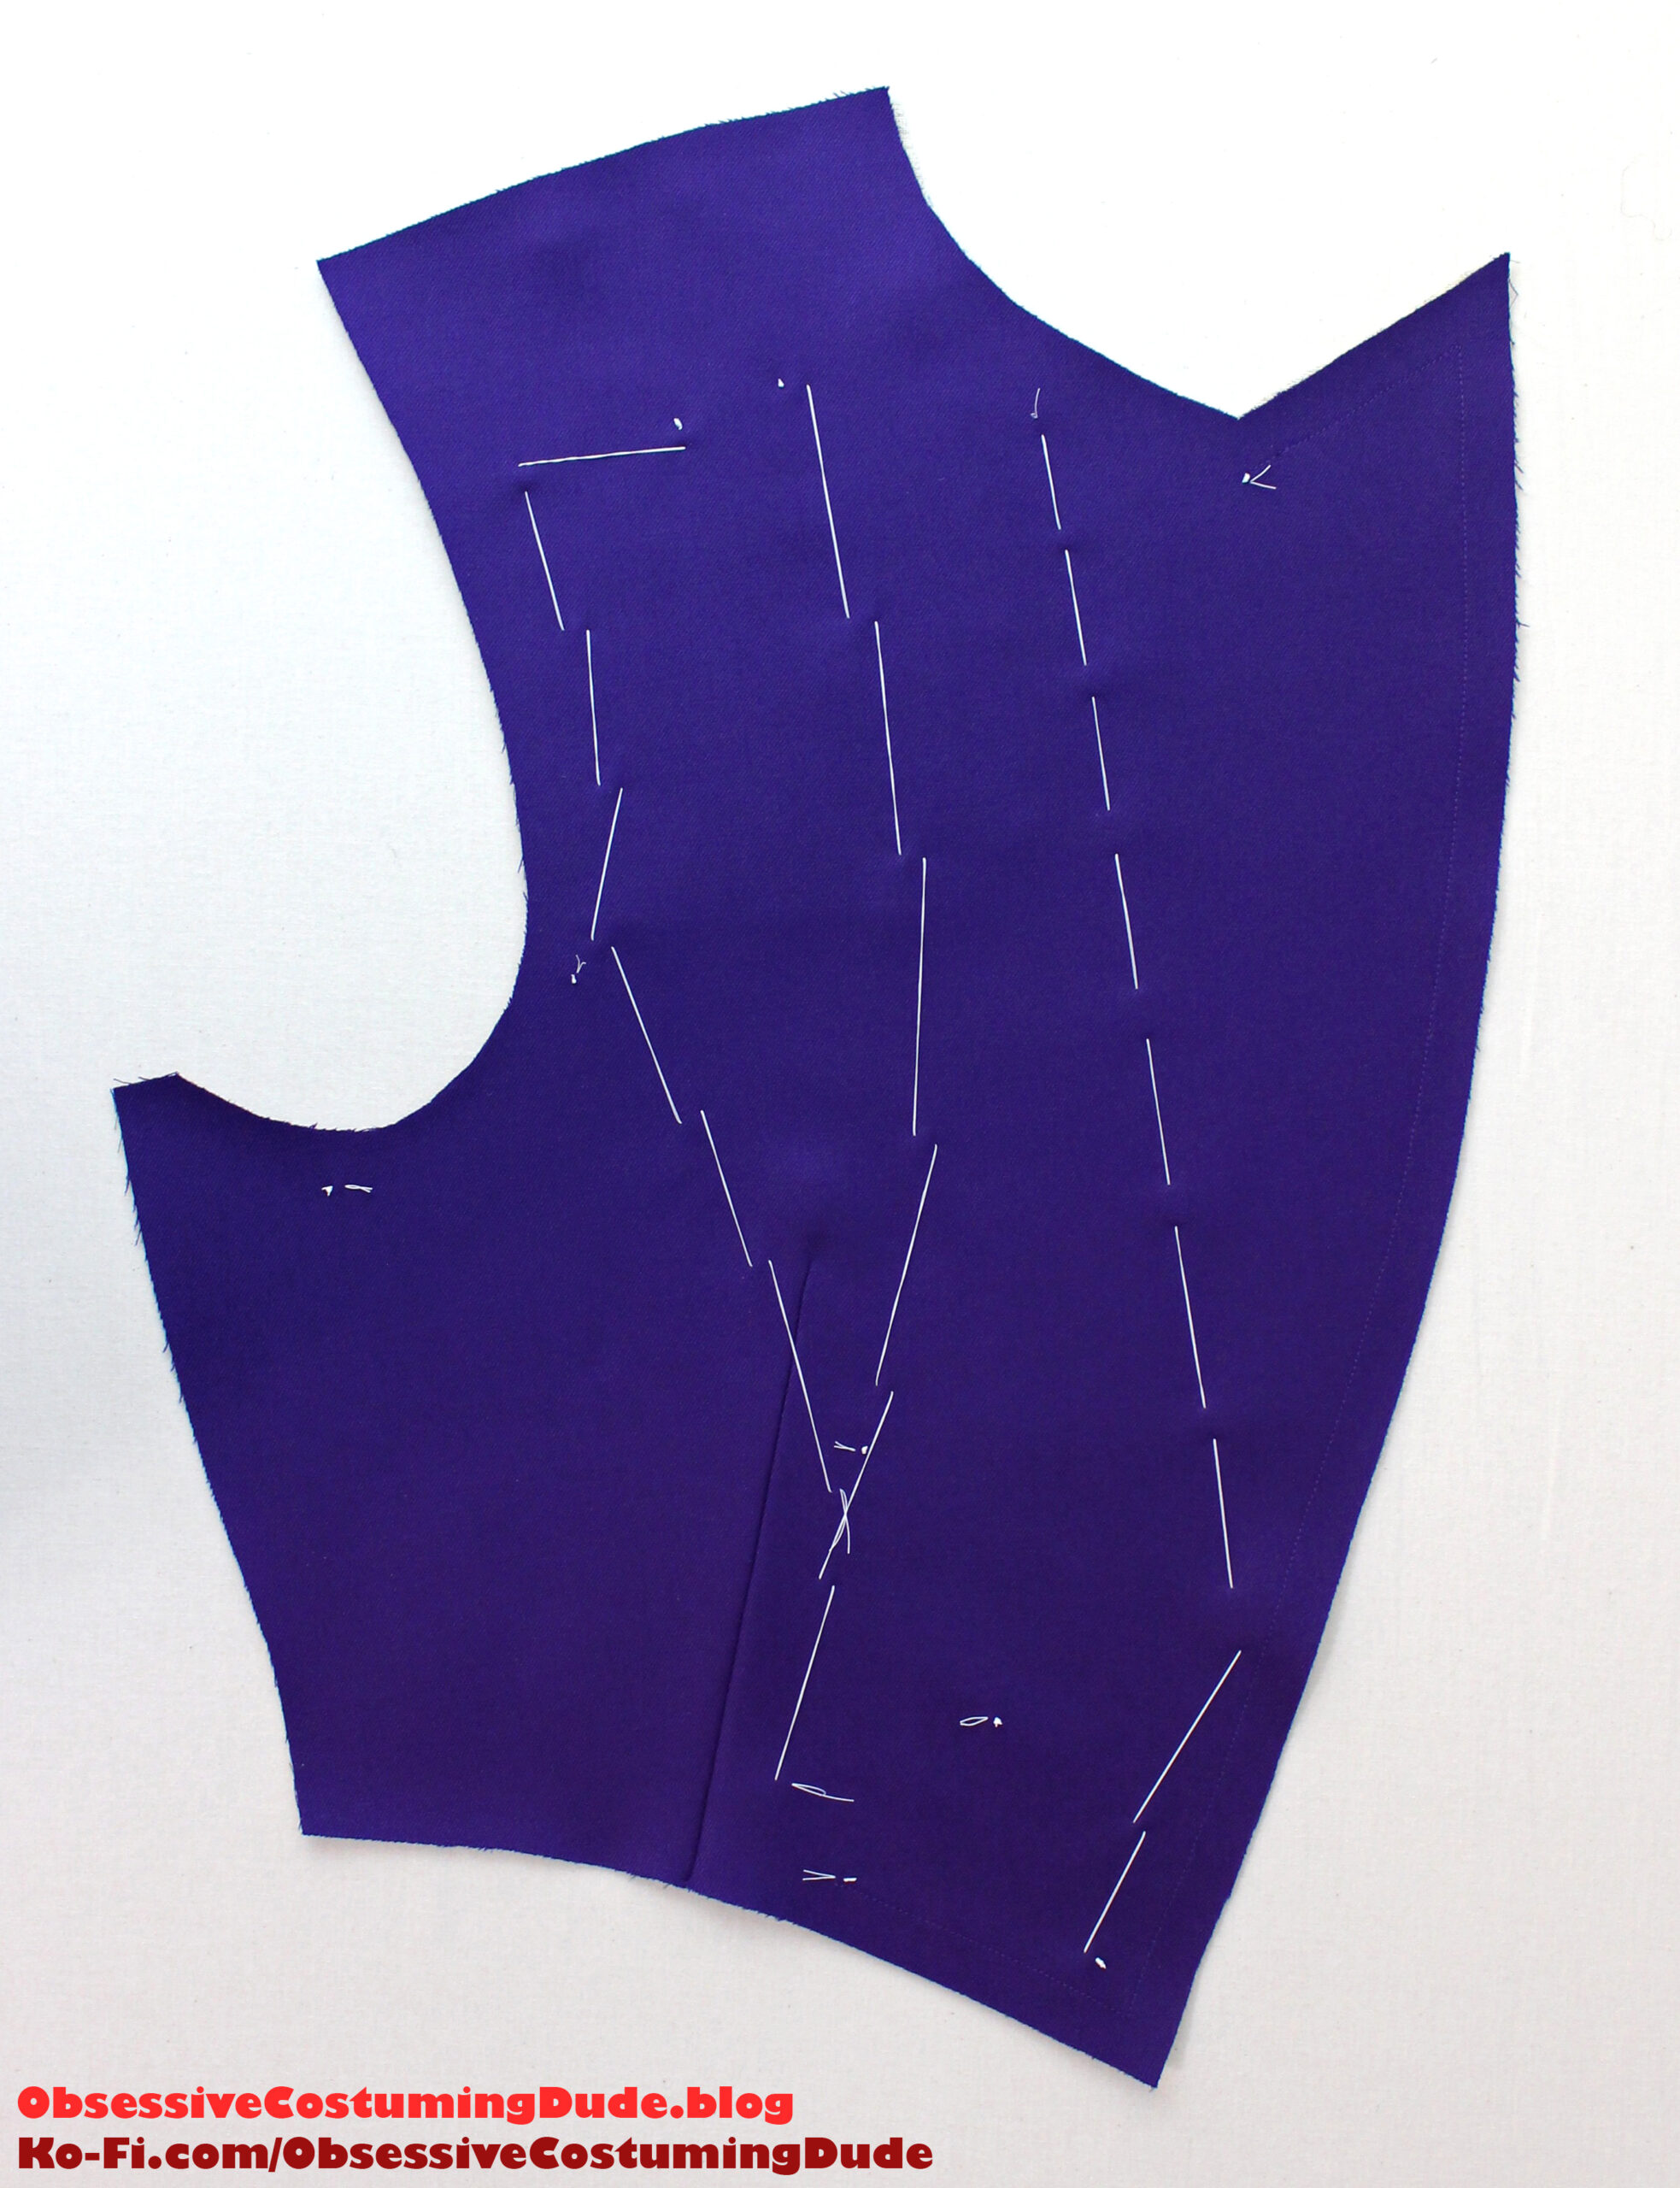
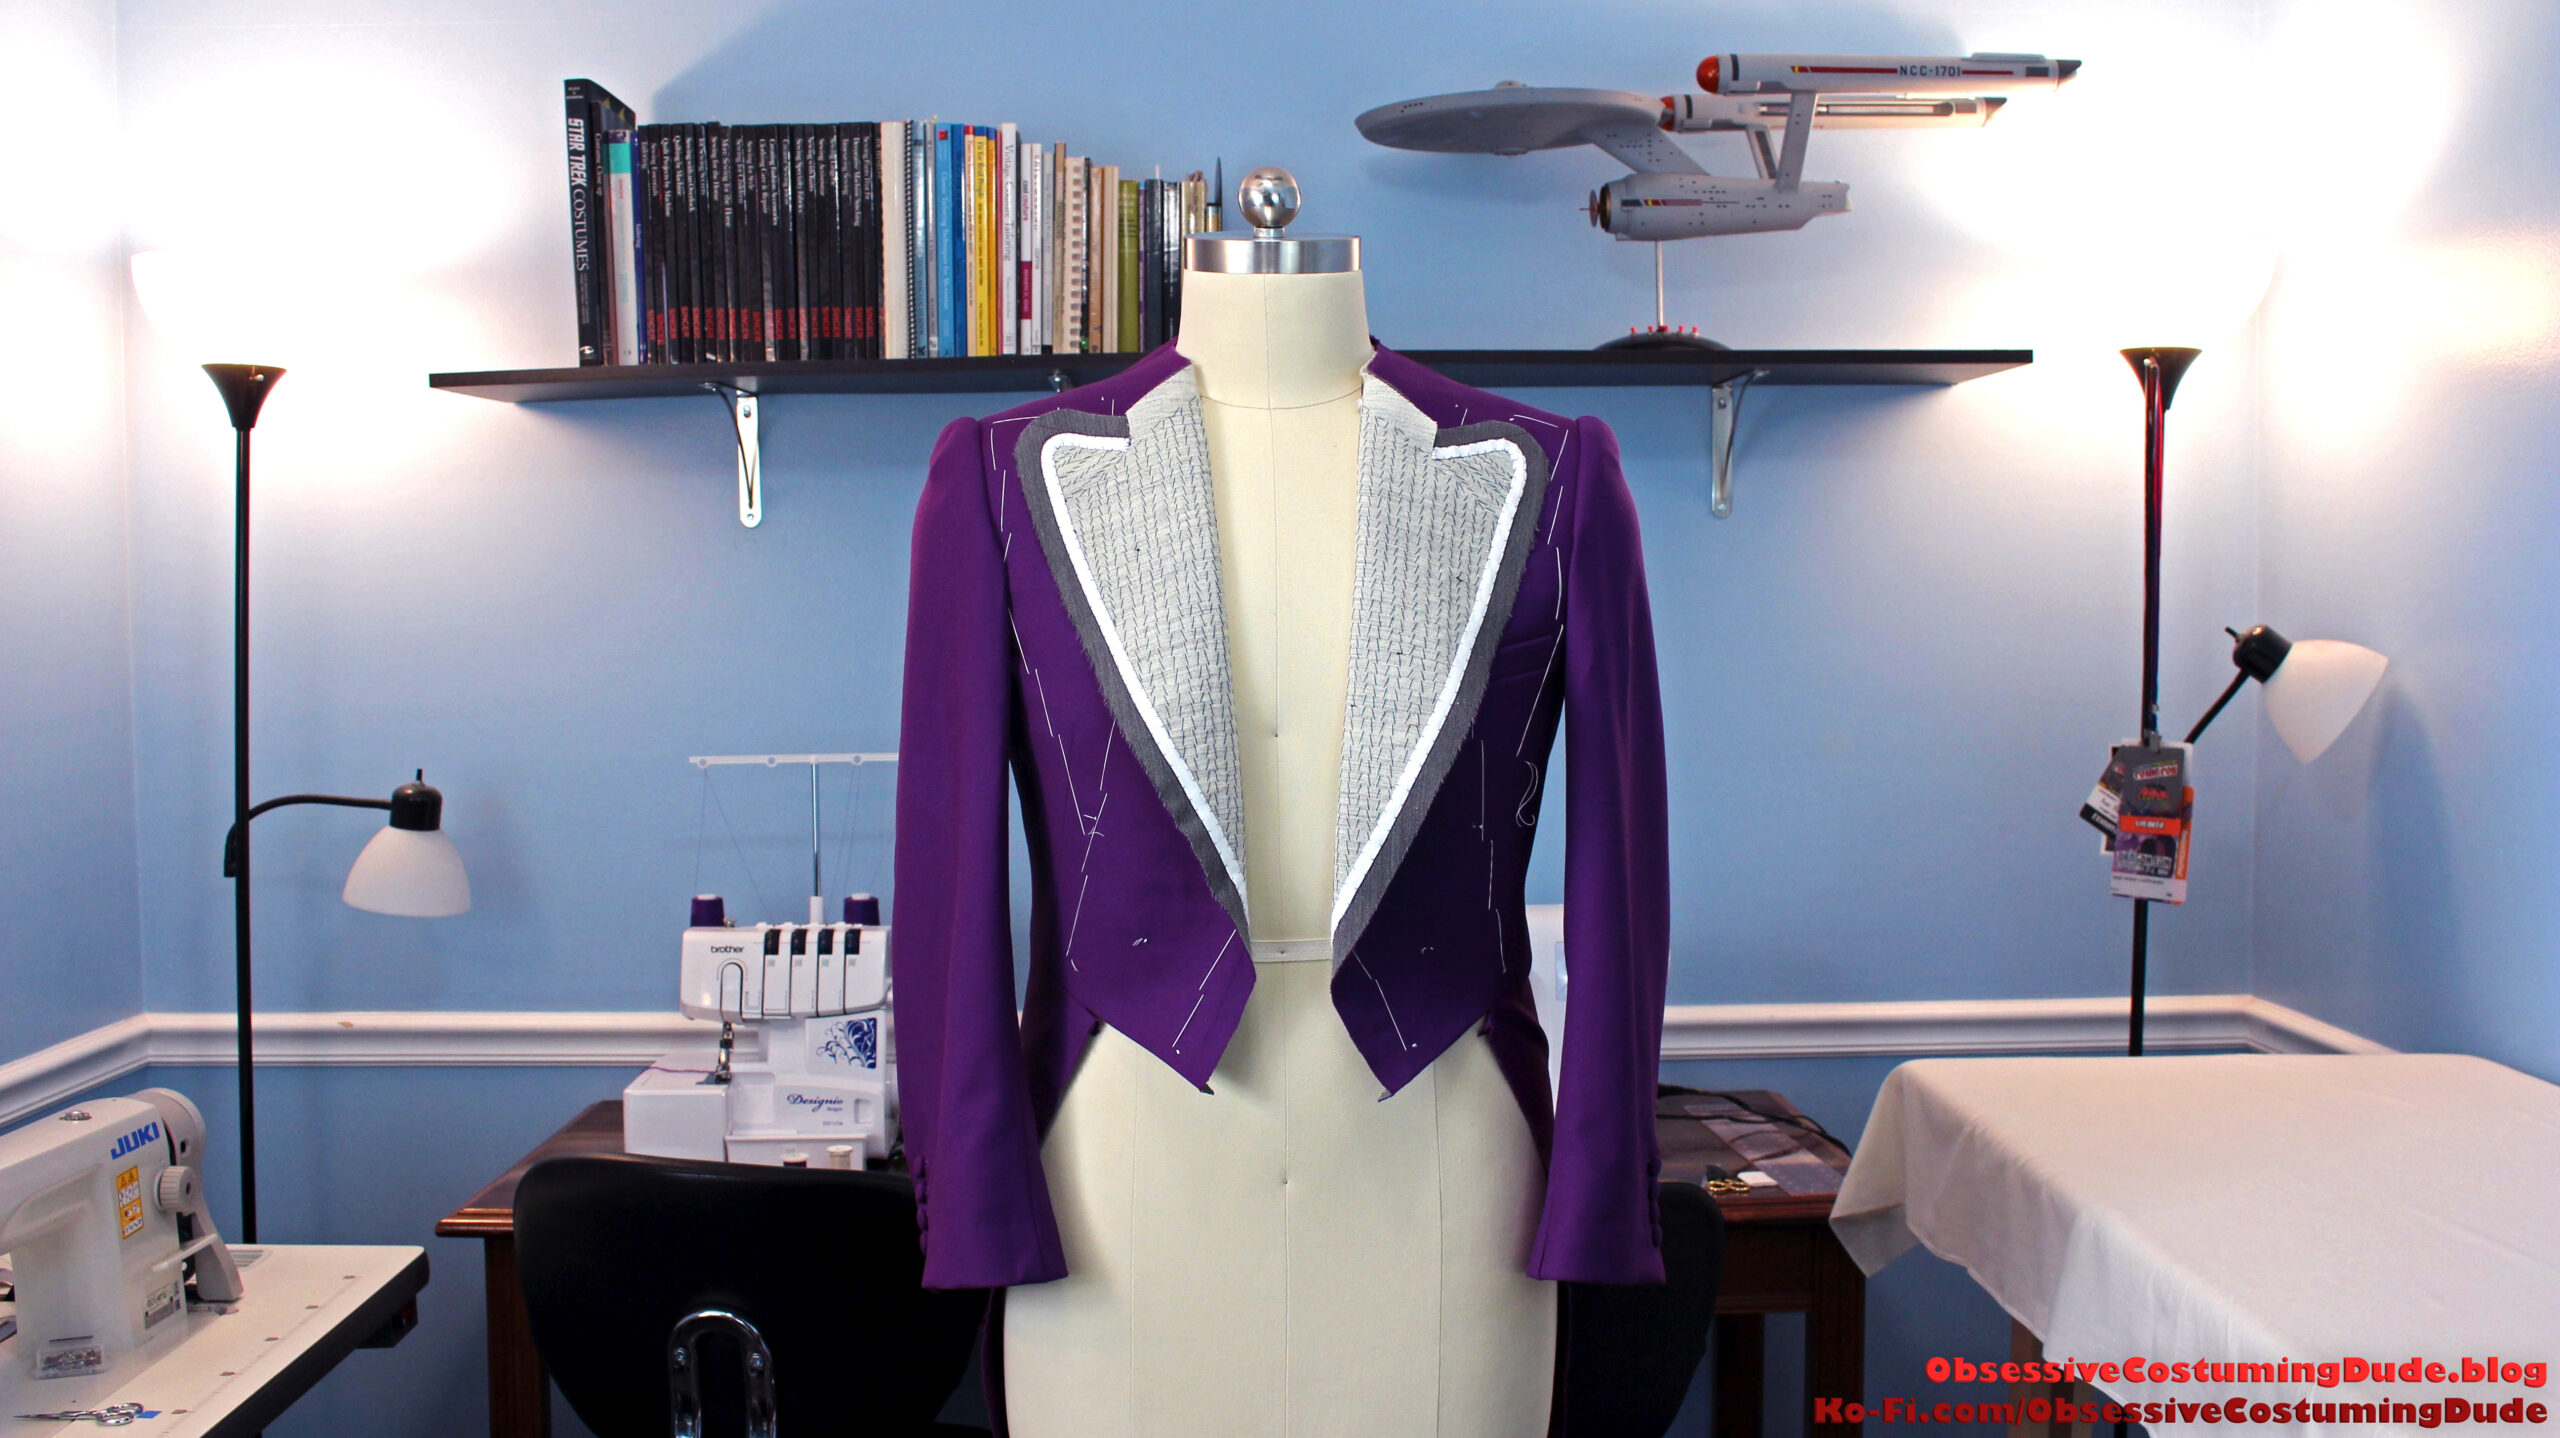
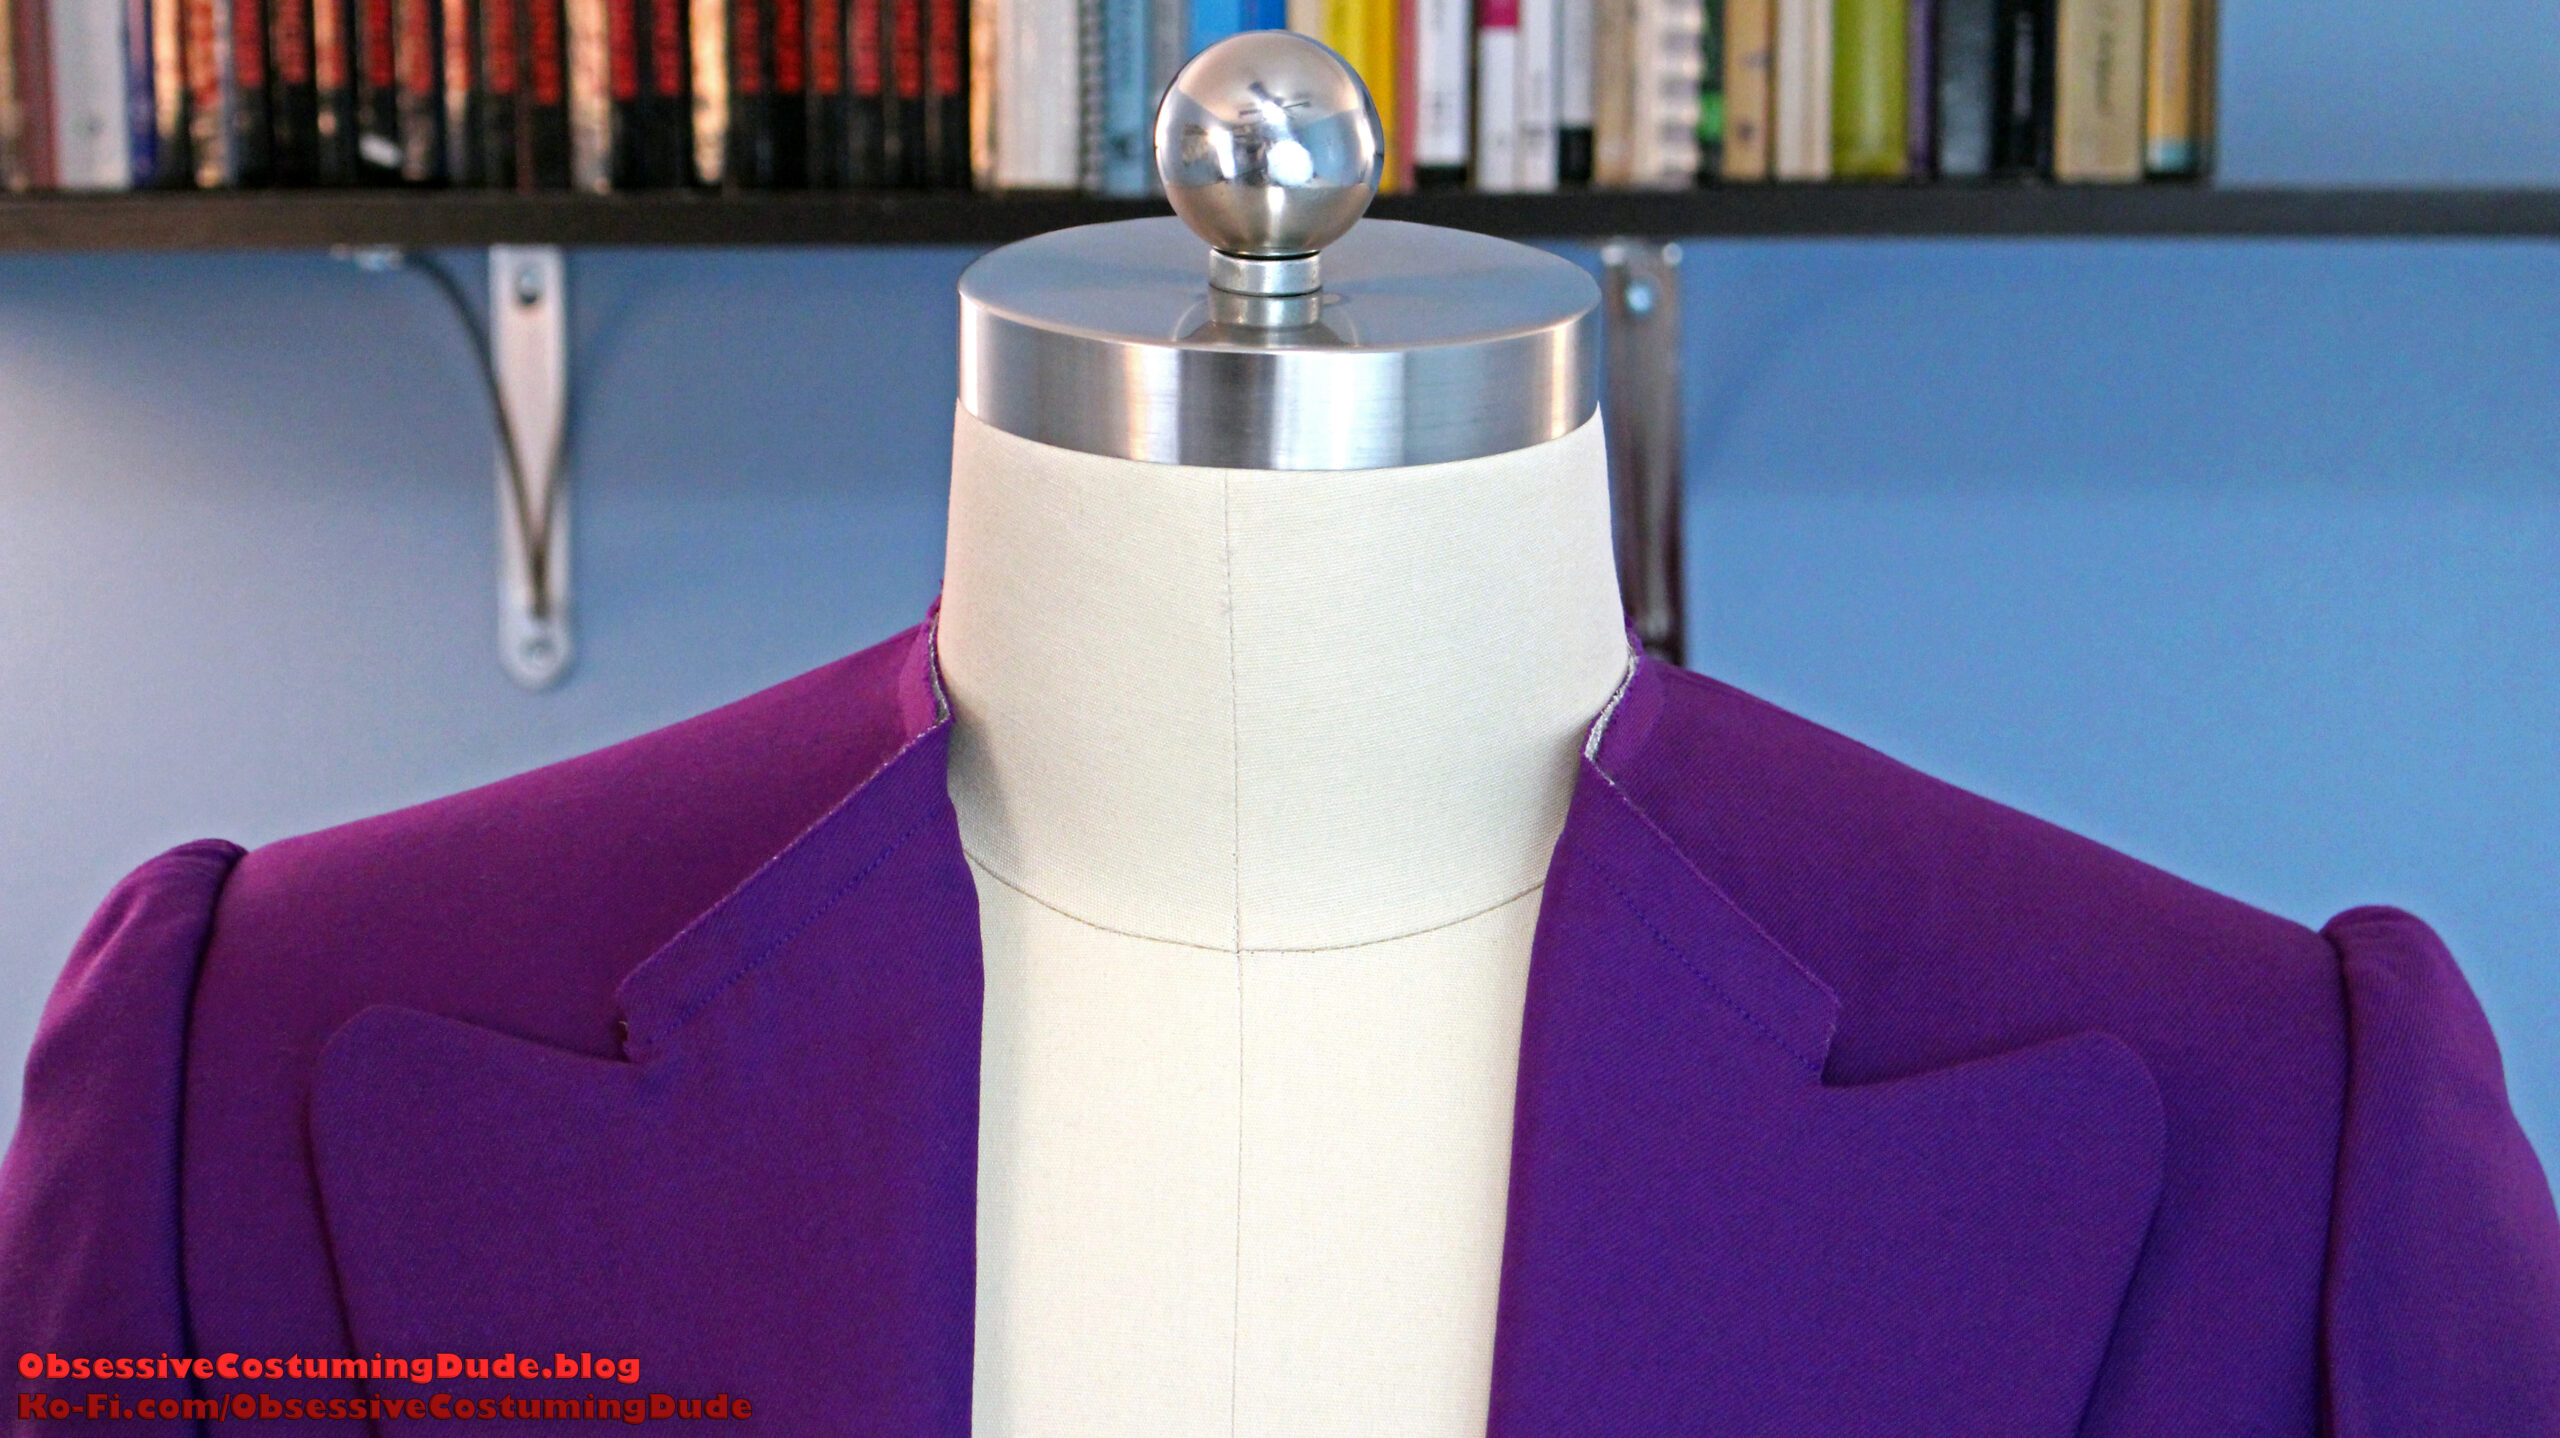
Now it’s time to breathe some life into the lapels and give them character!
Start by drawing the roll line and seam lines on the upper front canvas, if you haven’t already. (I prefer to do this before anchoring the canvas assembly to the coat front.)
I also like to mark guidelines for the rows of padstitching, about ¼” apart and parallel to the roll line.
Position the tailcoat front on a table, with the lapel hanging over the table edge along the roll line.
Using a single strand of waxed thread, begin padstitching right next to the flannel, moving on to the roll line and the rest of the lapel area.
Begin and end your stitching about ⅛” from the seam lines, so you’re not padstitching into the seam allowances.
Once you’ve padstitched the first several rows beyond the roll line, flip the tailcoat front over so it’s right-side-up and the lapel is in its finished position, to continue working.
These lapels are large so padstitching them will take a while – a perfect opportunity to turn on Batman again? 😉
Because these are peak lapels, rotate your padstitching 90° at the upper corners so it’s perpendicular to the previous rows and tighten the spacing a bit toward the corner.
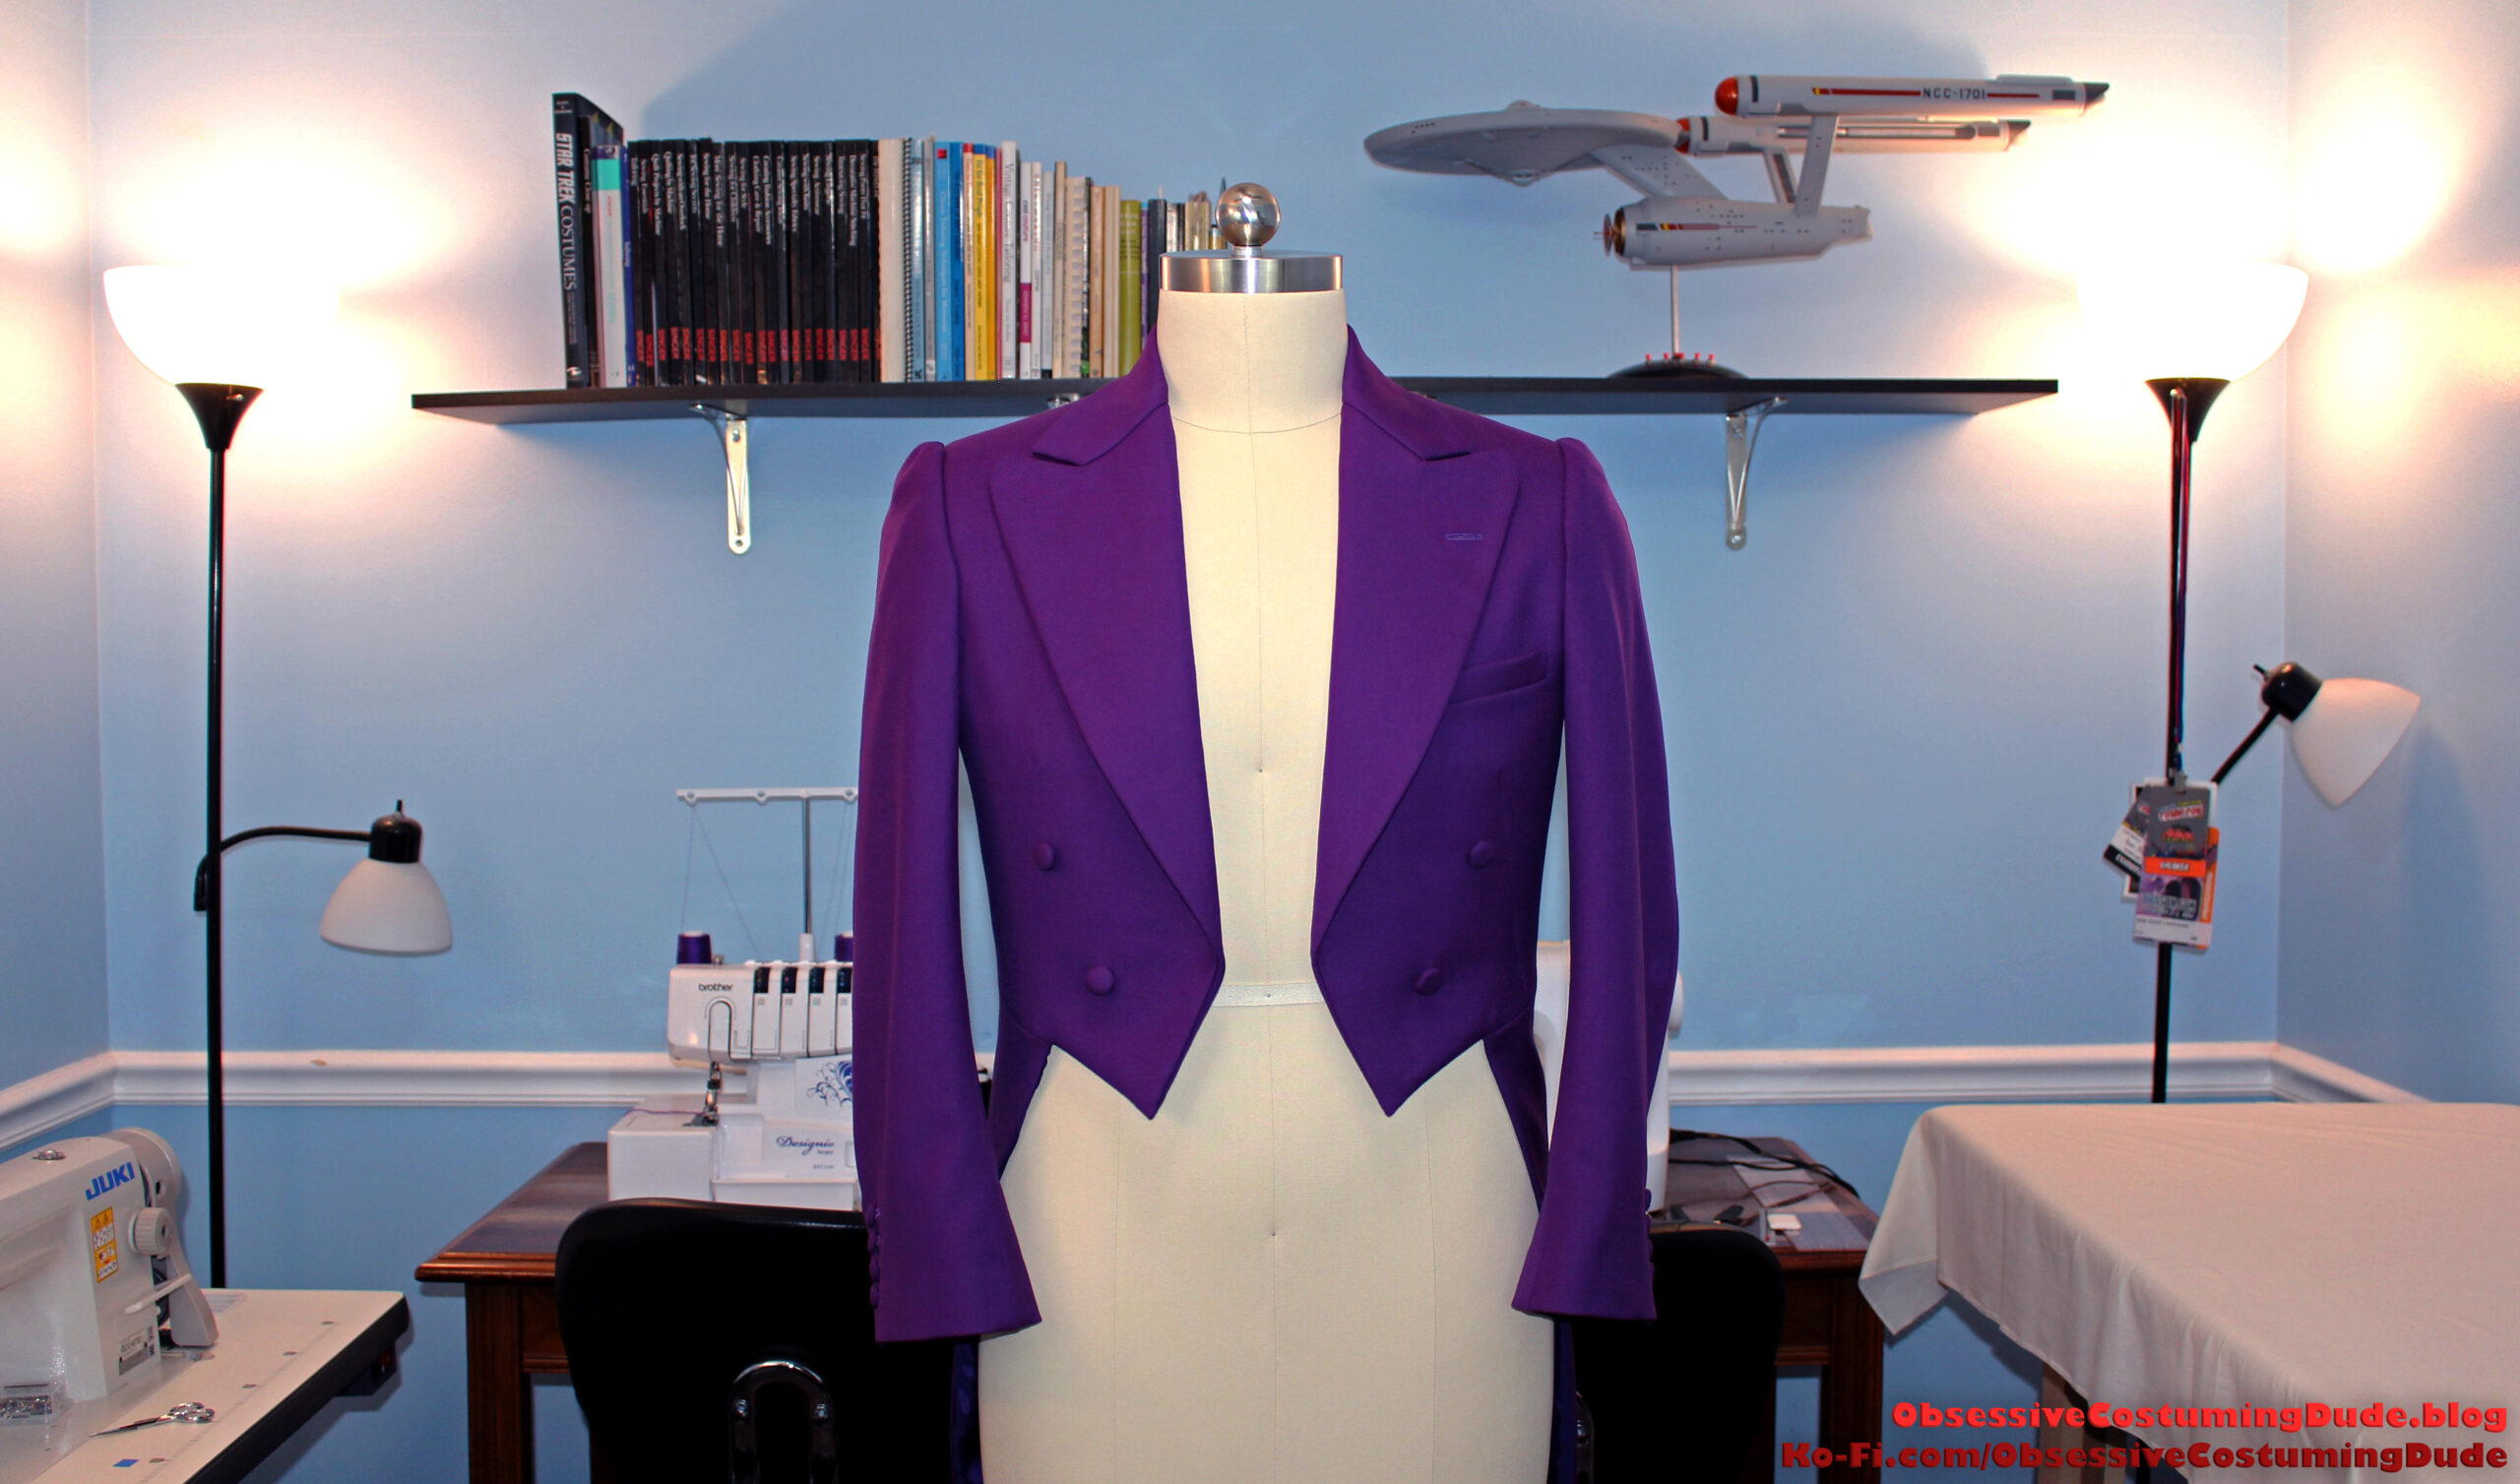
Because my Tailors Gone Wild Joker tailcoat pattern doubles as a “proper” Victorian tailcoat pattern it includes cornered peak lapels, but they were rounded on the Joker’s tailcoat.
If you’re making the Joker tailcoat (or any tailcoat with rounded “peaks”), don’t bother padstitching all the way to the corner since it will be trimmed away into a curve later anyway.
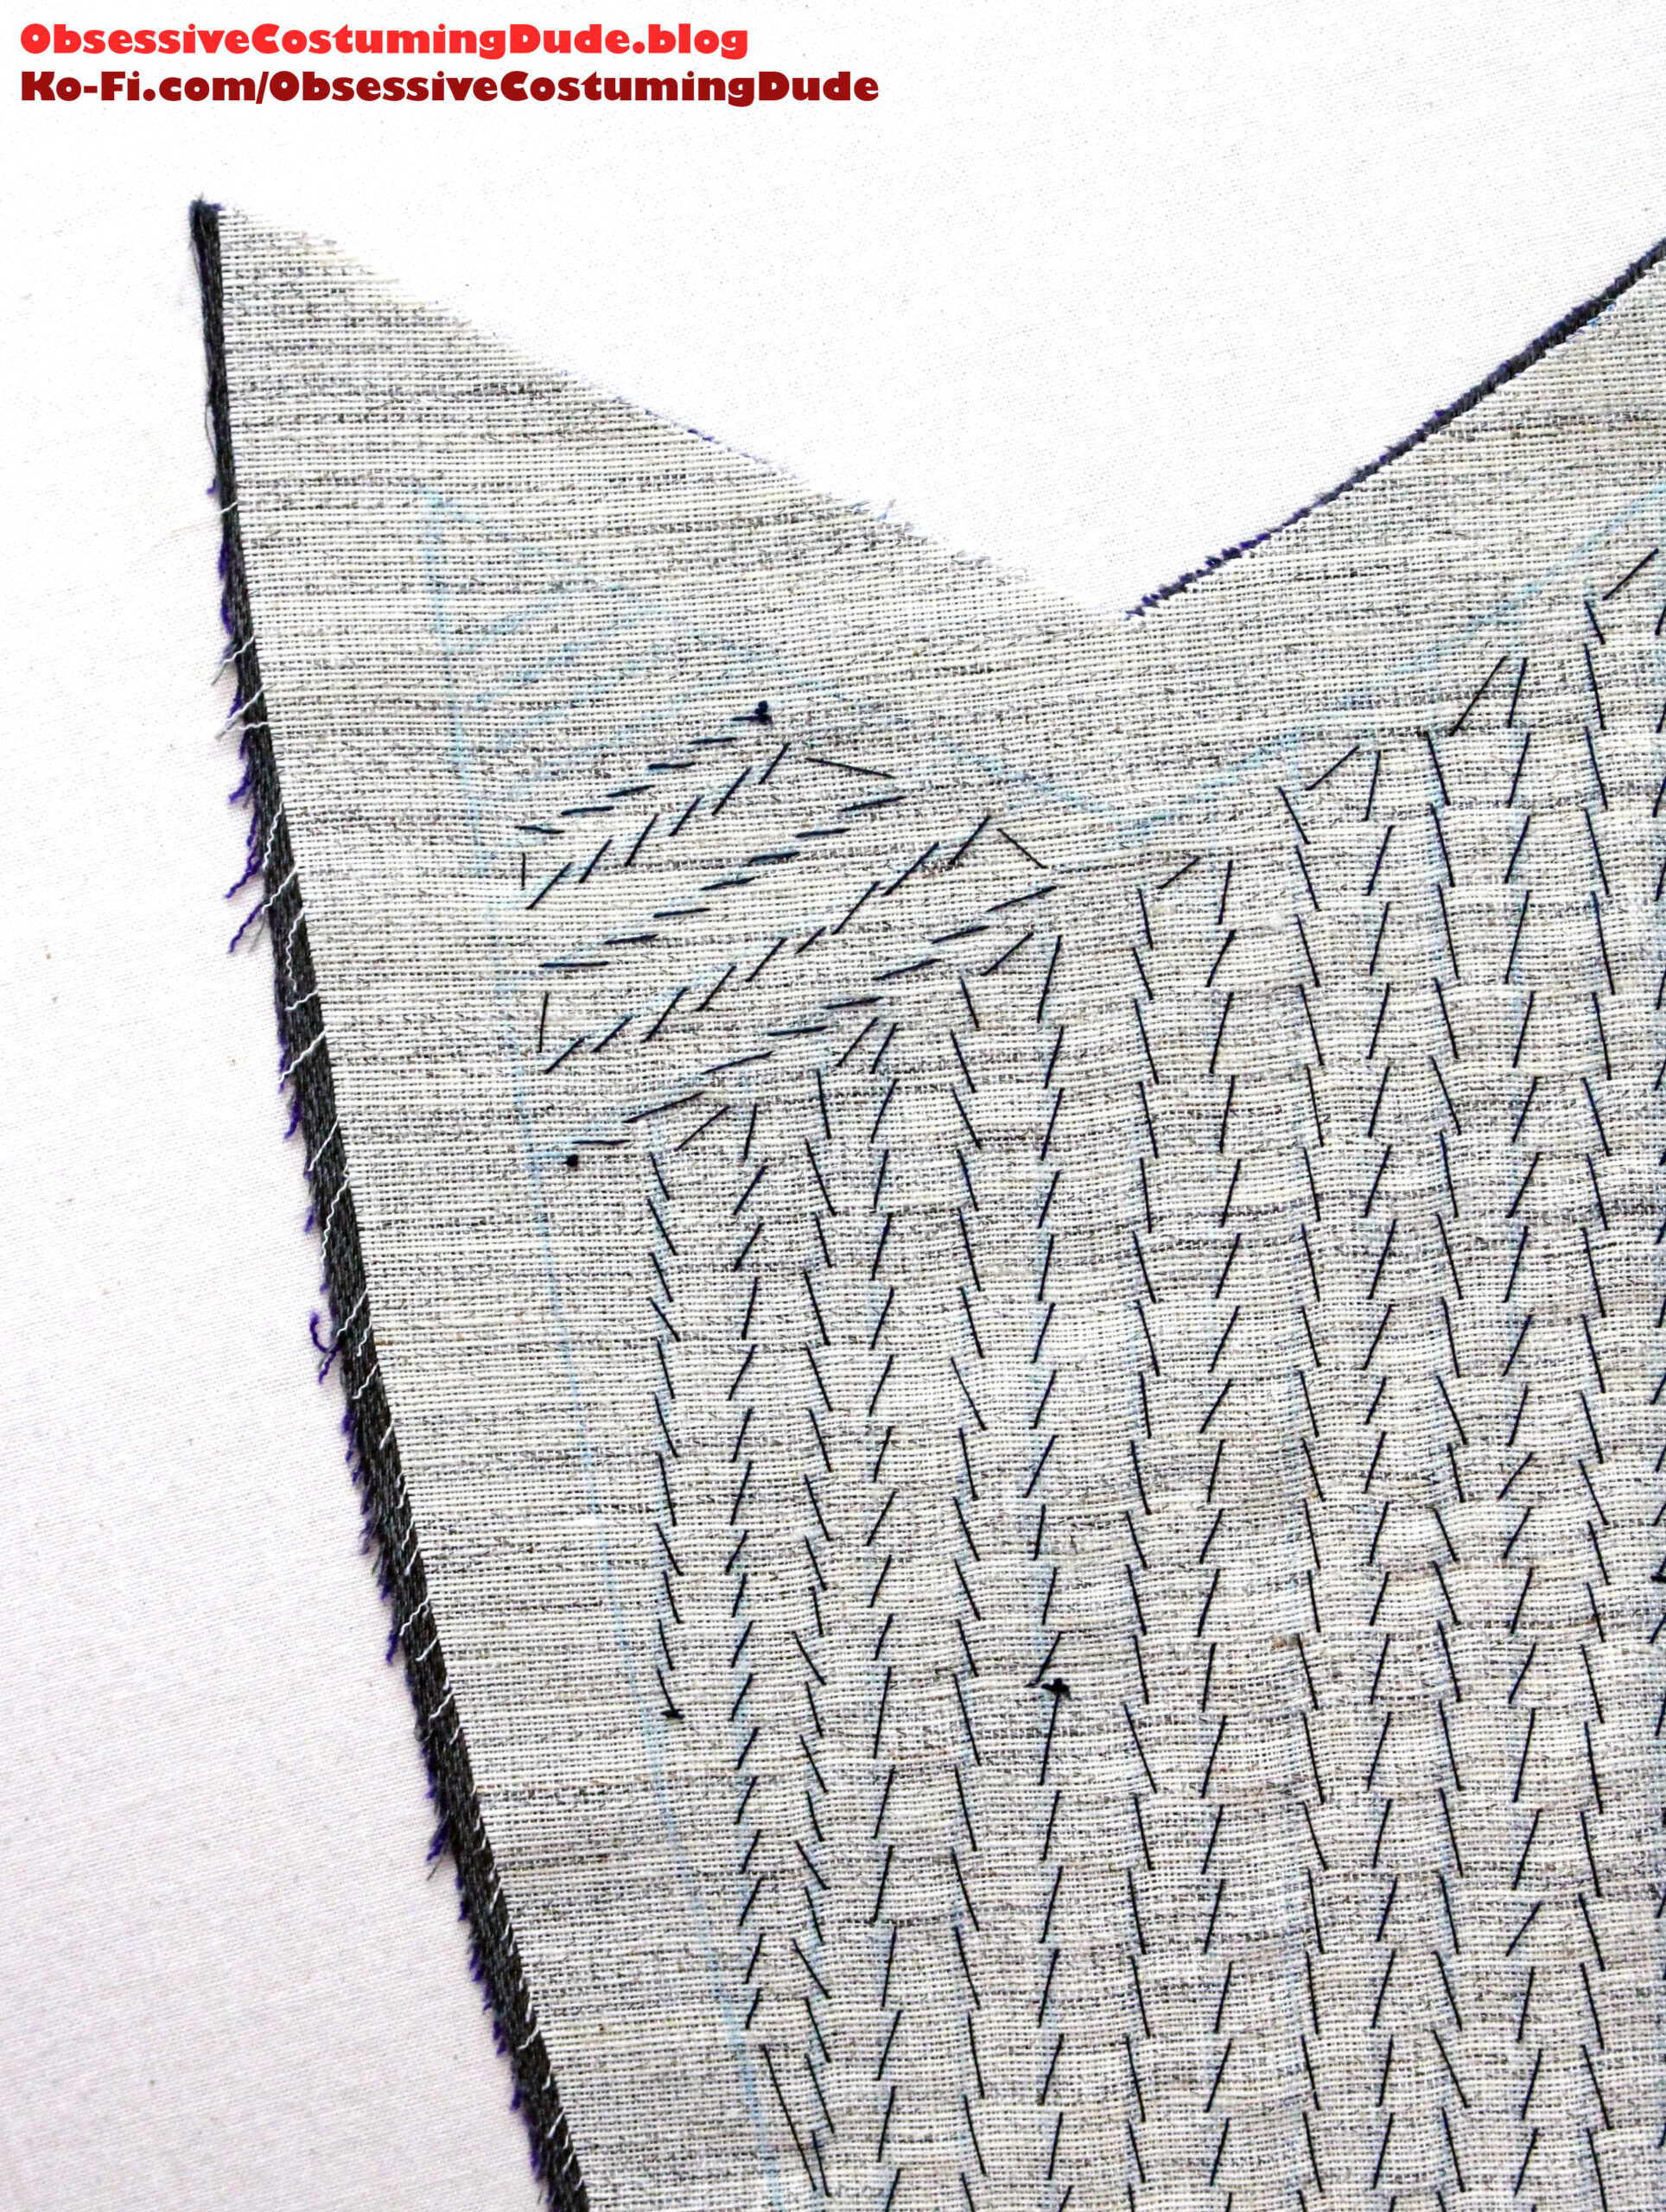
Once you’ve padstitched the entire lapel, position a wash cloth underneath it so its edge is flush with the roll line, and give it some steam to set the shape.
Then let it cool for a while.
Once it’s cooled, we need to apply some stay tape just outside the roll line, at the edge of the flannel.
Cut a length of pre-shrunk ⅜” cotton twill stay tape about 2/3 of the length of the roll line and position it over the edge of the flannel, ¼” away from the roll line.
Pin the tape into place, or baste it into place by hand.
The top half or so should be normal, but pull the lower half so it’s a little bit tight. (This will cause some small ripples to appear on the right side, but don’t worry about it for now.)
Catch-stitch the stay tape through all layers, catching only a tiny little bit of the outer jacket fabric each time.
Slide the assembly over a tailor’s ham and give it a gentle pressing to eliminate any remaining ripples.
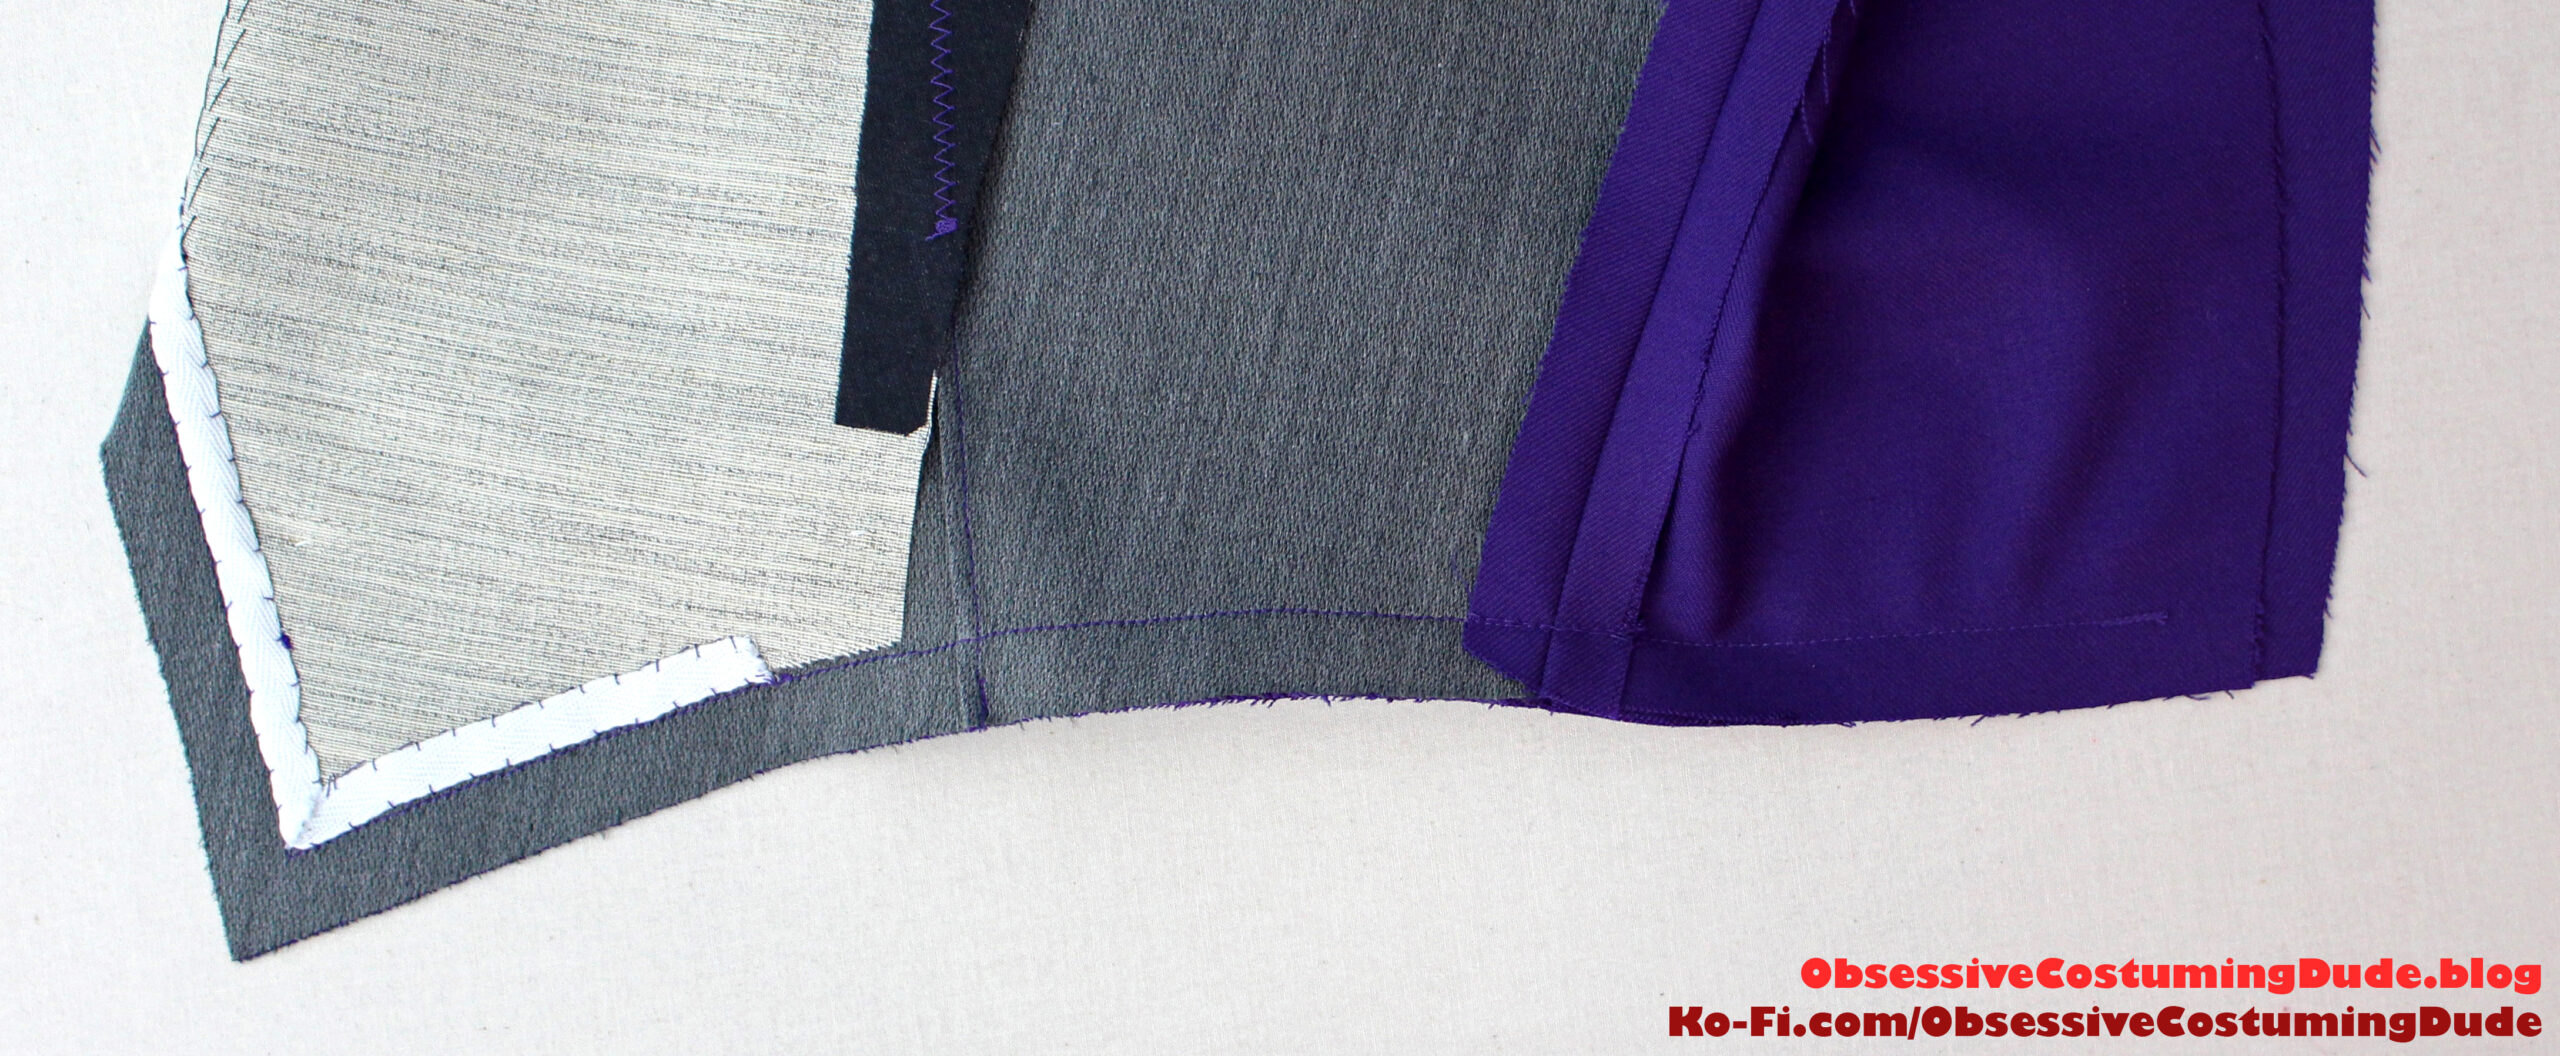
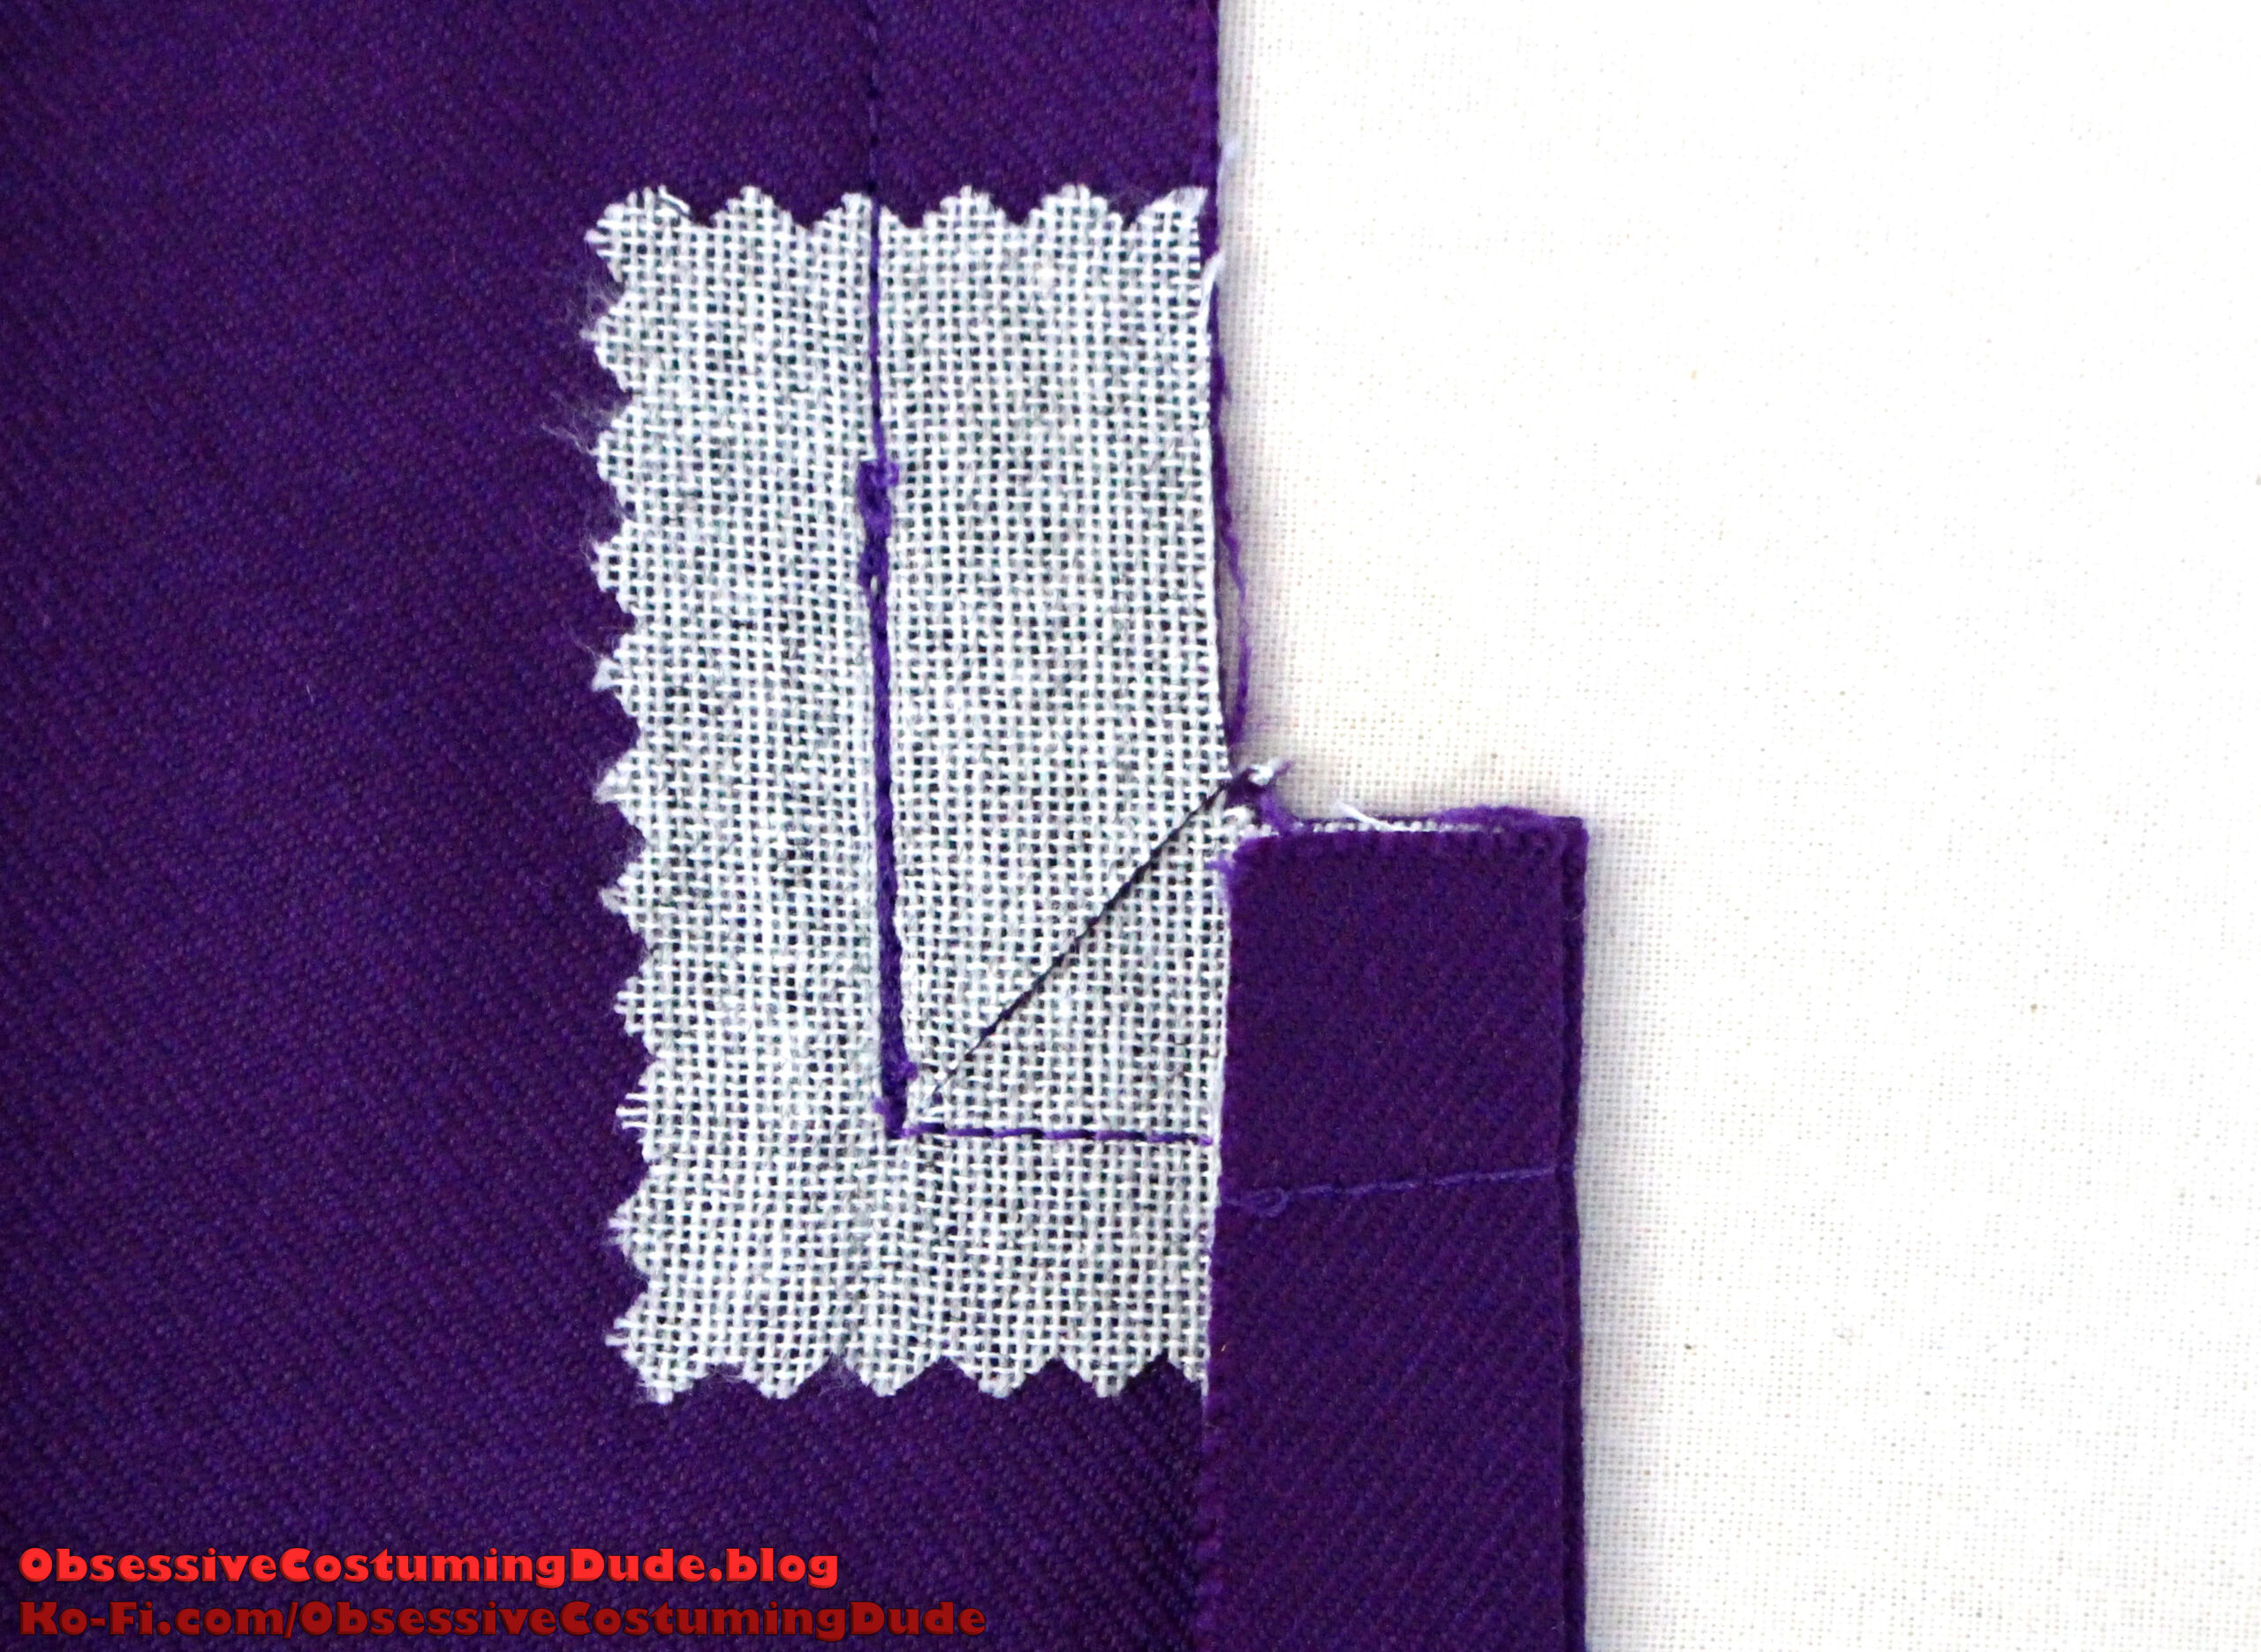
Trim away the canvas seam allowance along the neckline, front, and lower edges, from the collar notch all the way to the lower/outer corner.
If you’re making the Joker tailcoat (or any tailcoat with rounded “peaks”), mark and stay-stitch your desired curve onto the upper corners of the lapels.
Trim the seam allowance down to ⅝” along the new curve, and again trim away the canvas seam allowance.
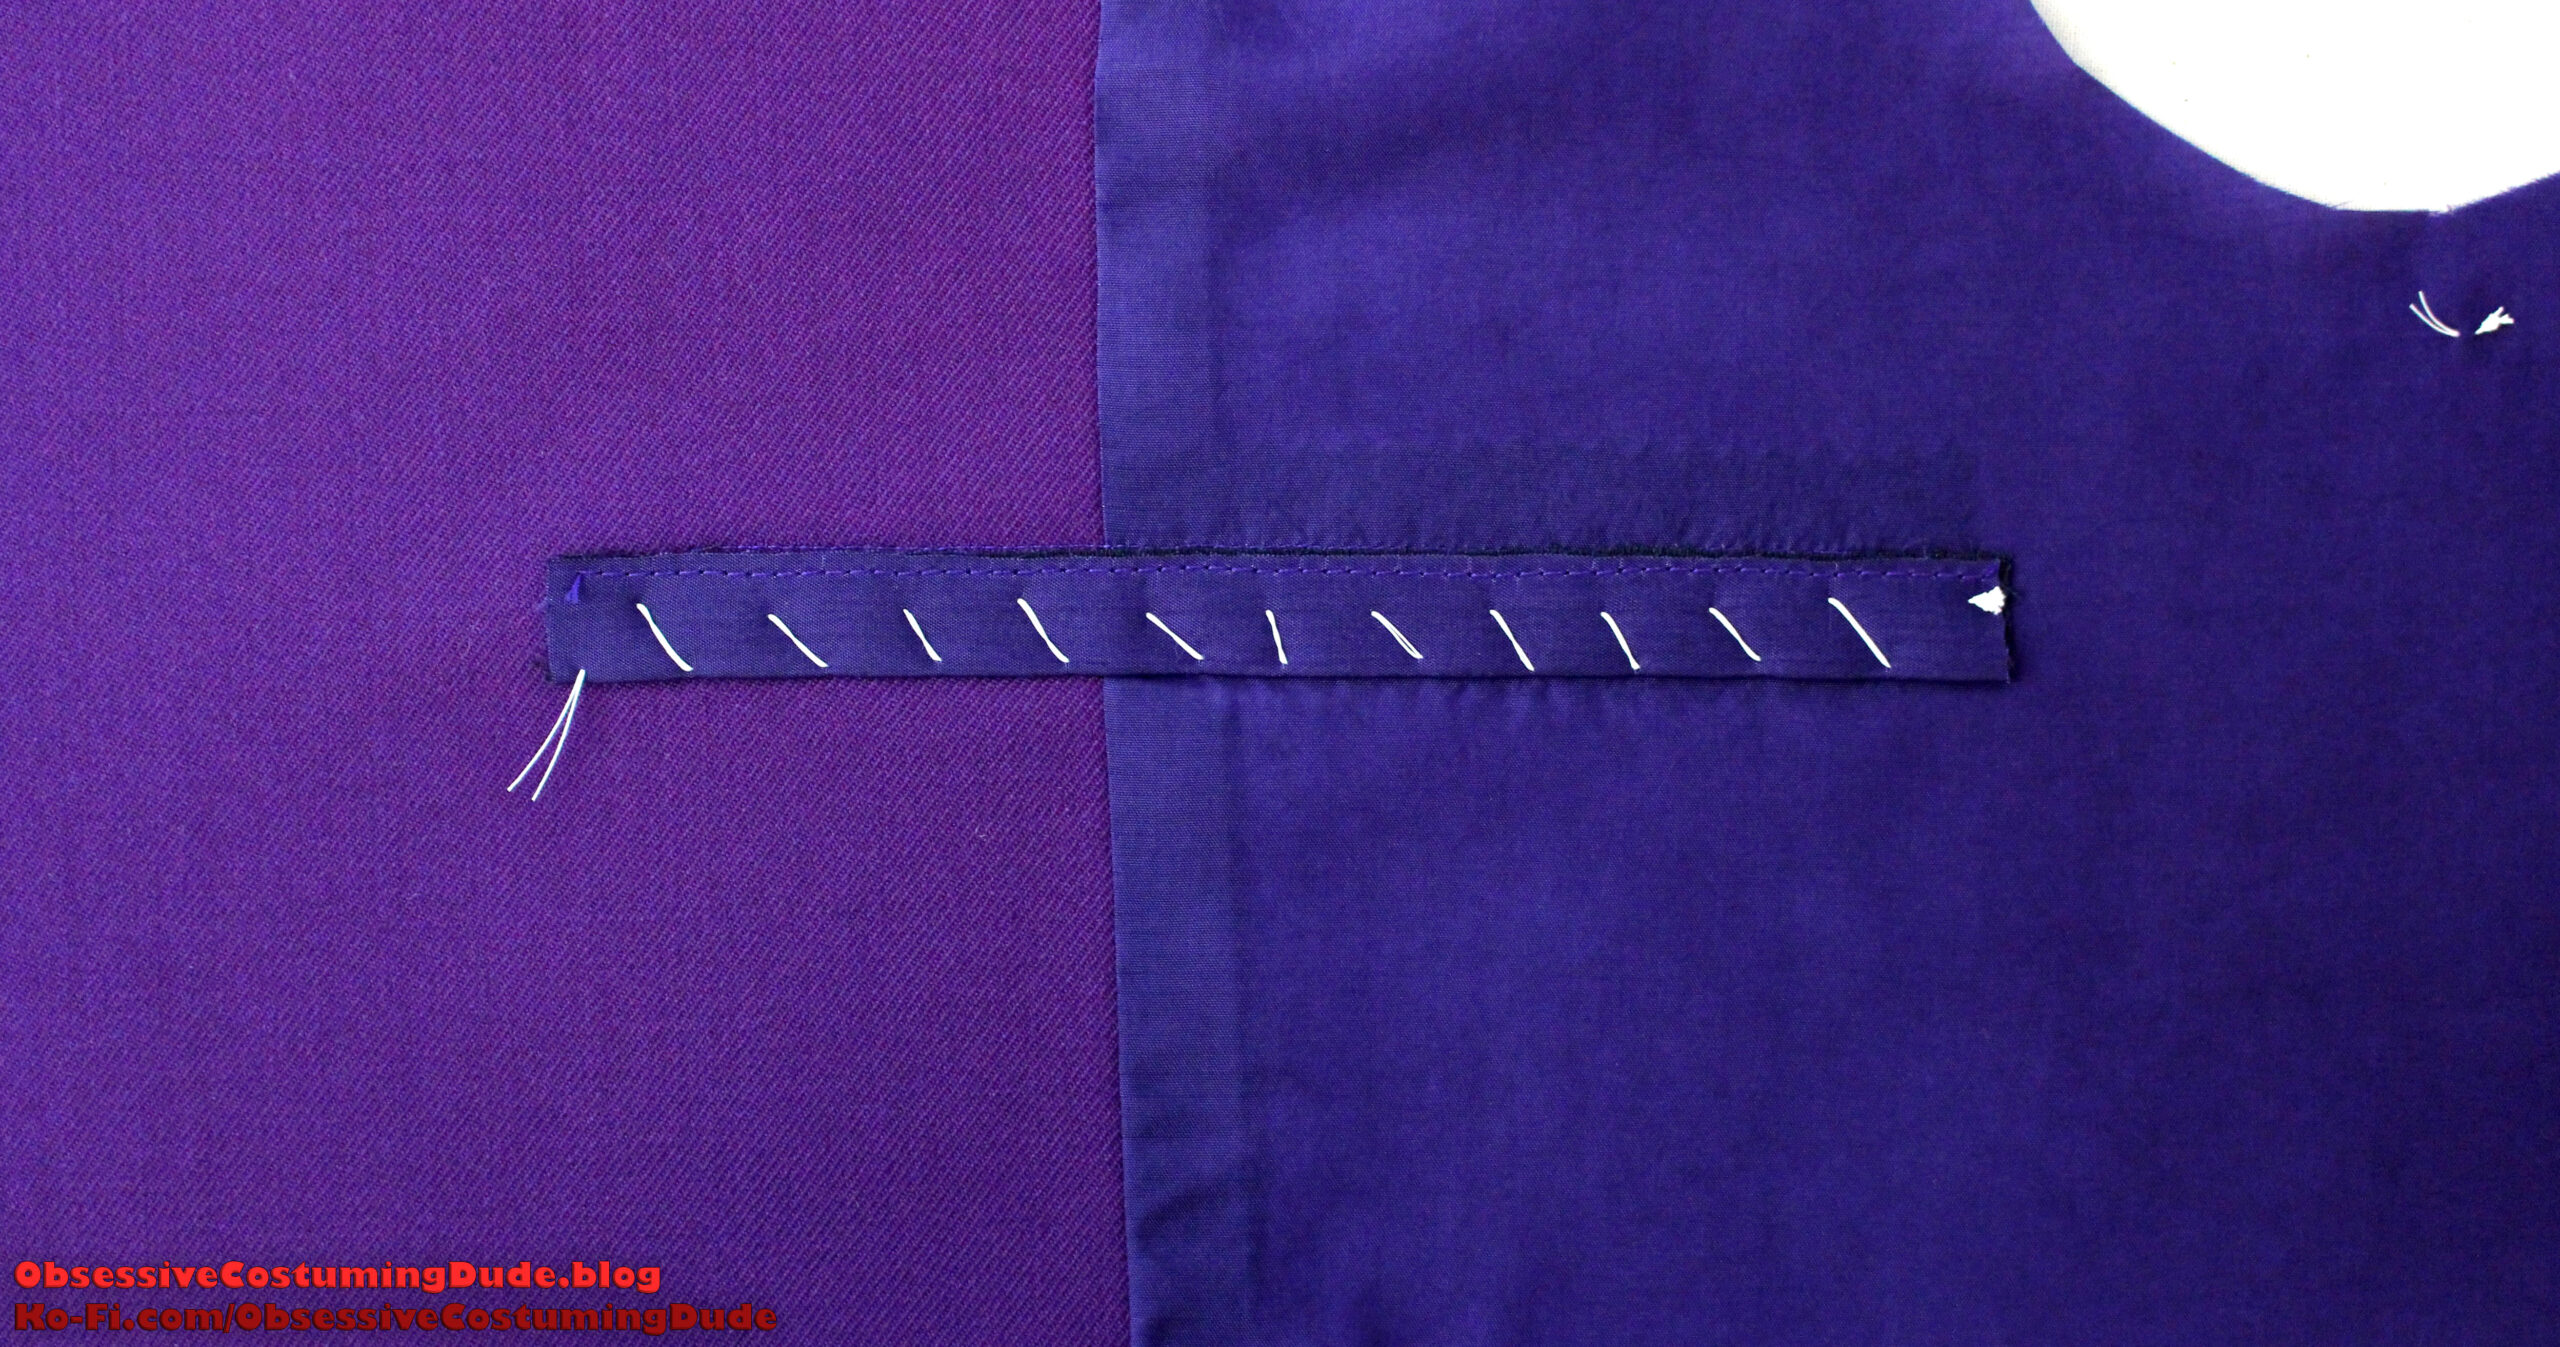
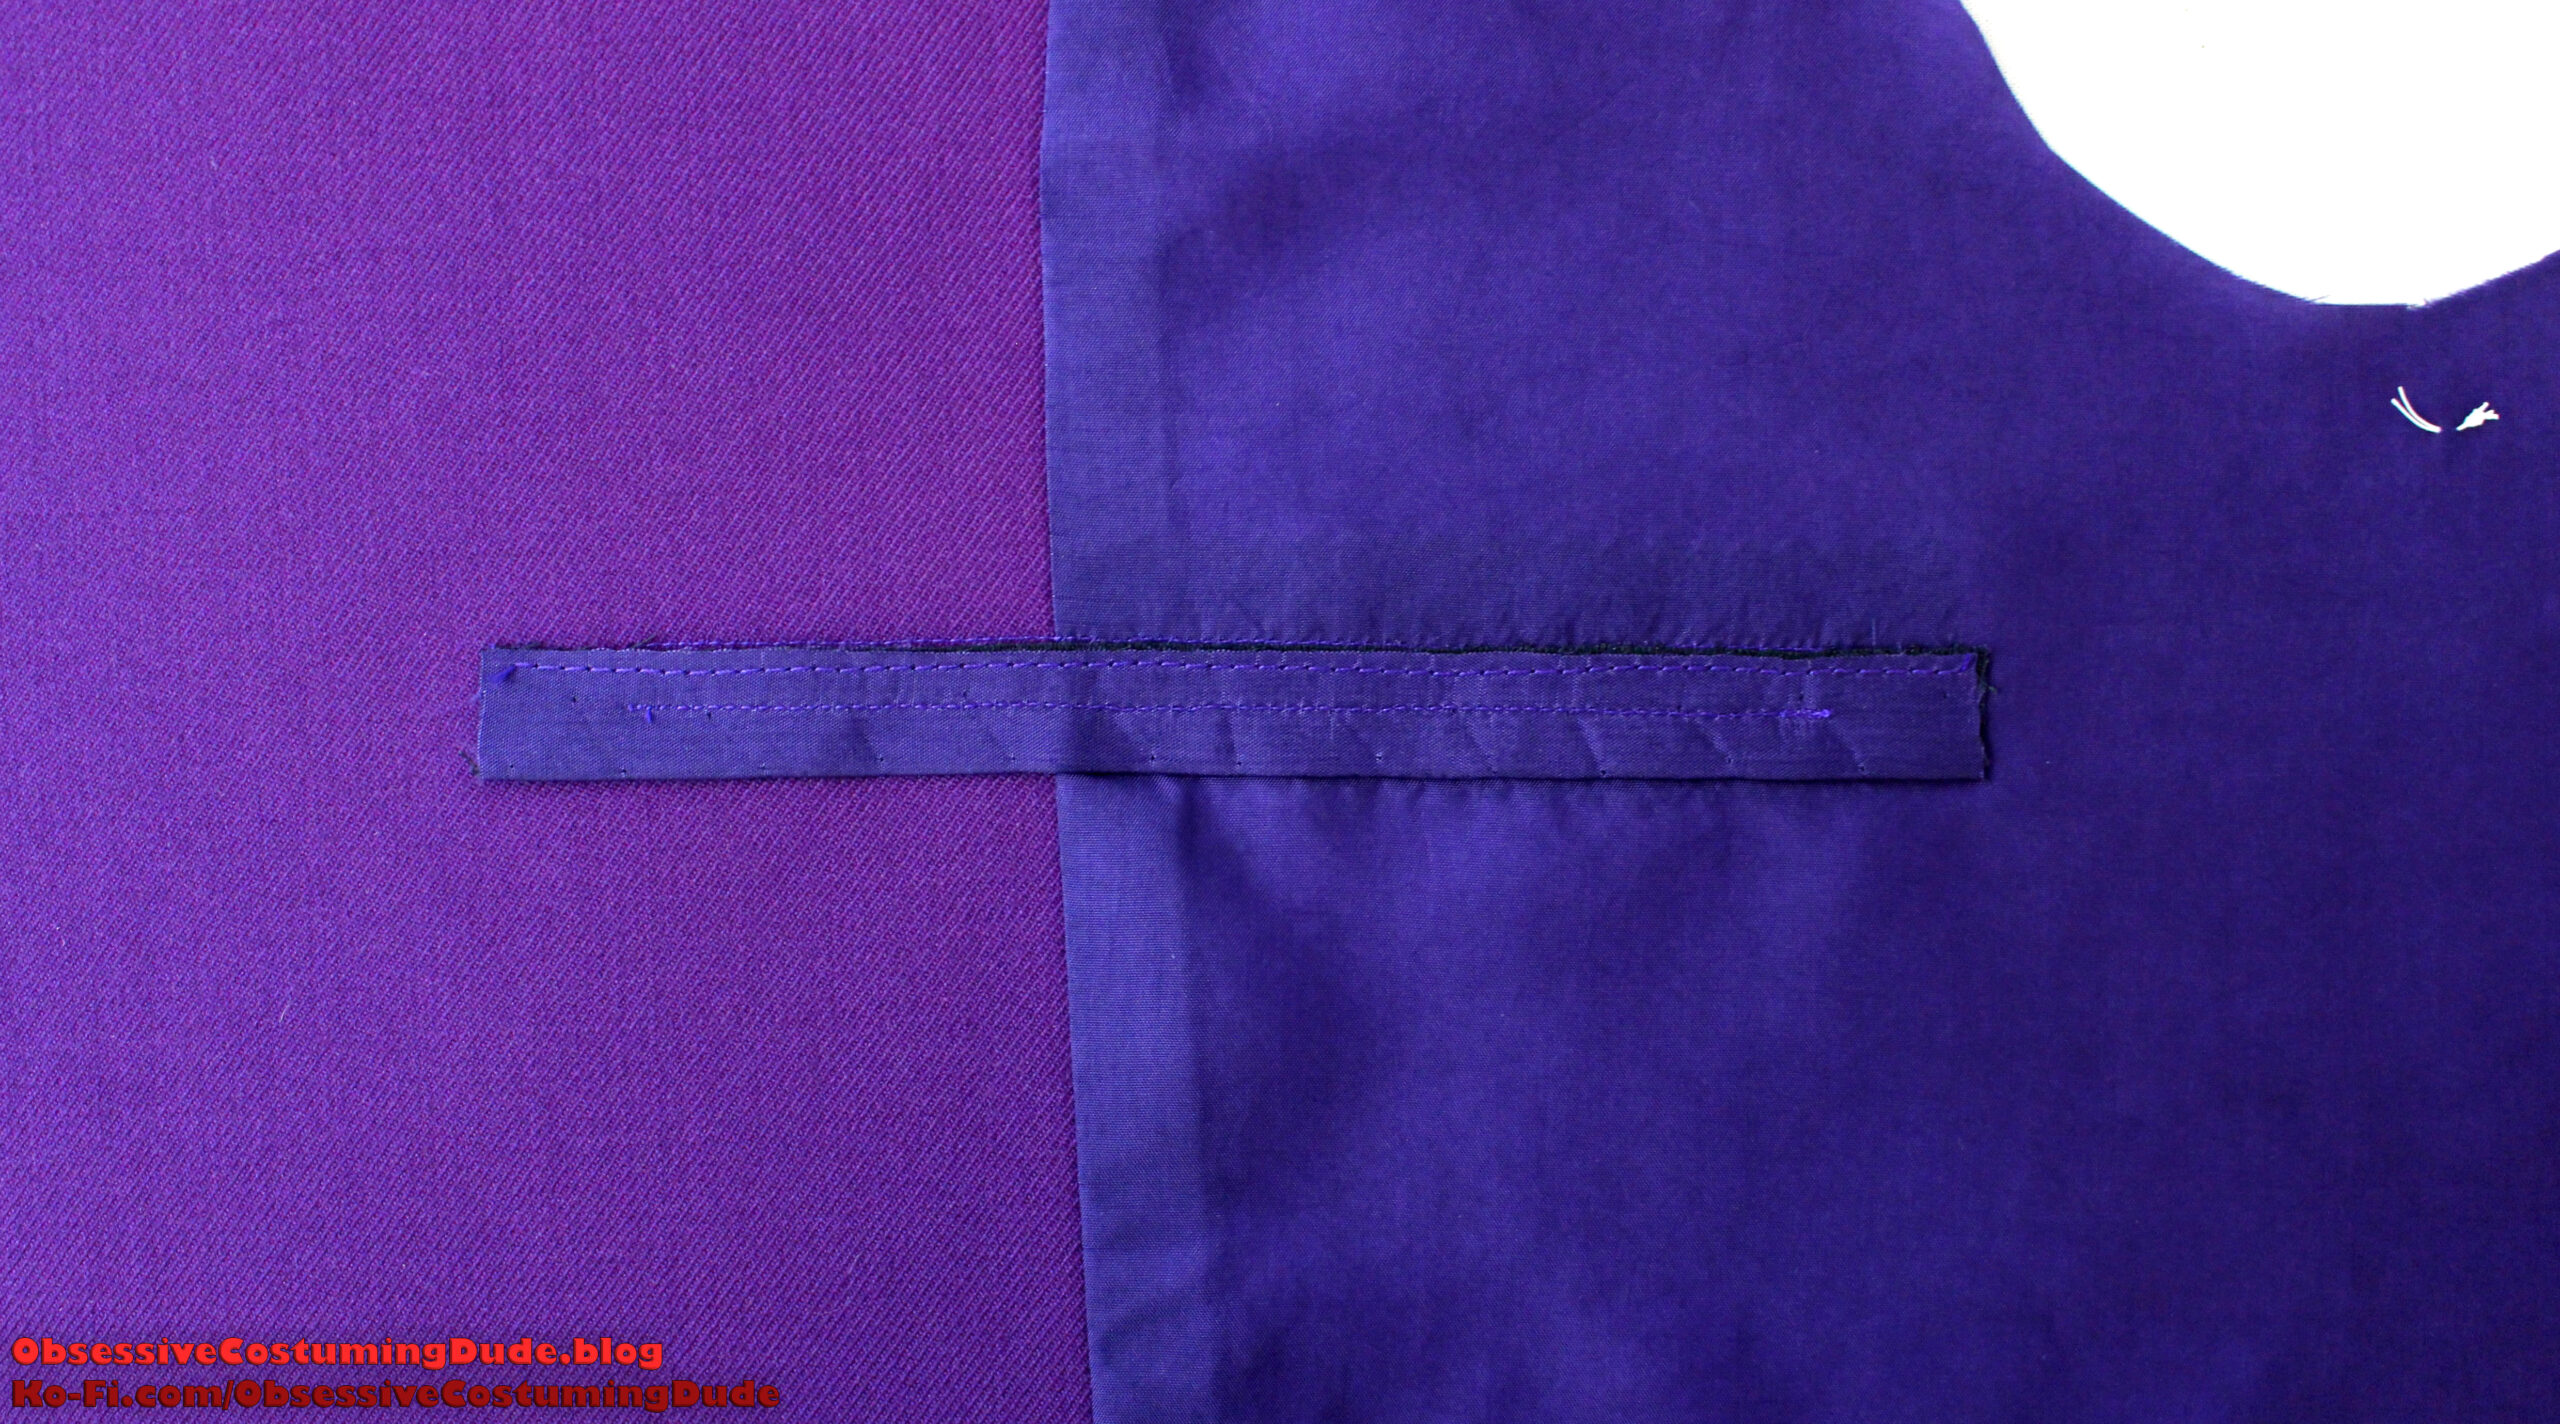
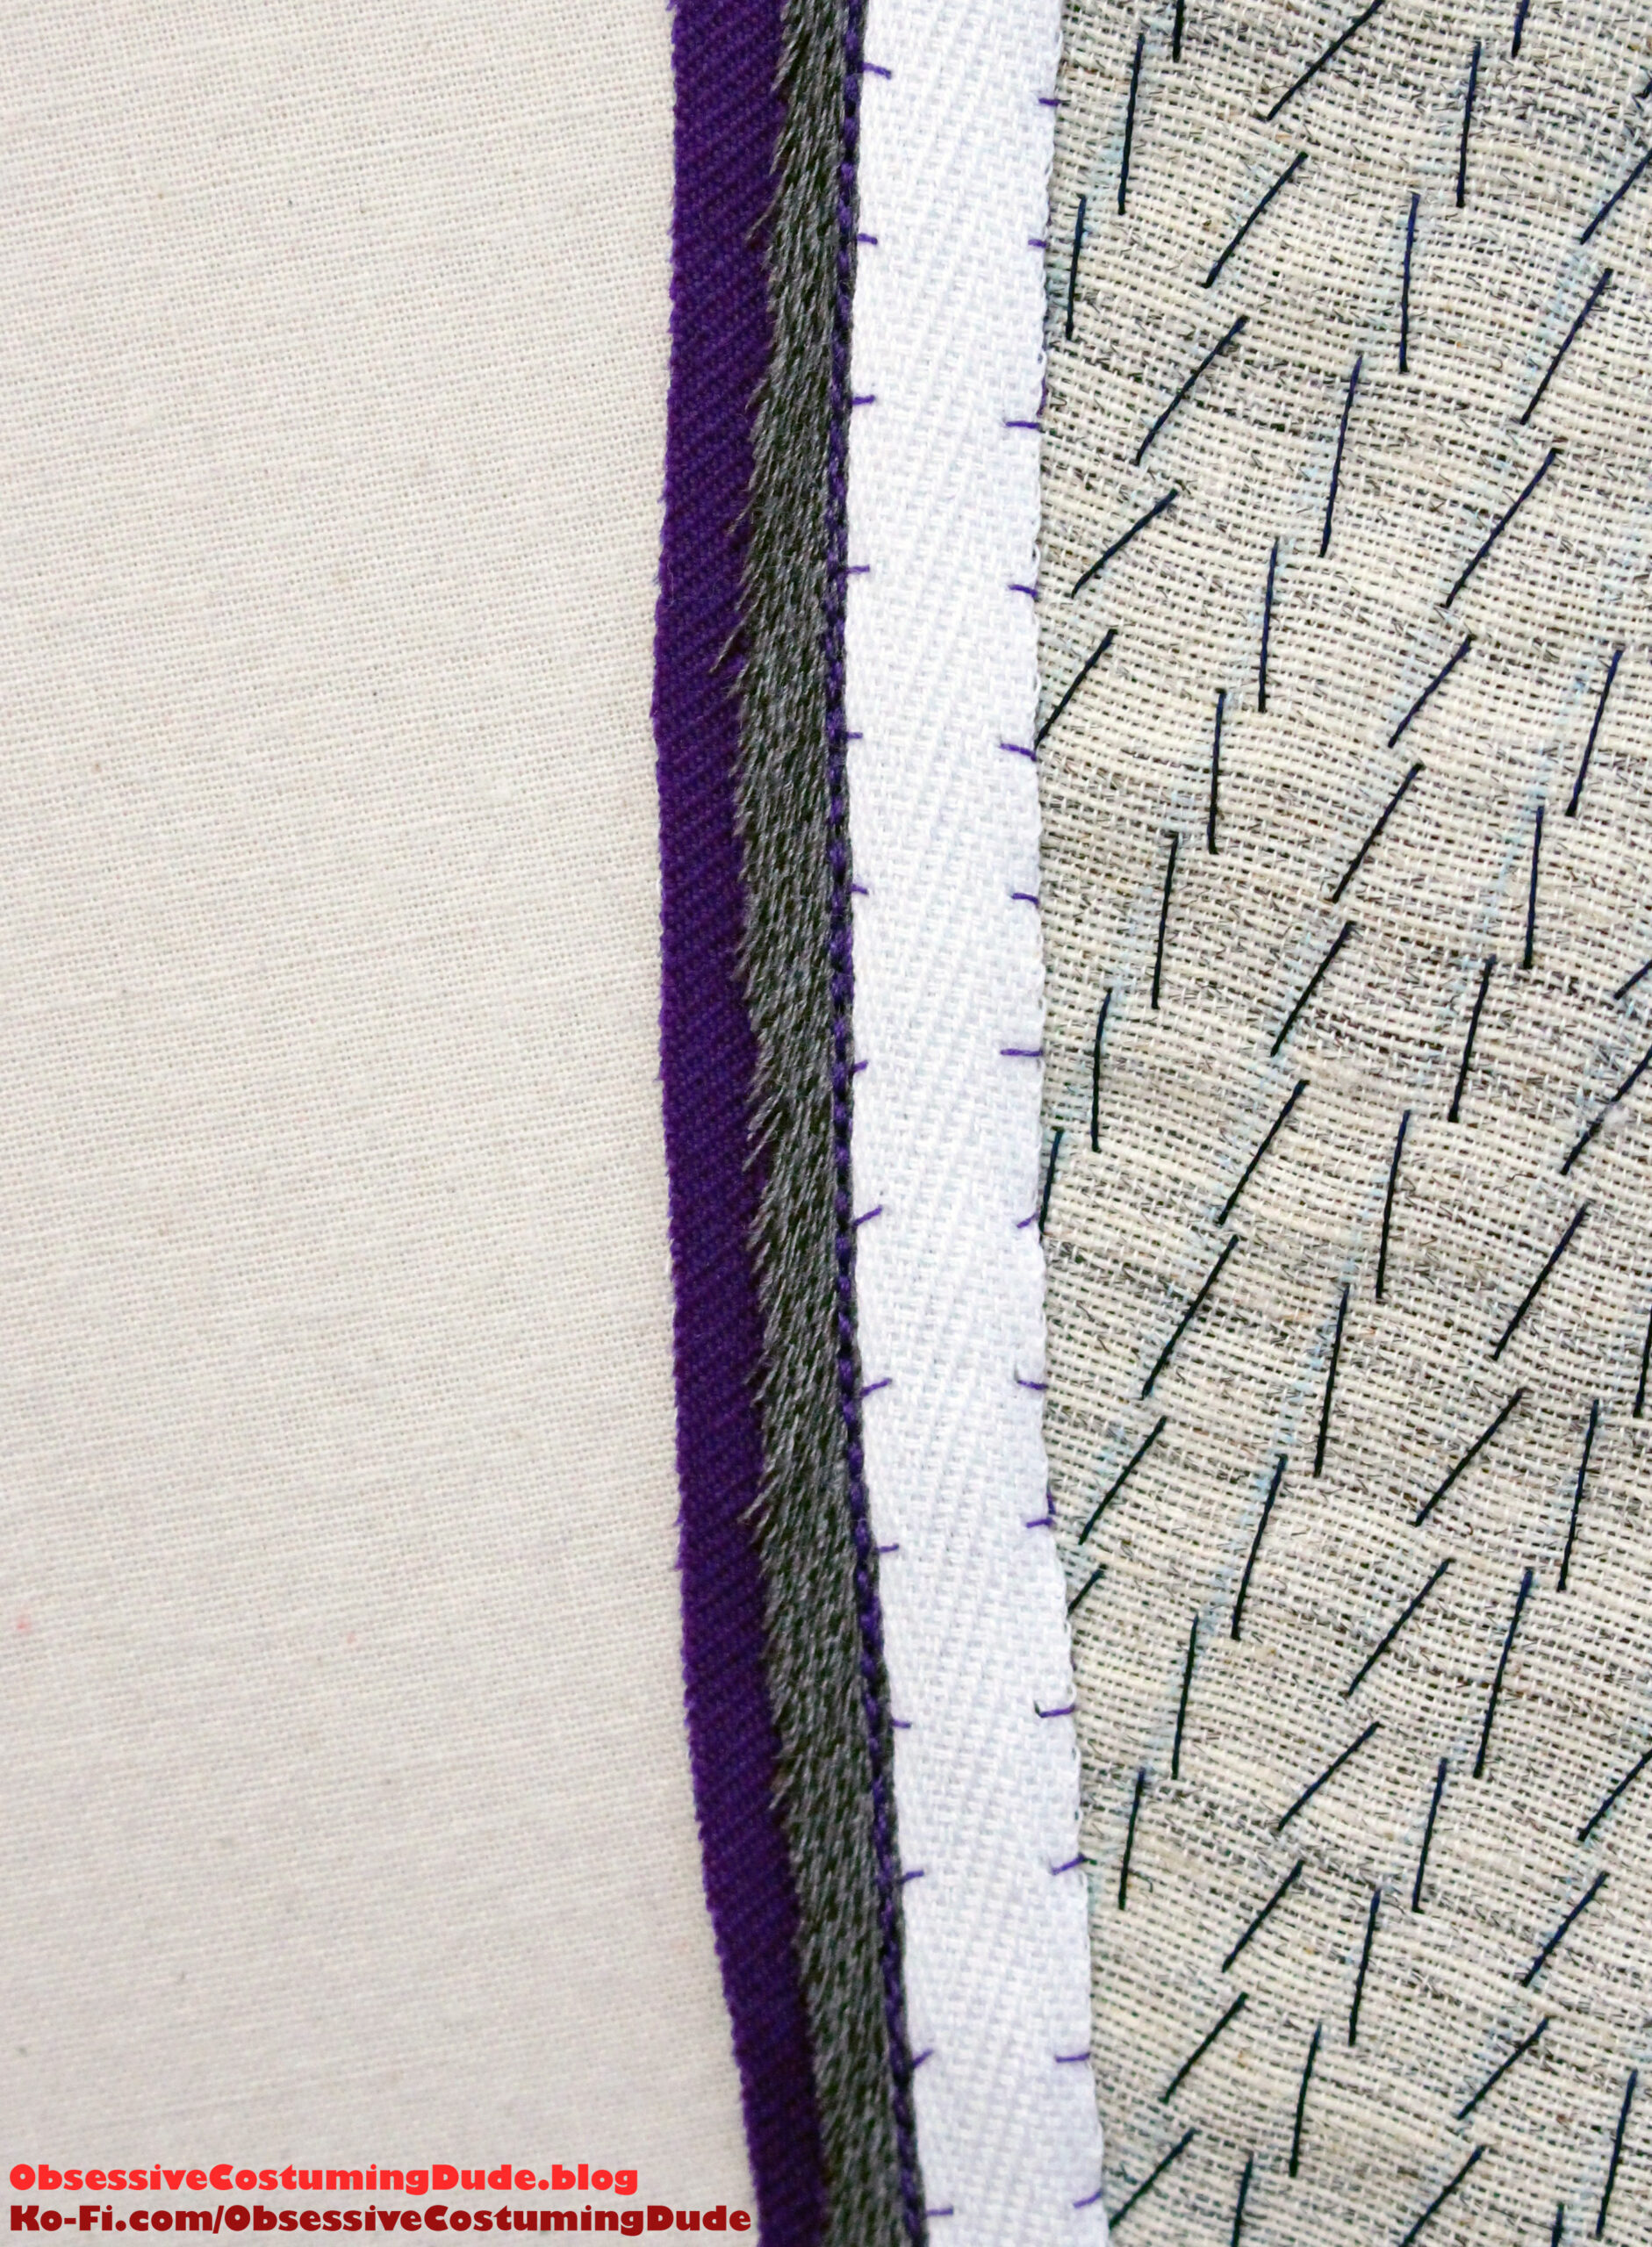
Cut another length of pre-shrunk ⅜” cotton twill stay tape, long enough to extend from the collar notch, down the front, and across the lower seam line to the “skirt” dot.
(I like to cut mine several inches longer than I think I’ll need, because any excess can easily be trimmed away later if you get to the end and have any left over.)
Pin the tape into place so it just barely covers the edge of the canvas, about 1/16” outside of the seam line.
And at the bottom of the roll line, place about ¼” of extra ease in the tape, to help the lapel roll over without the tape pulling it closed.
Fell-stitch the tape to the coat. (Along the outer edge, only stitch through the fusible interfacing, and along the inner edge, catch only the canvas.)
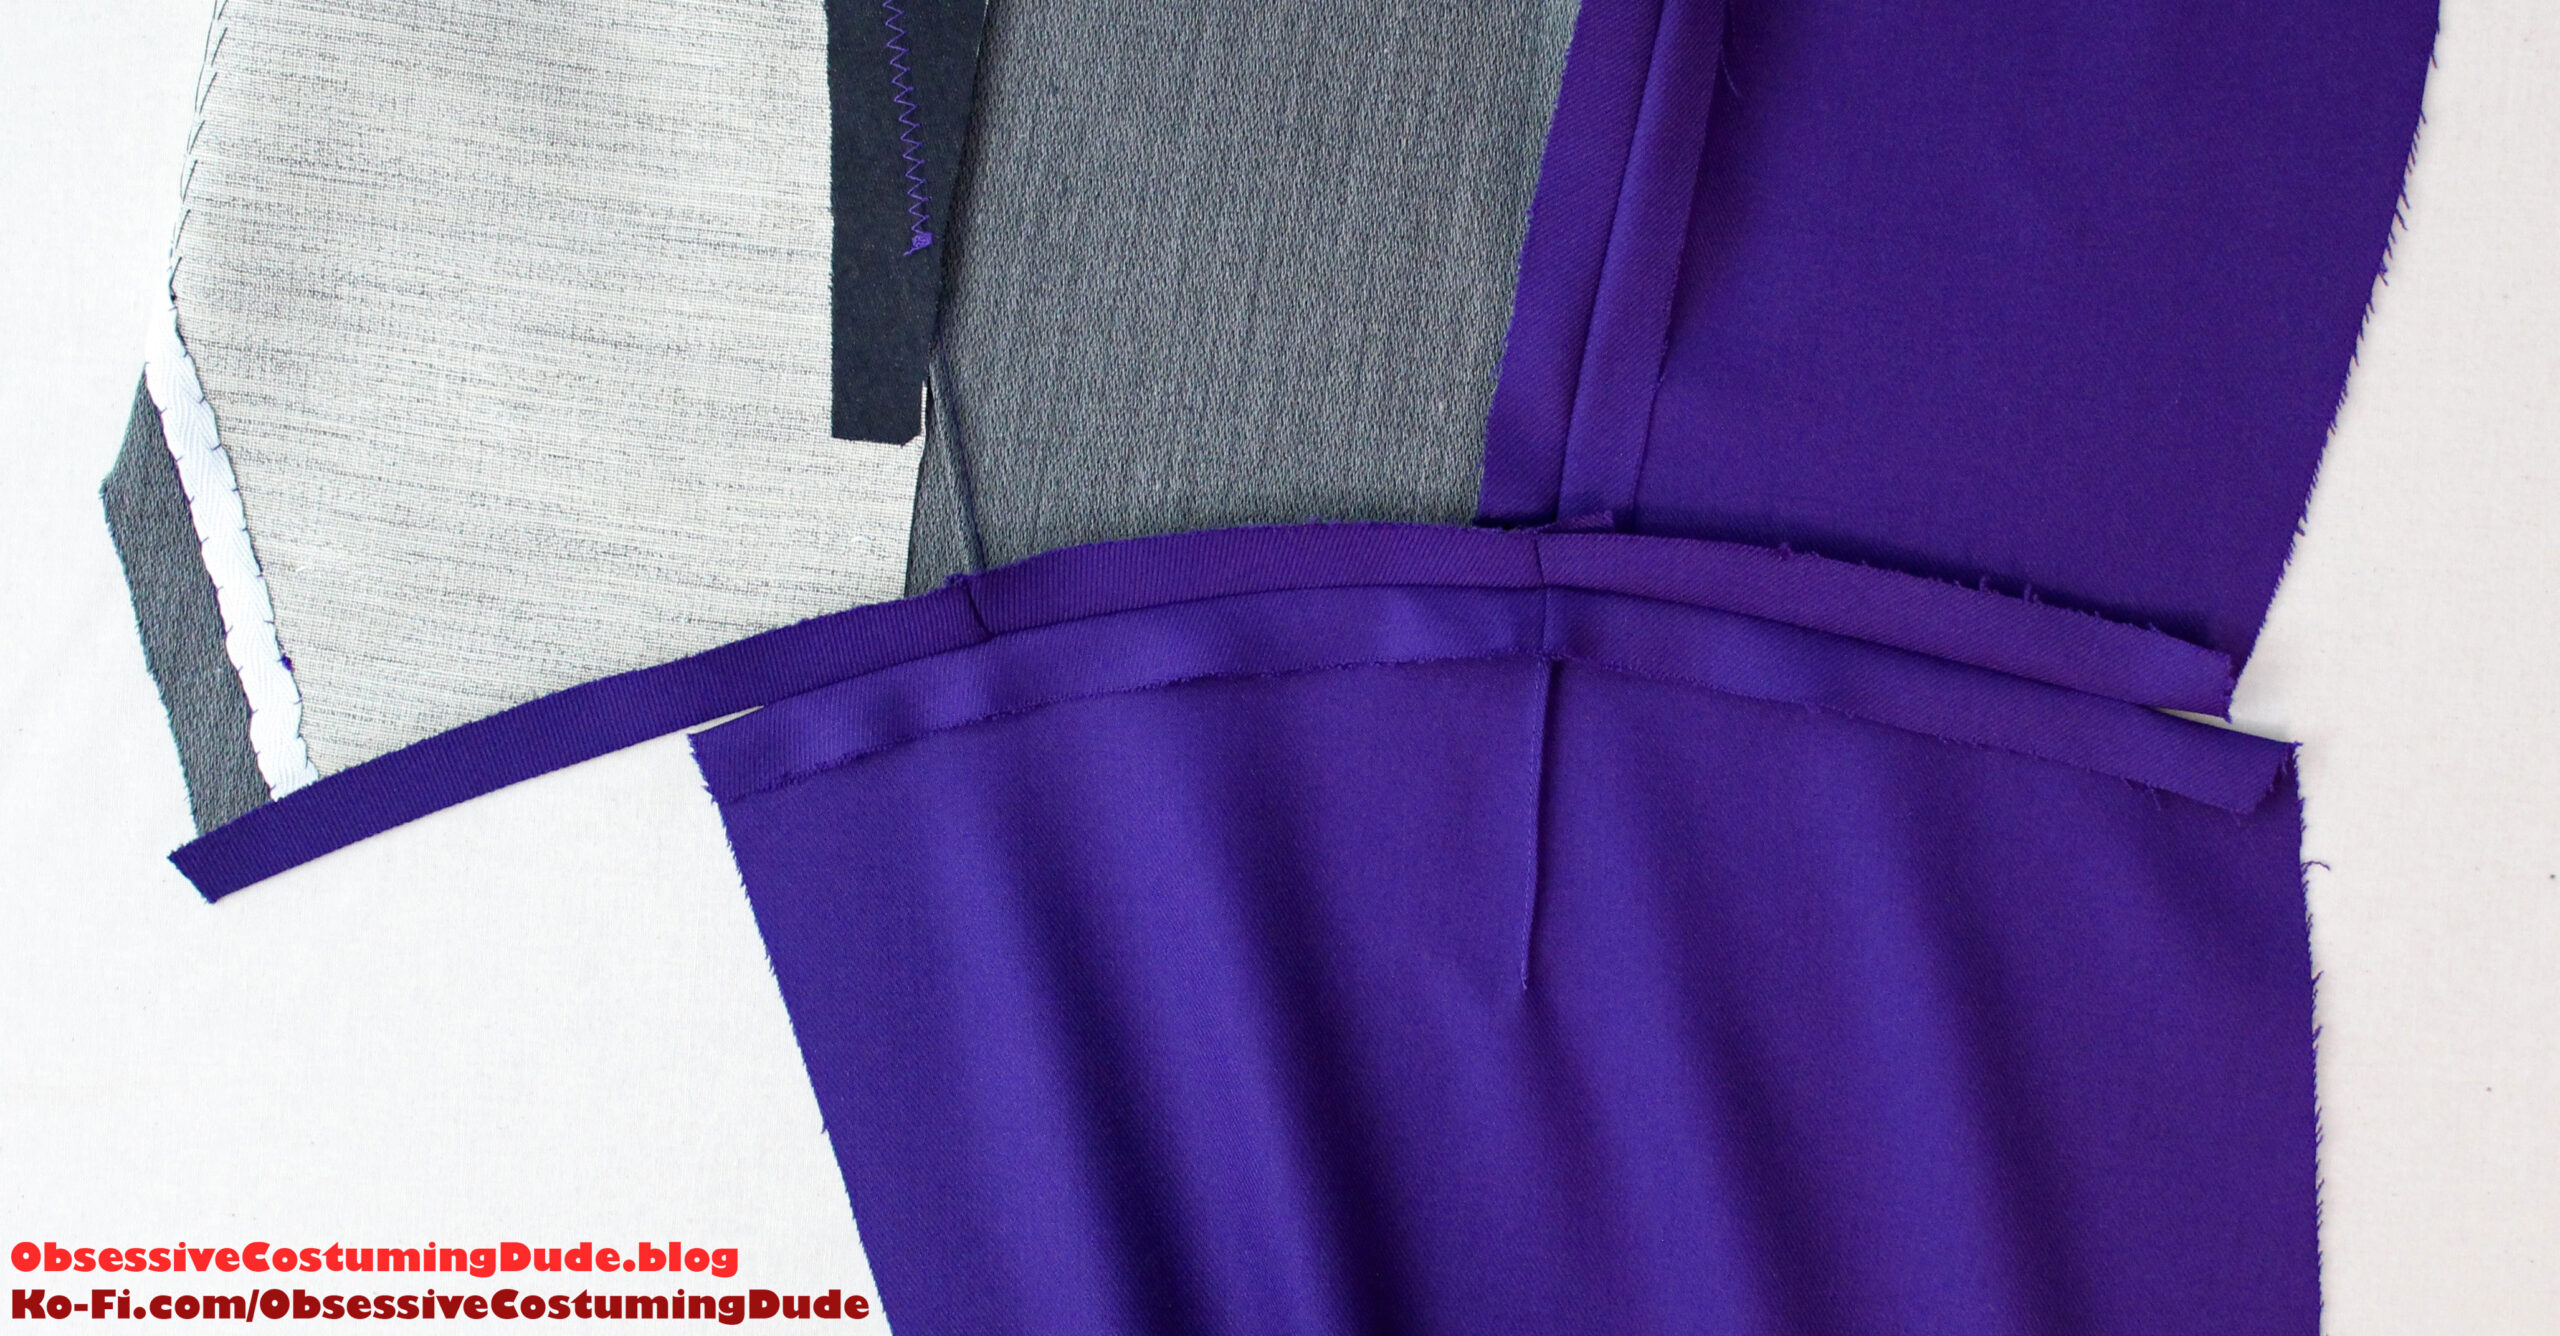
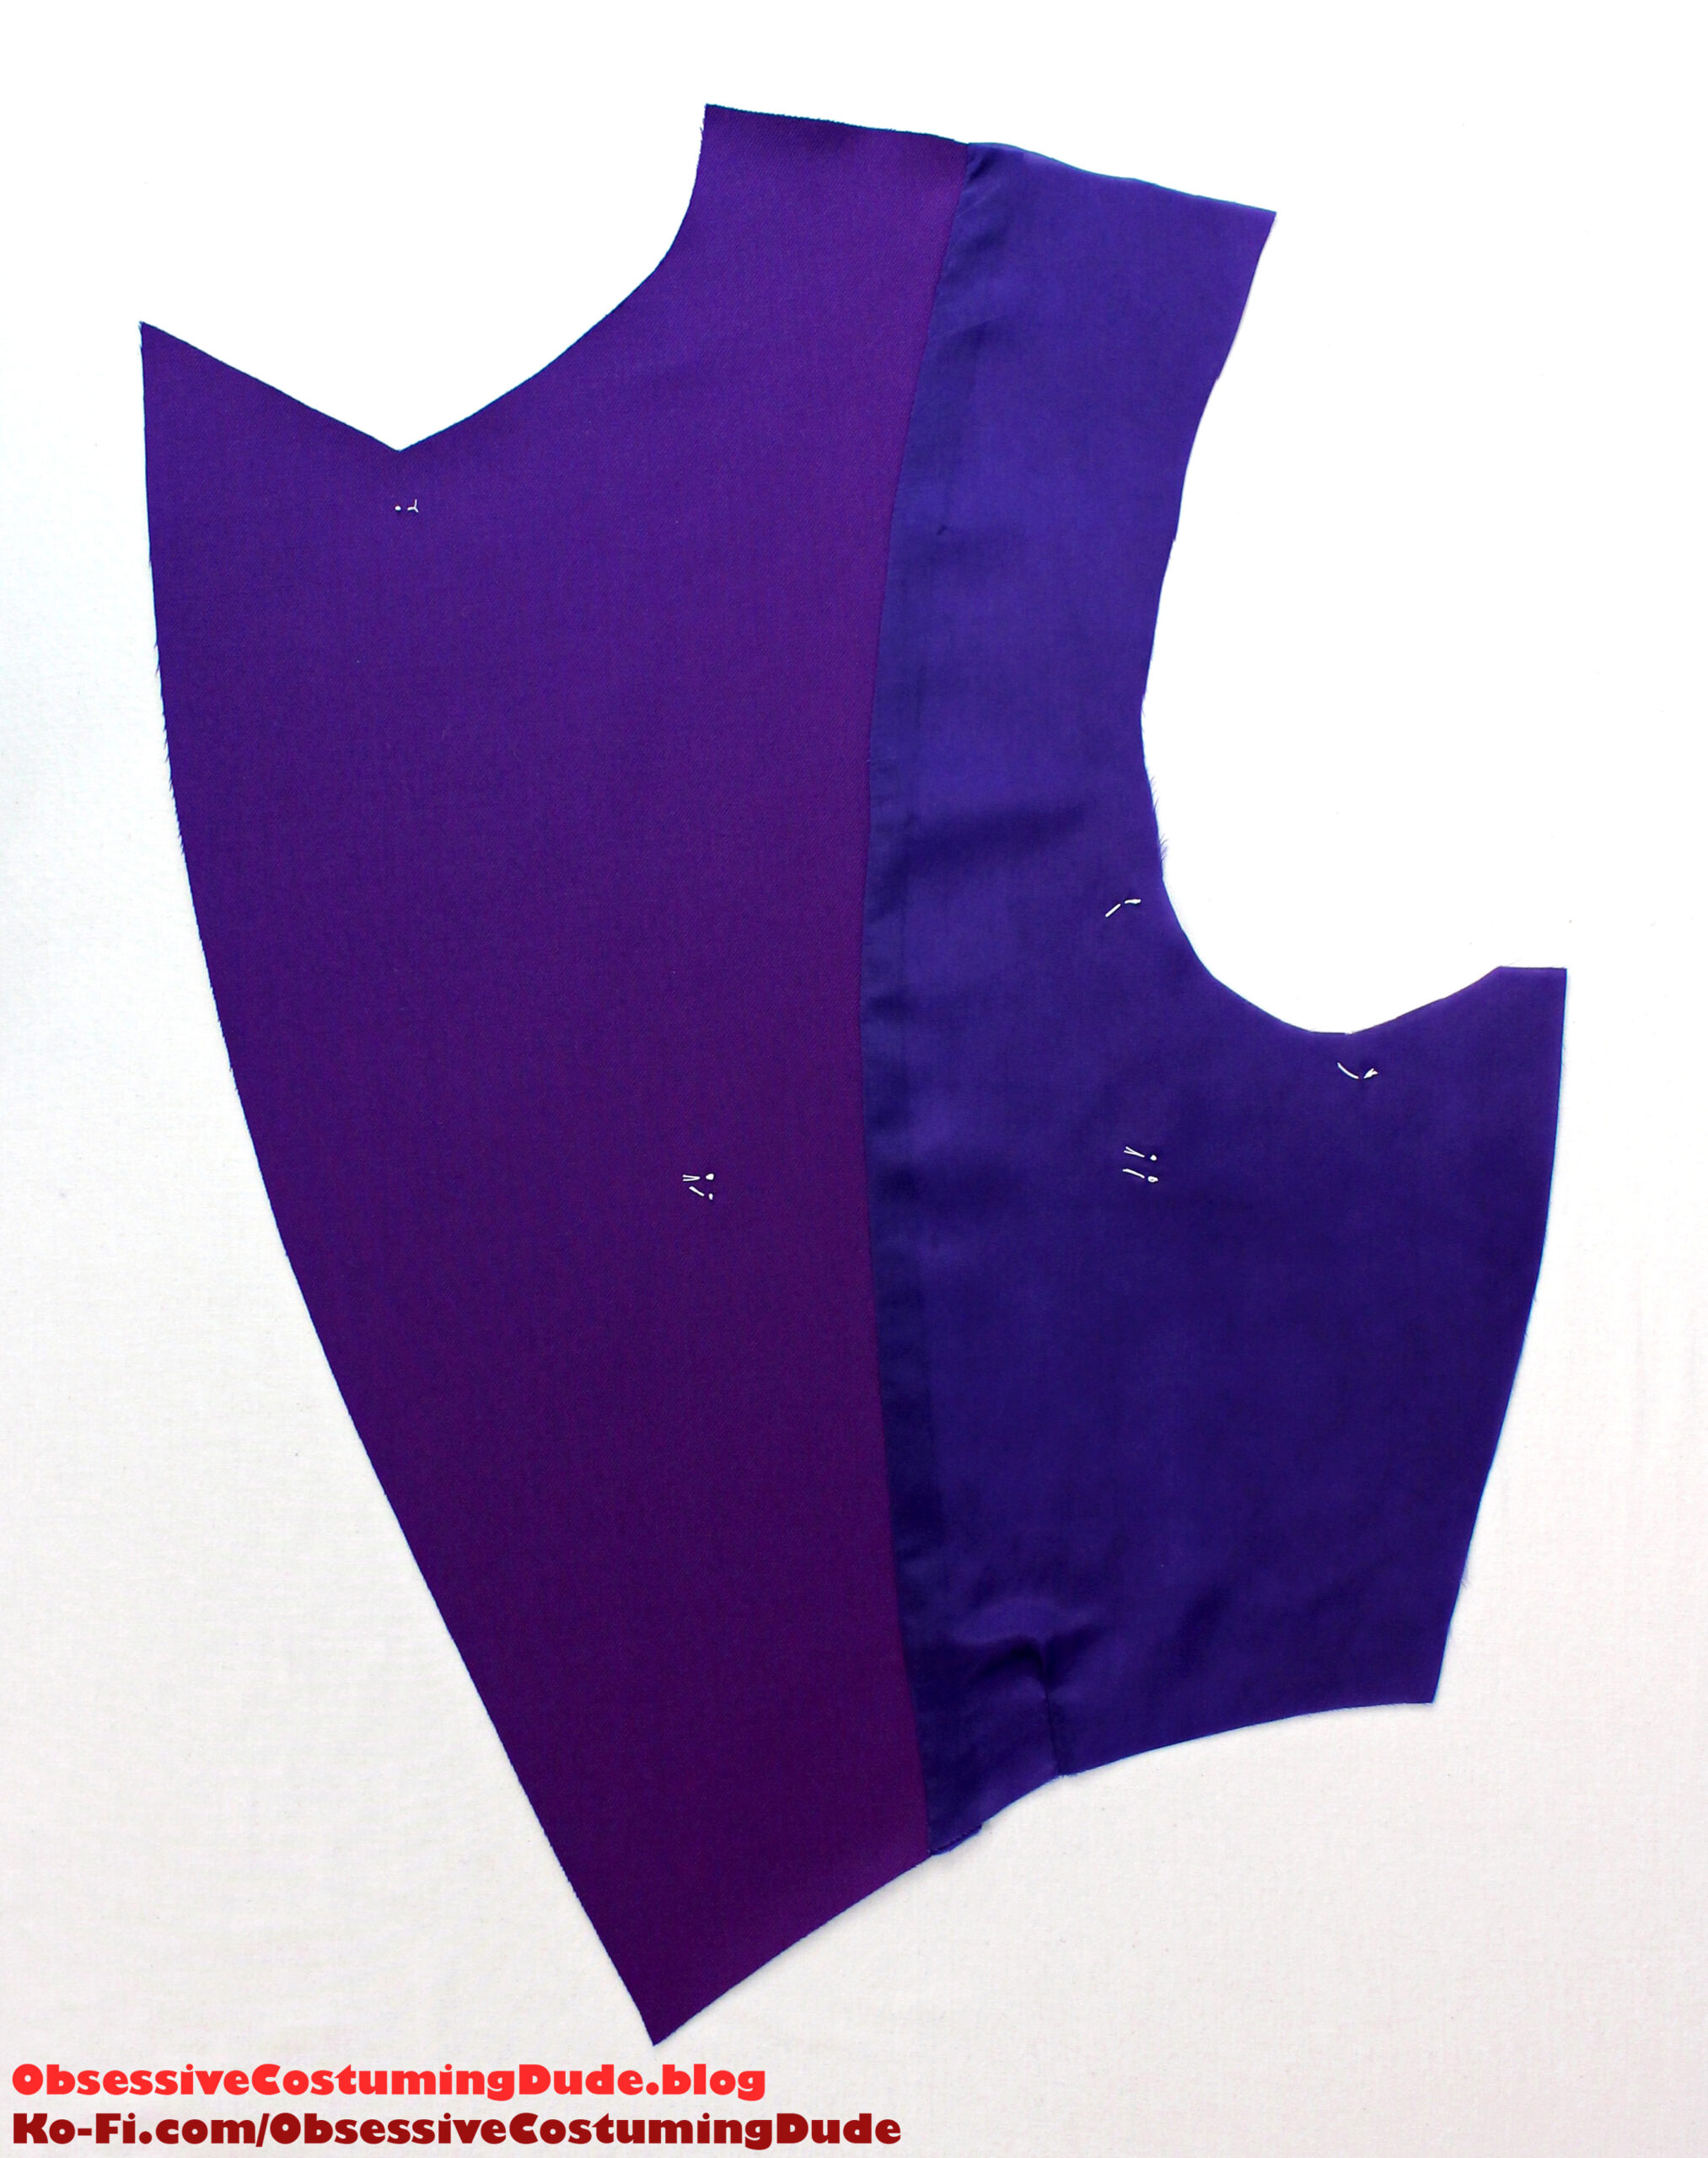
Sew the front assembly to the side back (piece E), right sides together.
Press the seam allowances open.
Sew the dart closed on the skirt (piece K).
Press the dart toward the back.
Sew the skirt to the upper assembly, beginning and ending (and reinforcing) your stitching at the dots, and with the side seam aligned with the skirt dart.
(Note that this will leave the outermost ⅝” of the upper back and skirt front free, and the backmost 1 ⅛” of the skirt free as well. The back of the skirt will extend beyond the side back by ½”.)
Press the seam allowances open.
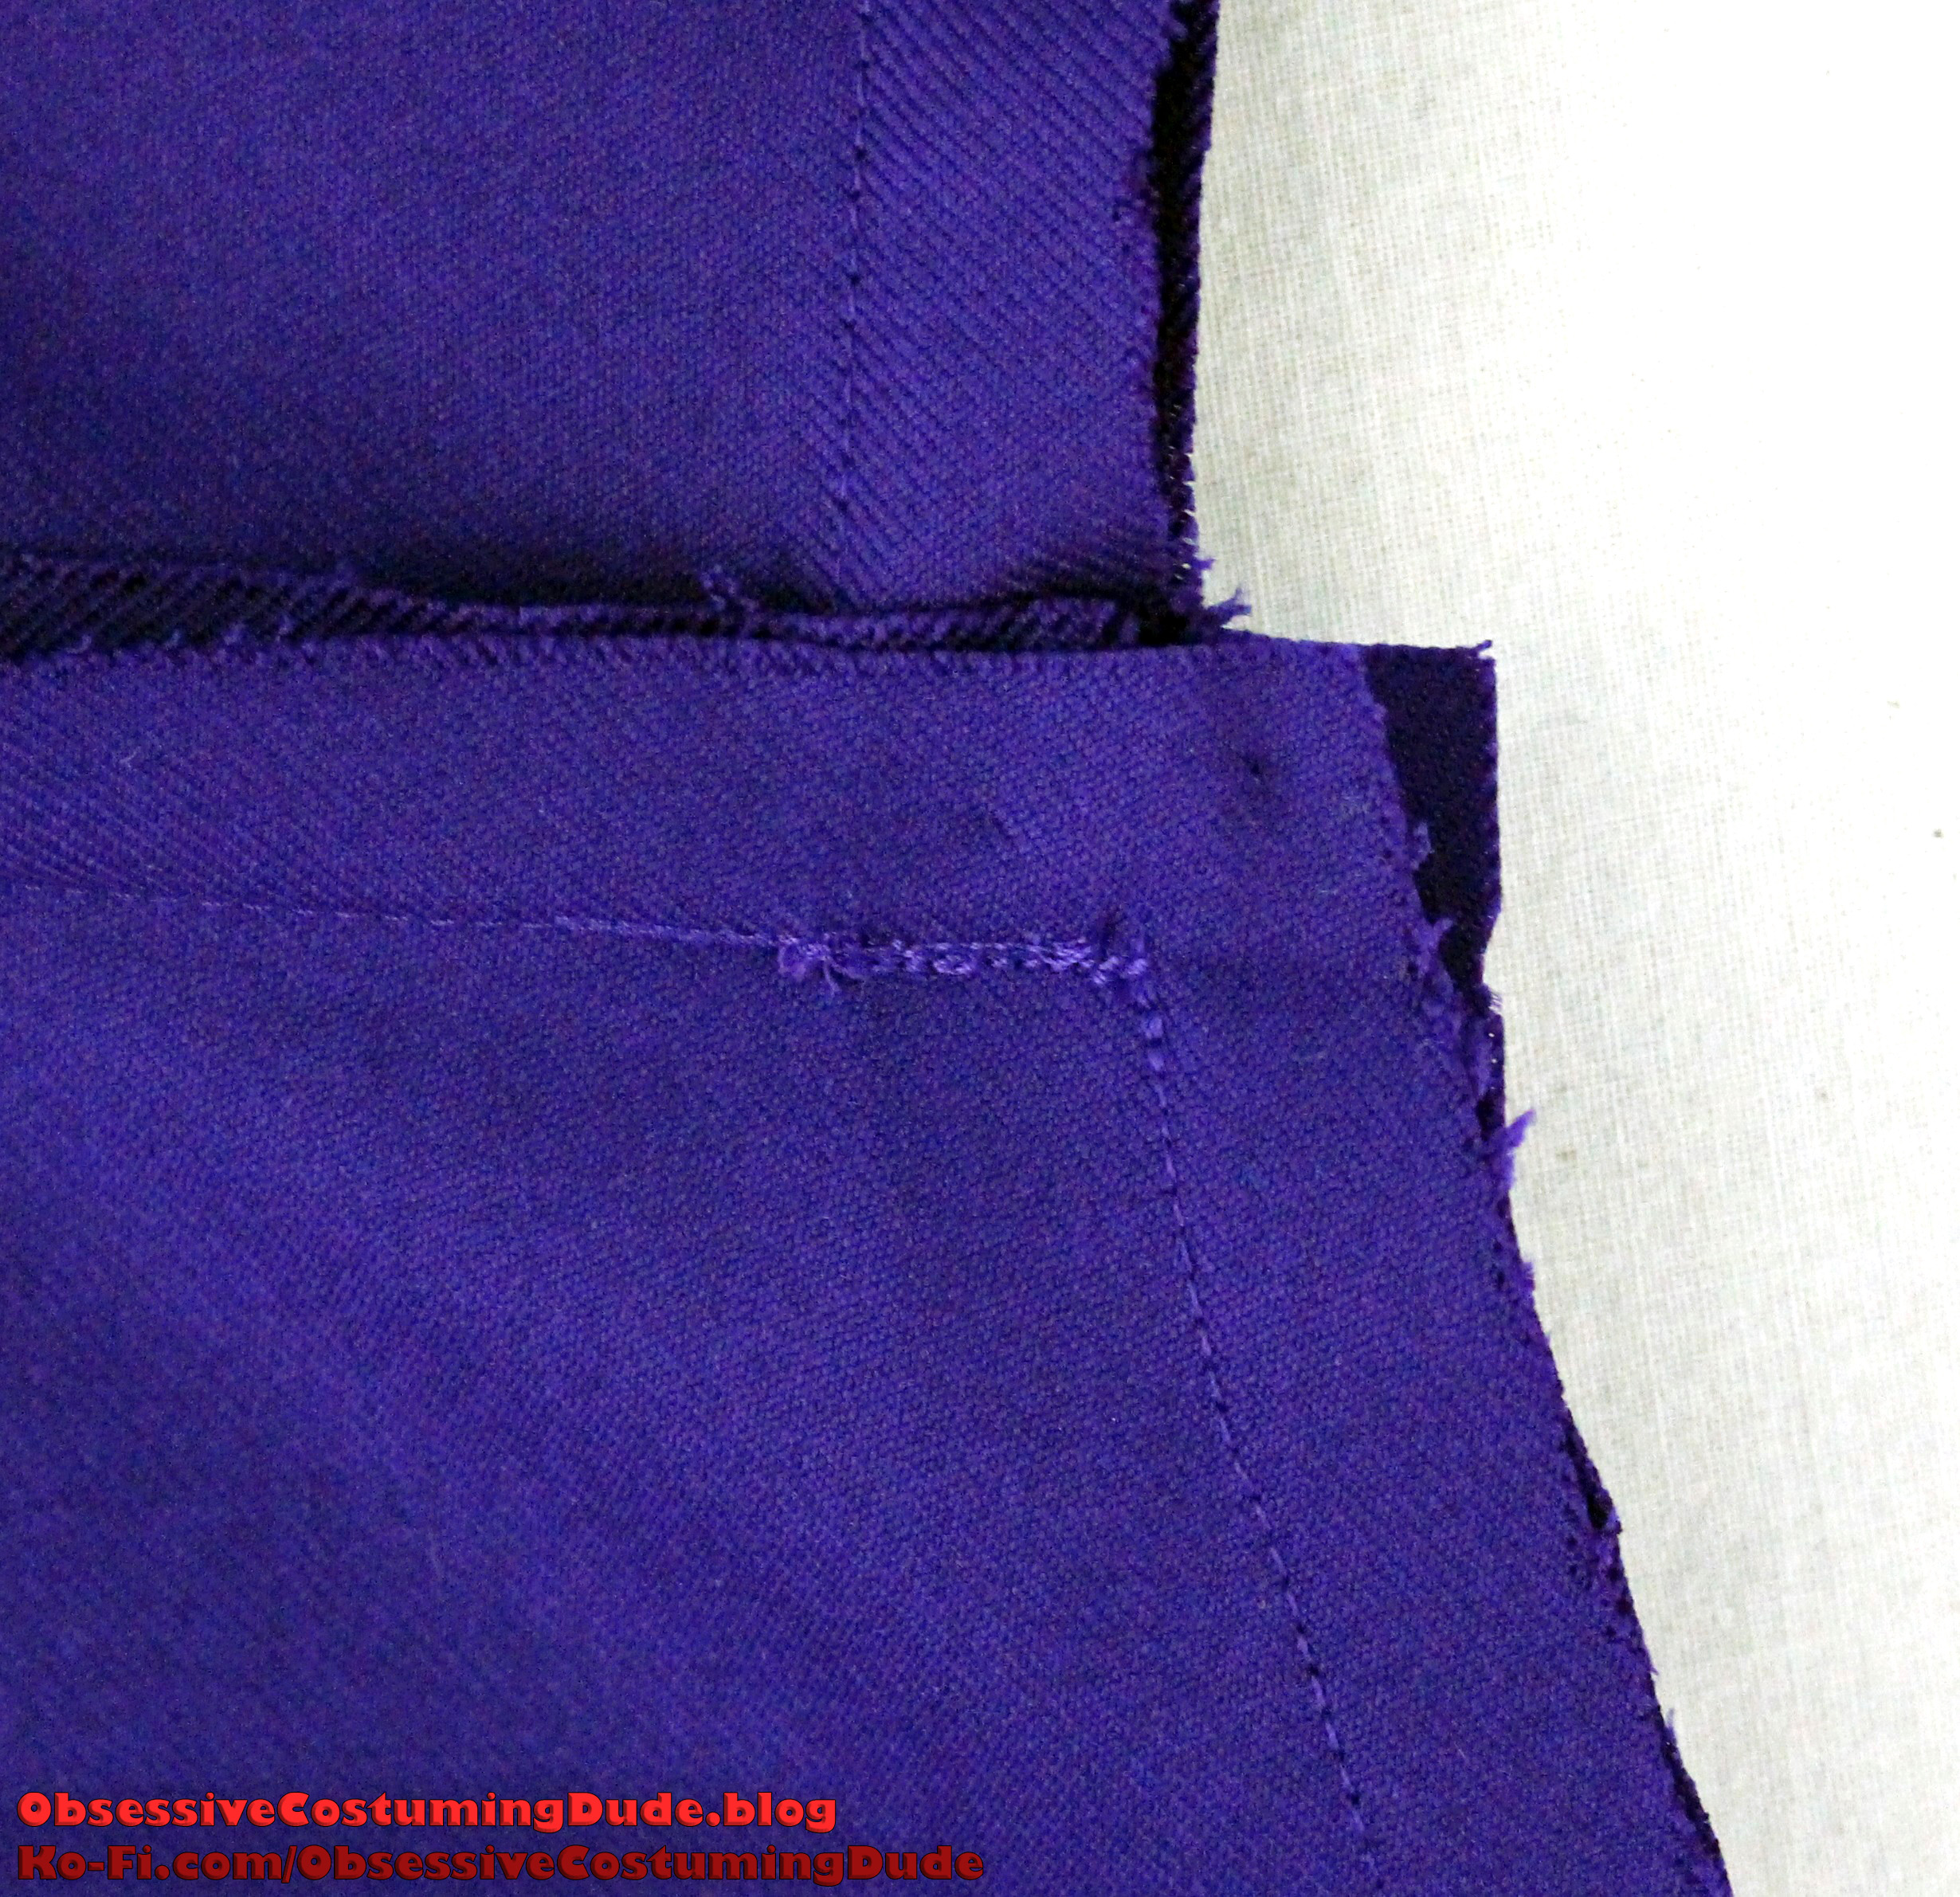
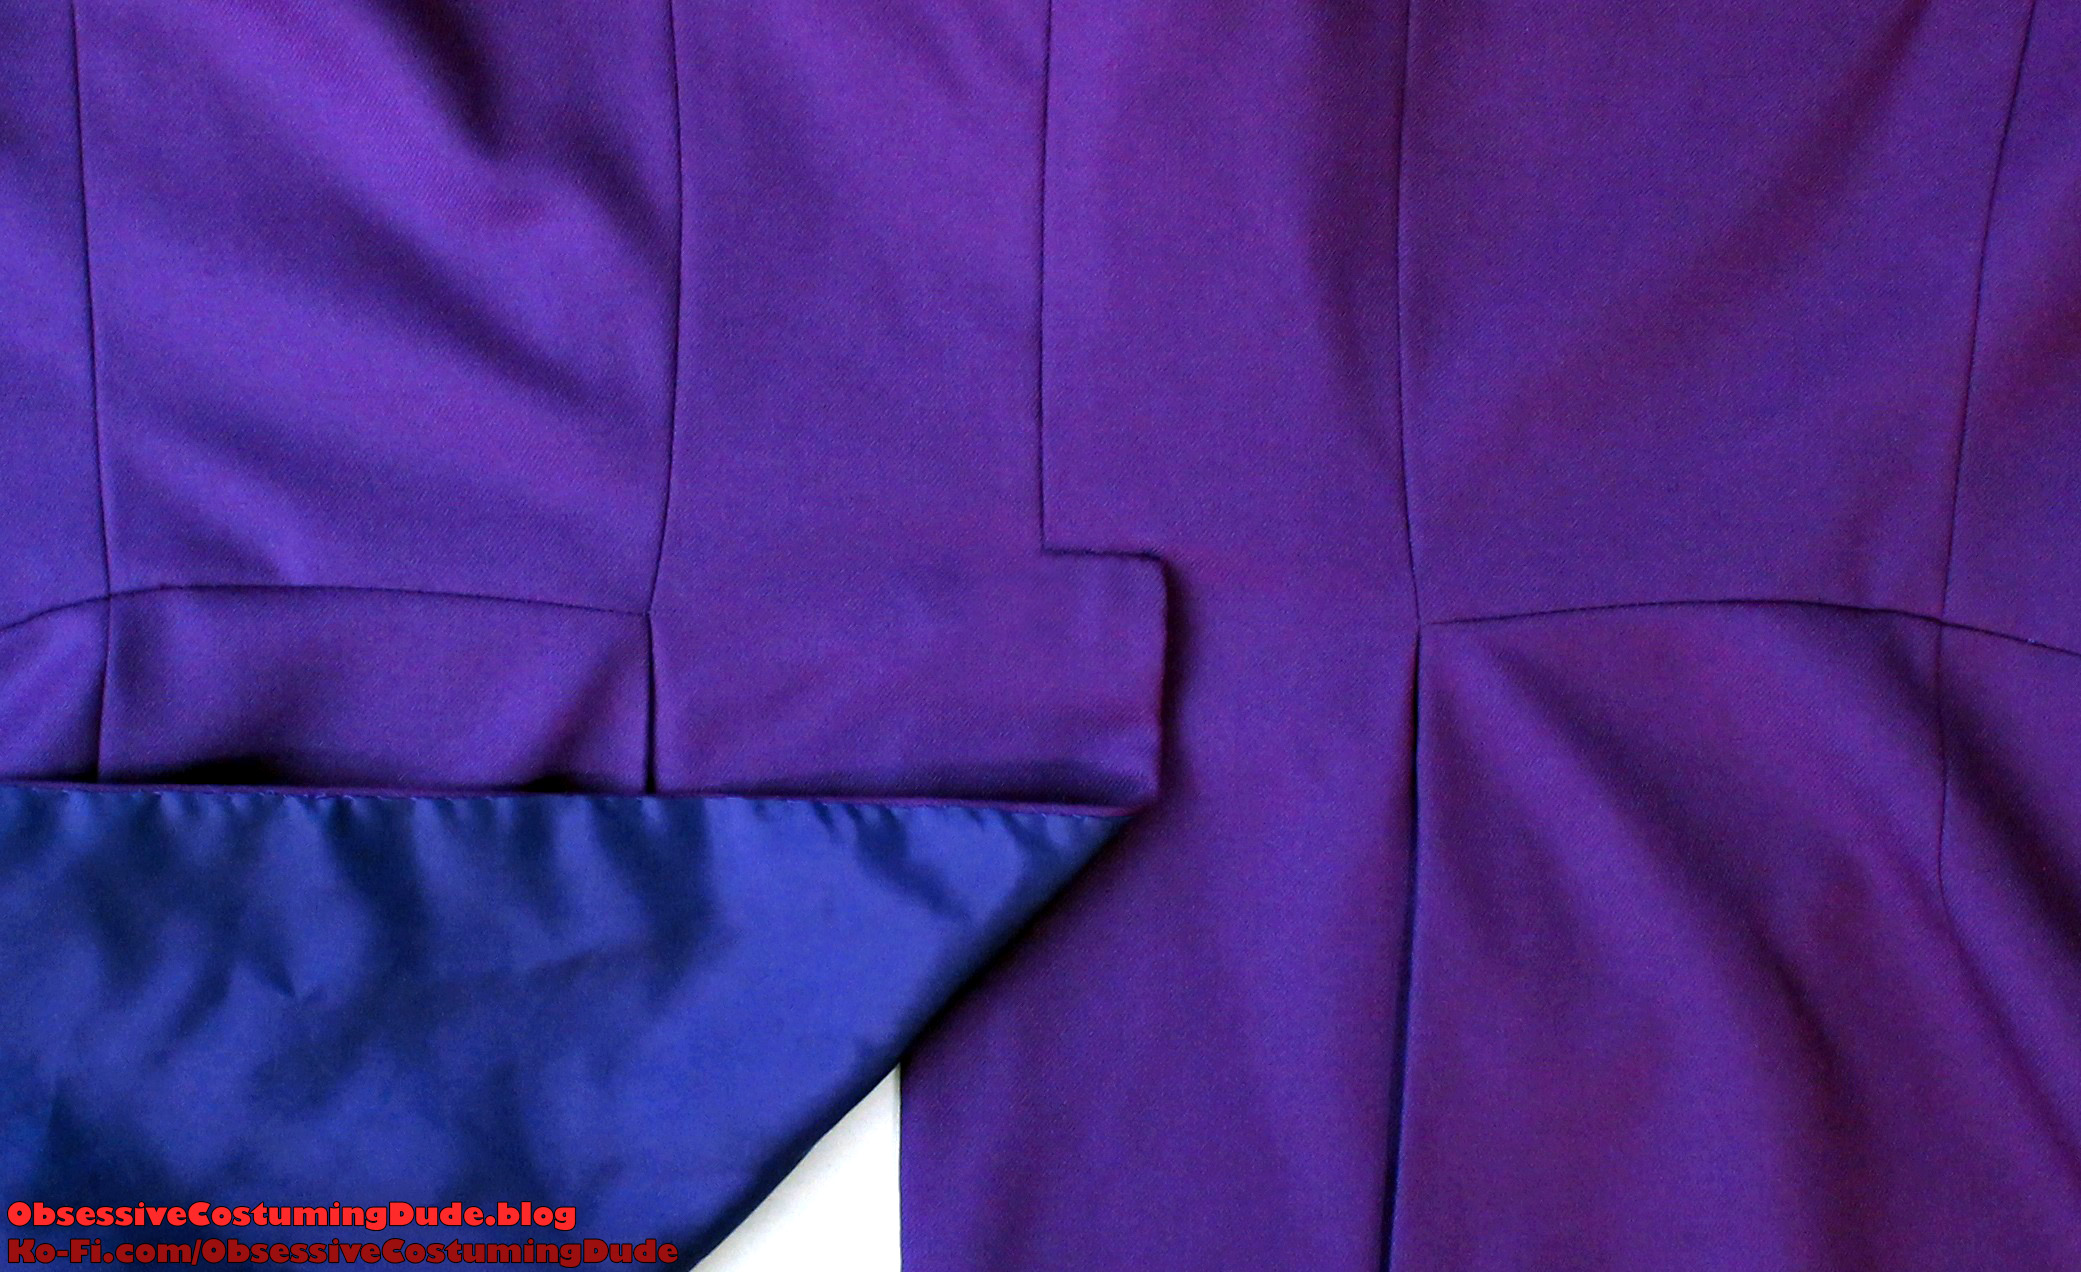
Here’s what it should look like from the right side; observe the properly-aligned side seam and skirt dart.
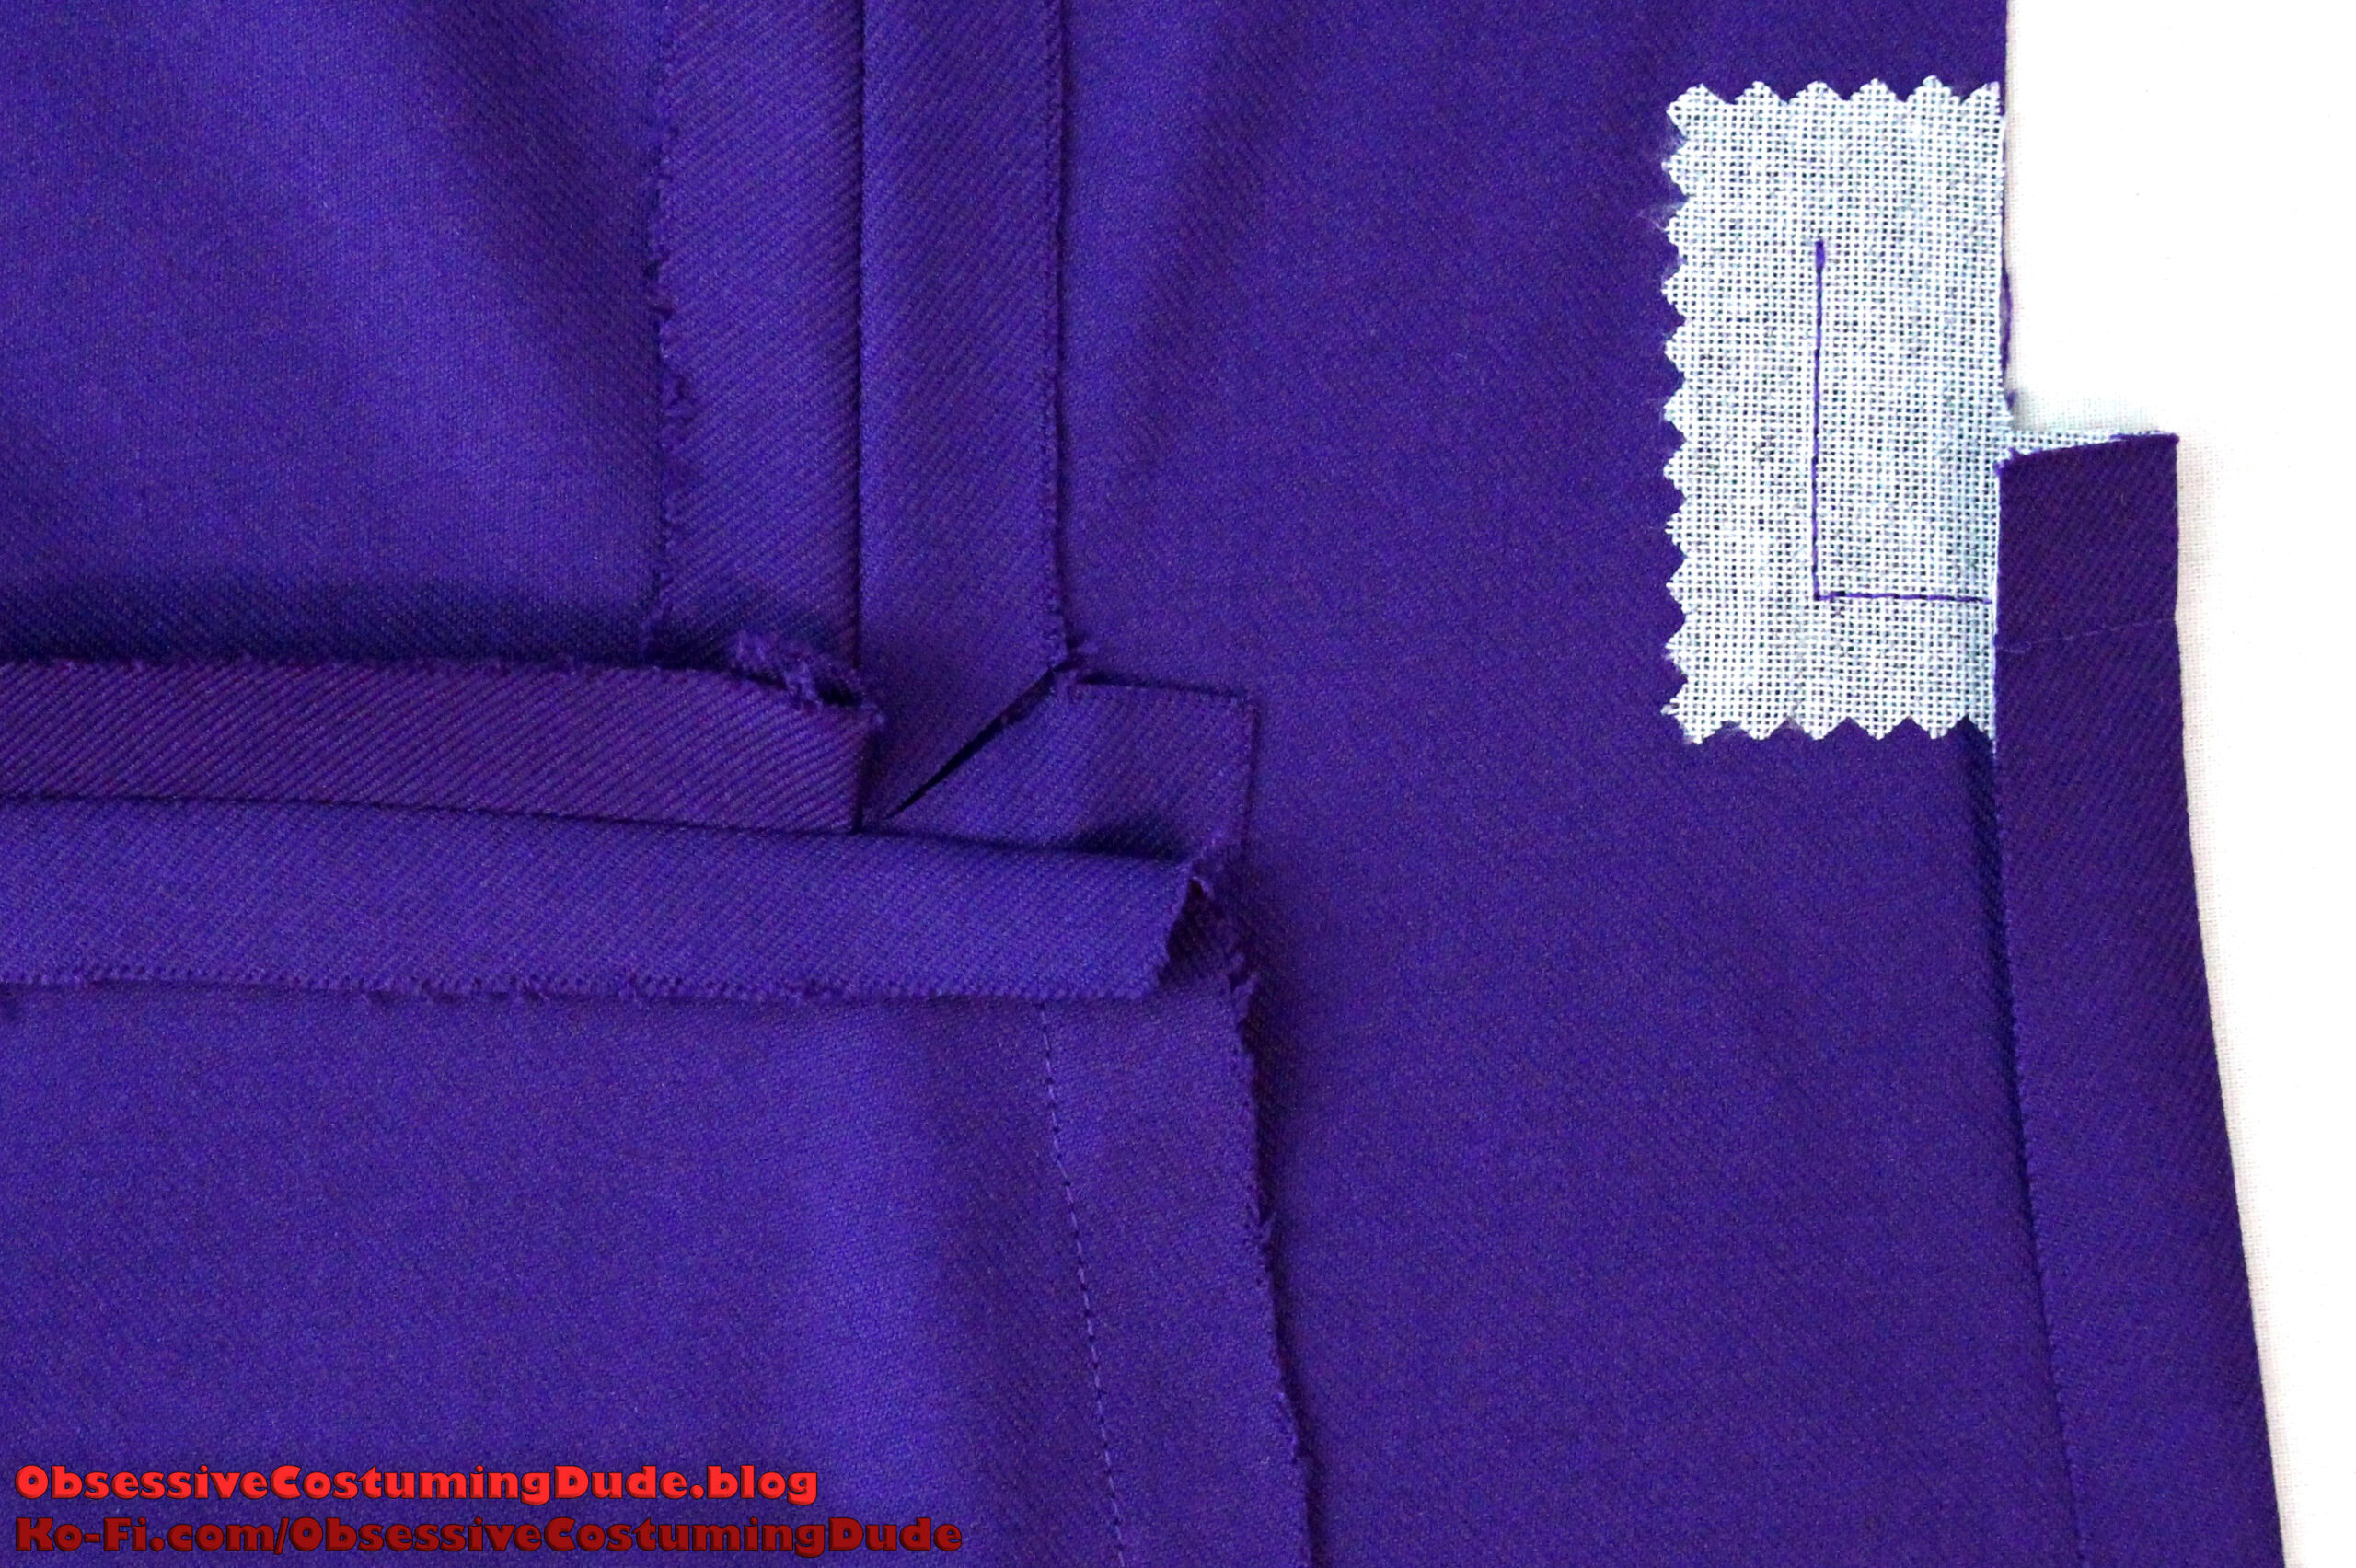
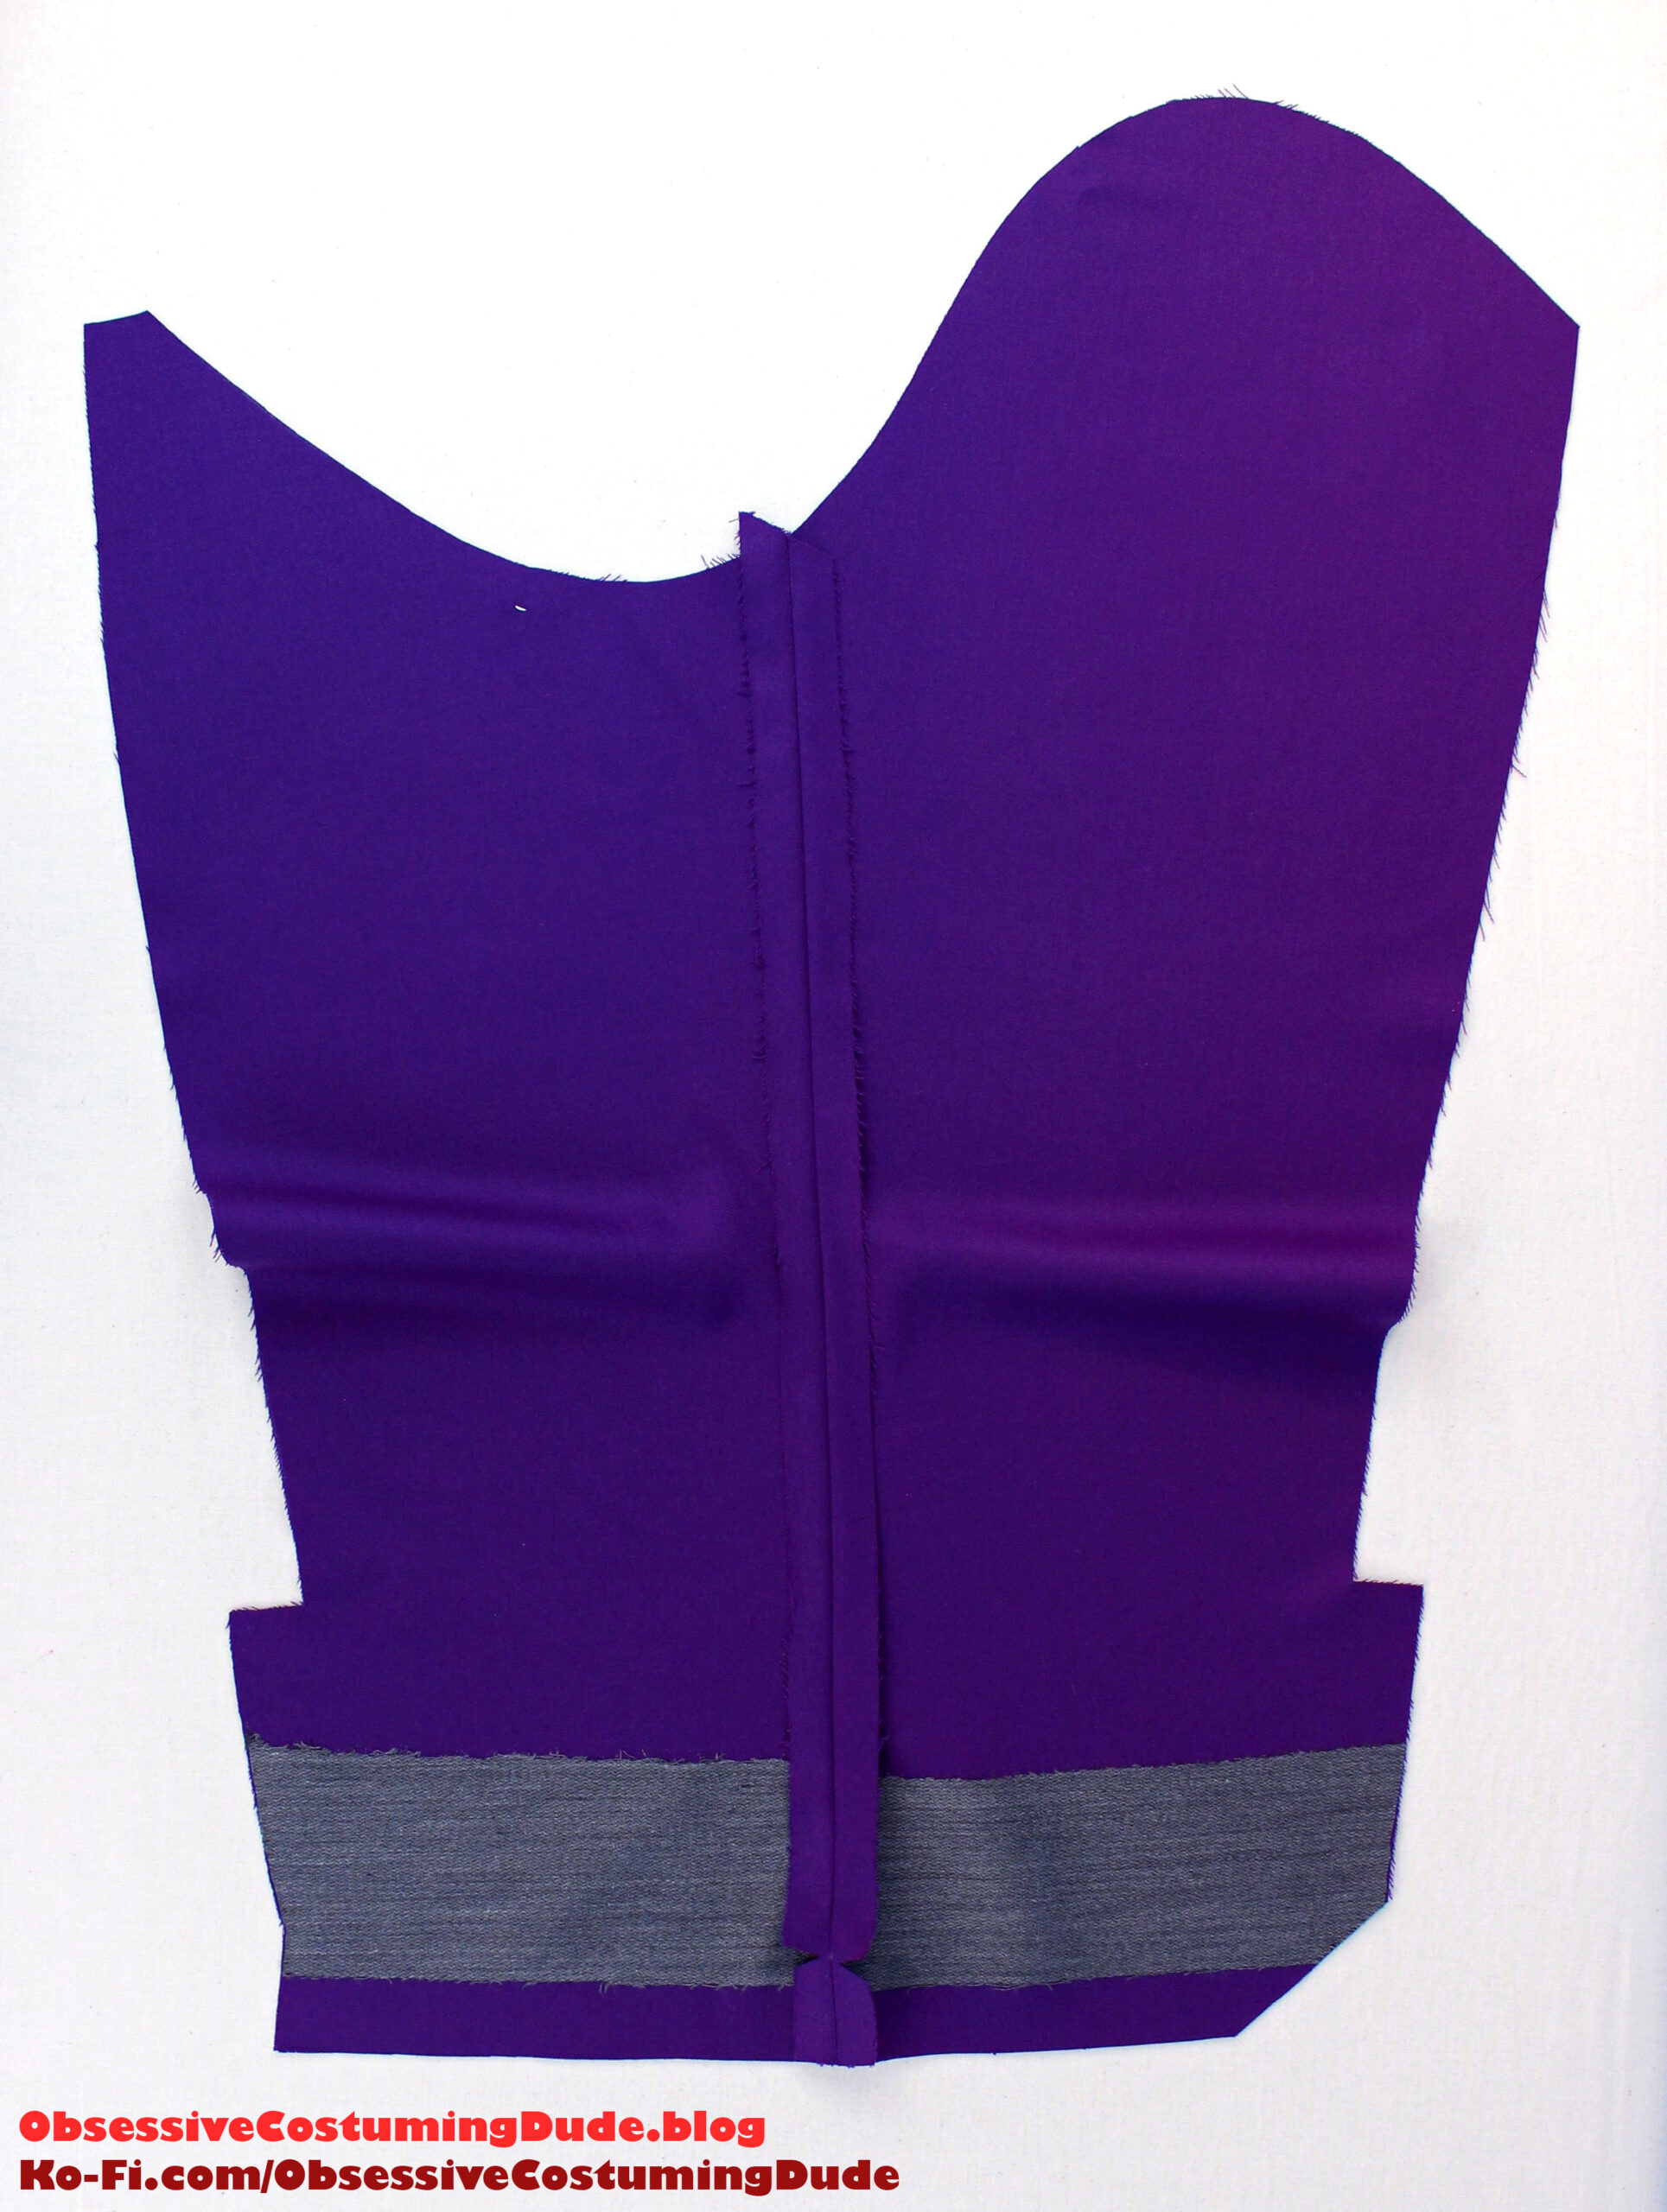
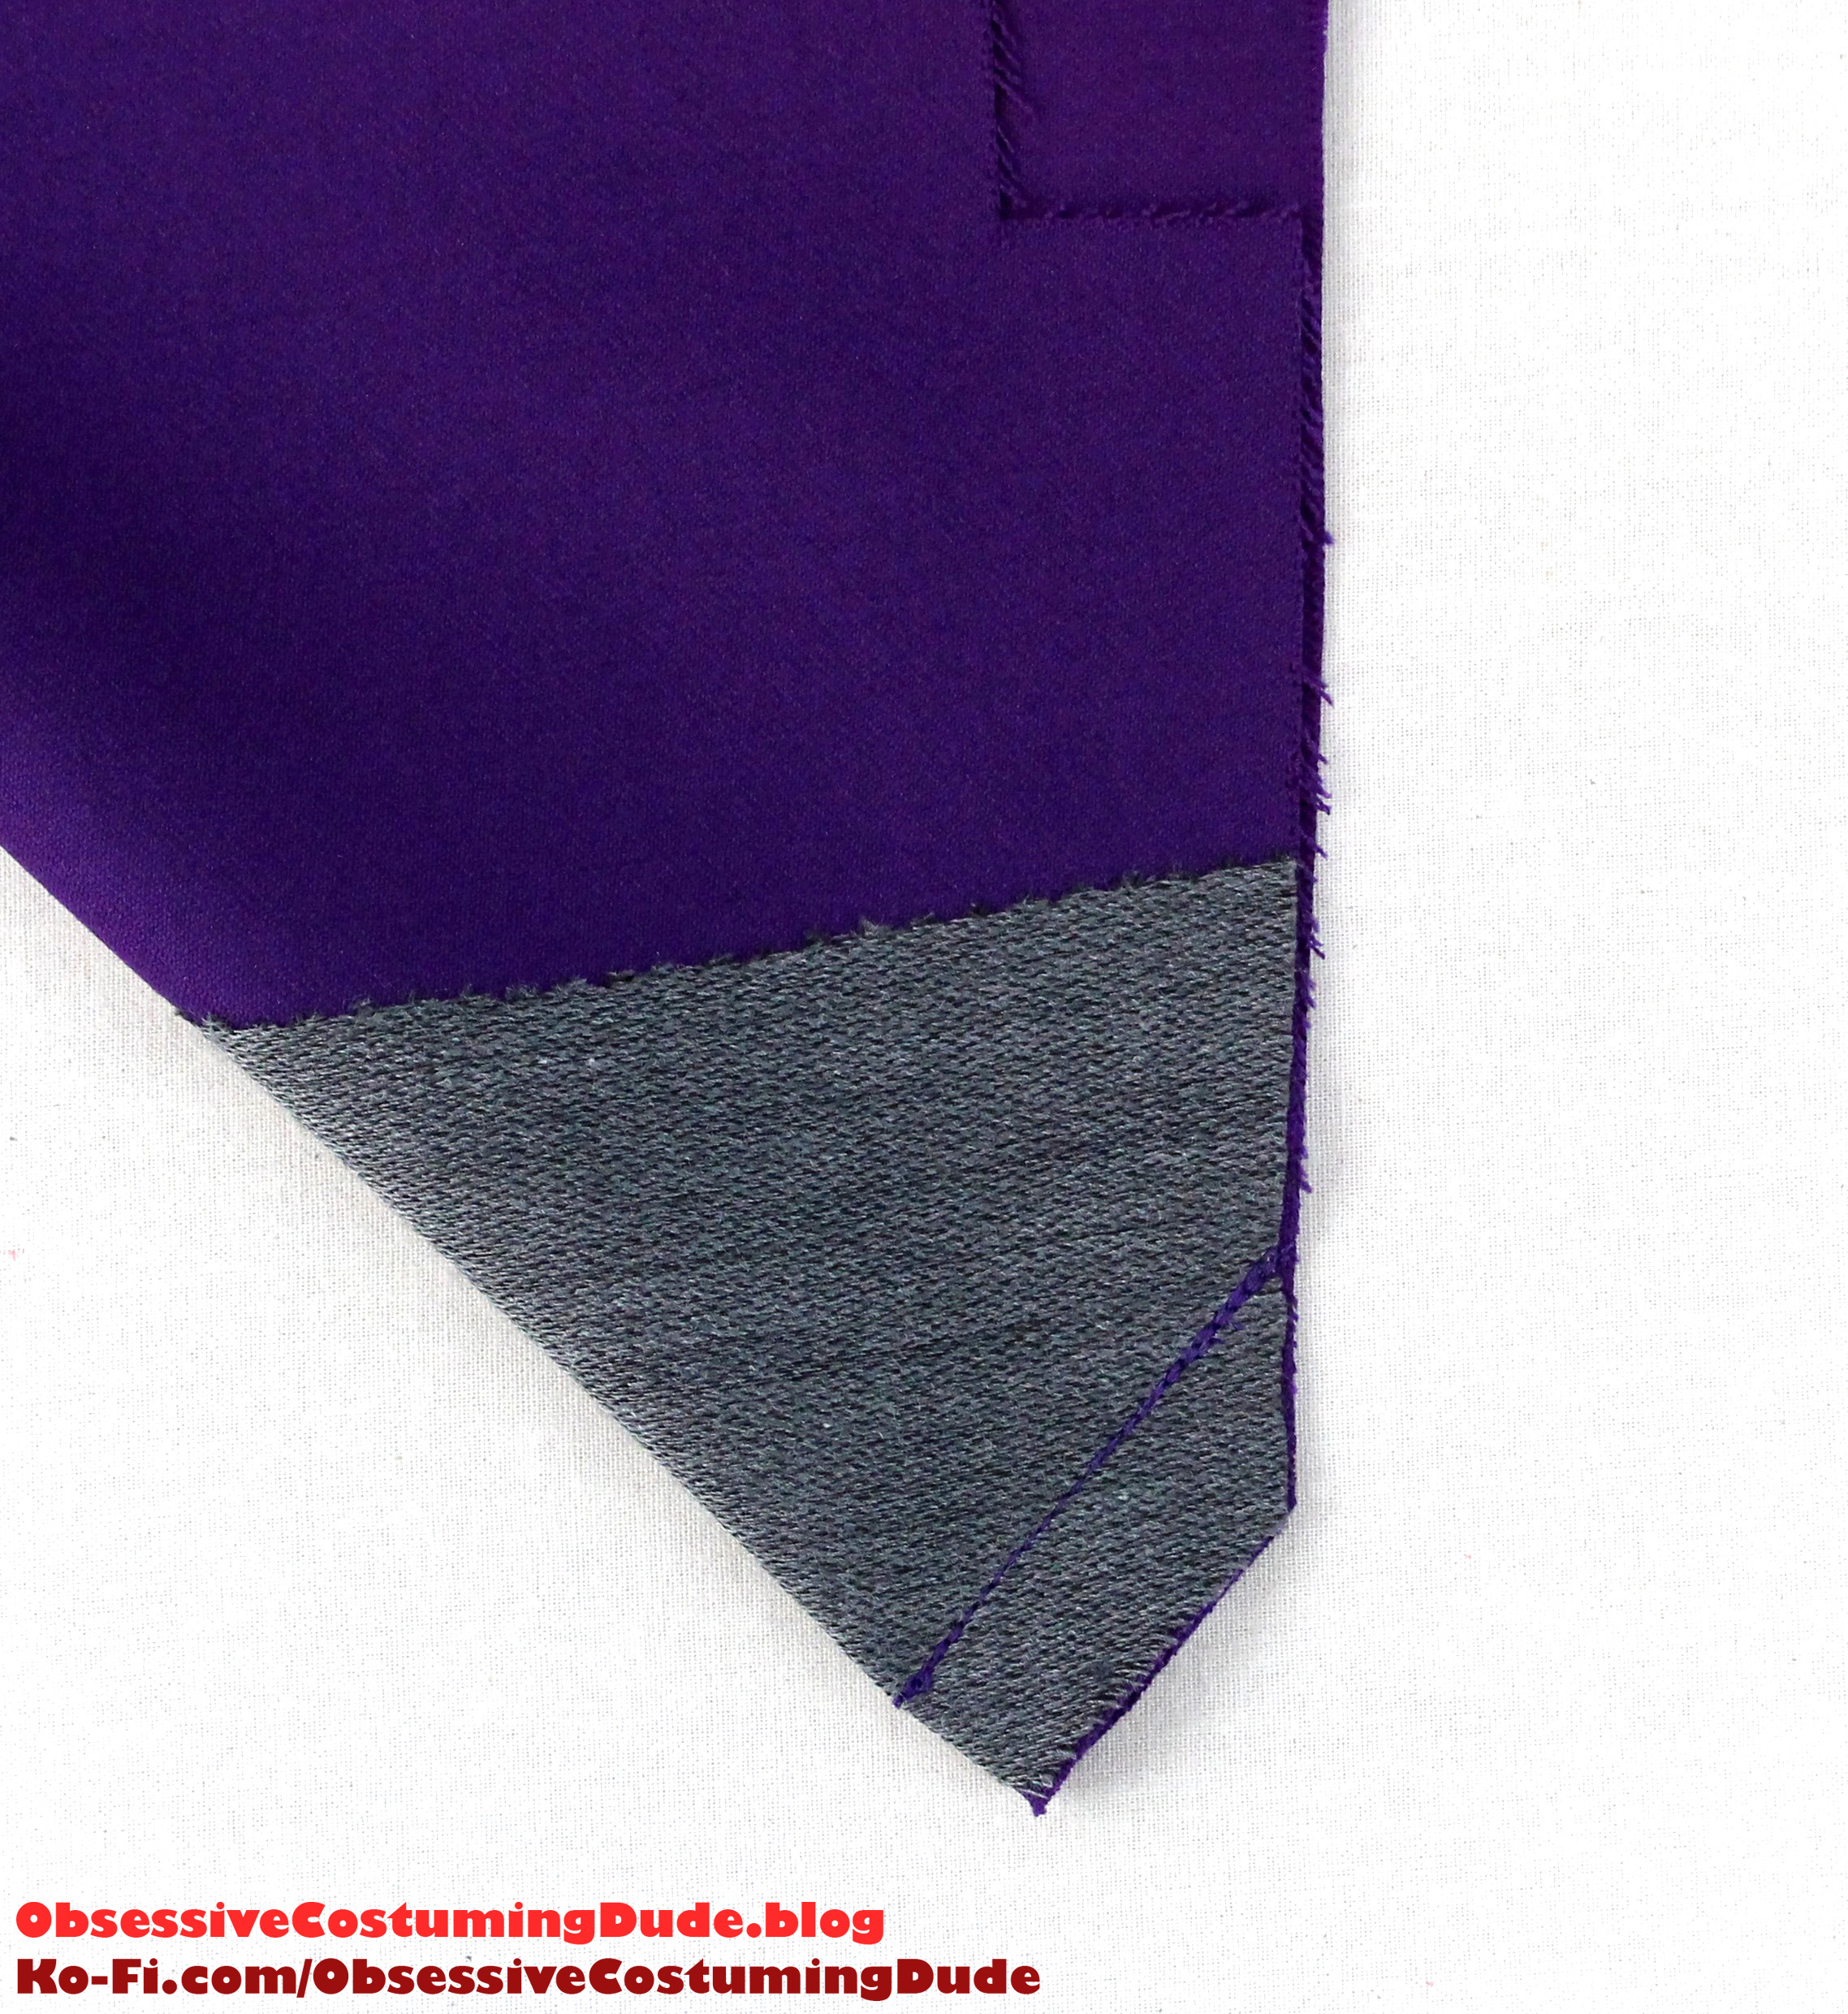
Stay-stitch the corner of the center back (piece F).
Press the center back vent allowance under.
Stay-stitch the corner of the center back (piece F).
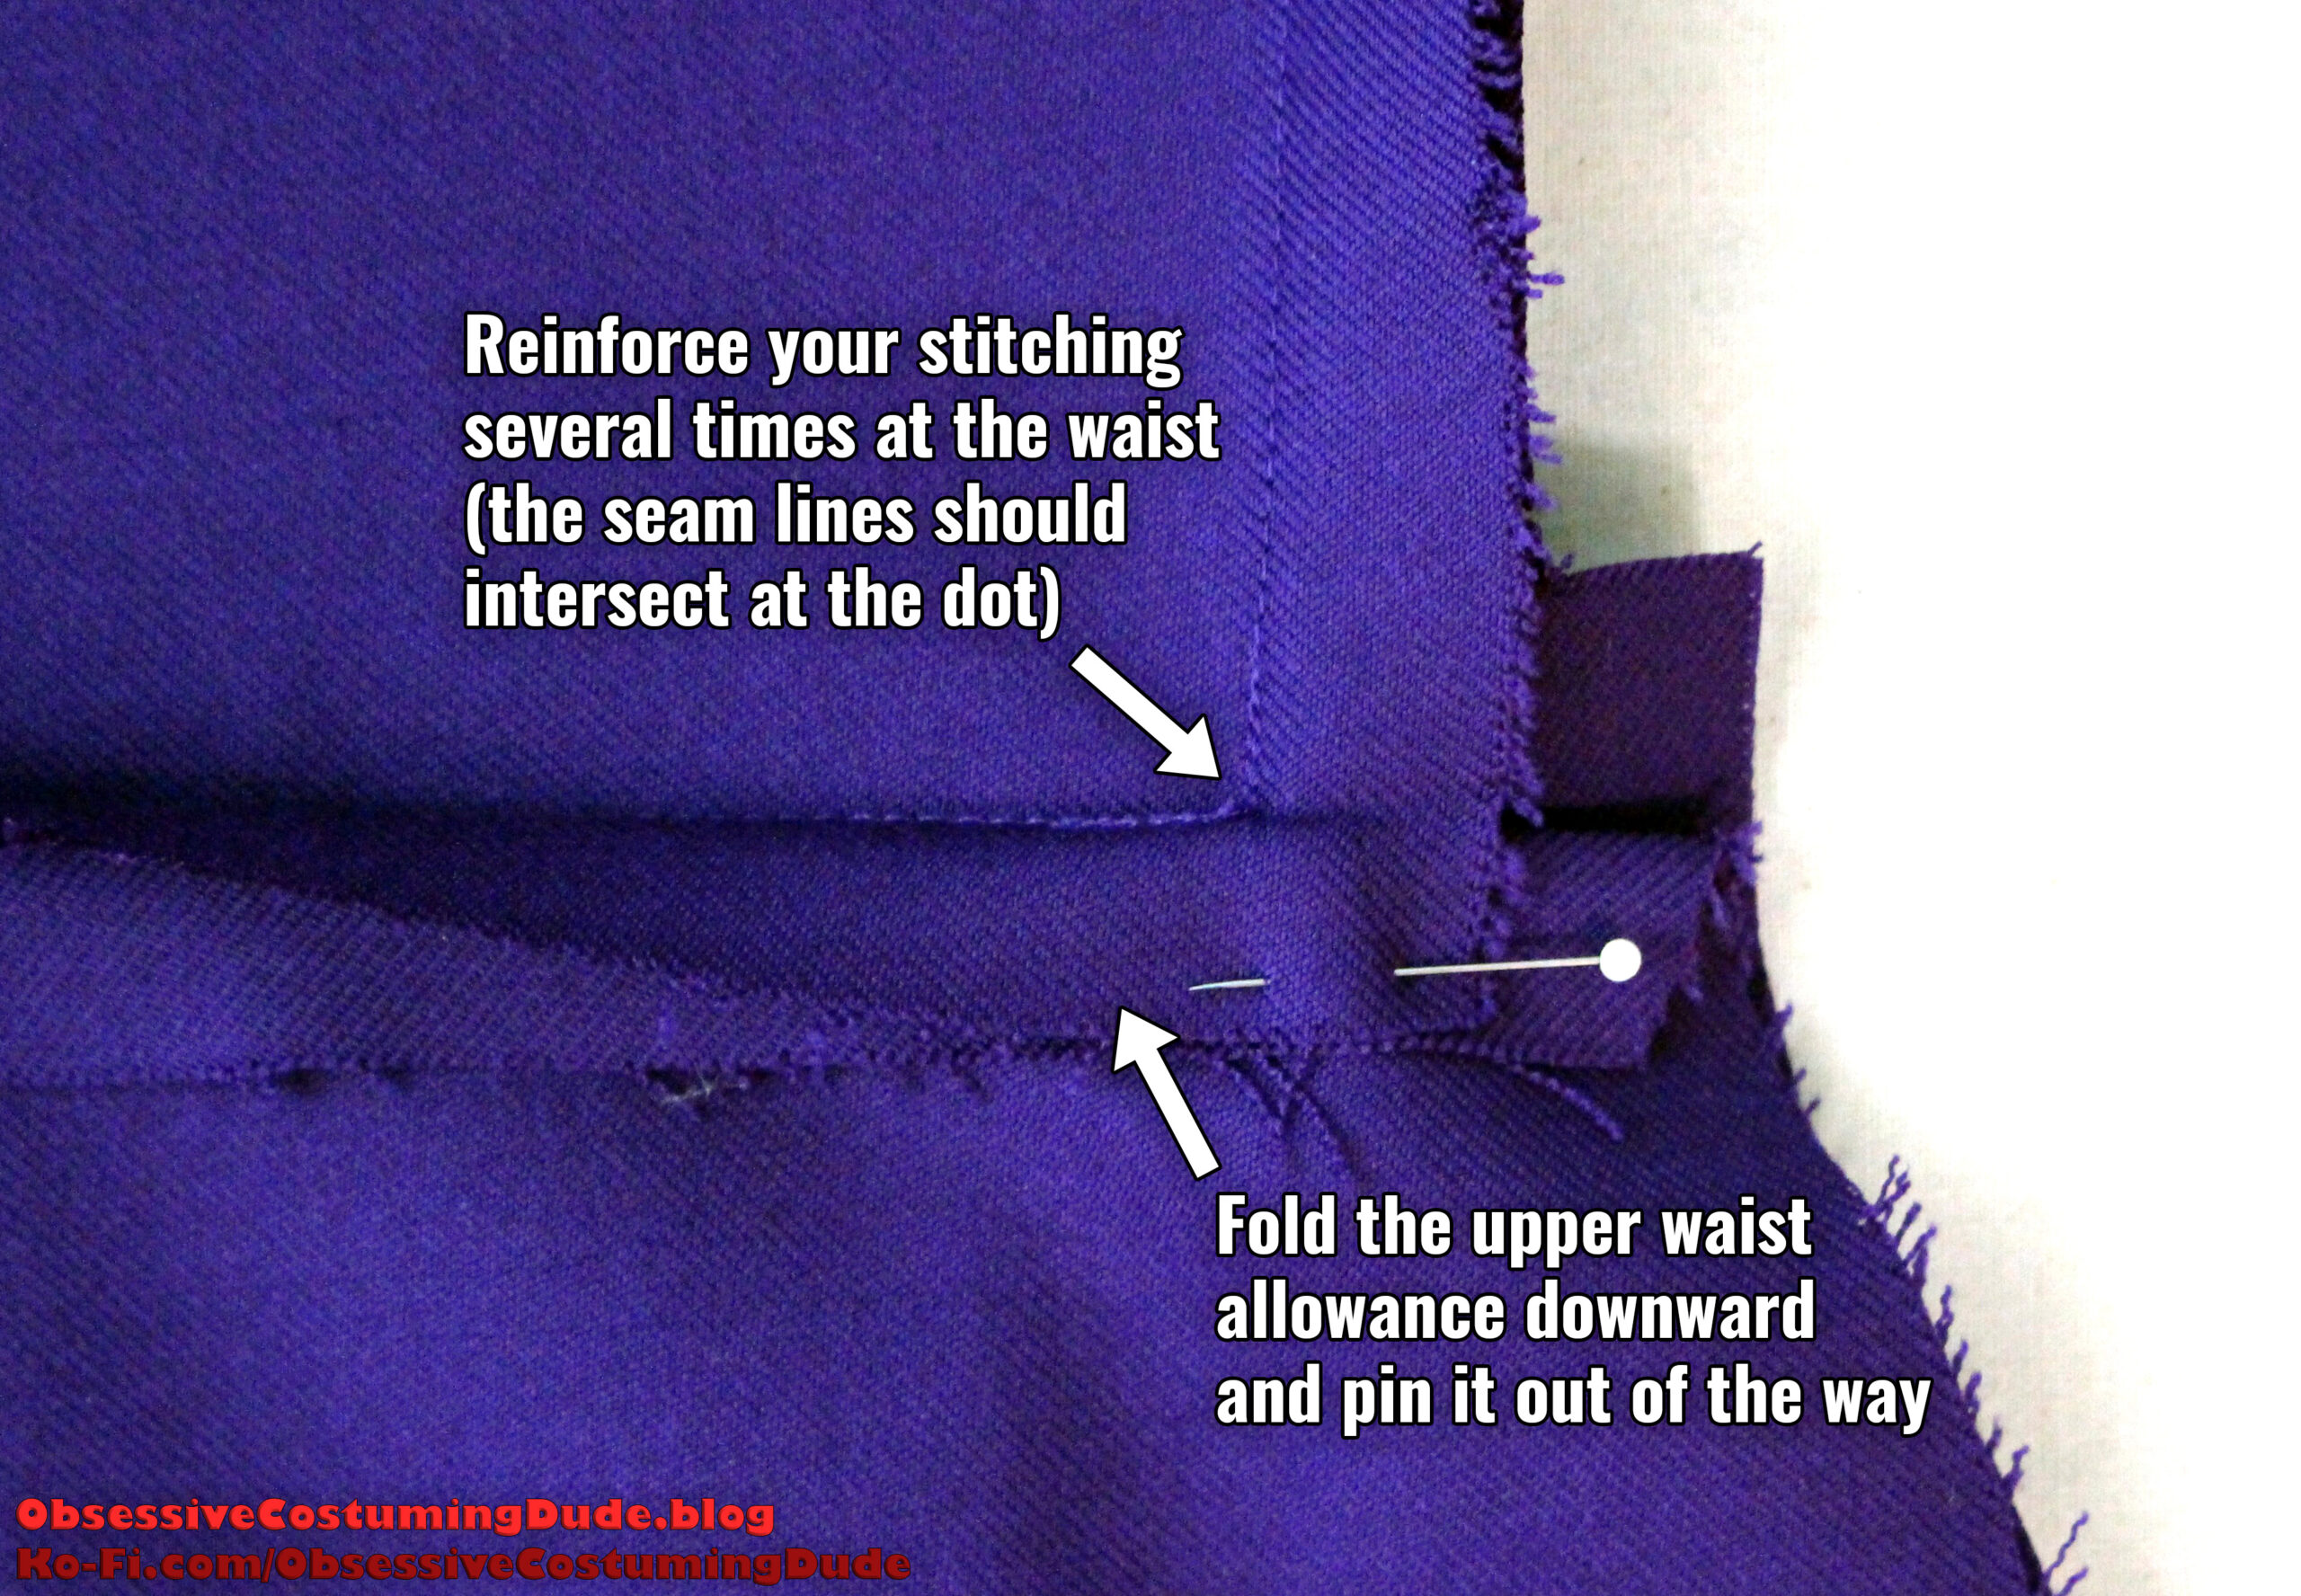
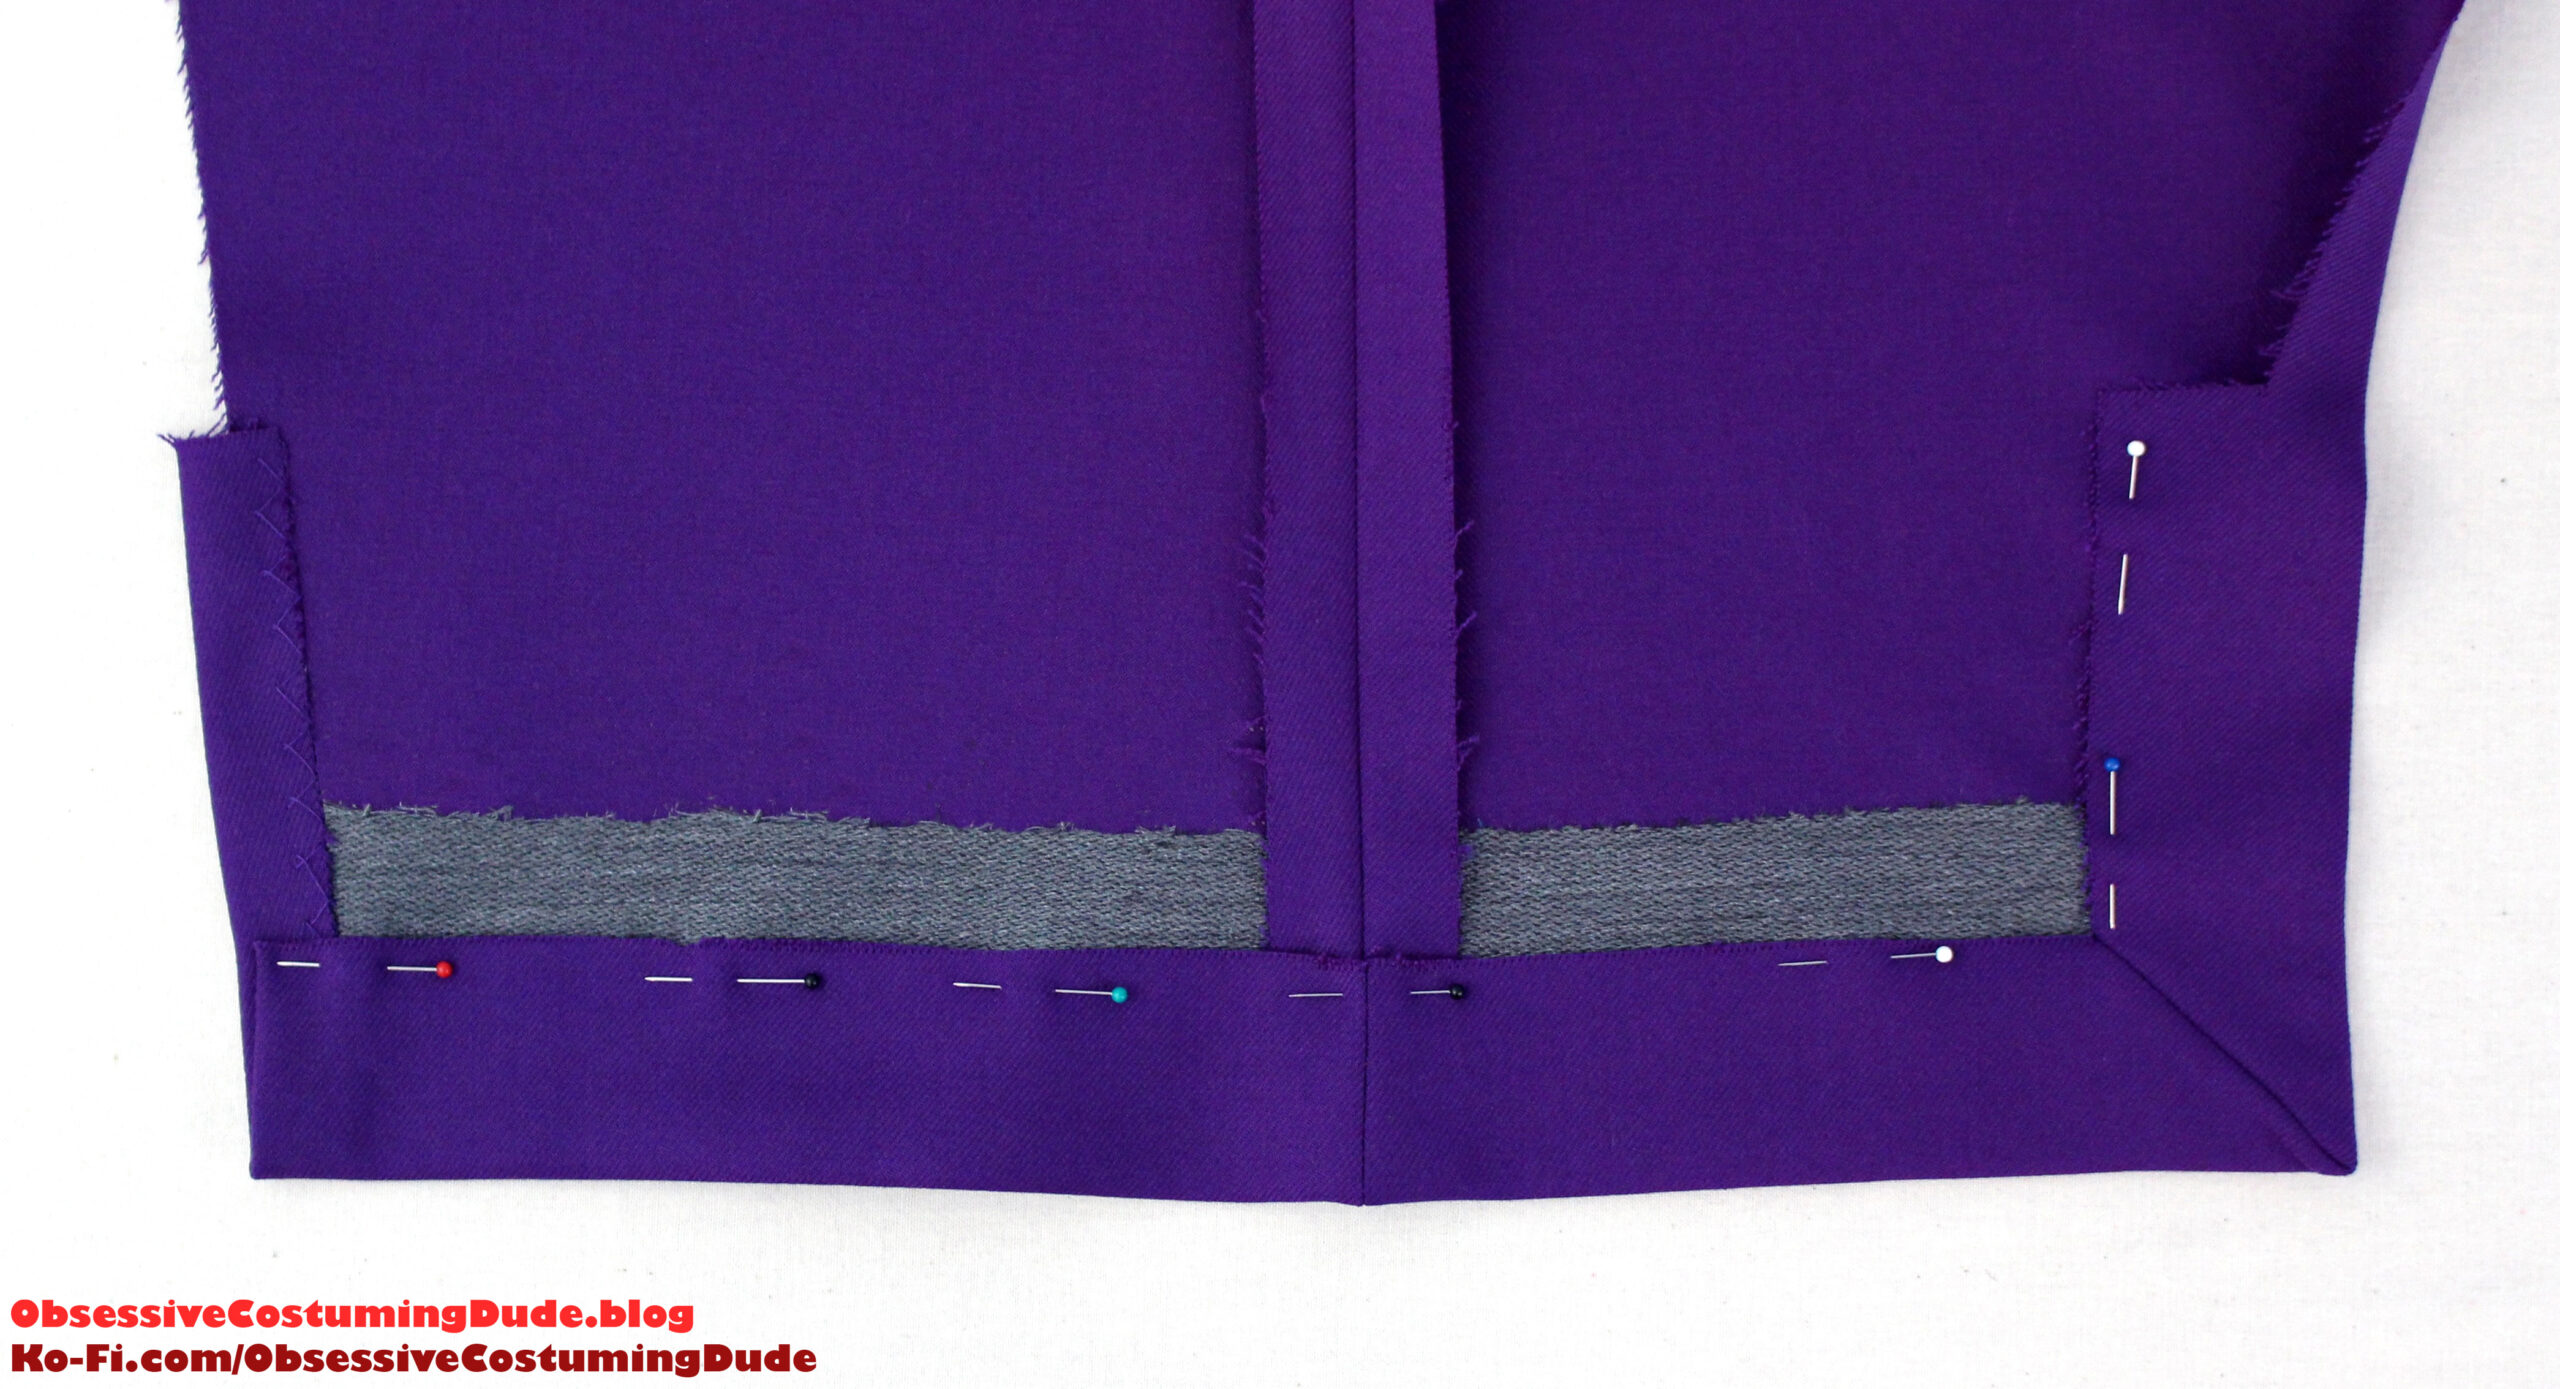
Sewing the front/skirt assembly to the center back is done in three stitches.
For the first stitch, fold the upper waist seam allowance downward at the back.
Sew the panels together along the side back princess seam from the armscye down to the waist seam, right sides together, matching balance points and reinforcing your stitching at the waist.
(The bottom of the princess seam should end exactly at the dot and meet the back of the waist seam.)
For the second stitch, fold the lower waist seam allowance upward at the back.
Sew the back edge of the skirt to the center back, beginning and reinforcing your stitching several times at the dot.
And finally, with the waist allowances both folded upward out of the way, sew horizontally from one stitch to the other to connect them and close the assembly, reinforcing your stitching several times.
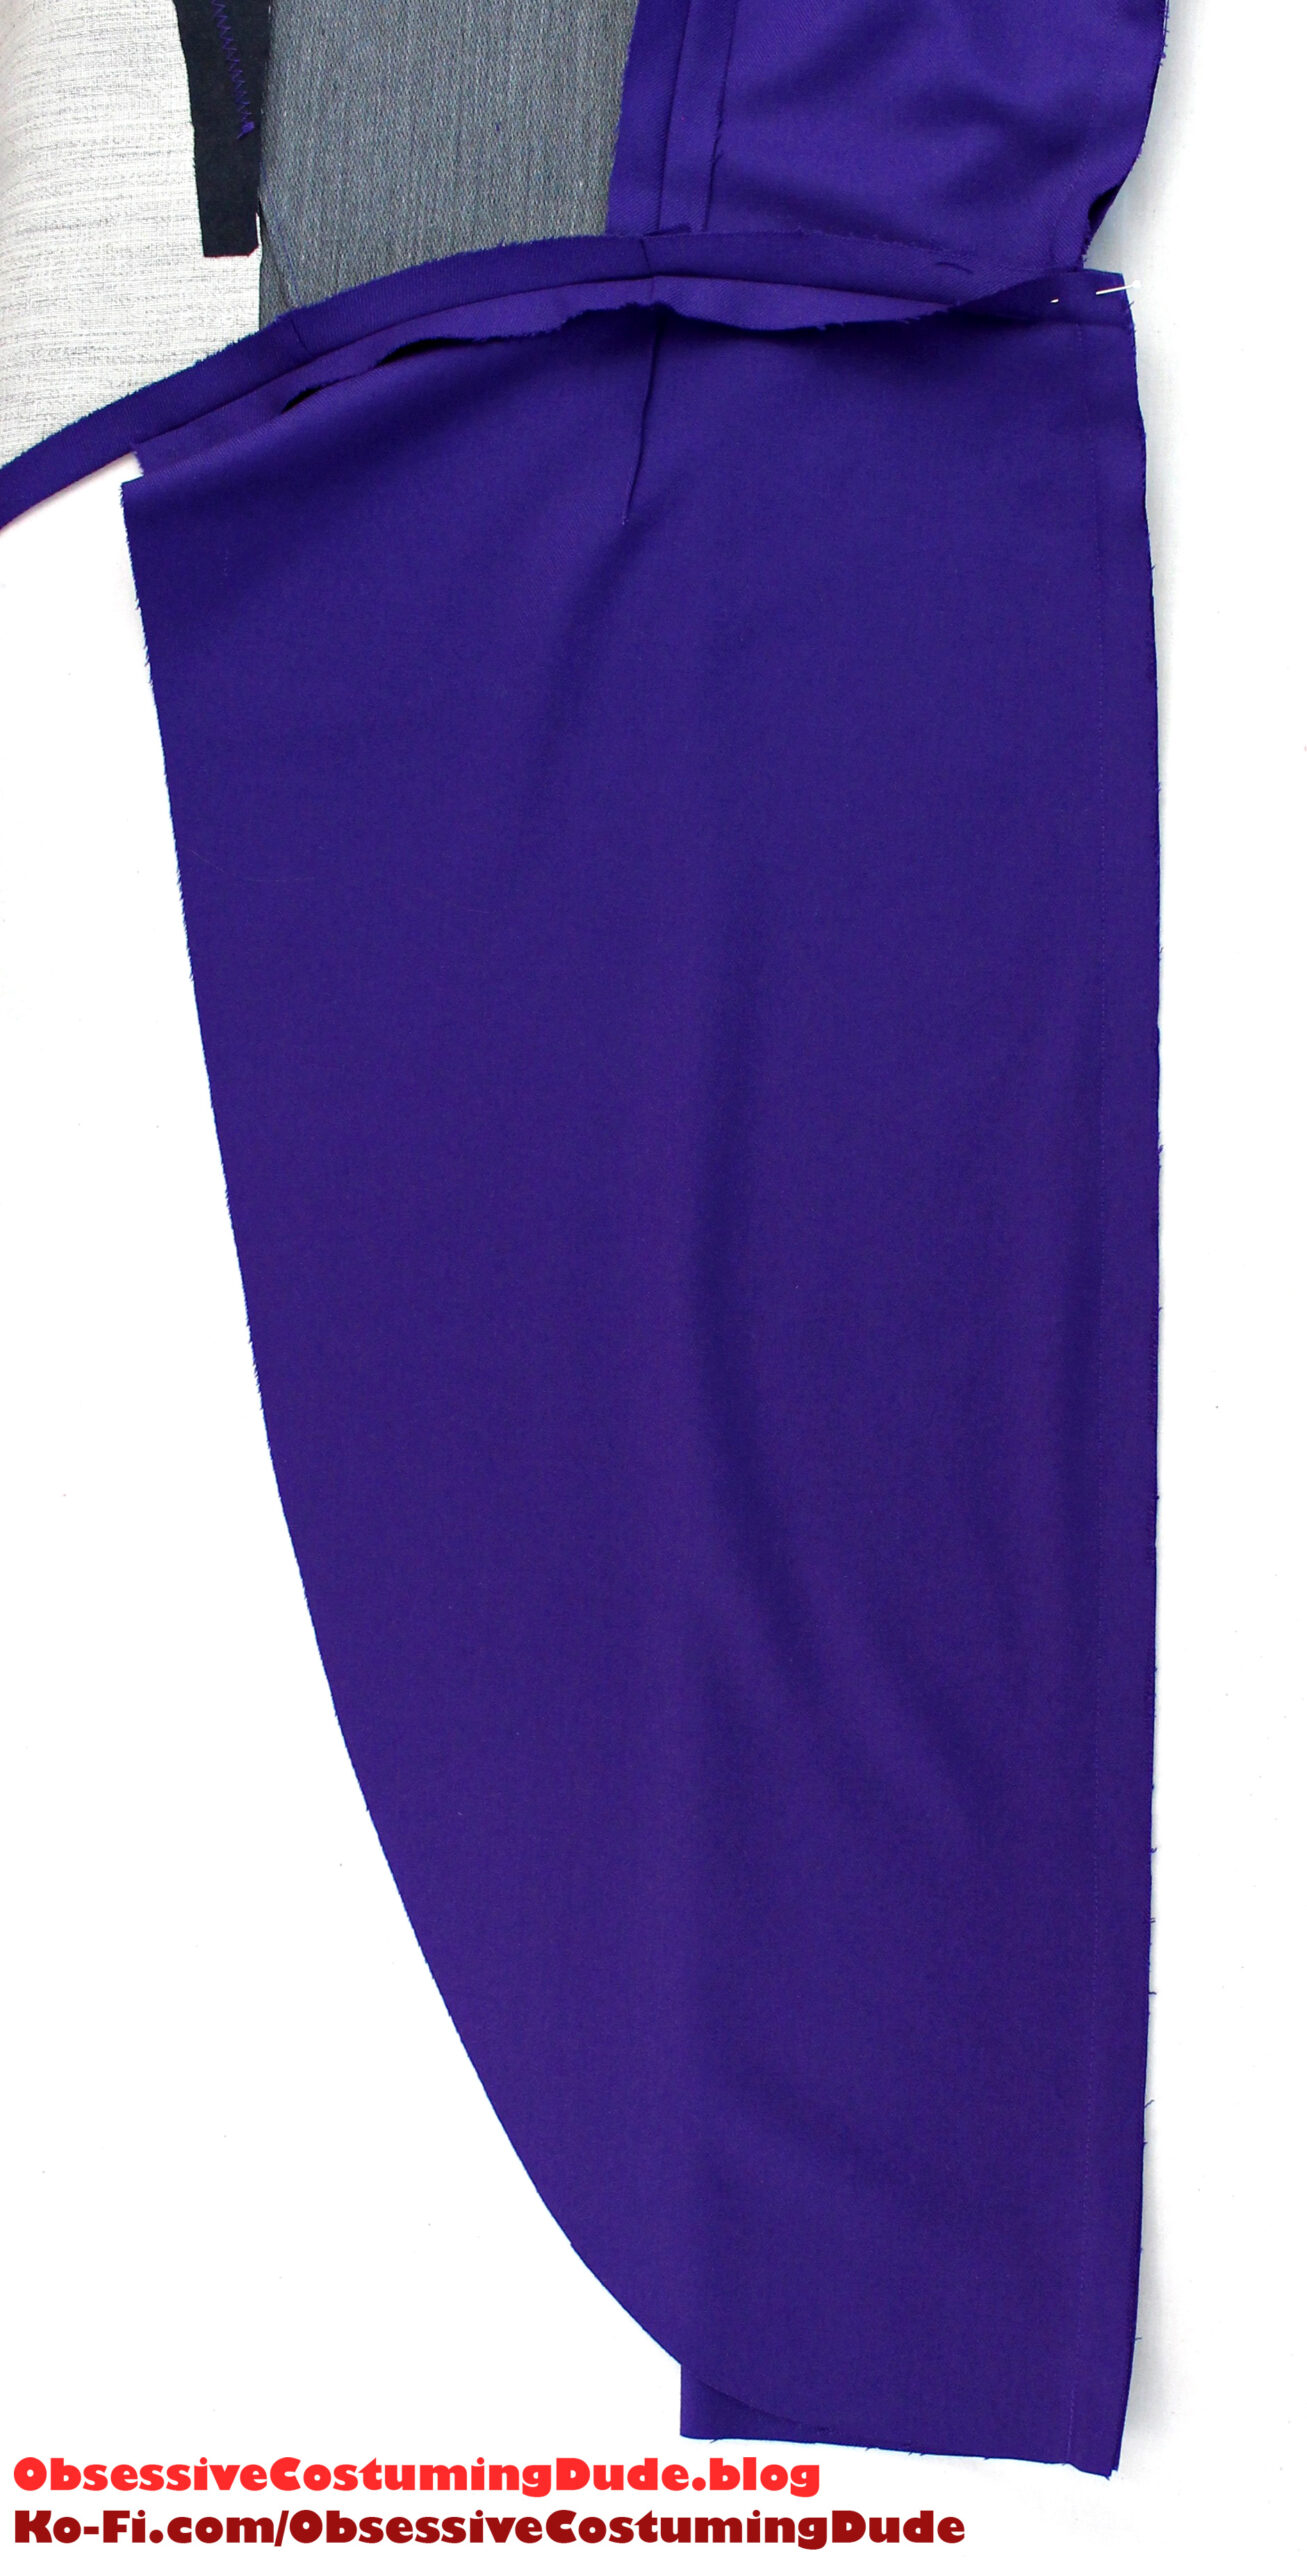
Clip the center back allowances along the curve of the princess seam as-needed to release the tension, and notch the side back allowances along the curve as well.
Press the upper back (princess) seam allowances open.
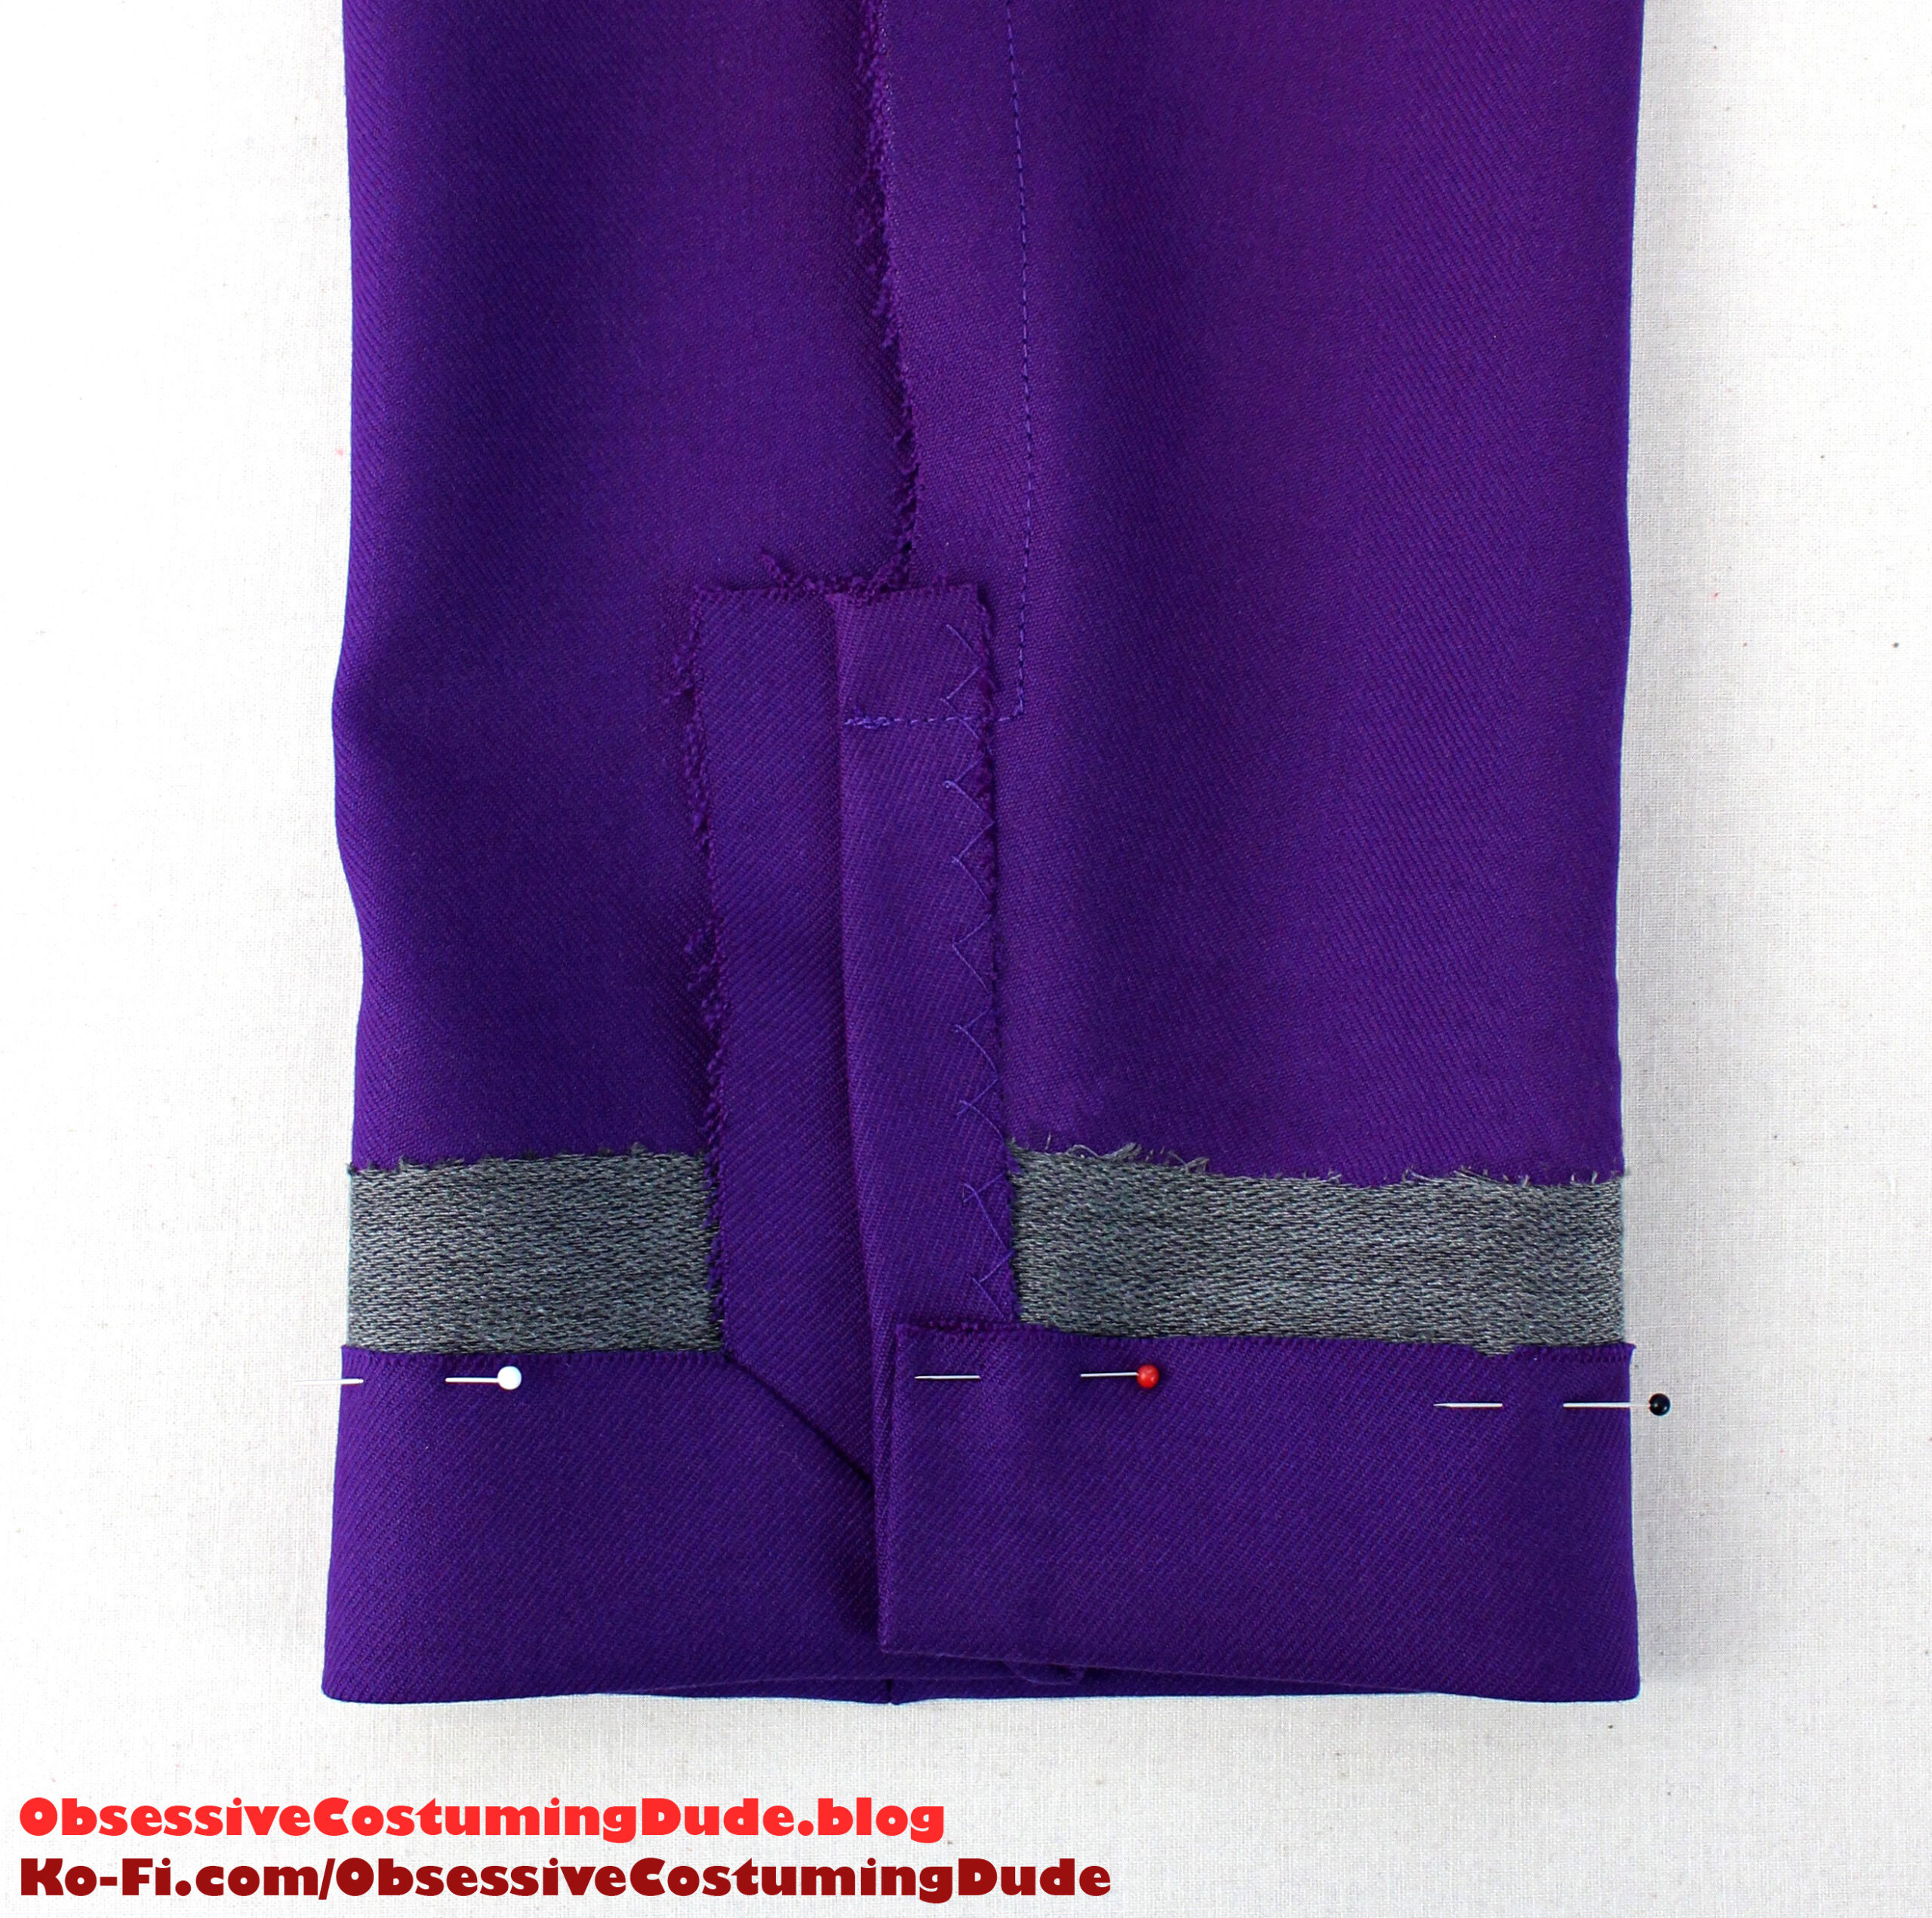
Diagonally clip the center back seam allowance at the corner (where the back and waist seams intersect).
Press the skirt/back seam allowances toward the front.
This will form a ½” pleat along the skirt/back seam.
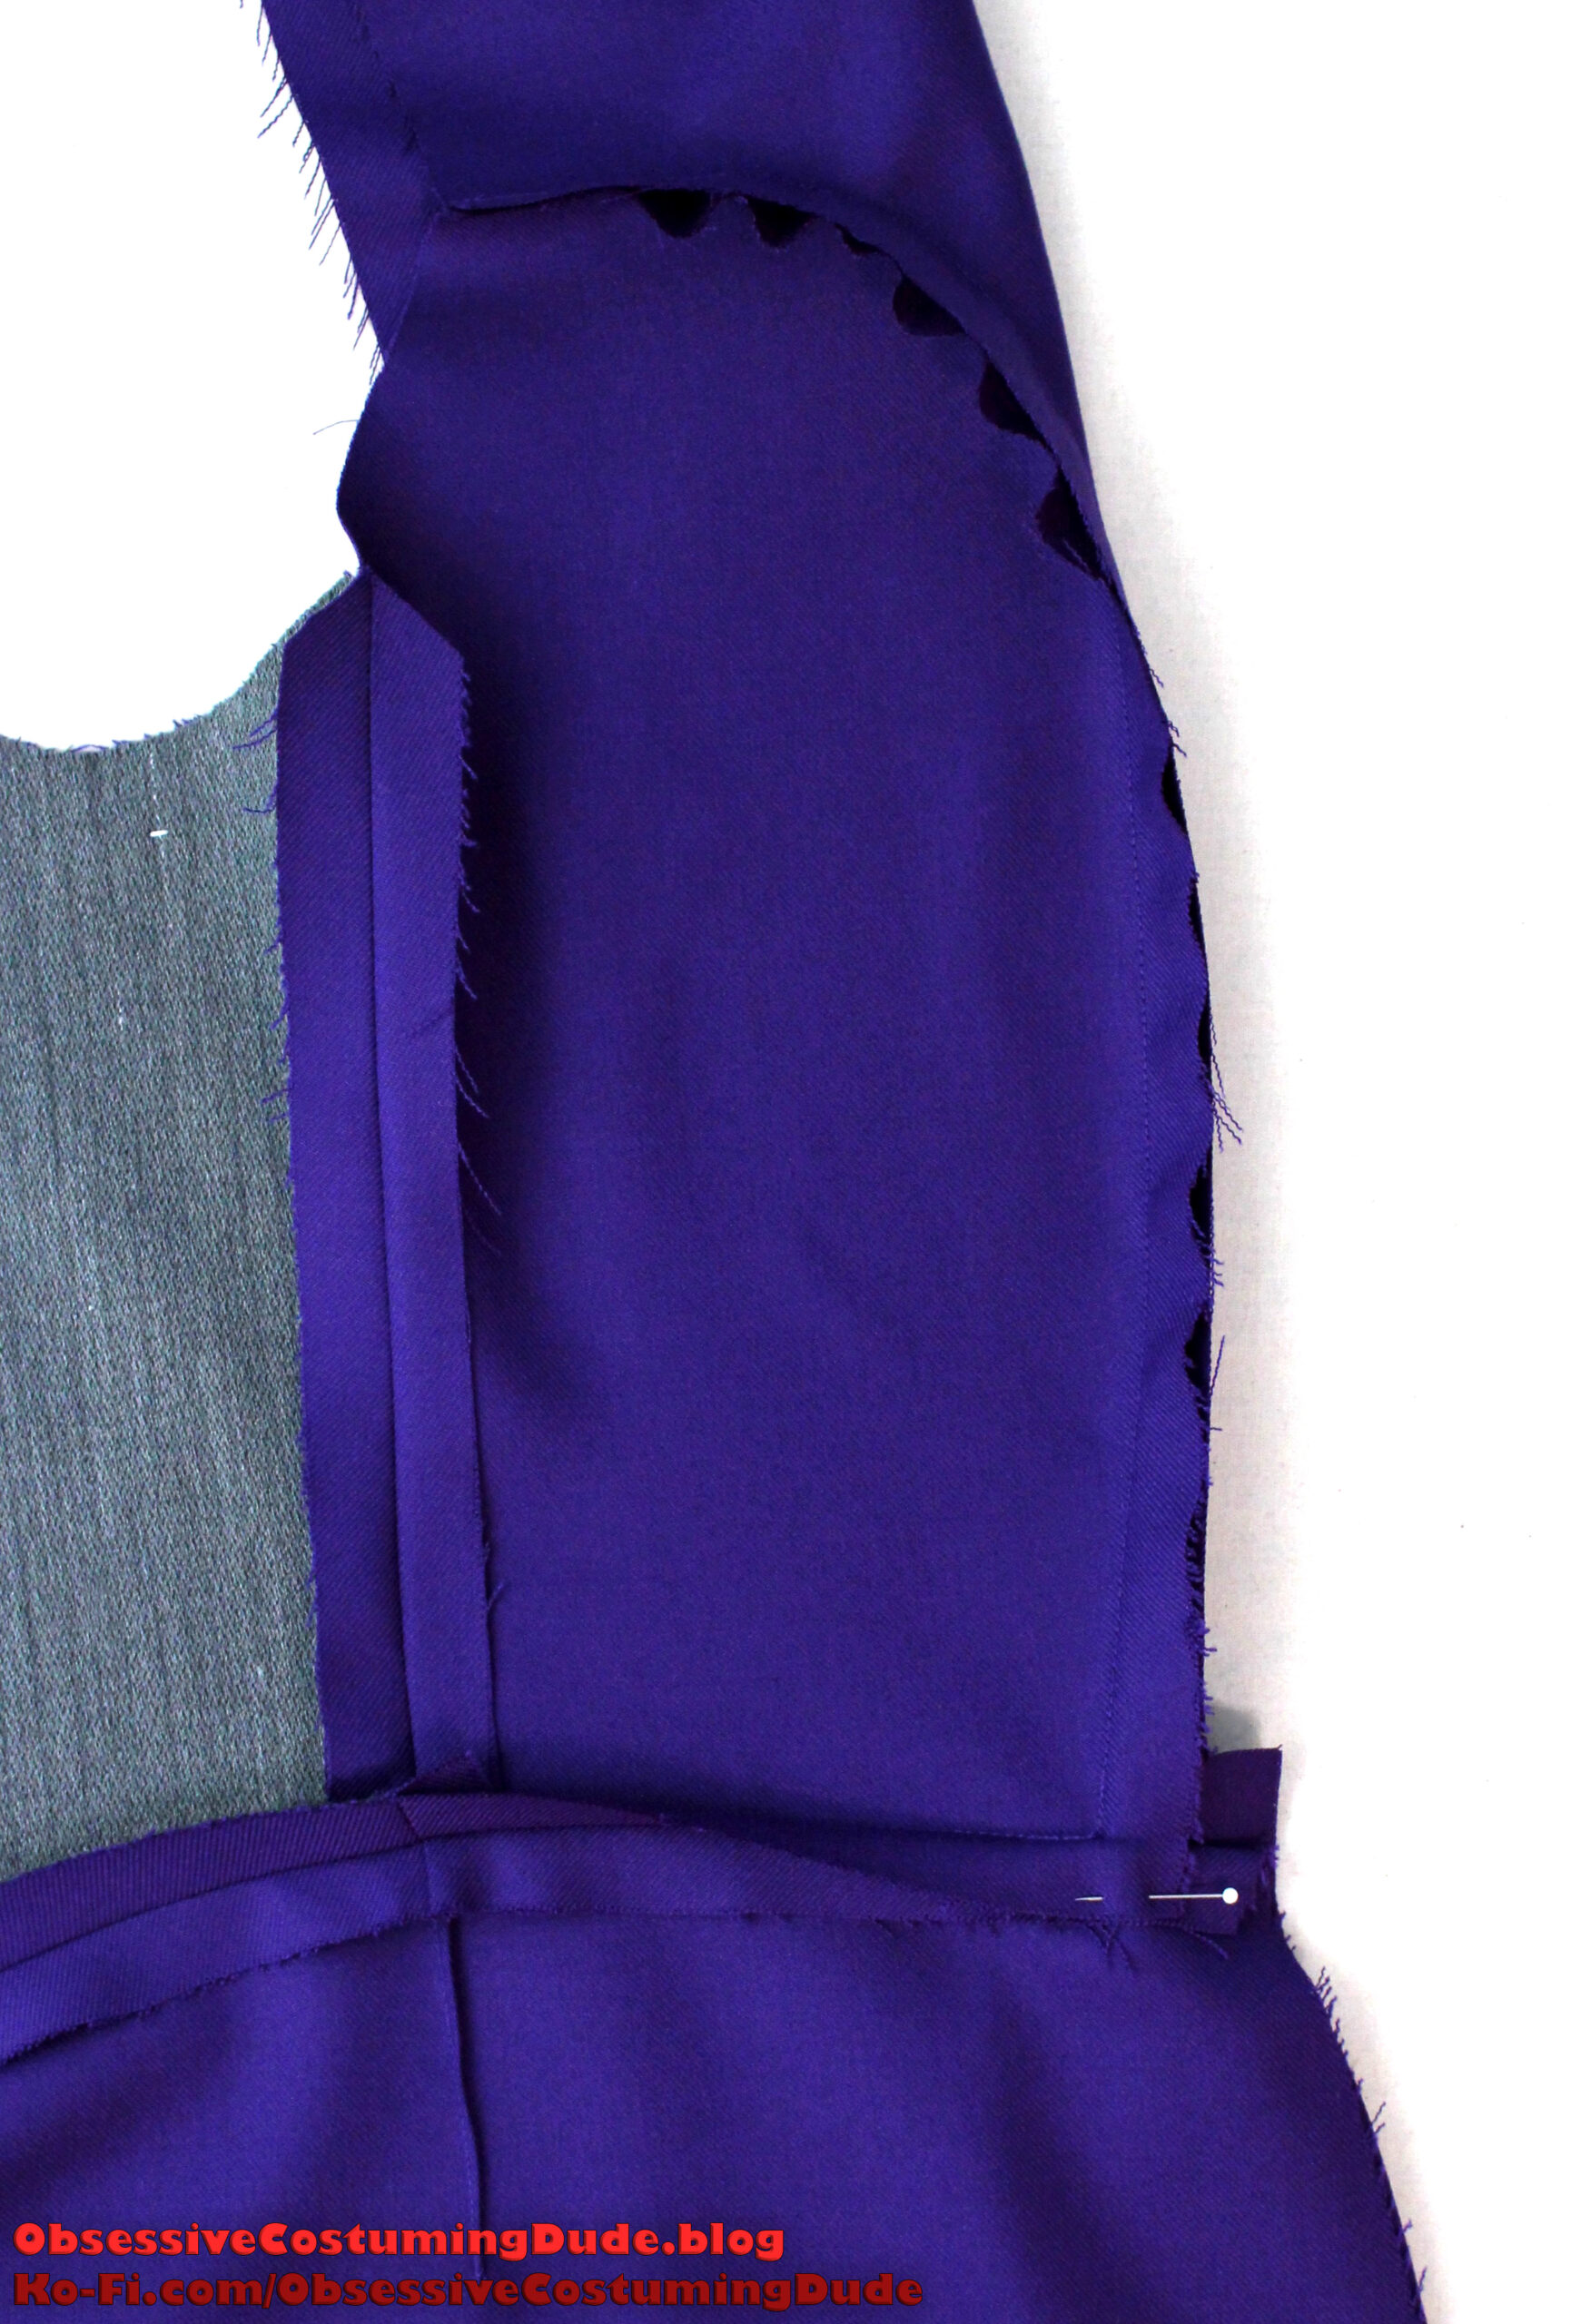
Pull the front canvas assembly away from the shoulder area.
Sew the front to the back at the shoulders. (The back shoulders are slightly wider than the fronts, so they need to be gently eased in.)
Press the shoulder seam allowances open.
Then fold the canvas assembly back into place and loosely hand-sew it to the back shoulder seam allowance.
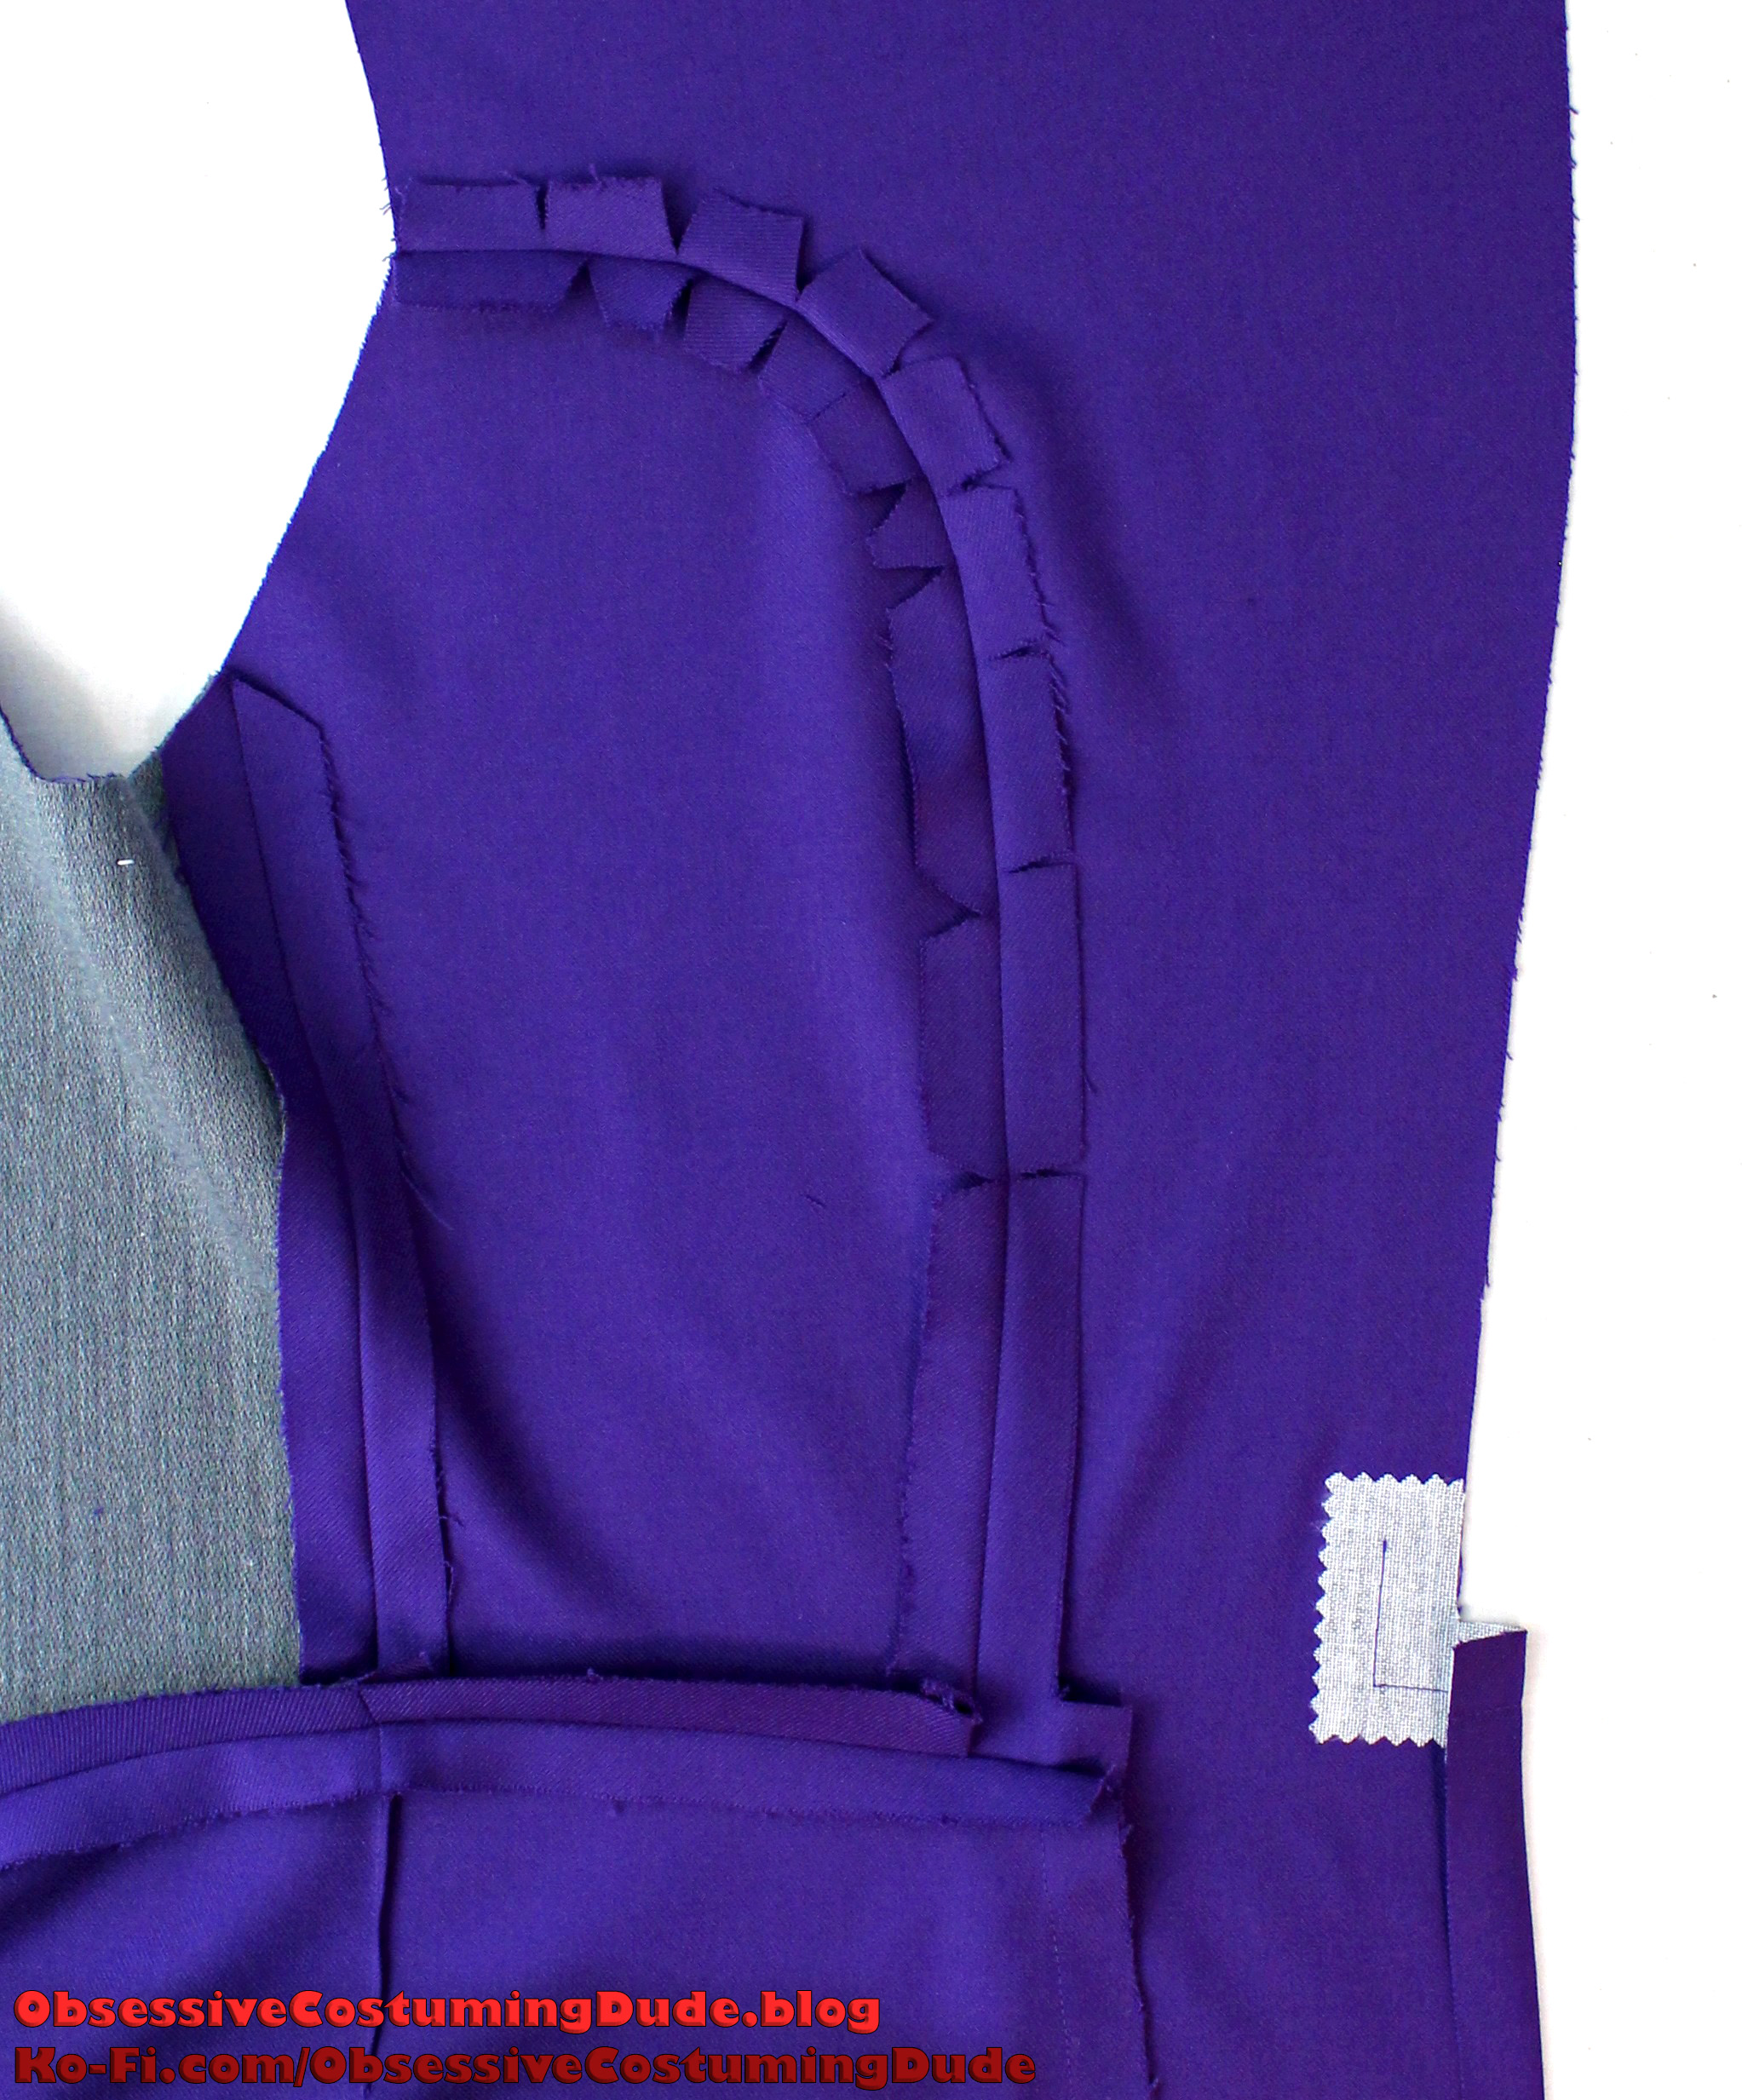
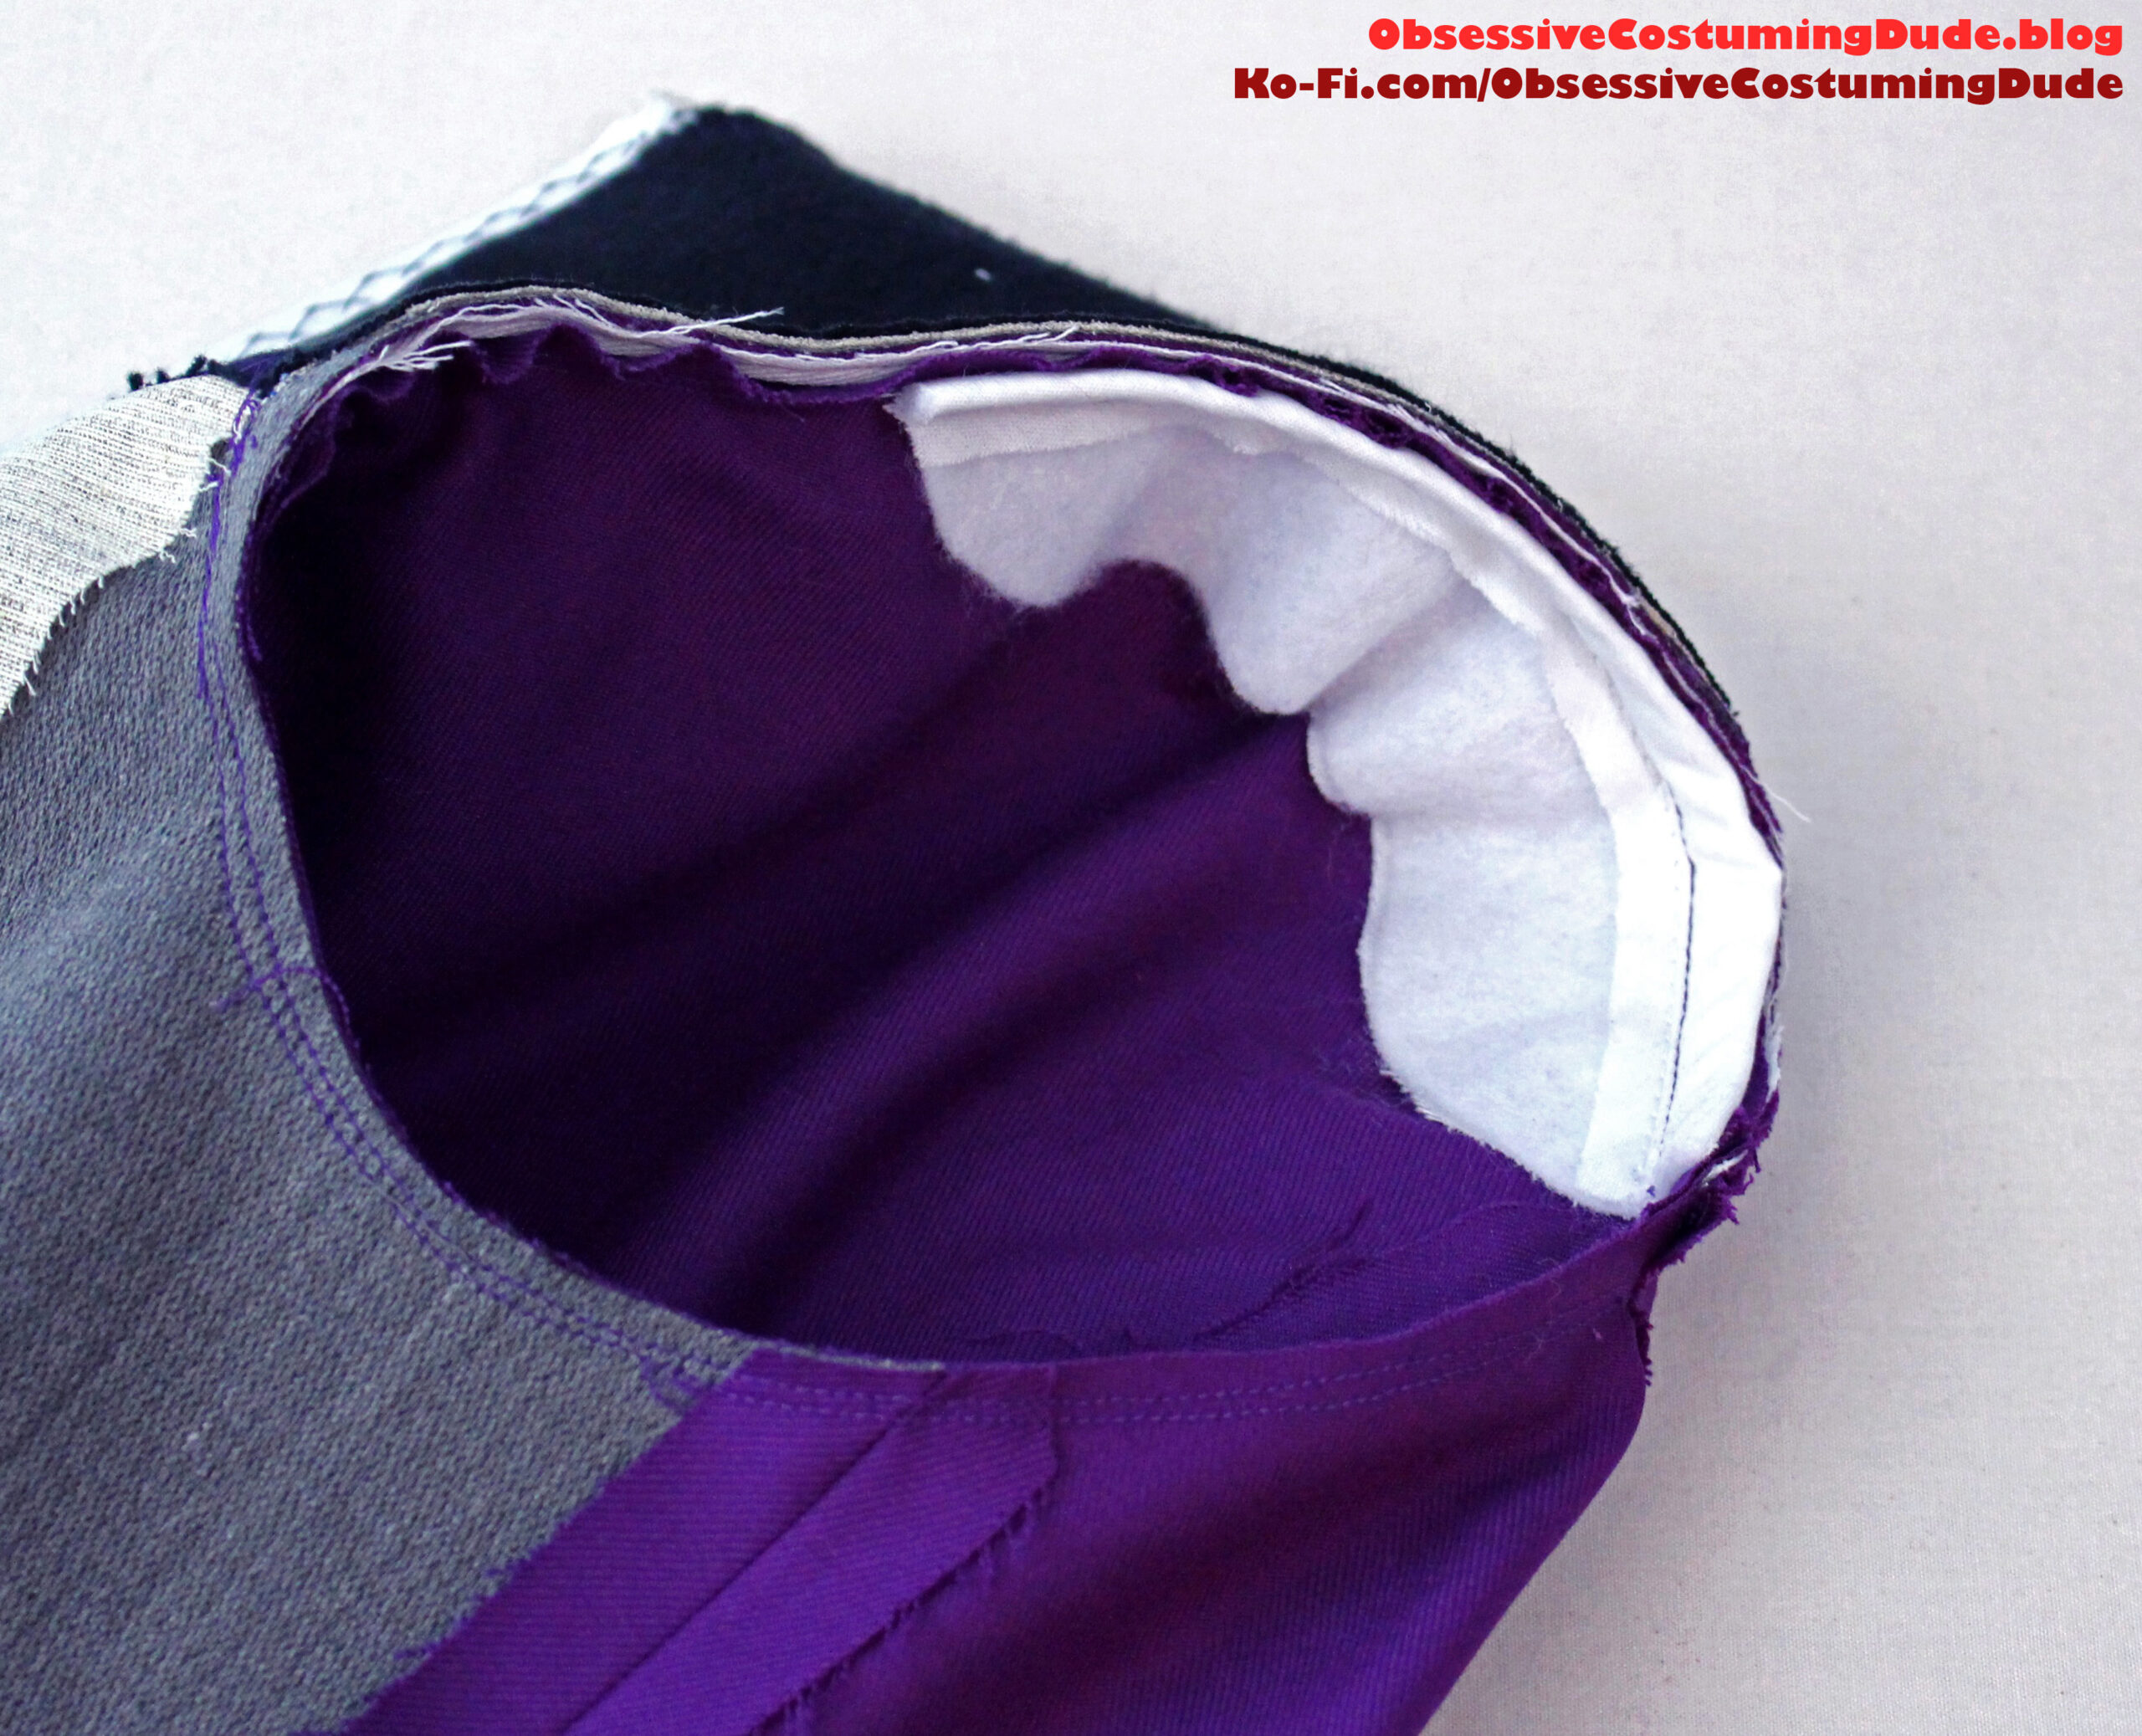
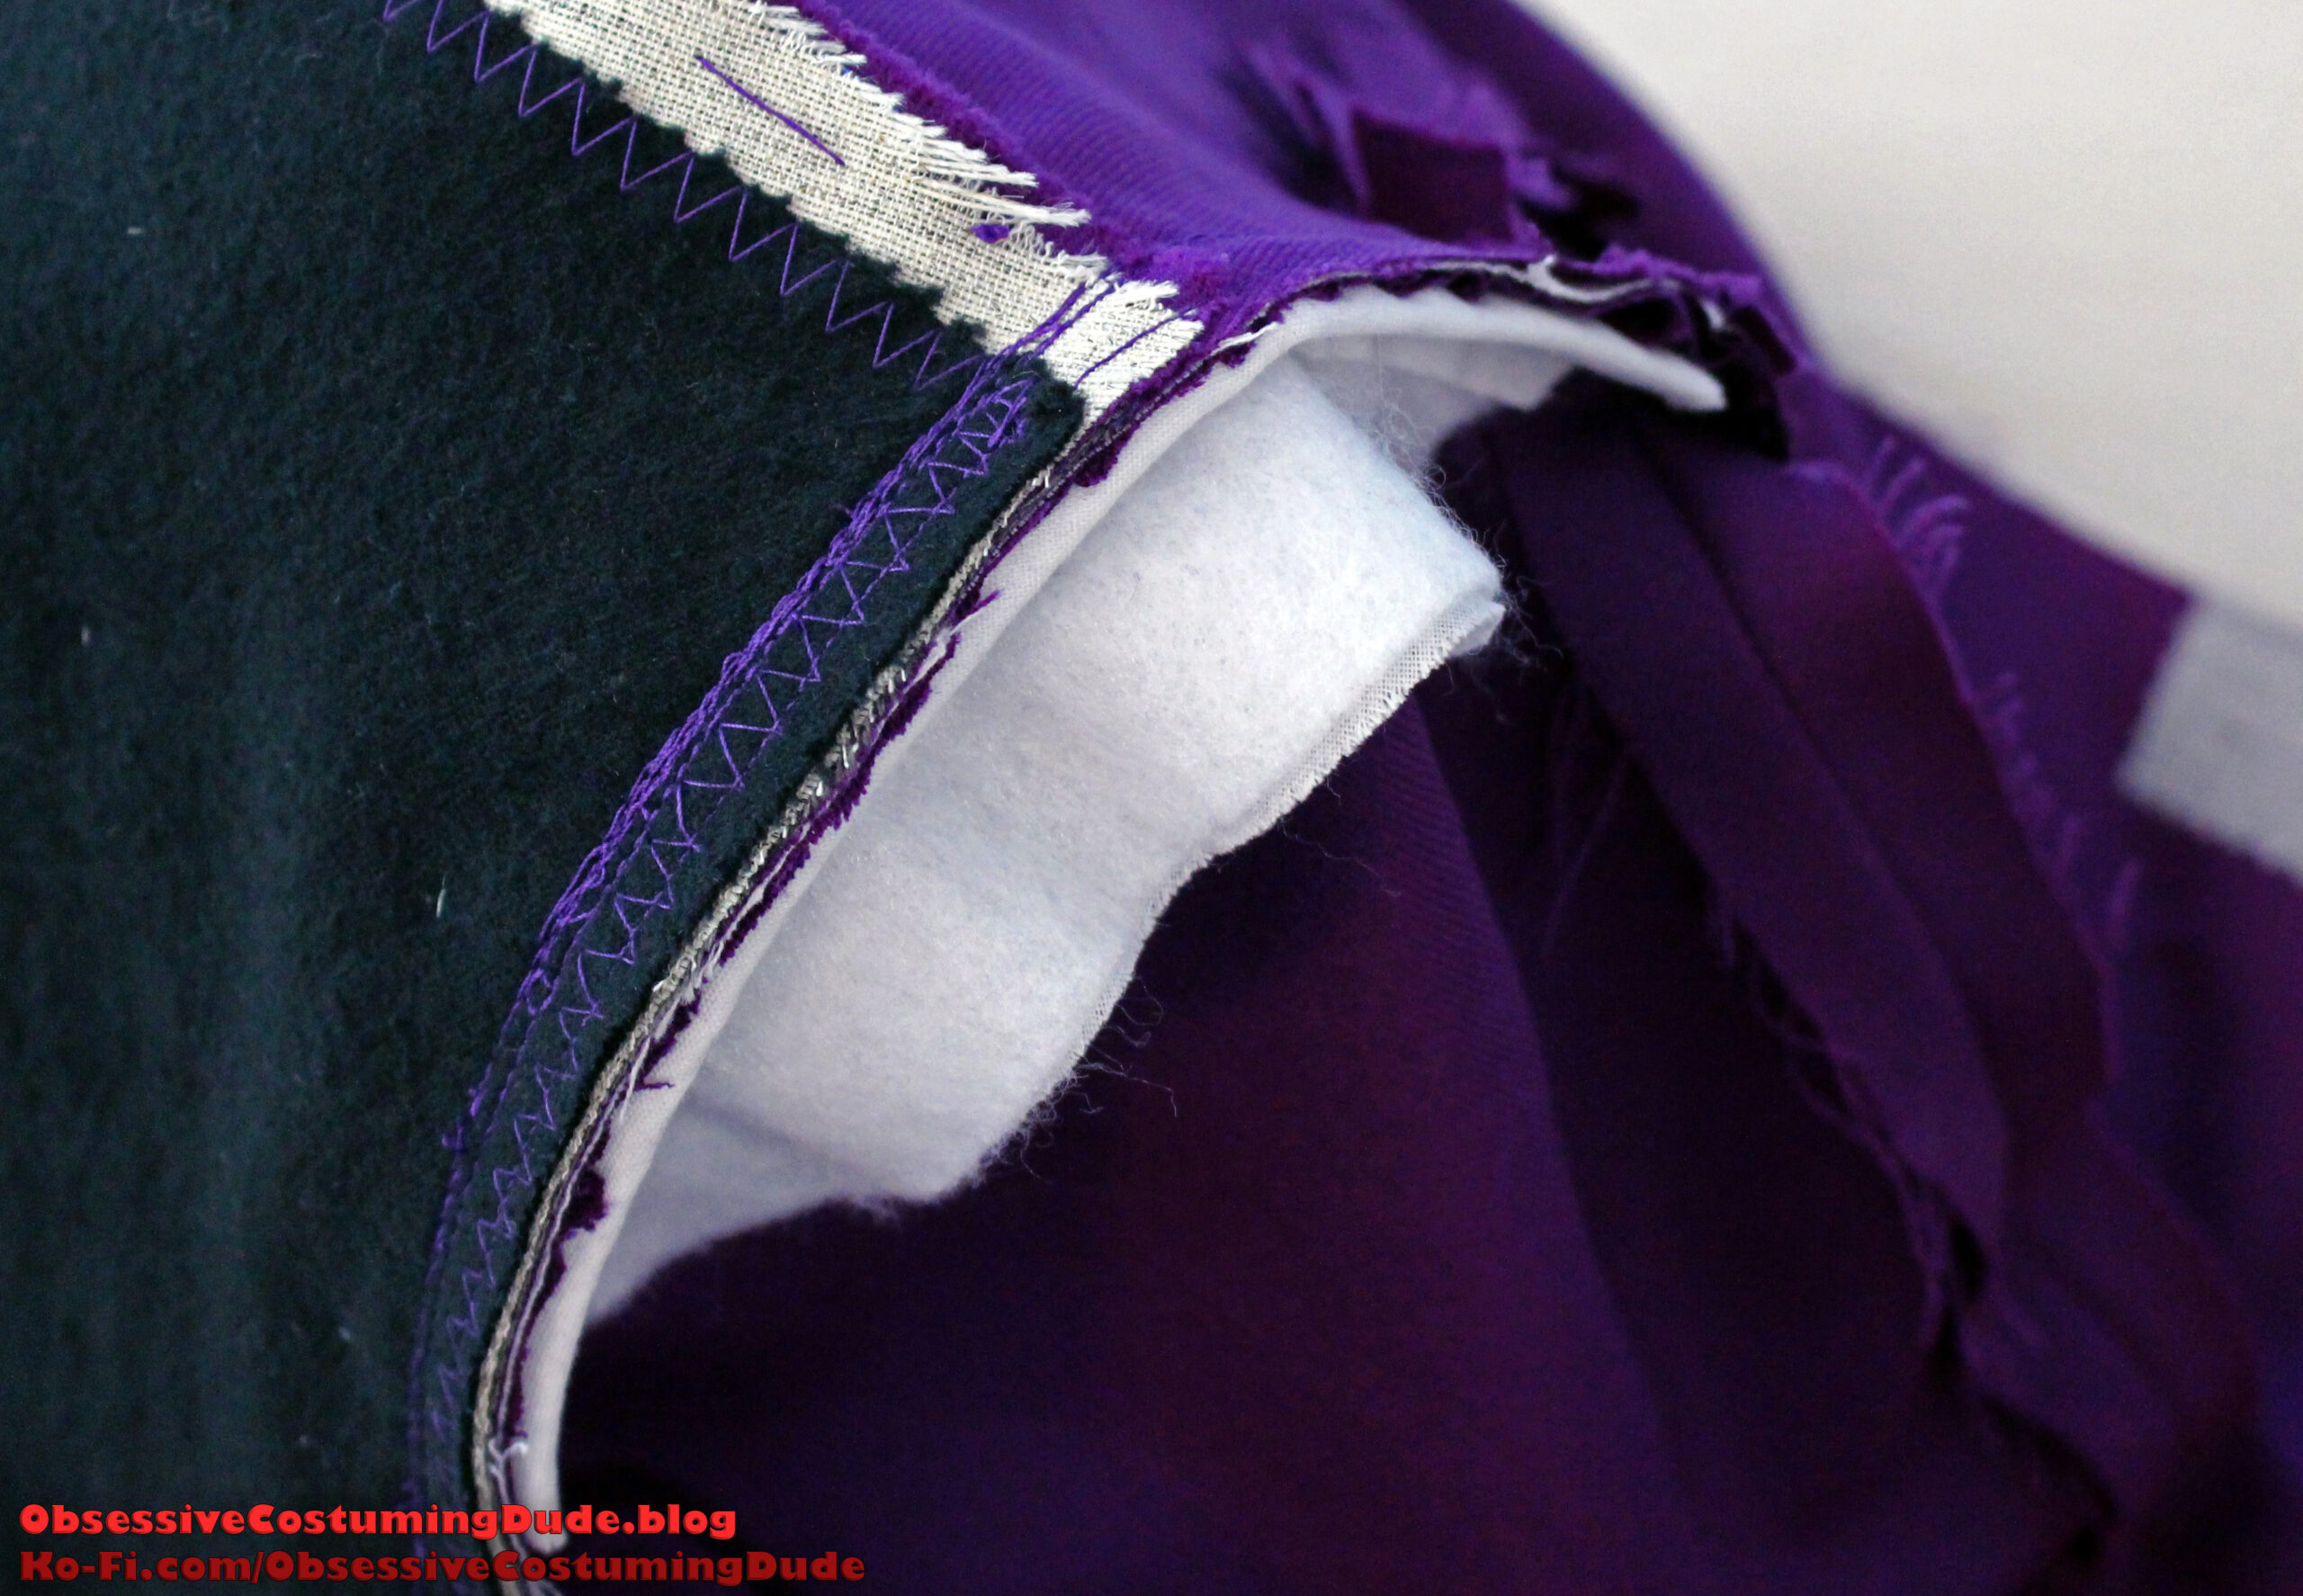
Before attaching the sleeves, the armscyes should be stabilized.
In Classic Tailoring Techniques for Menswear Cabrera recommends using a strip of pocketing to accomplish this, while in Vintage Couture Tailoring Thomas von Nordheim recommends simply hand-sewing a chain stitch, but I like to just use the ⅜” cotton twill stay tape again.
Pin the tape to the coat around the armscye, from the front dot to the back princess seam, with the outer edge of the tape flush with the fabric. (The underarm isn’t reinforced, as to leave the wearer’s movement unrestricted.)
Sew the stay tape to the armscye.
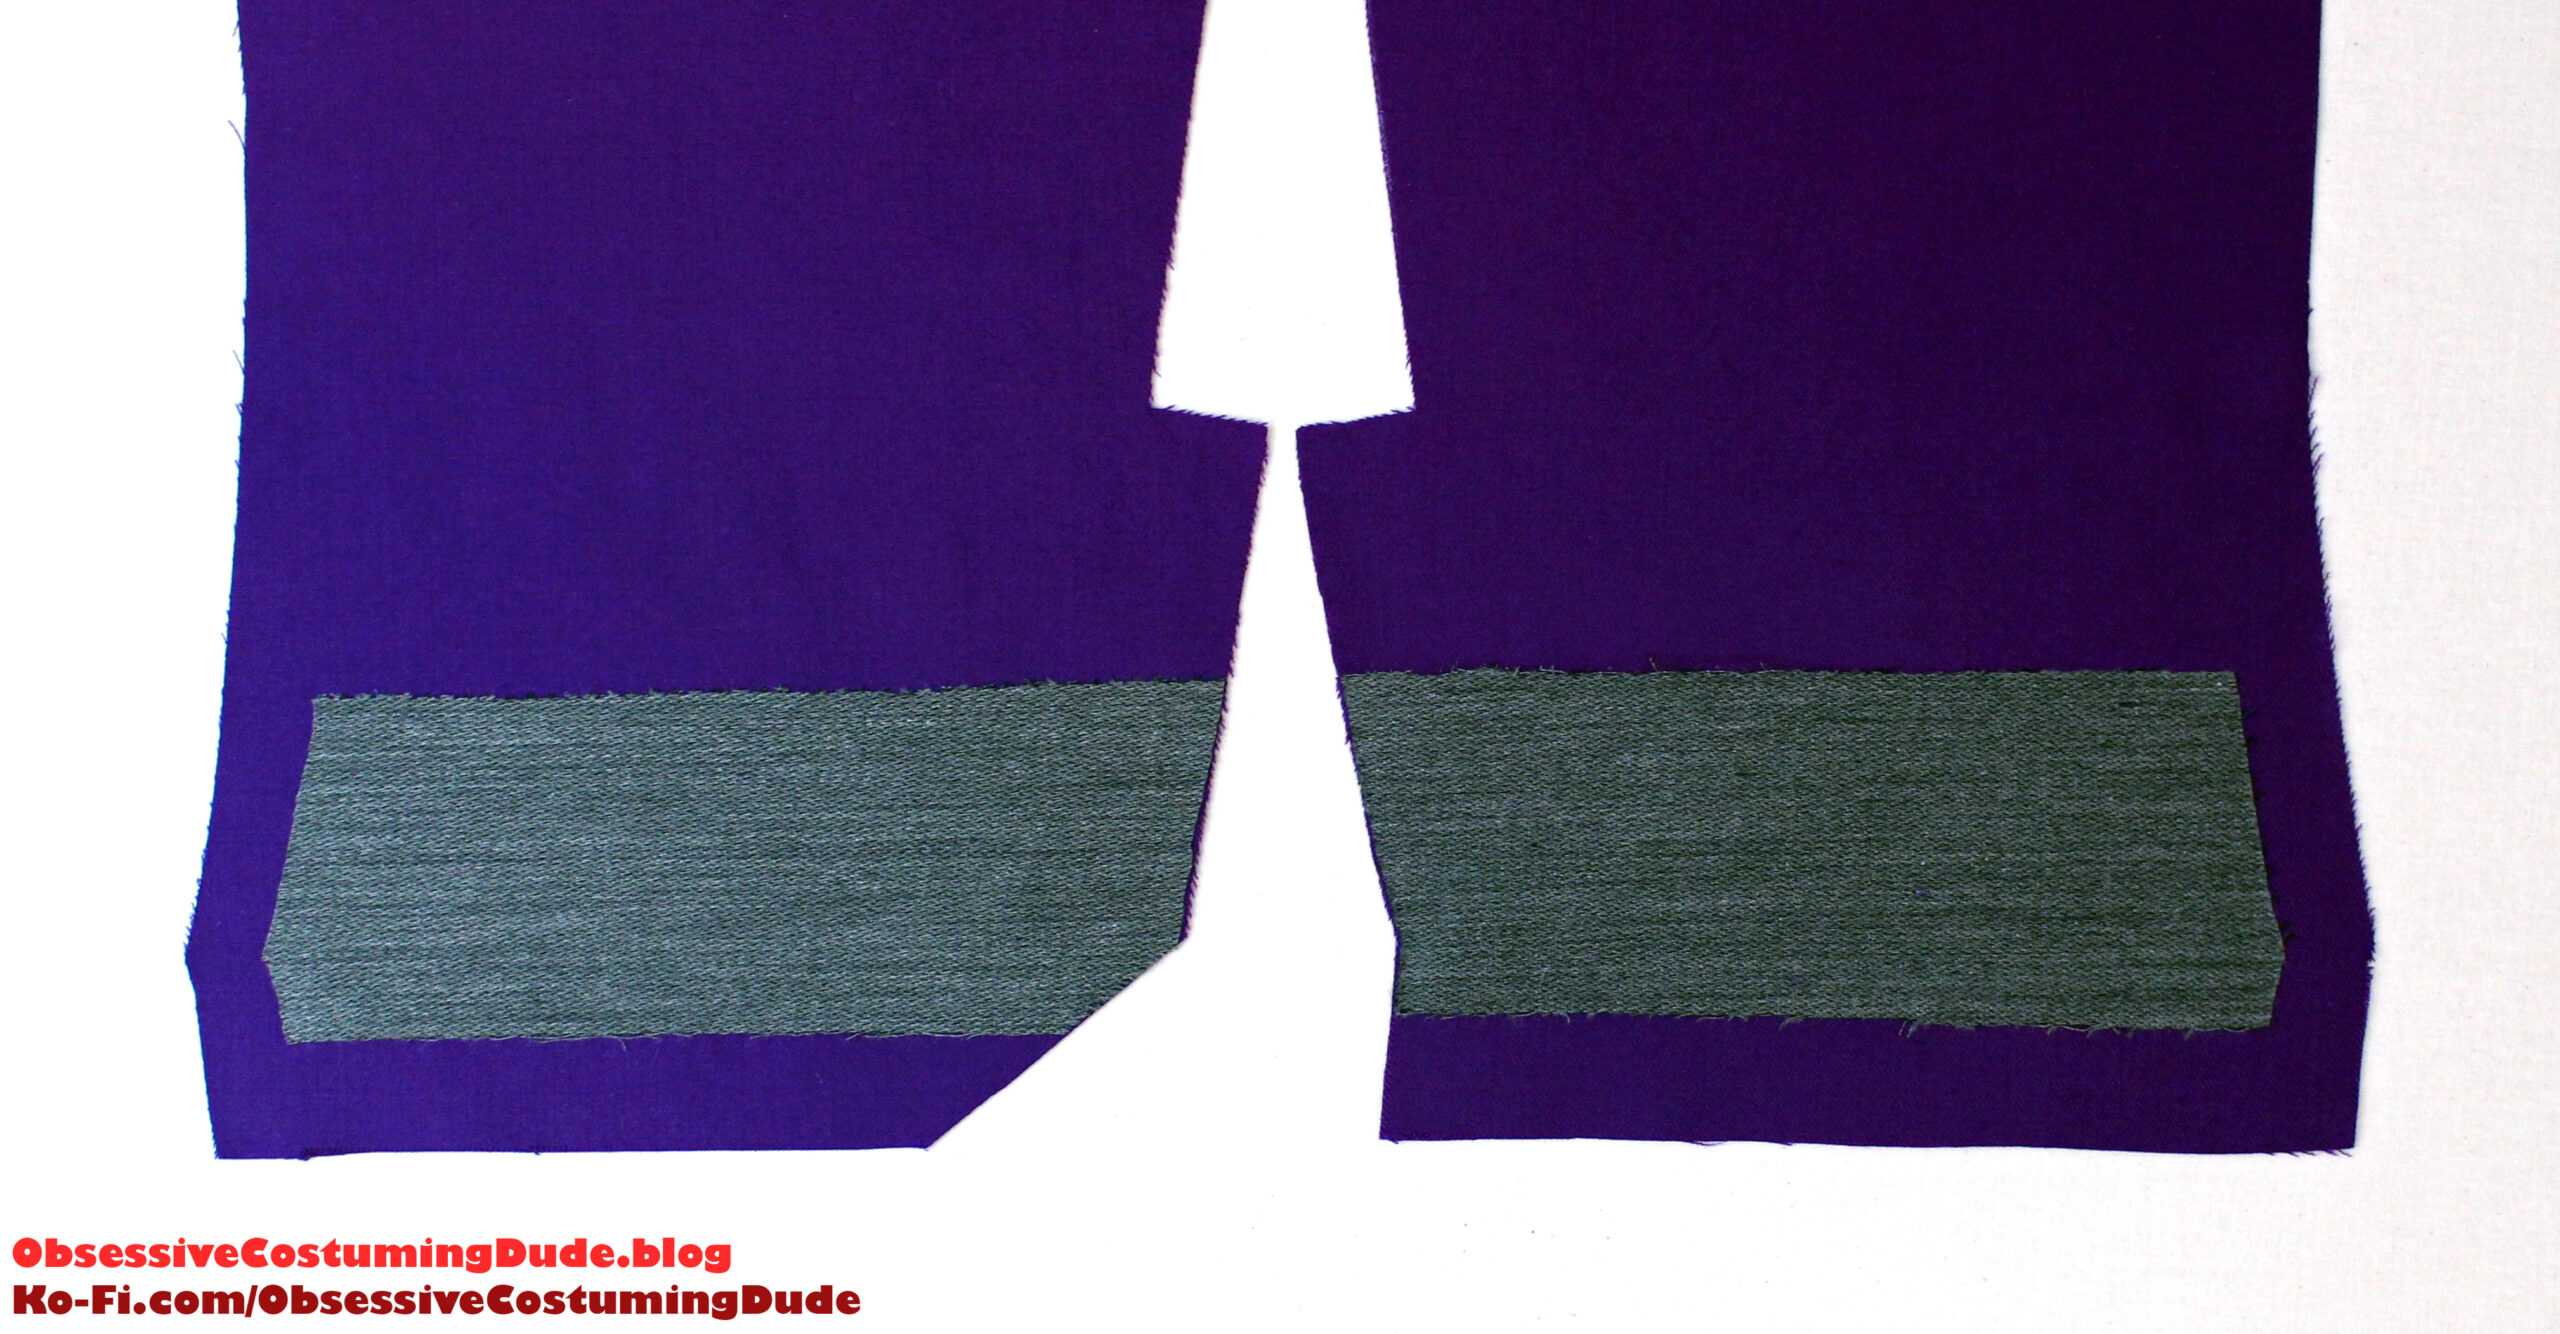
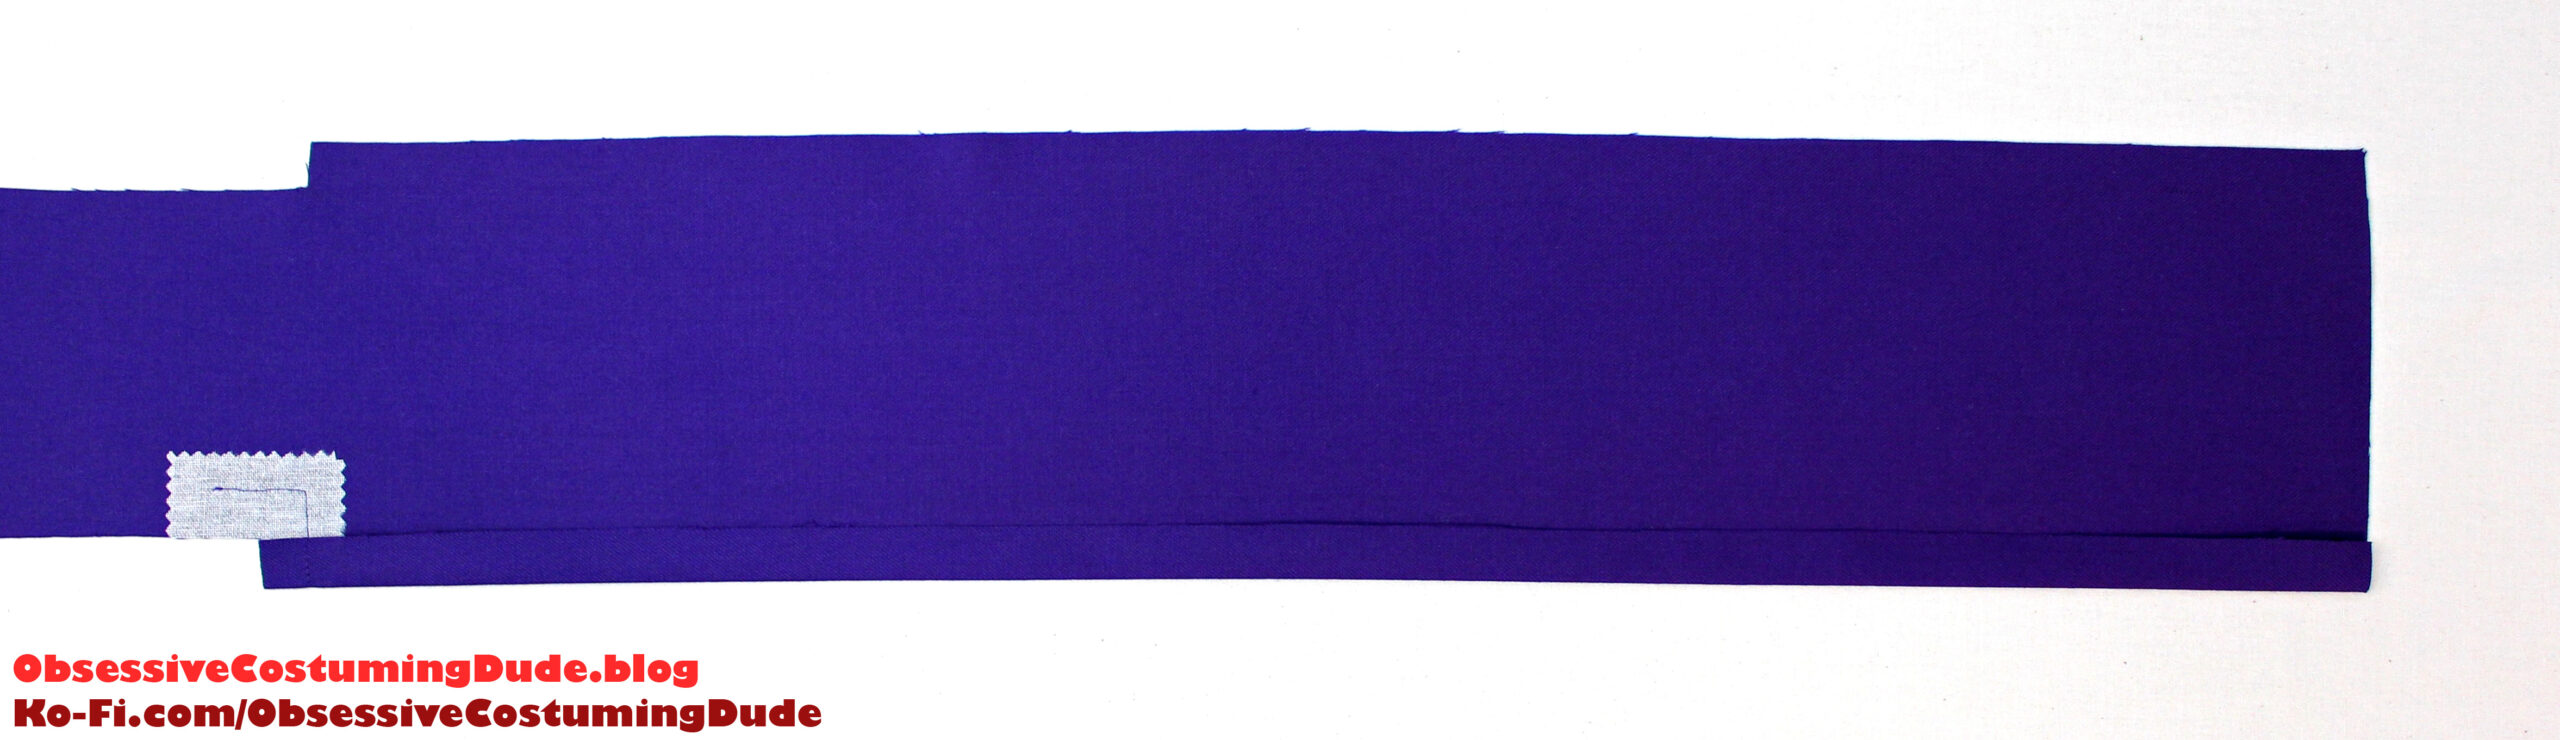
Sew the upper sleeve (piece G) to the under sleeve (piece H) along the front edges, right sides together.
Press the seam allowances open. (I suggest notching the seam allowances at the hem line.)
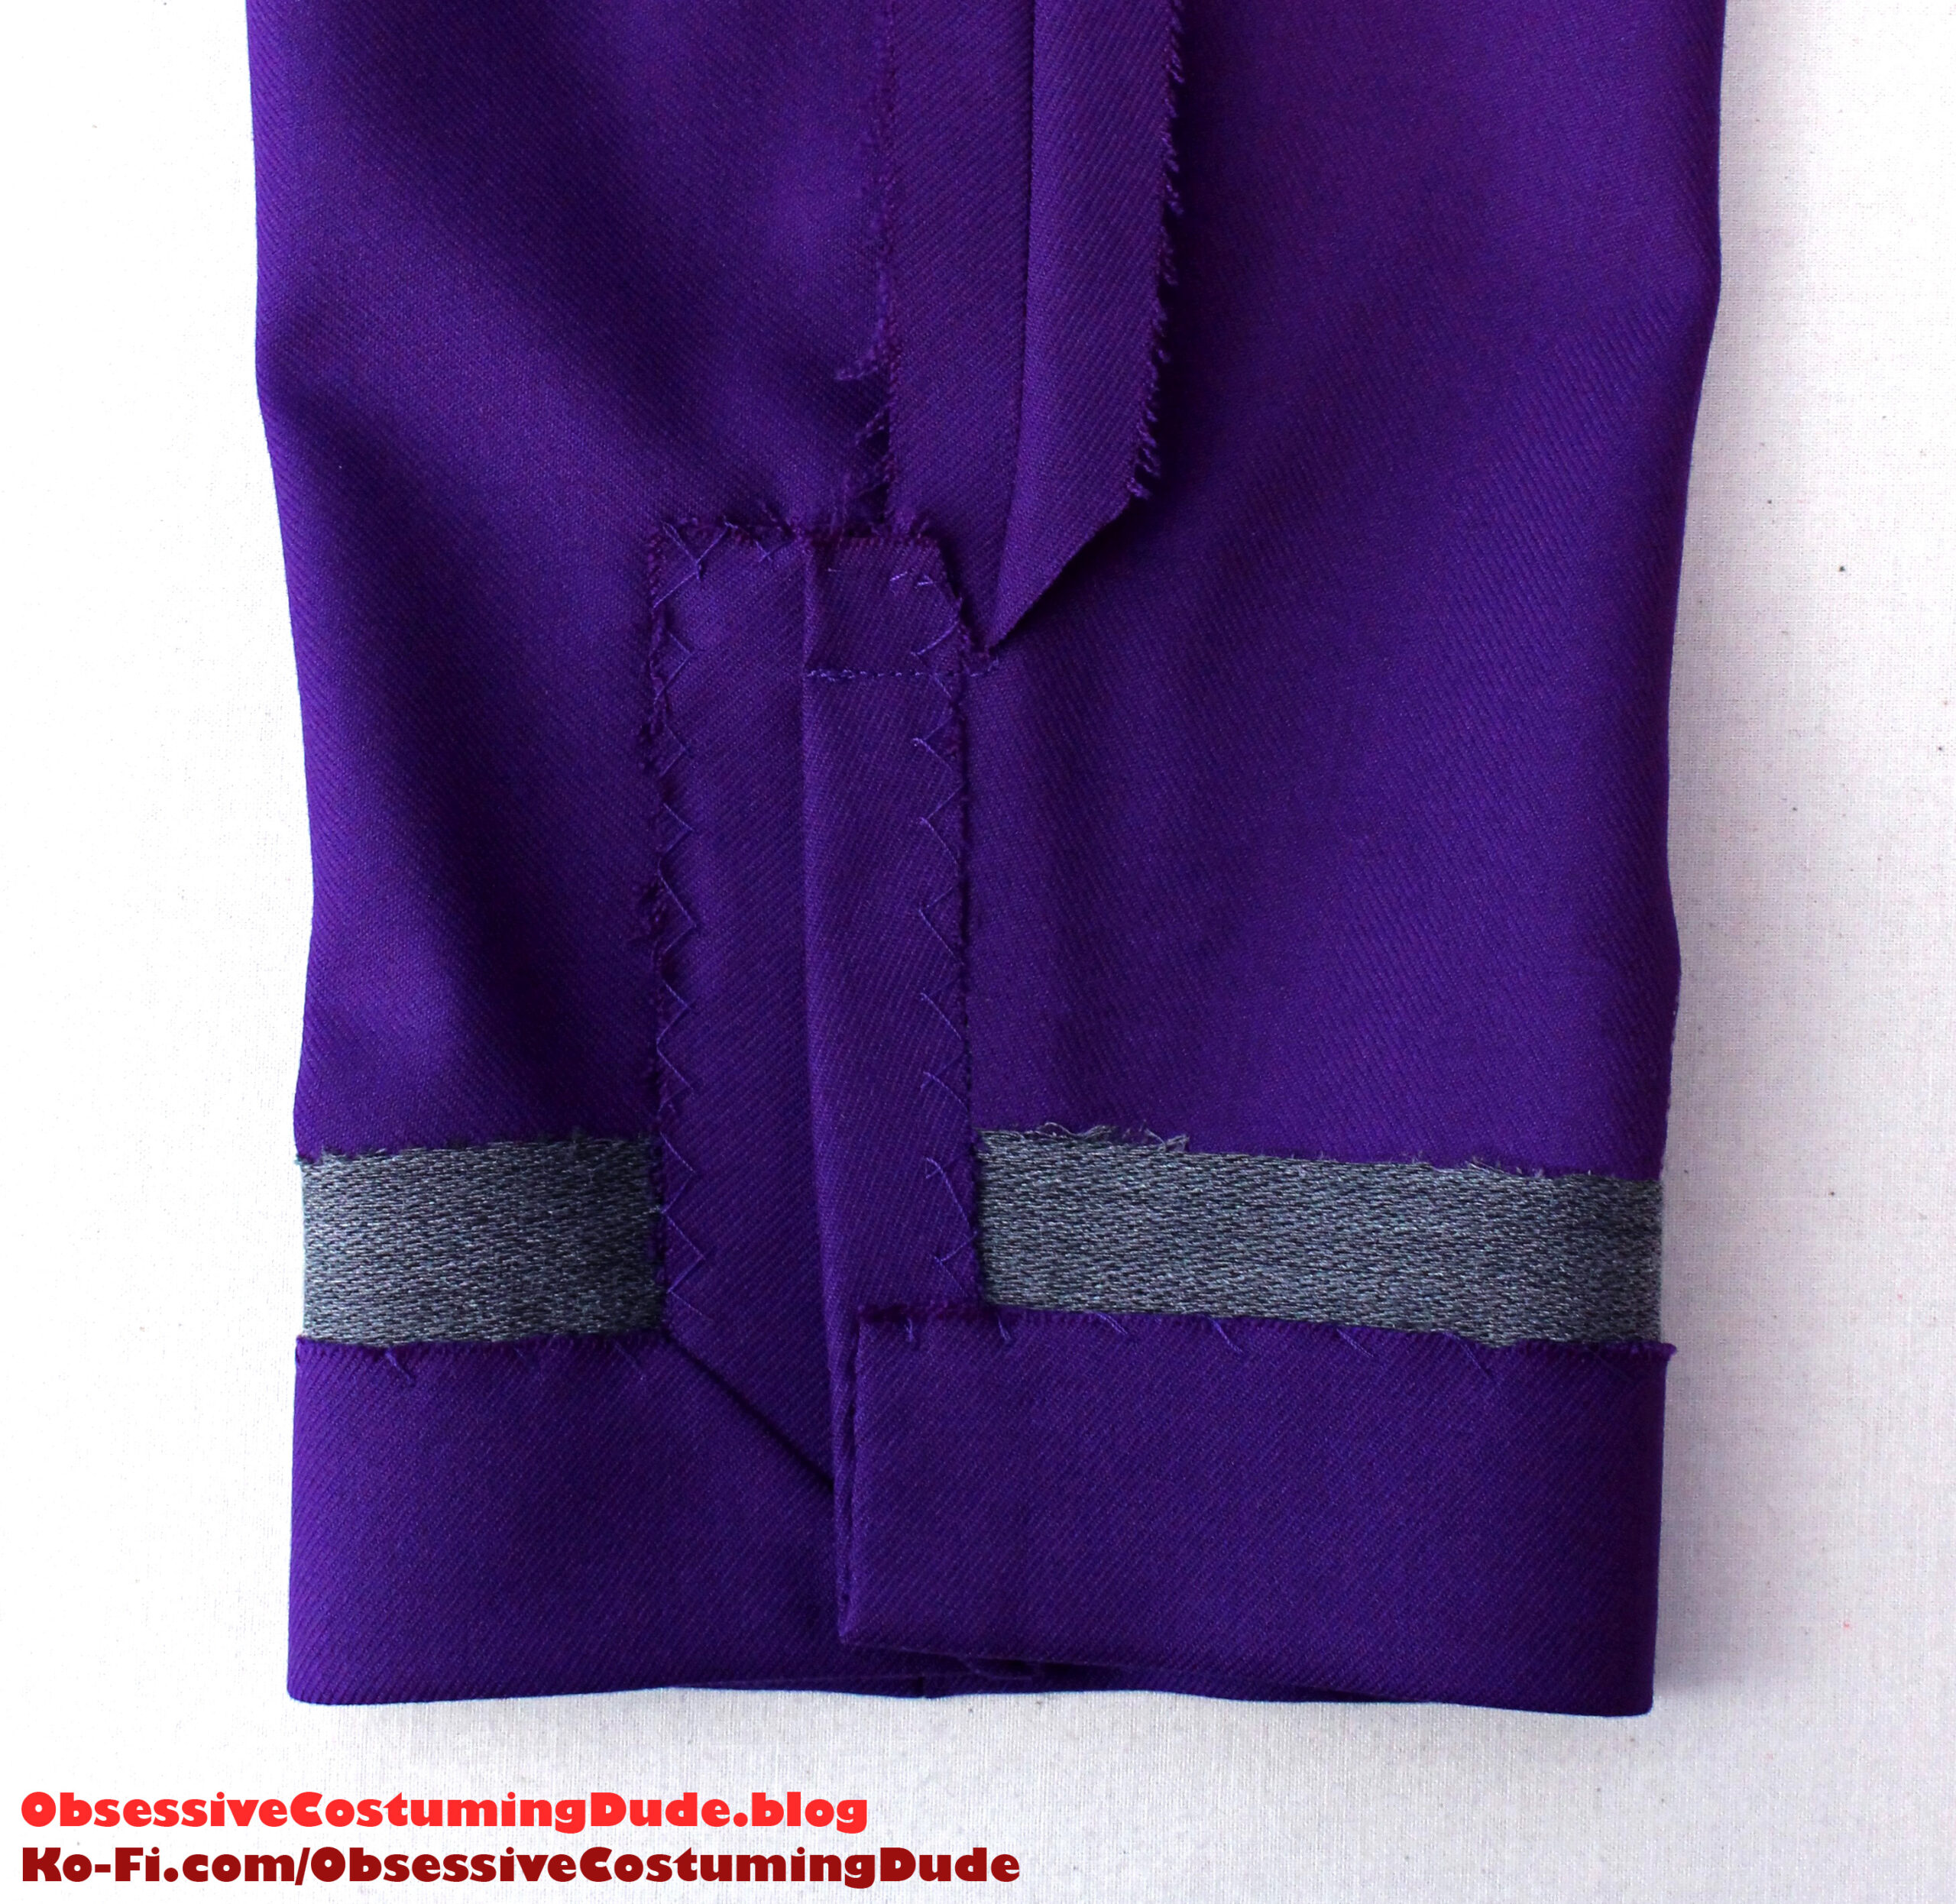
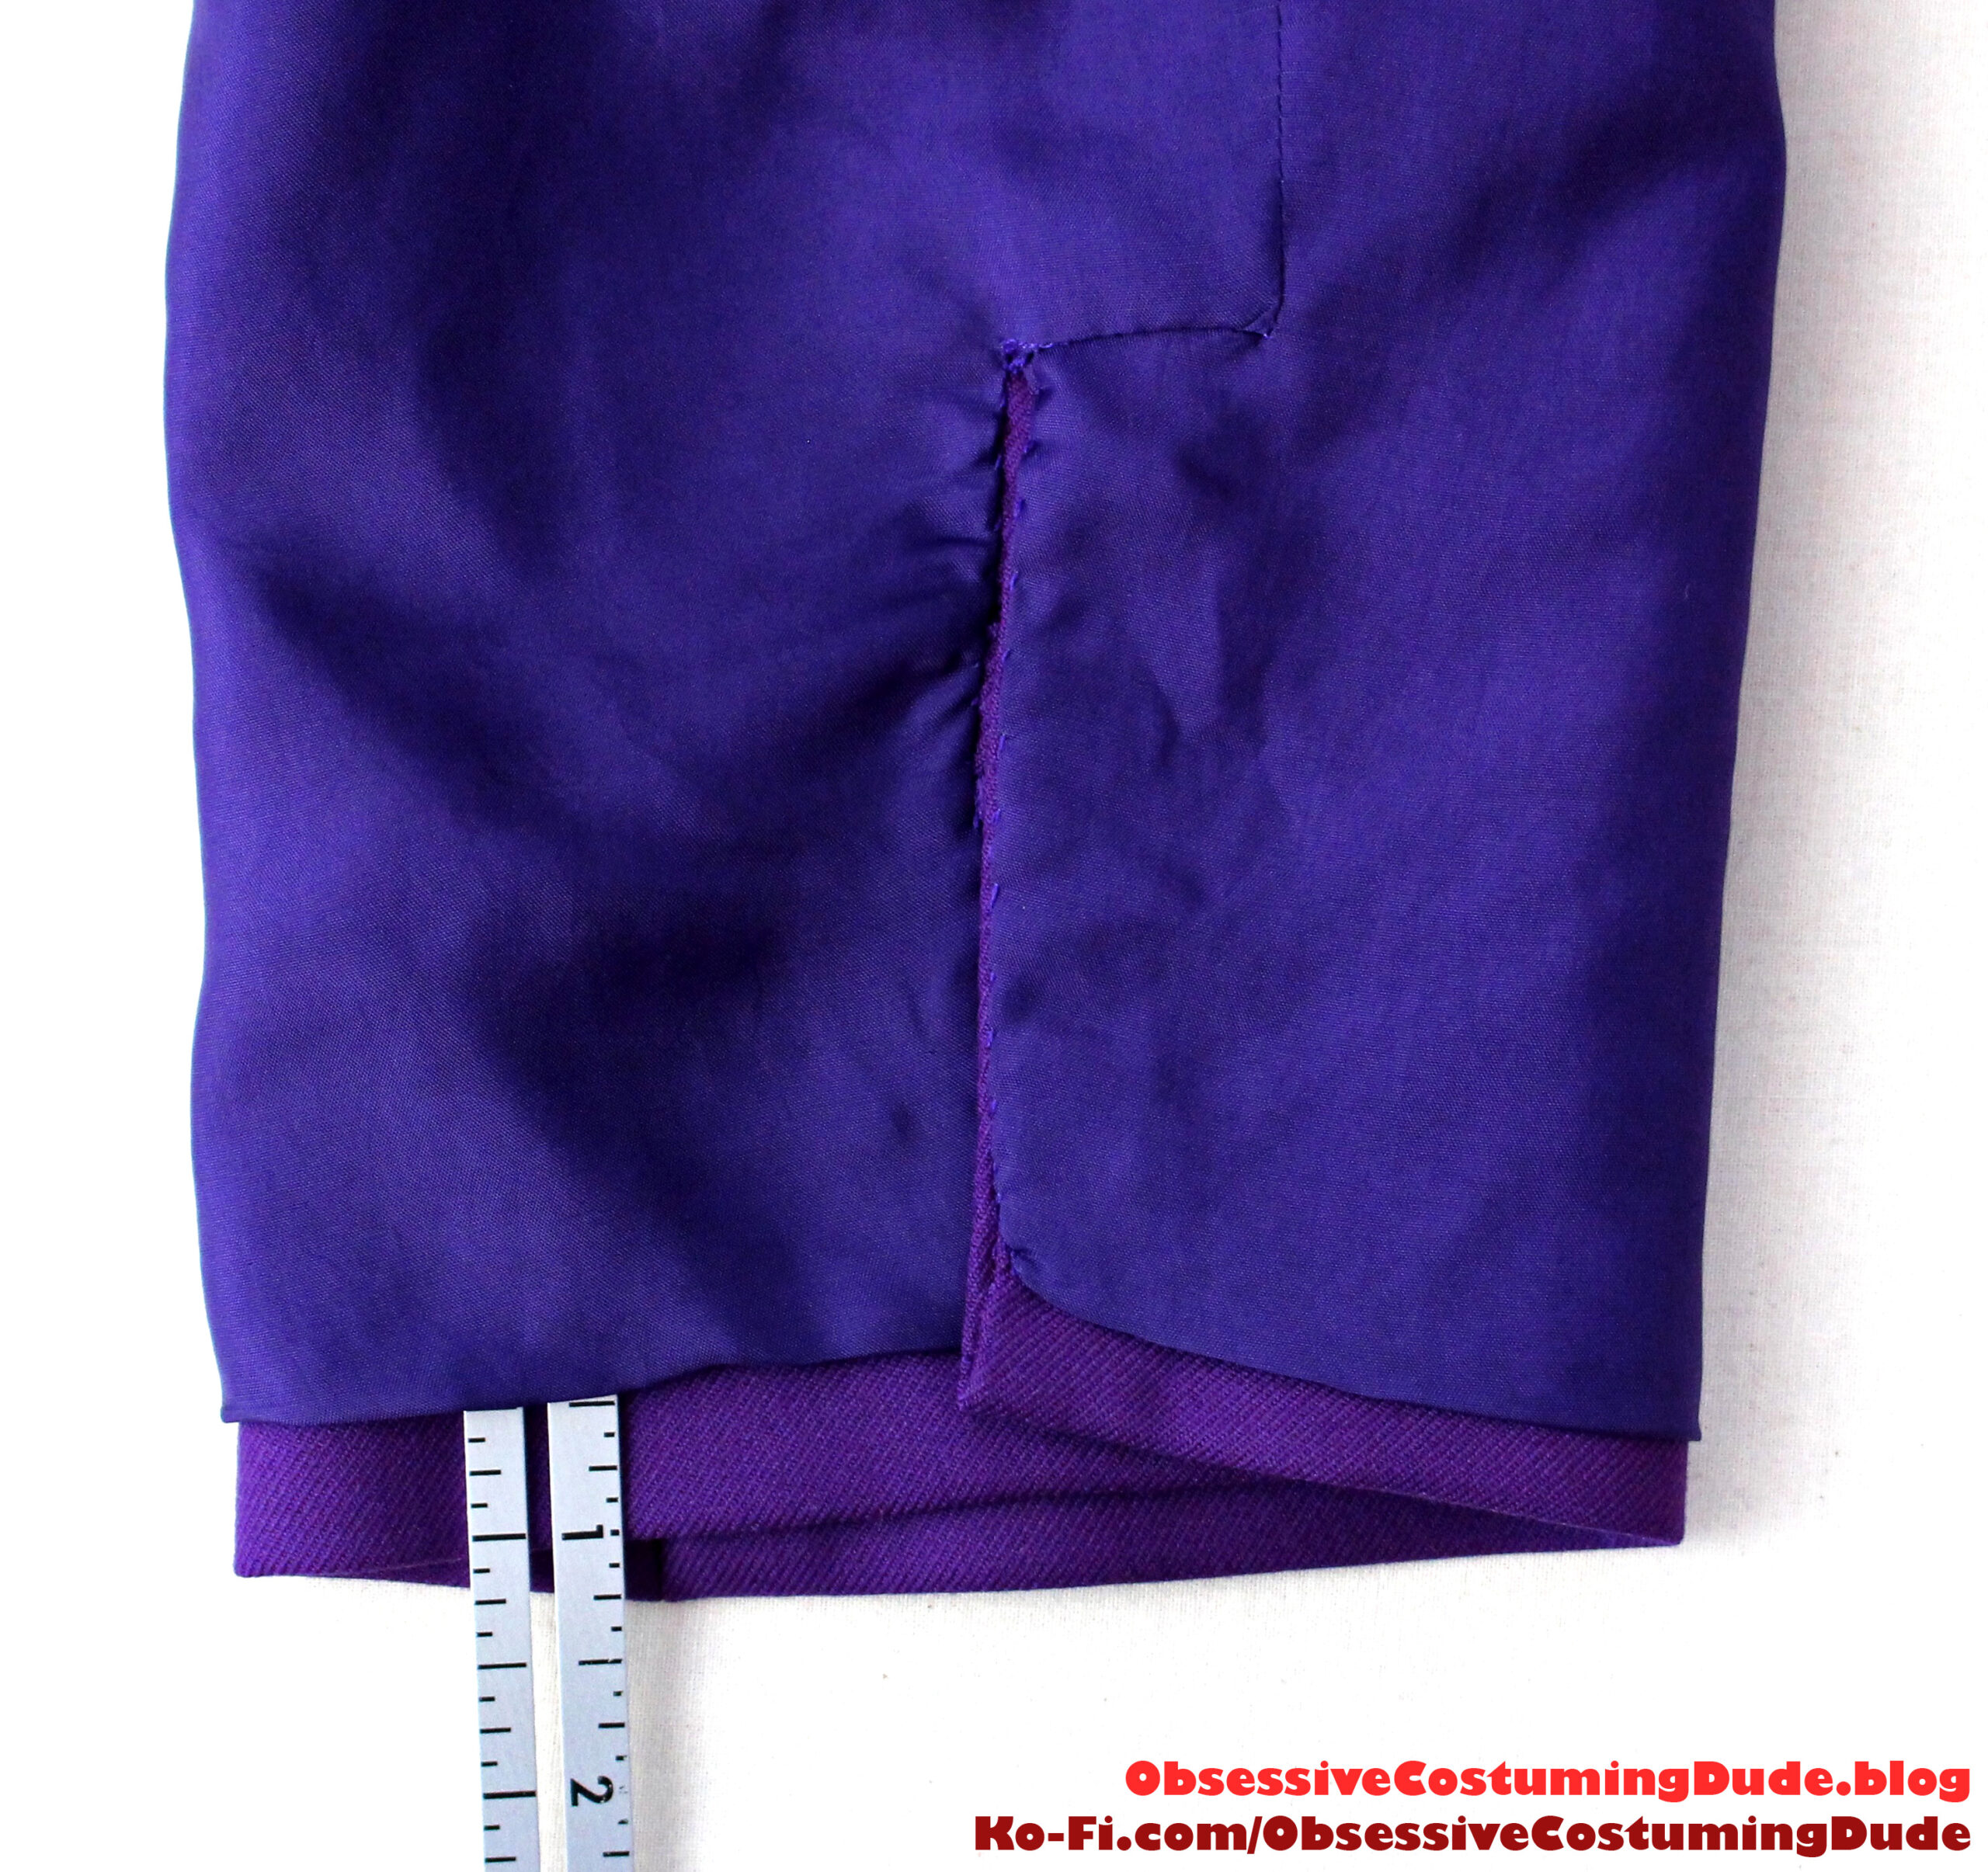
To miter the sleeve vent overlap, fold the lower corner of the back sleeve over on itself diagonally, right sides together, so the lower and vent edges are flush.
Sew lower corner of the sleeve closed with standard ⅝” seam allowance.
Trim the allowances down to about ⅛” and gently turn out the corner.
Turn under the front vent underlap, press, and catch-stitch it into place.
Press the sleeve hem allowance upward and pin the allowances into place along the vent and lower edges.
Sew the sleeve closed along the back edges, pivoting and stitching across the top of the vent.
Clip the front seam allowance diagonally to the stitching at the corner, and press the seam allowances open.
Catch-stitch the vent overlap into place, and hem the sleeve by hand (taking care to only stitch through the fusible interfacing and not onto the outside of the sleeve).
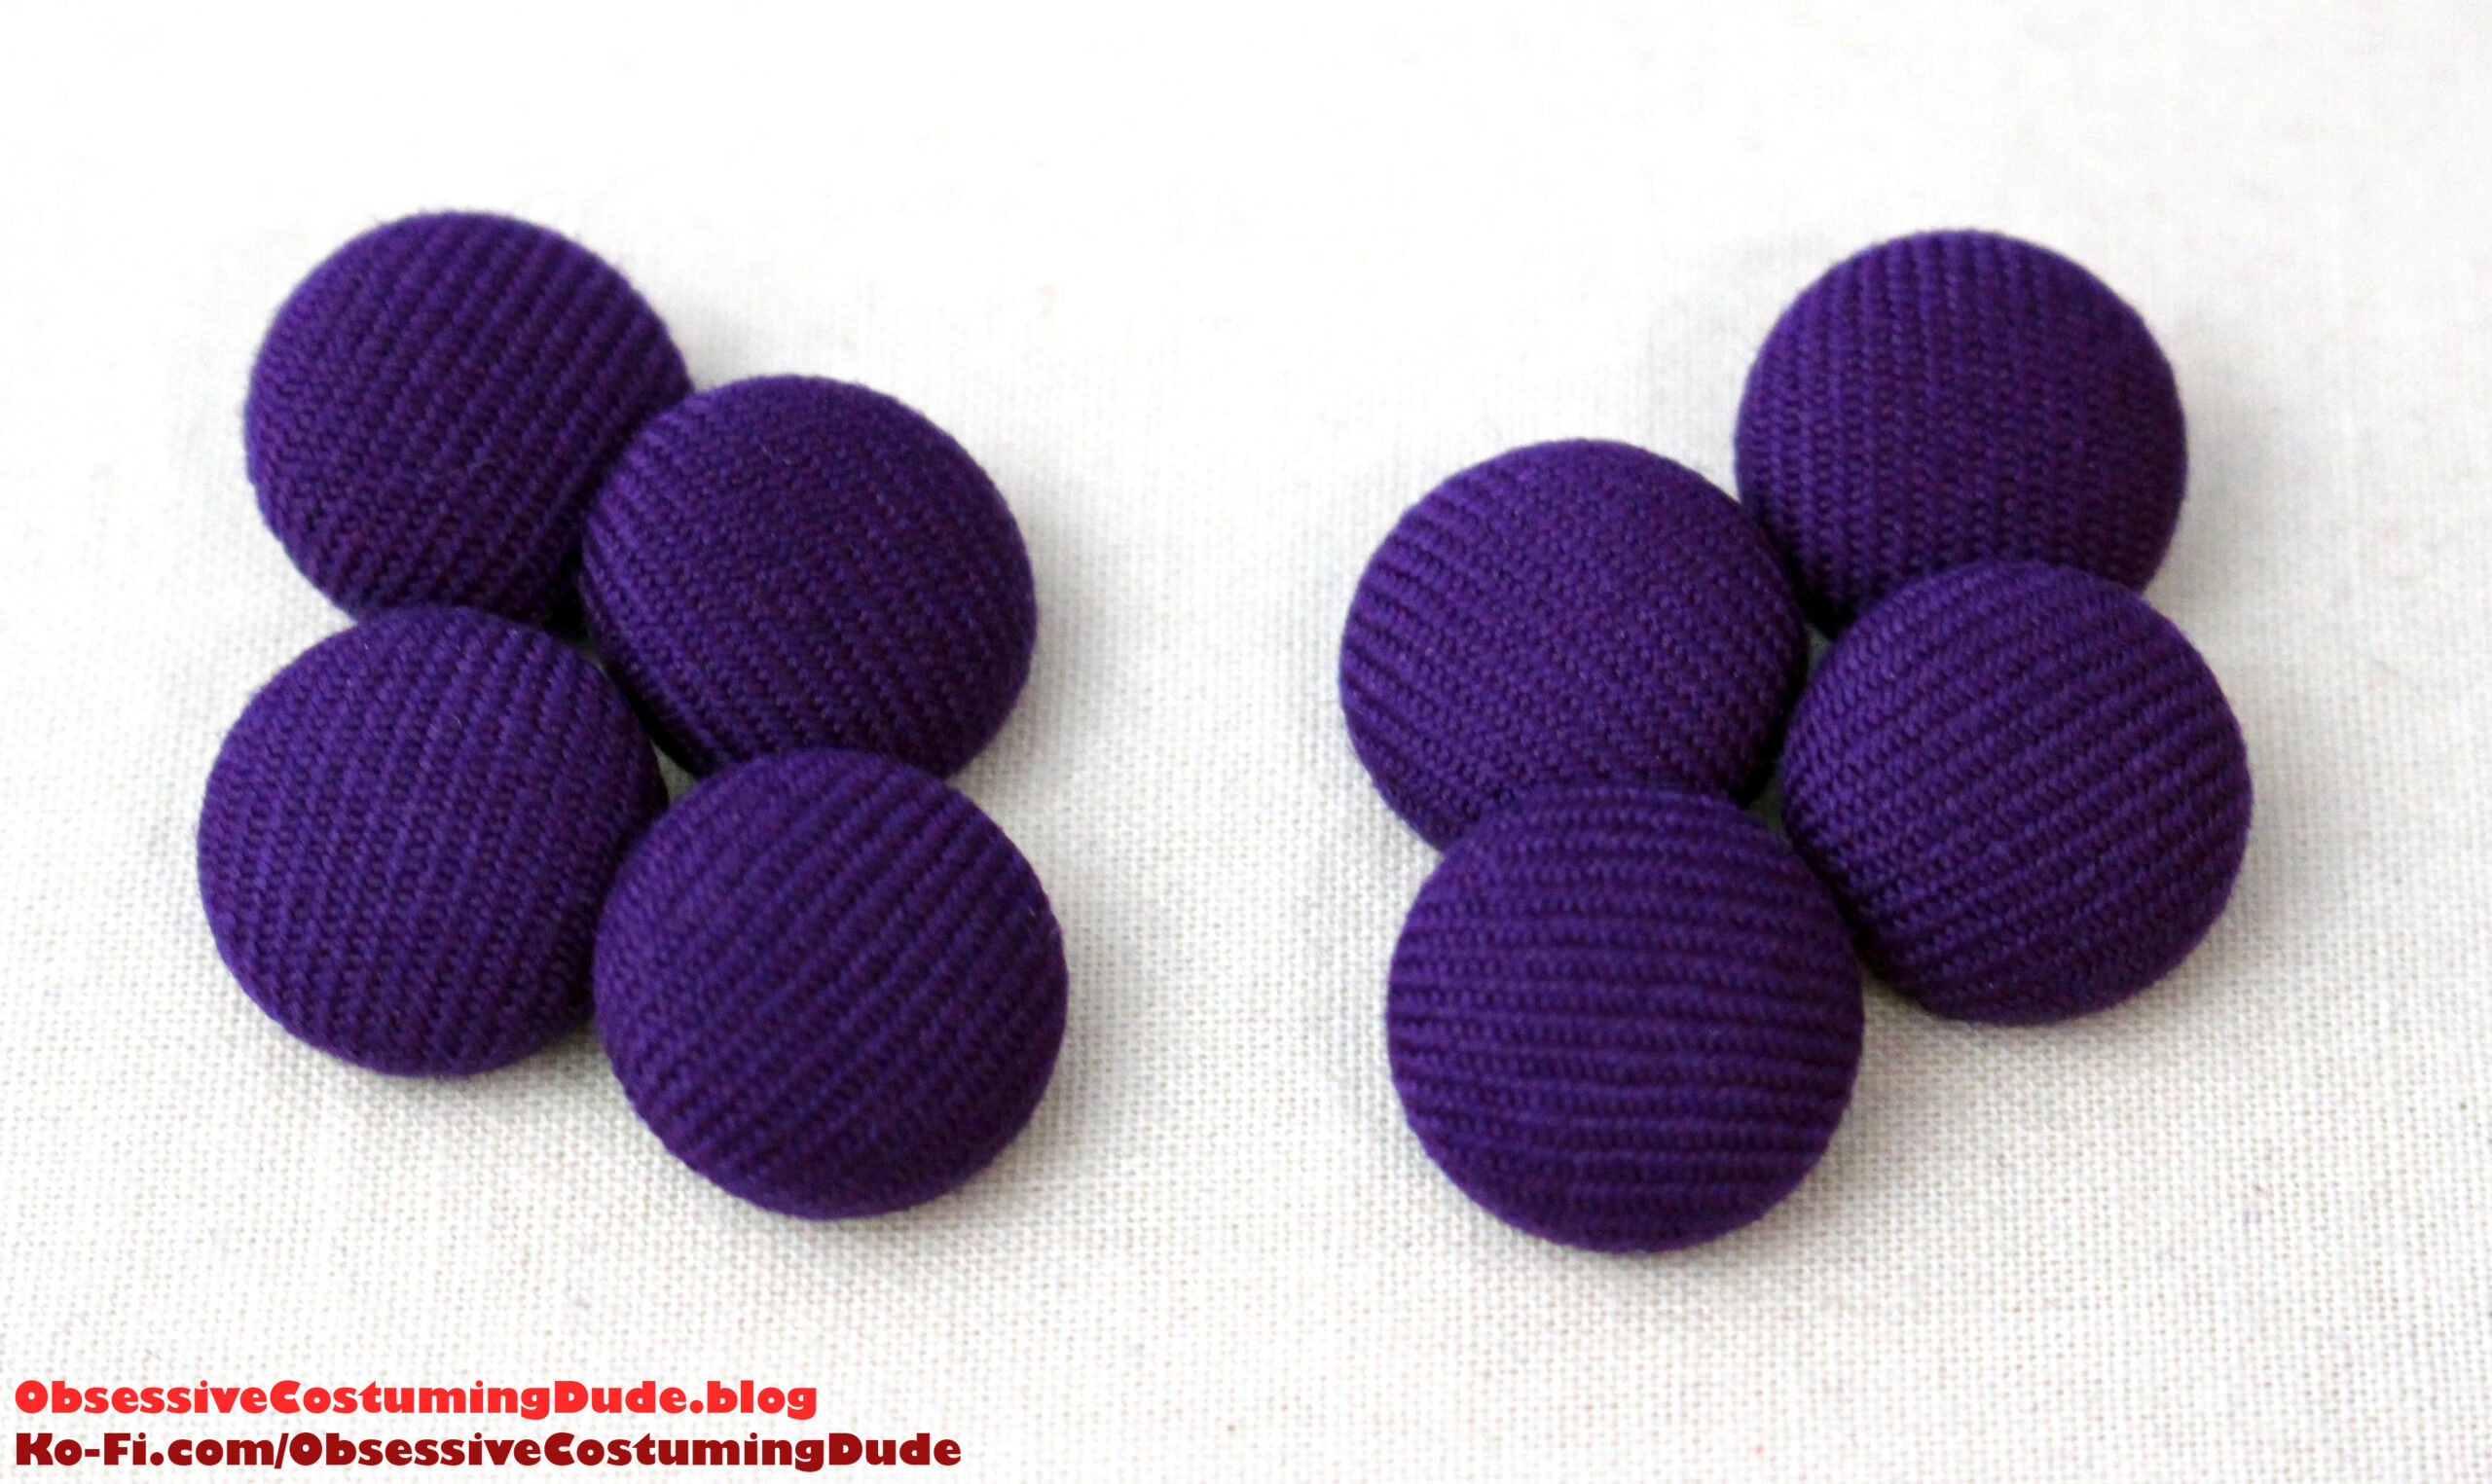
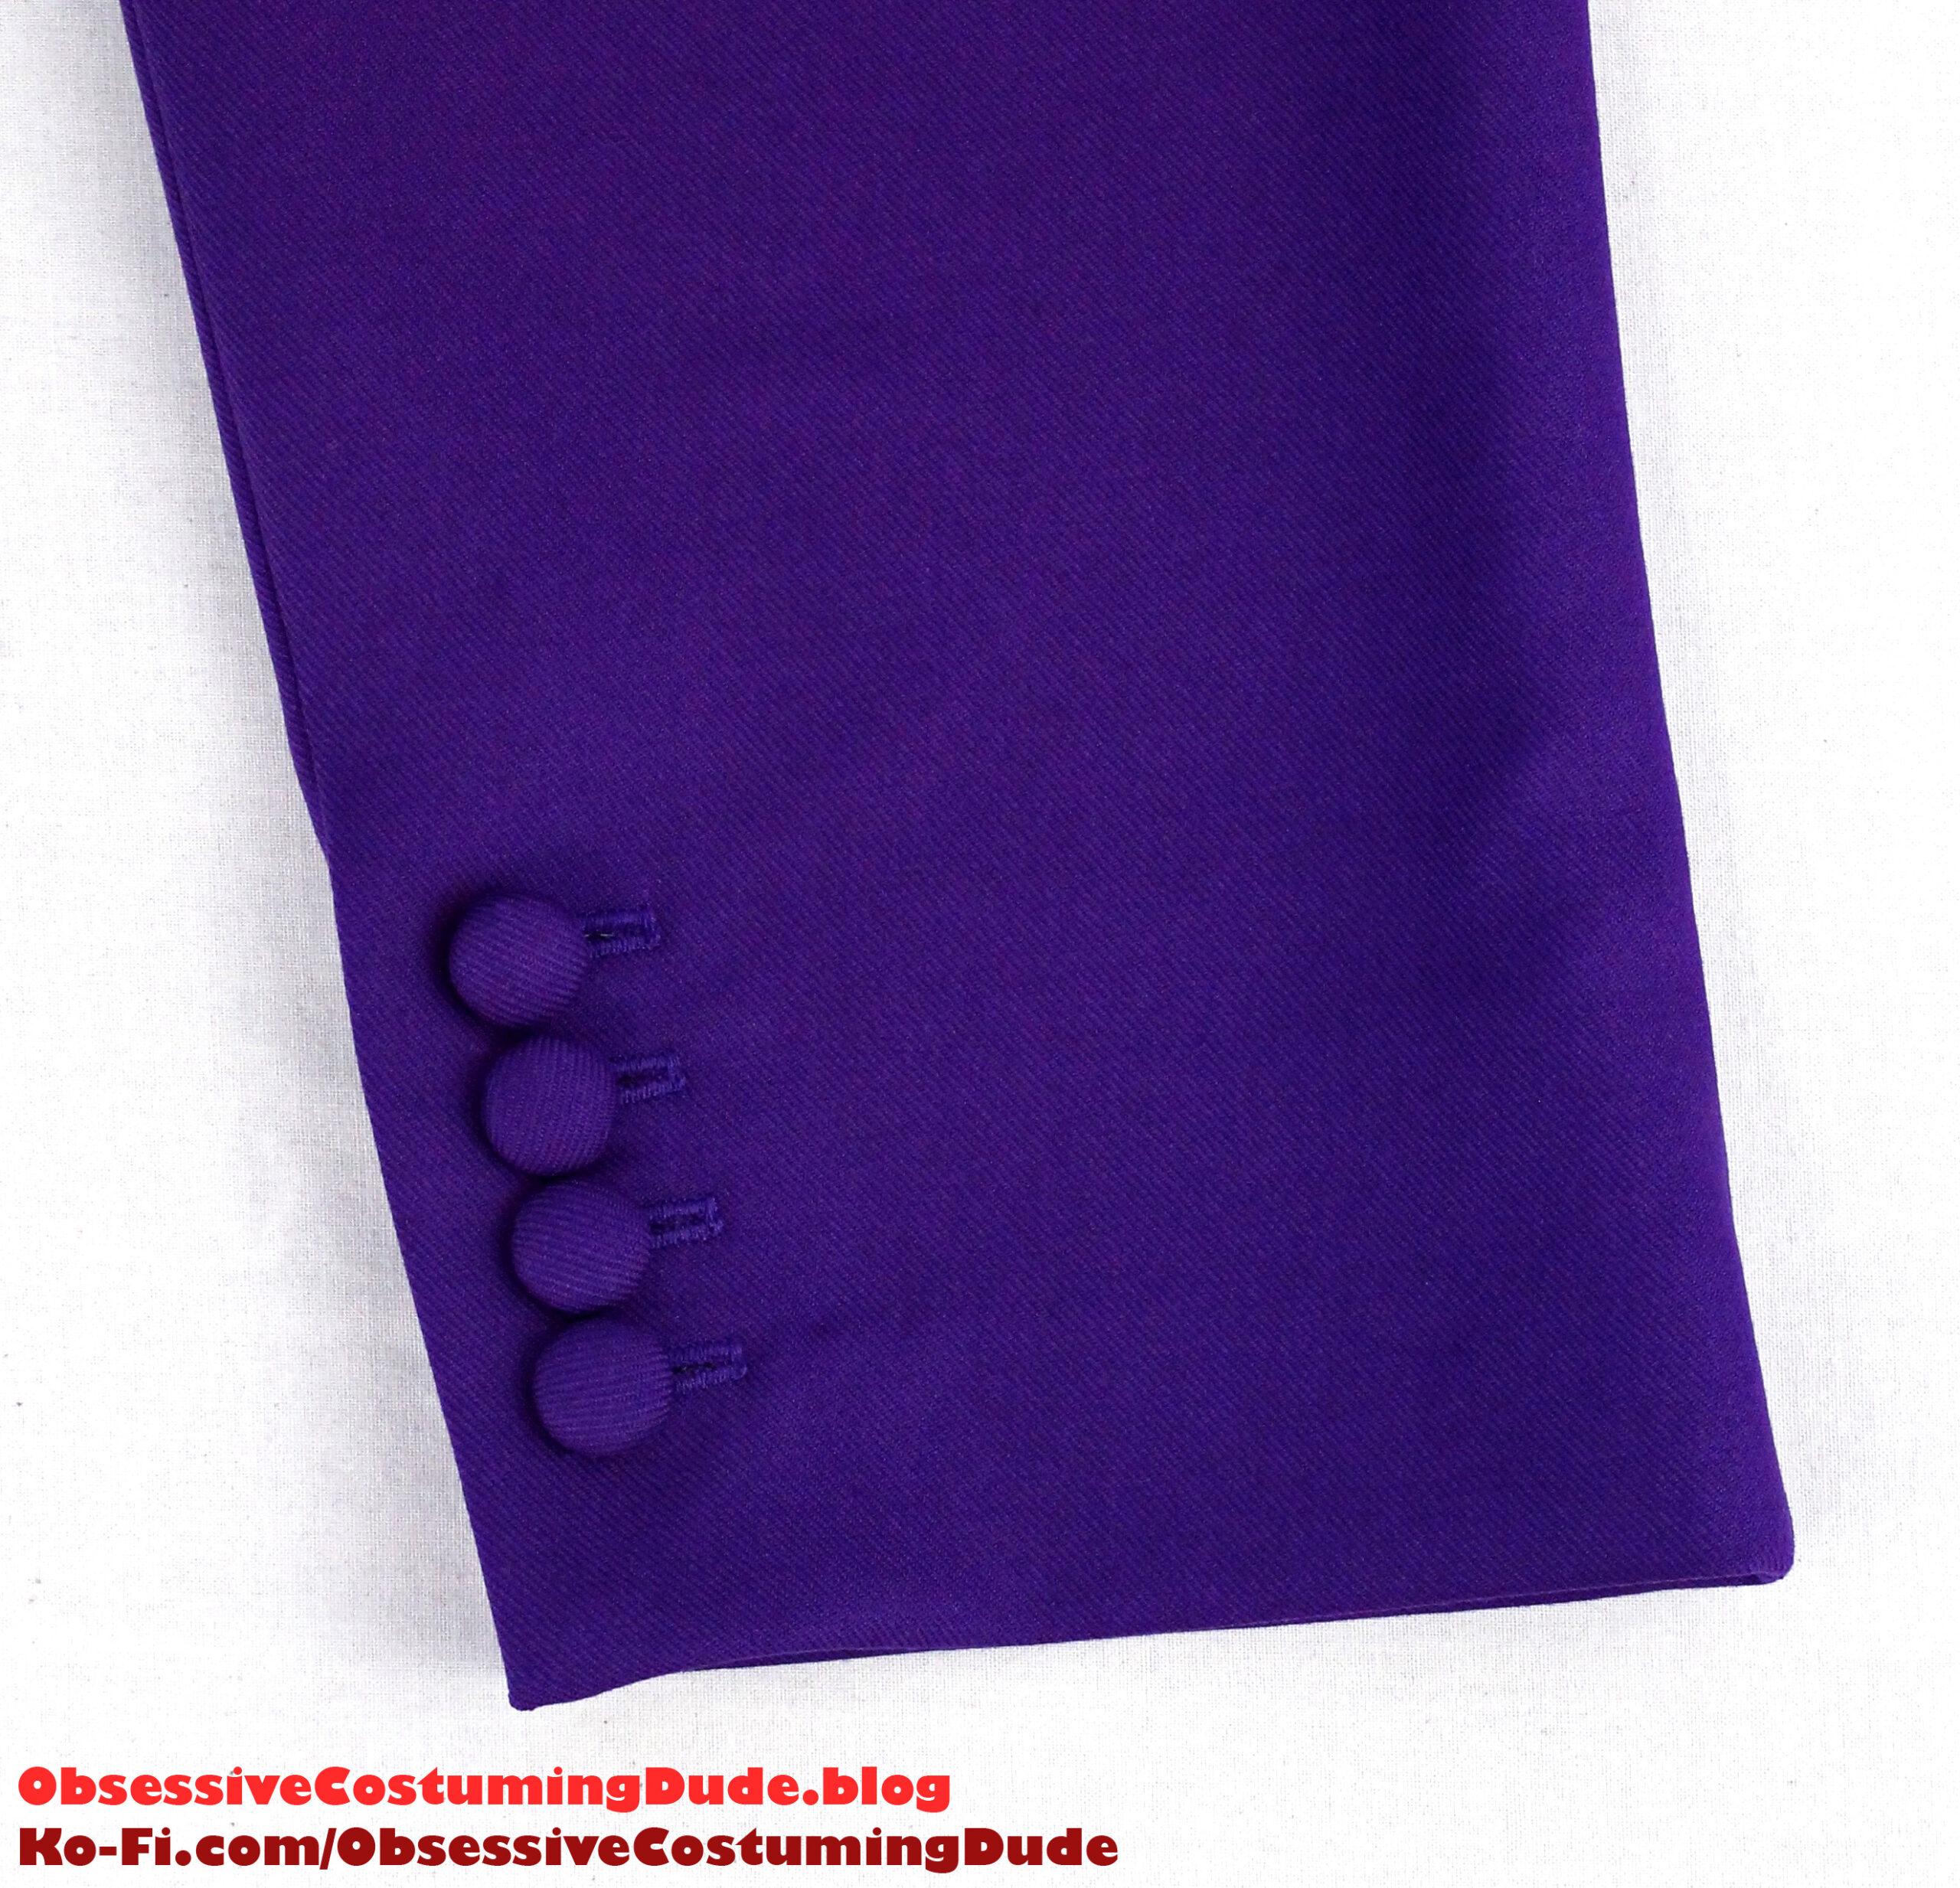
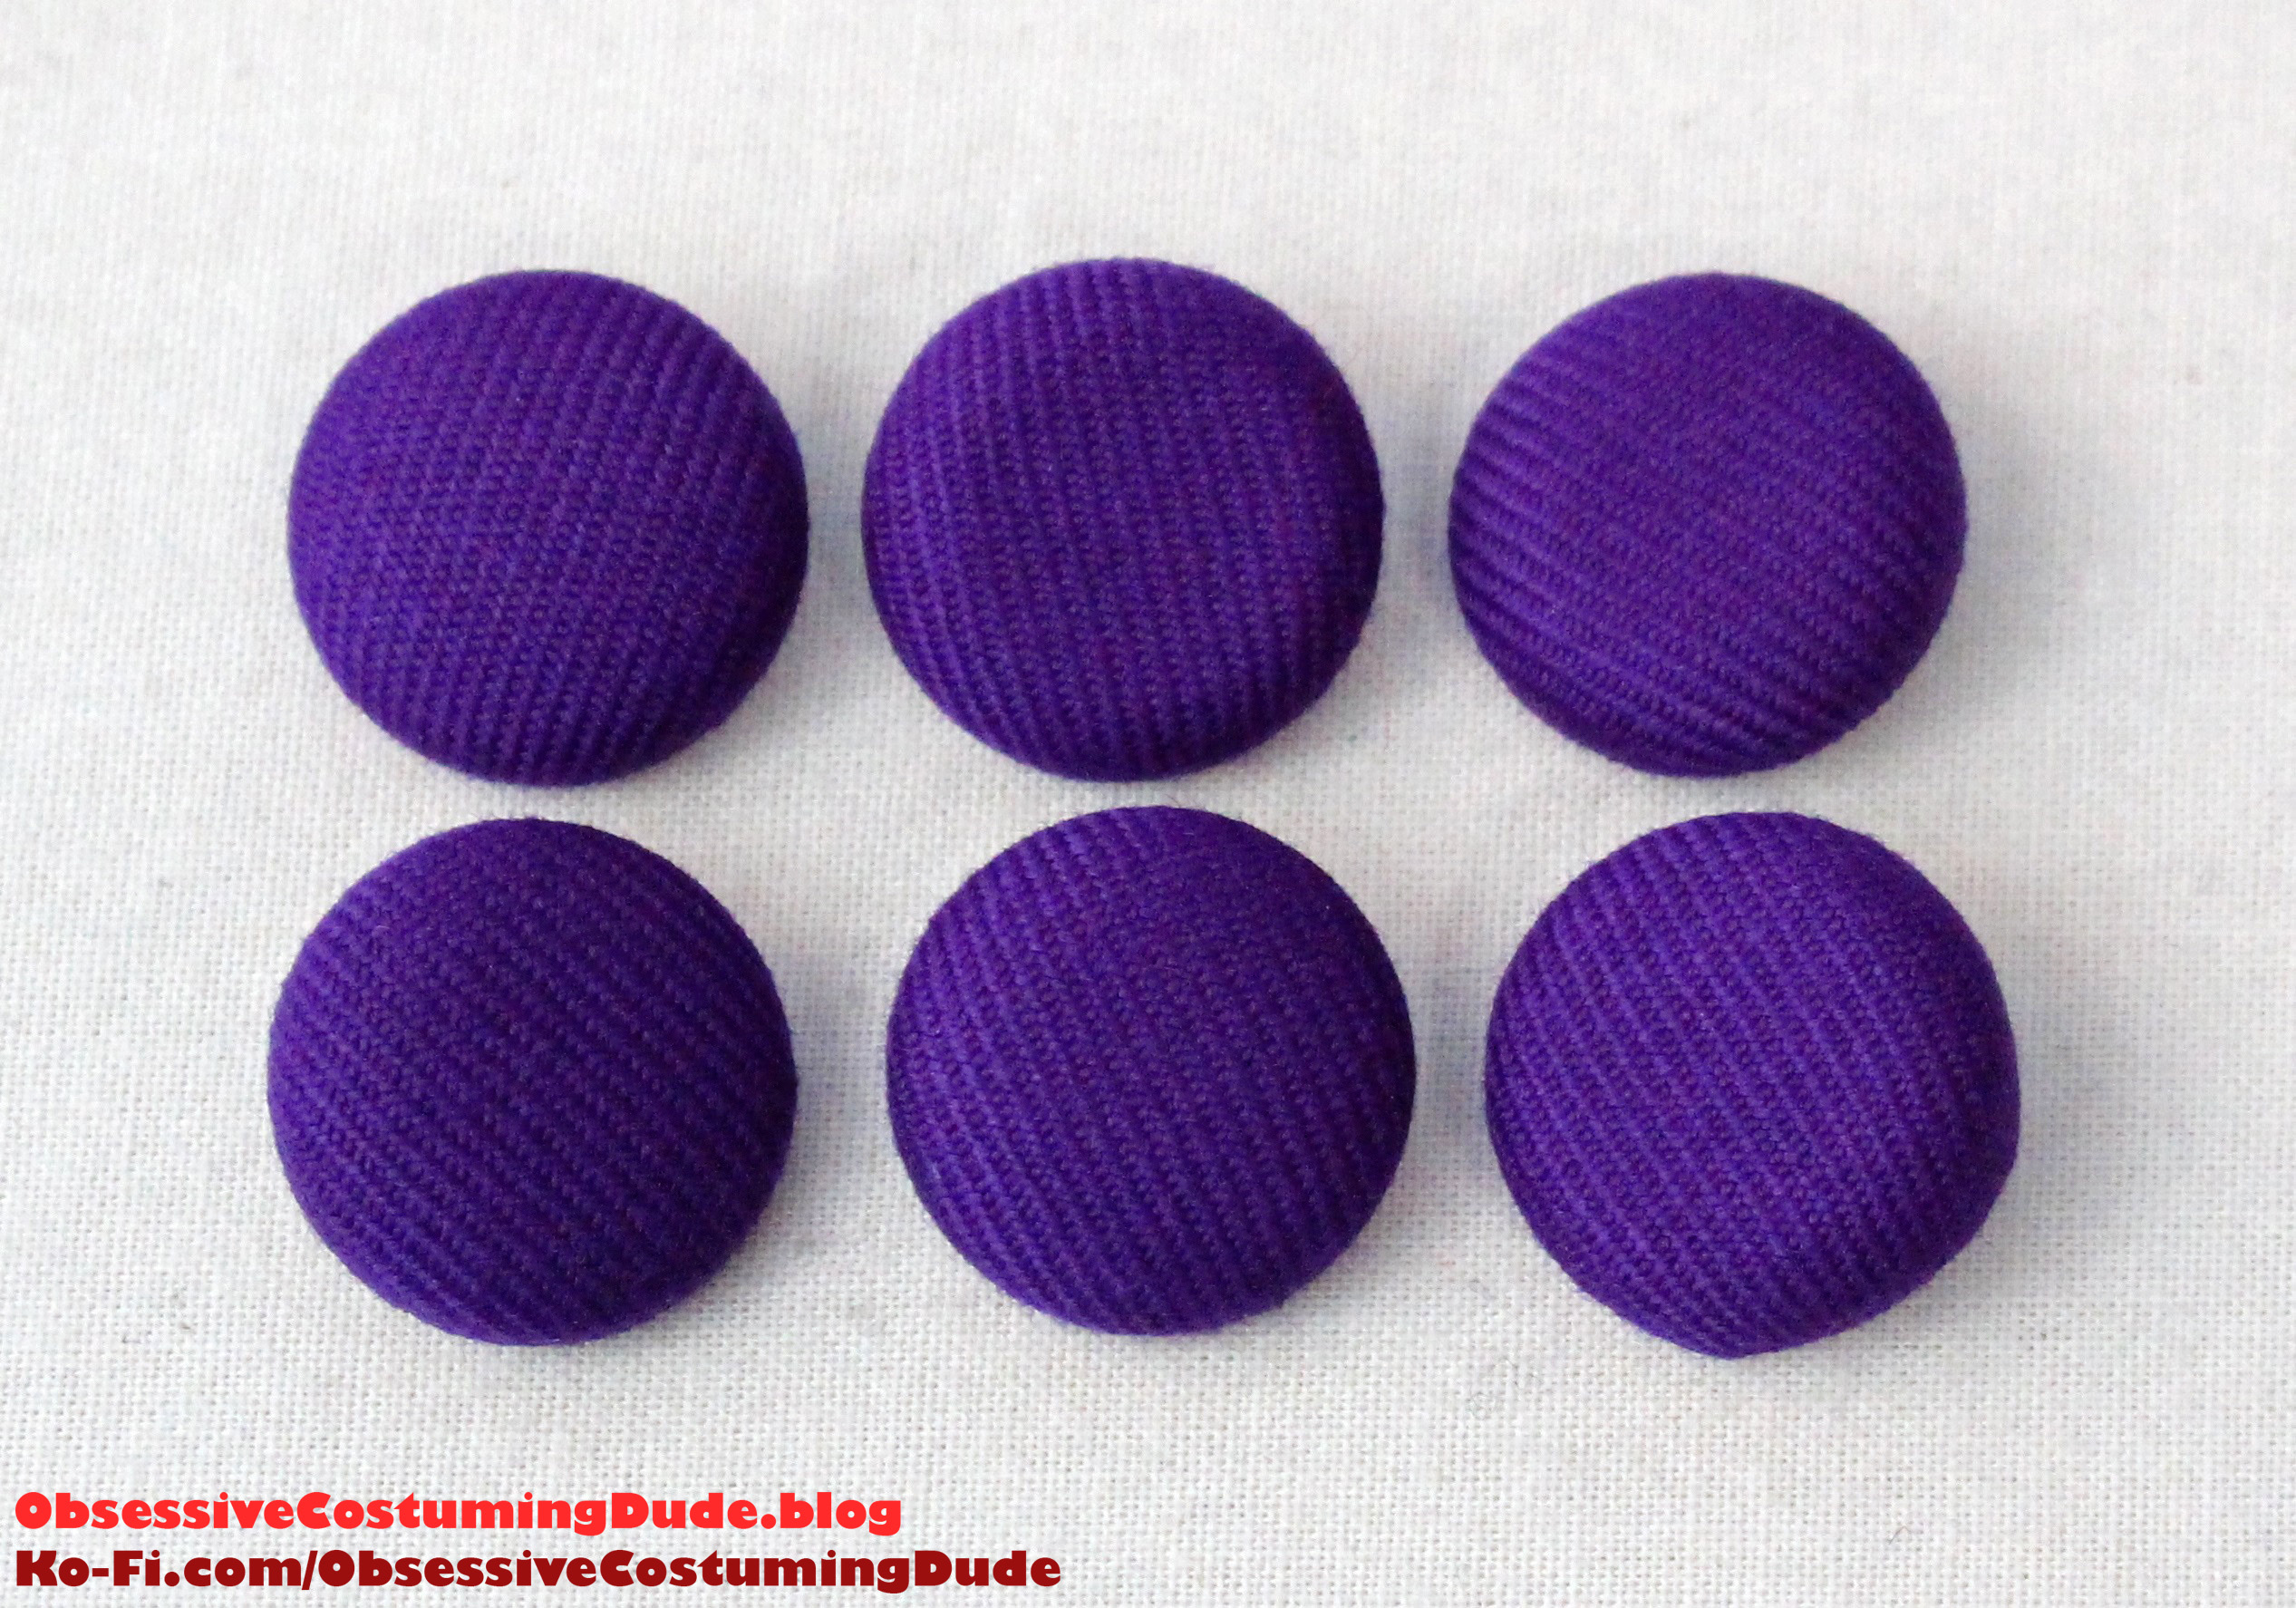
Make eight ⅝” fabric buttons as described in the DIY button kit instructions.
Make four buttonholes on the vent overlap, and hand-sew the four corresponding buttons to the vent underlap.
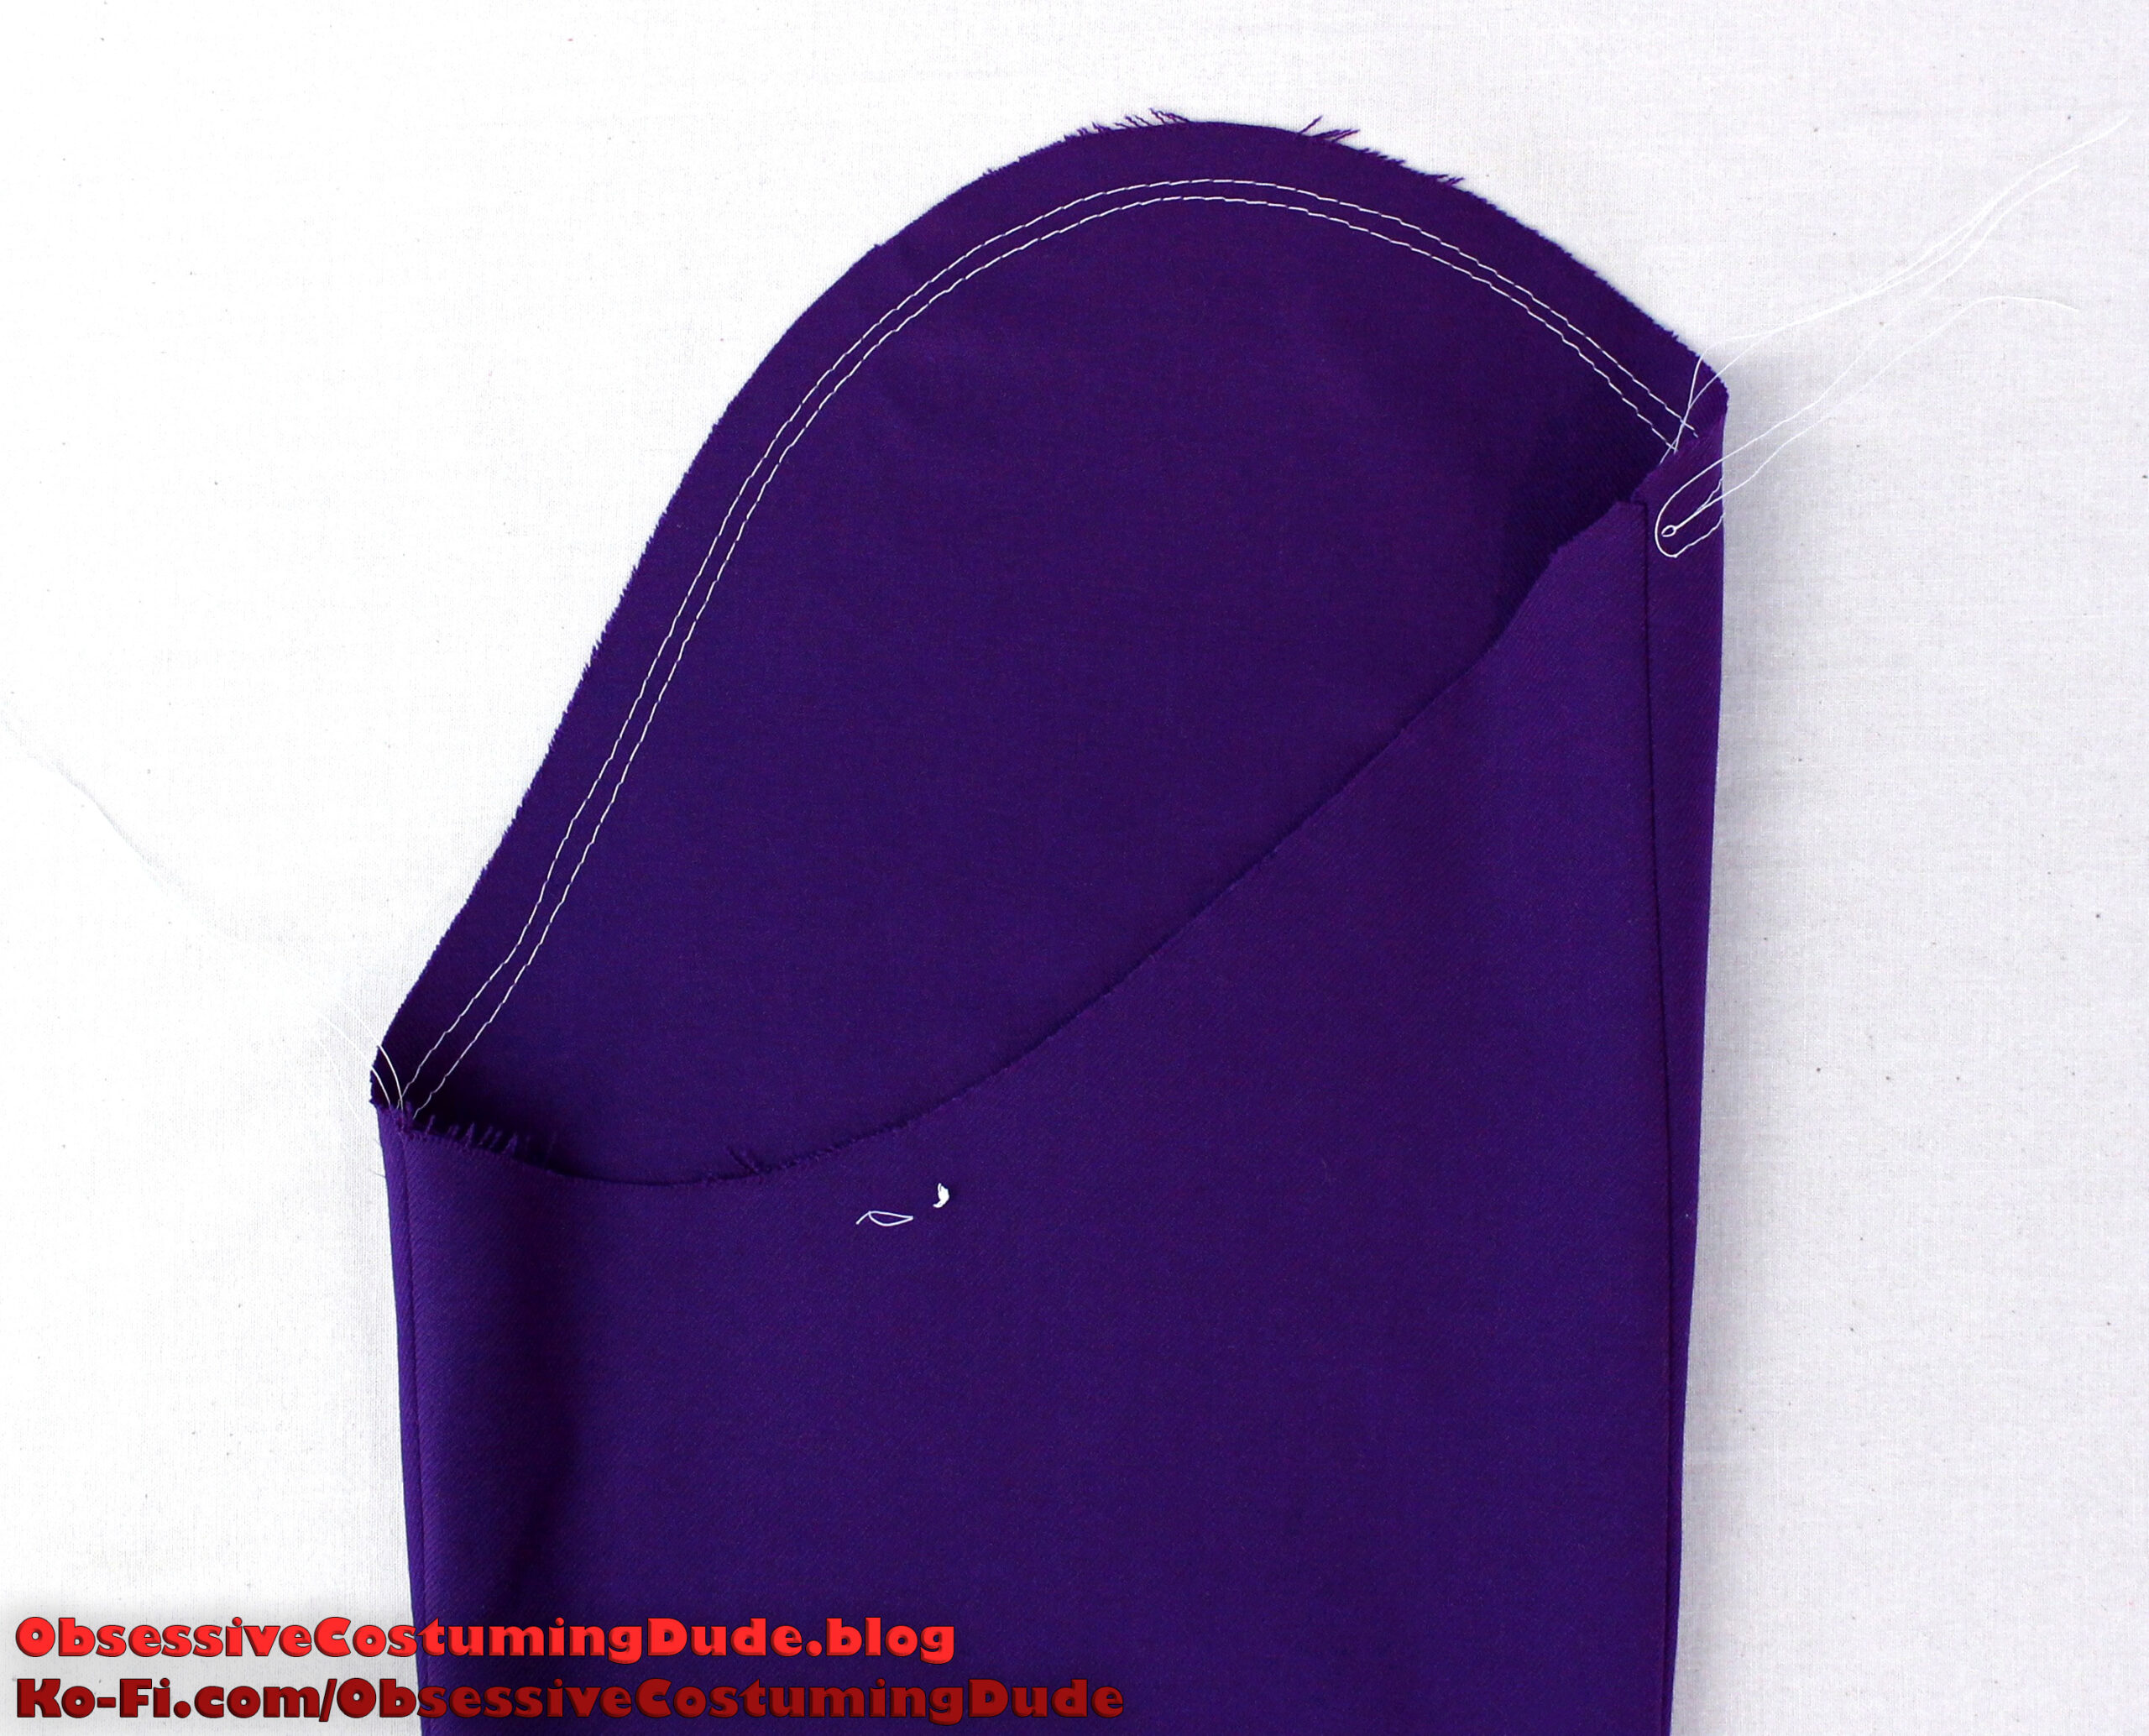
To set in the sleeve, the ease in the sleeve cap first needs to be gathered down fit the armscye.
Sew two rows of gathering stitches around the sleeve cap, inside the seam allowance.
Gather the cap ease along the stitches and steam it away over a tailor’s ham.
With the armscye stabilized and the sleeve cap gathered, it’s time to set the sleeve!
Pin the sleeve into place along the armscye, matching dots and balance points. (The back sleeve seam should align with the back princess seam on the coat.)
Baste the sleeve to the body and inspect the cap to ensure there are no folds, pleats, puckers, etc.
Once satisfied with the quality of the sleeve cap, sew the sleeve to the body, then stitch again ⅛” inside of the previous stitch line.
Trim the seam allowances to ½” around the cap, and to about ¼” around the lower armhole.
Position the sleeve head over the armscye to determine how long it should be. (It should extend over approximately the same distance as the cap ease, or perhaps a little bit farther.)
Trim it down to size, and trim the ends into gentle curves.
Insert the sleeve head into the sleeve cap, edges flush, and pin it into place.
Using a quilting/walking foot, sew the sleeve head to the armscye about ⅛” from the seam line (⅜” from the edge).
Pull the sleeve through the armhole, then press the sleeve head and armscye seam allowances toward the sleeve.
Gently pull the sleeve back through the armhole and turn the assembly right-sides-out.
Repeat for the other side. (Do not attach the two halves together along the center back yet.)
INTERIOR ASSEMBLIES
Instead of sewing the dart into the front lining (piece M), I suggest instead making a small pleat along the bottom inch or so, the same width as the dart.
Sew the front facing (piece L) to the front lining (piece M).
Press the seam allowances toward the side.
The front facing is already bolstered with the fusible hair canvas, but I do like to stabilize the back/lining portion of the interior pocket opening.
Should you wish to as well, cut a small rectangle of lightweight fusible interfacing about 1” tall and a 3 ½” long with pinking shears, and apply it to the pocket area on the underside of the lining.
I also suggest rimming away the front facing/lining seam allowances under the pocket opening.
Topstitch around the pocket opening, shortening your stitch length around the corners.
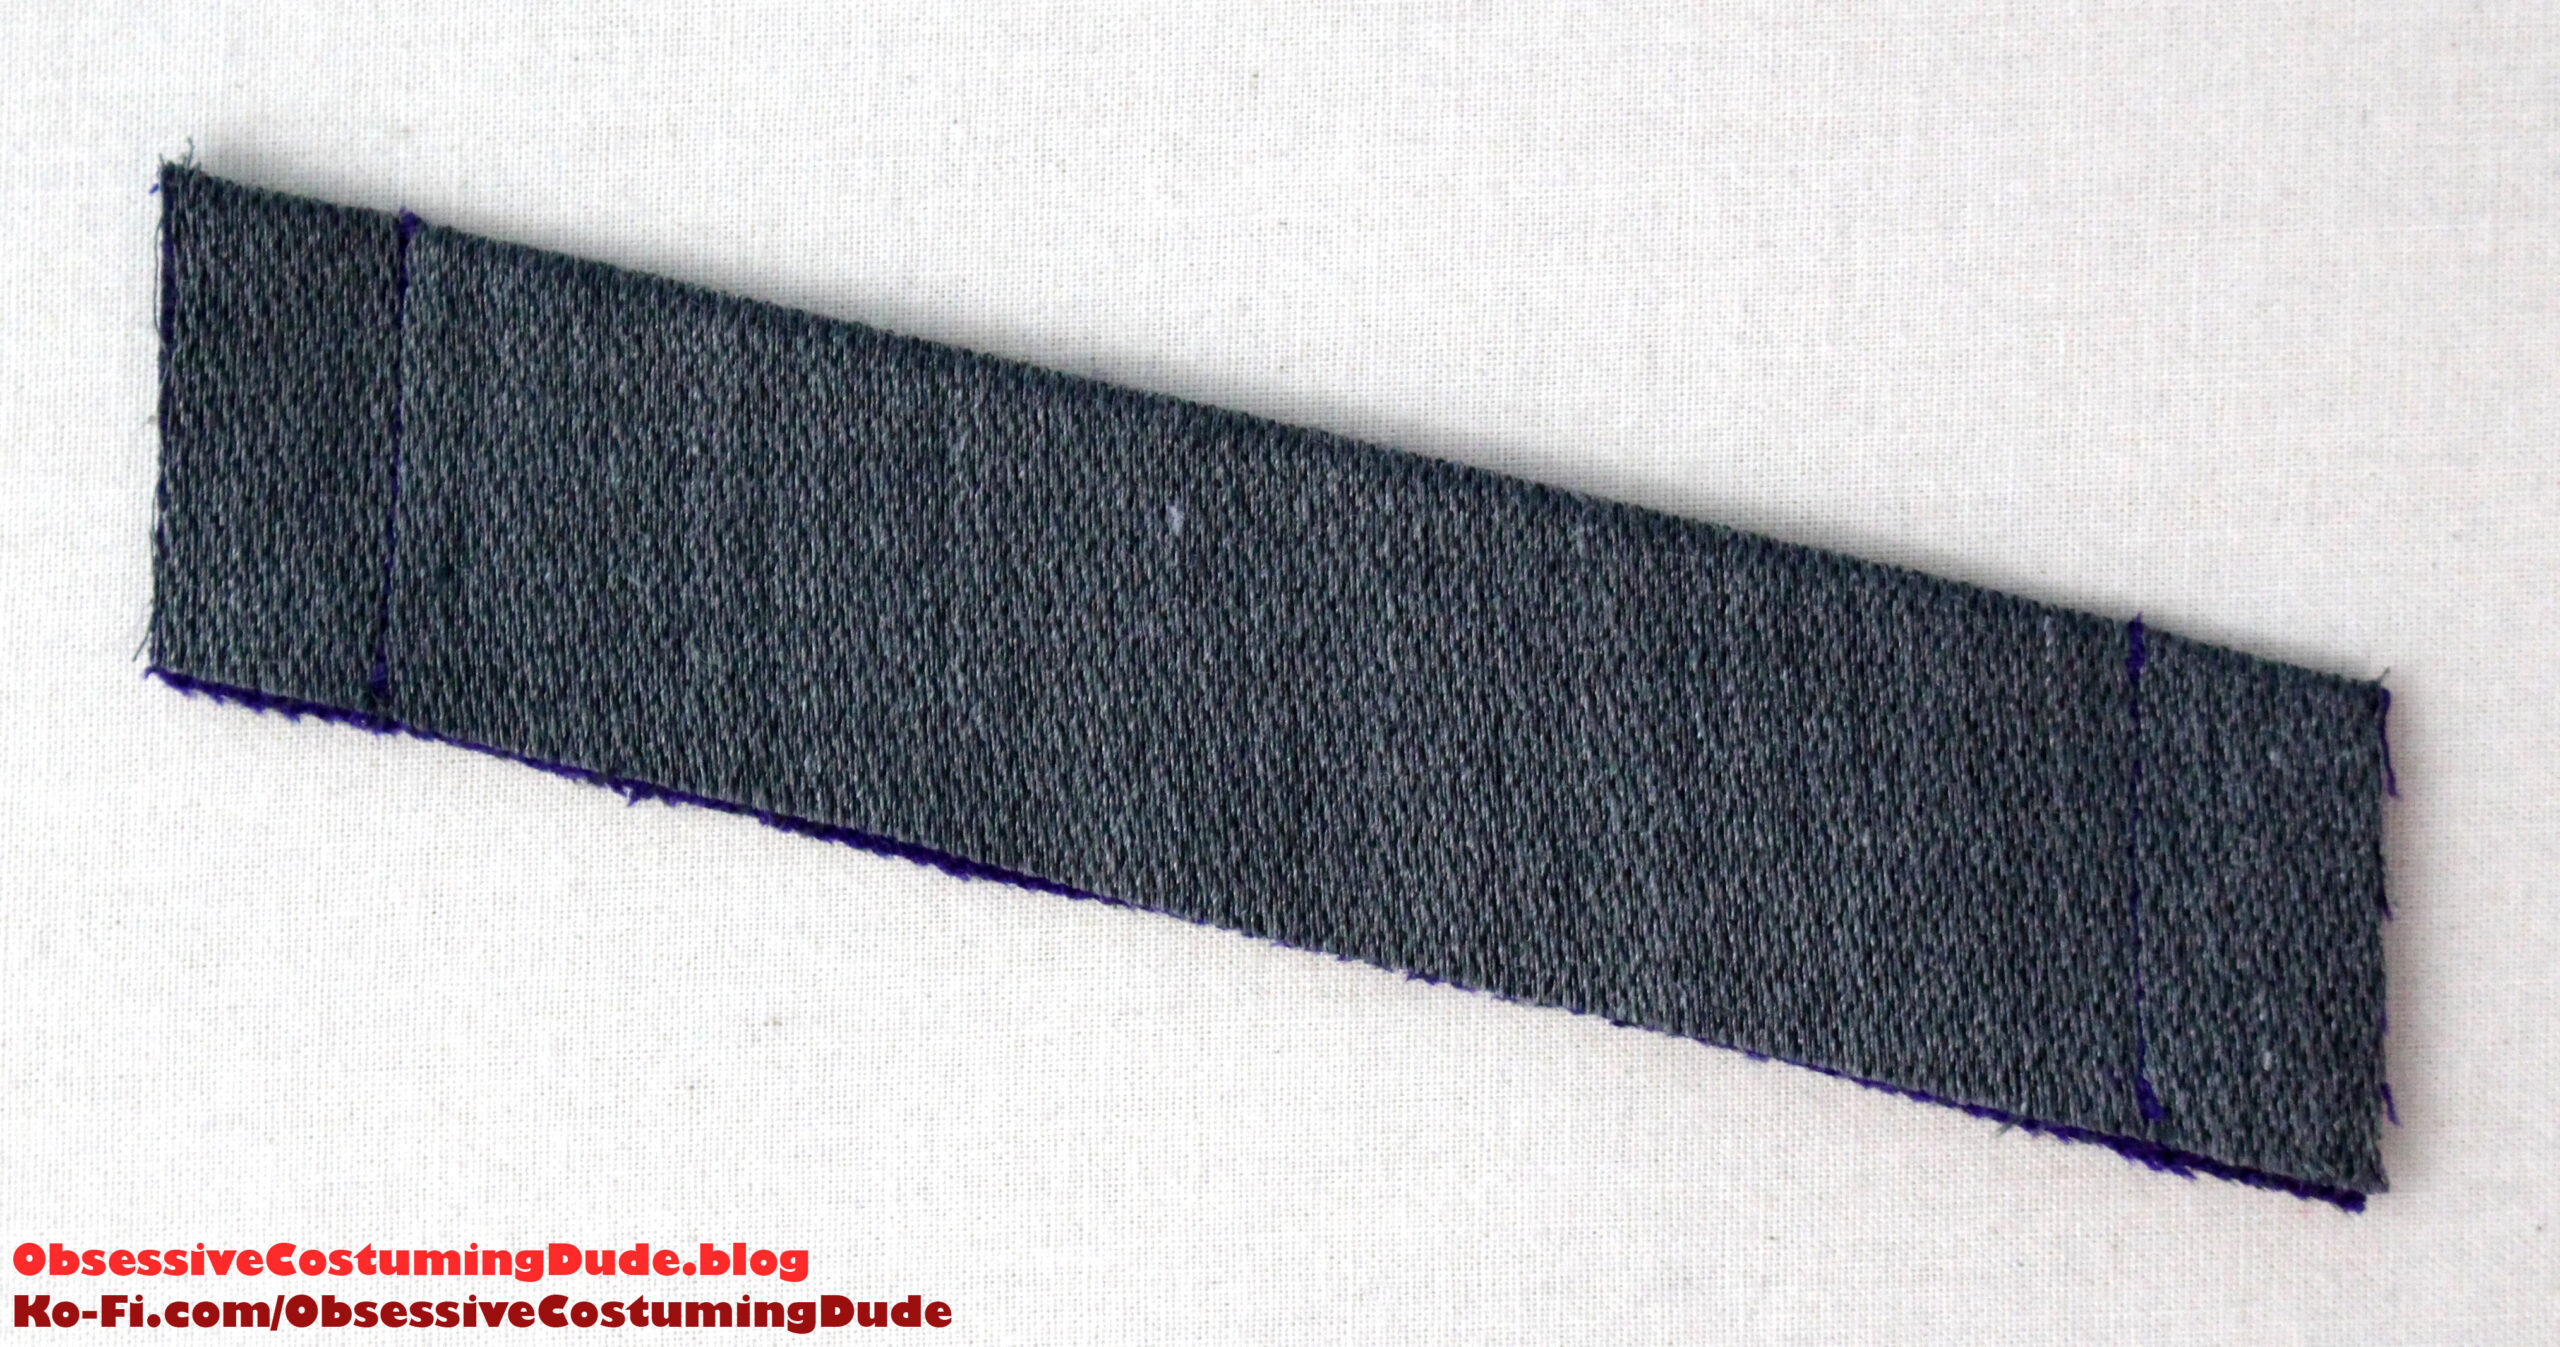
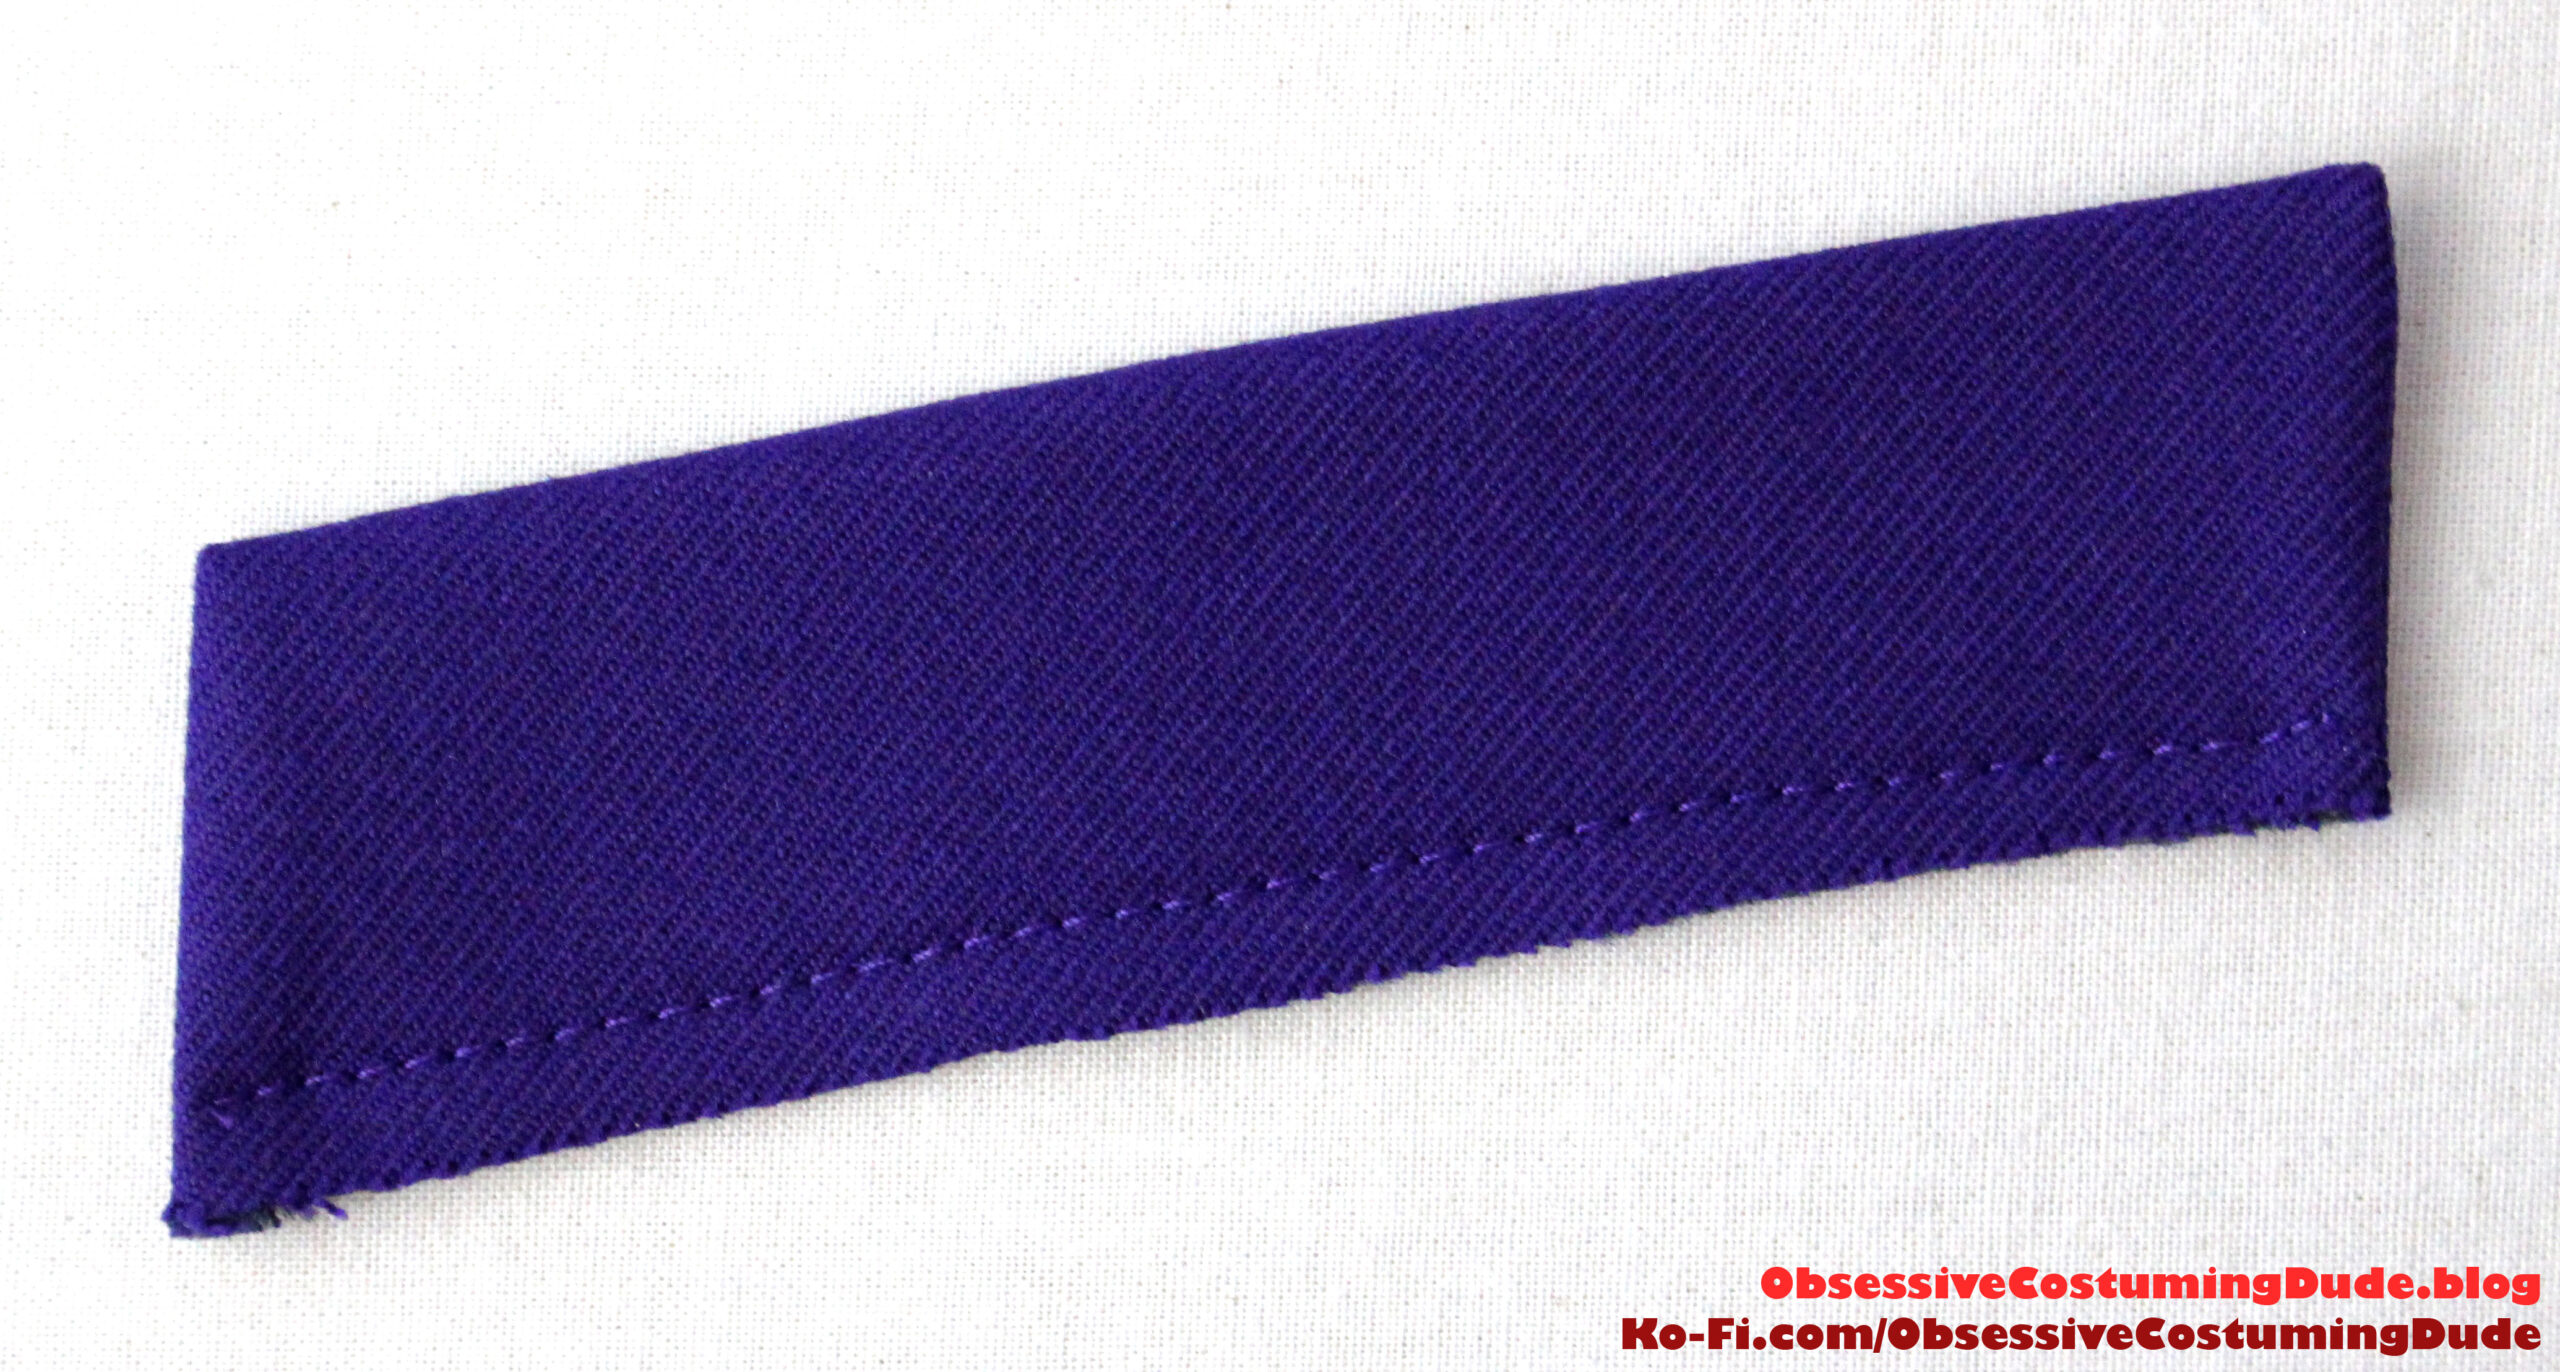
I also like to bolster up my interior pocket welt (piece Q) with a lightweight fusible.
Press the pocket welt in half, wrong sides together and long edges flush.
Sew or baste the long ends of the pocket welt together close to the edge.
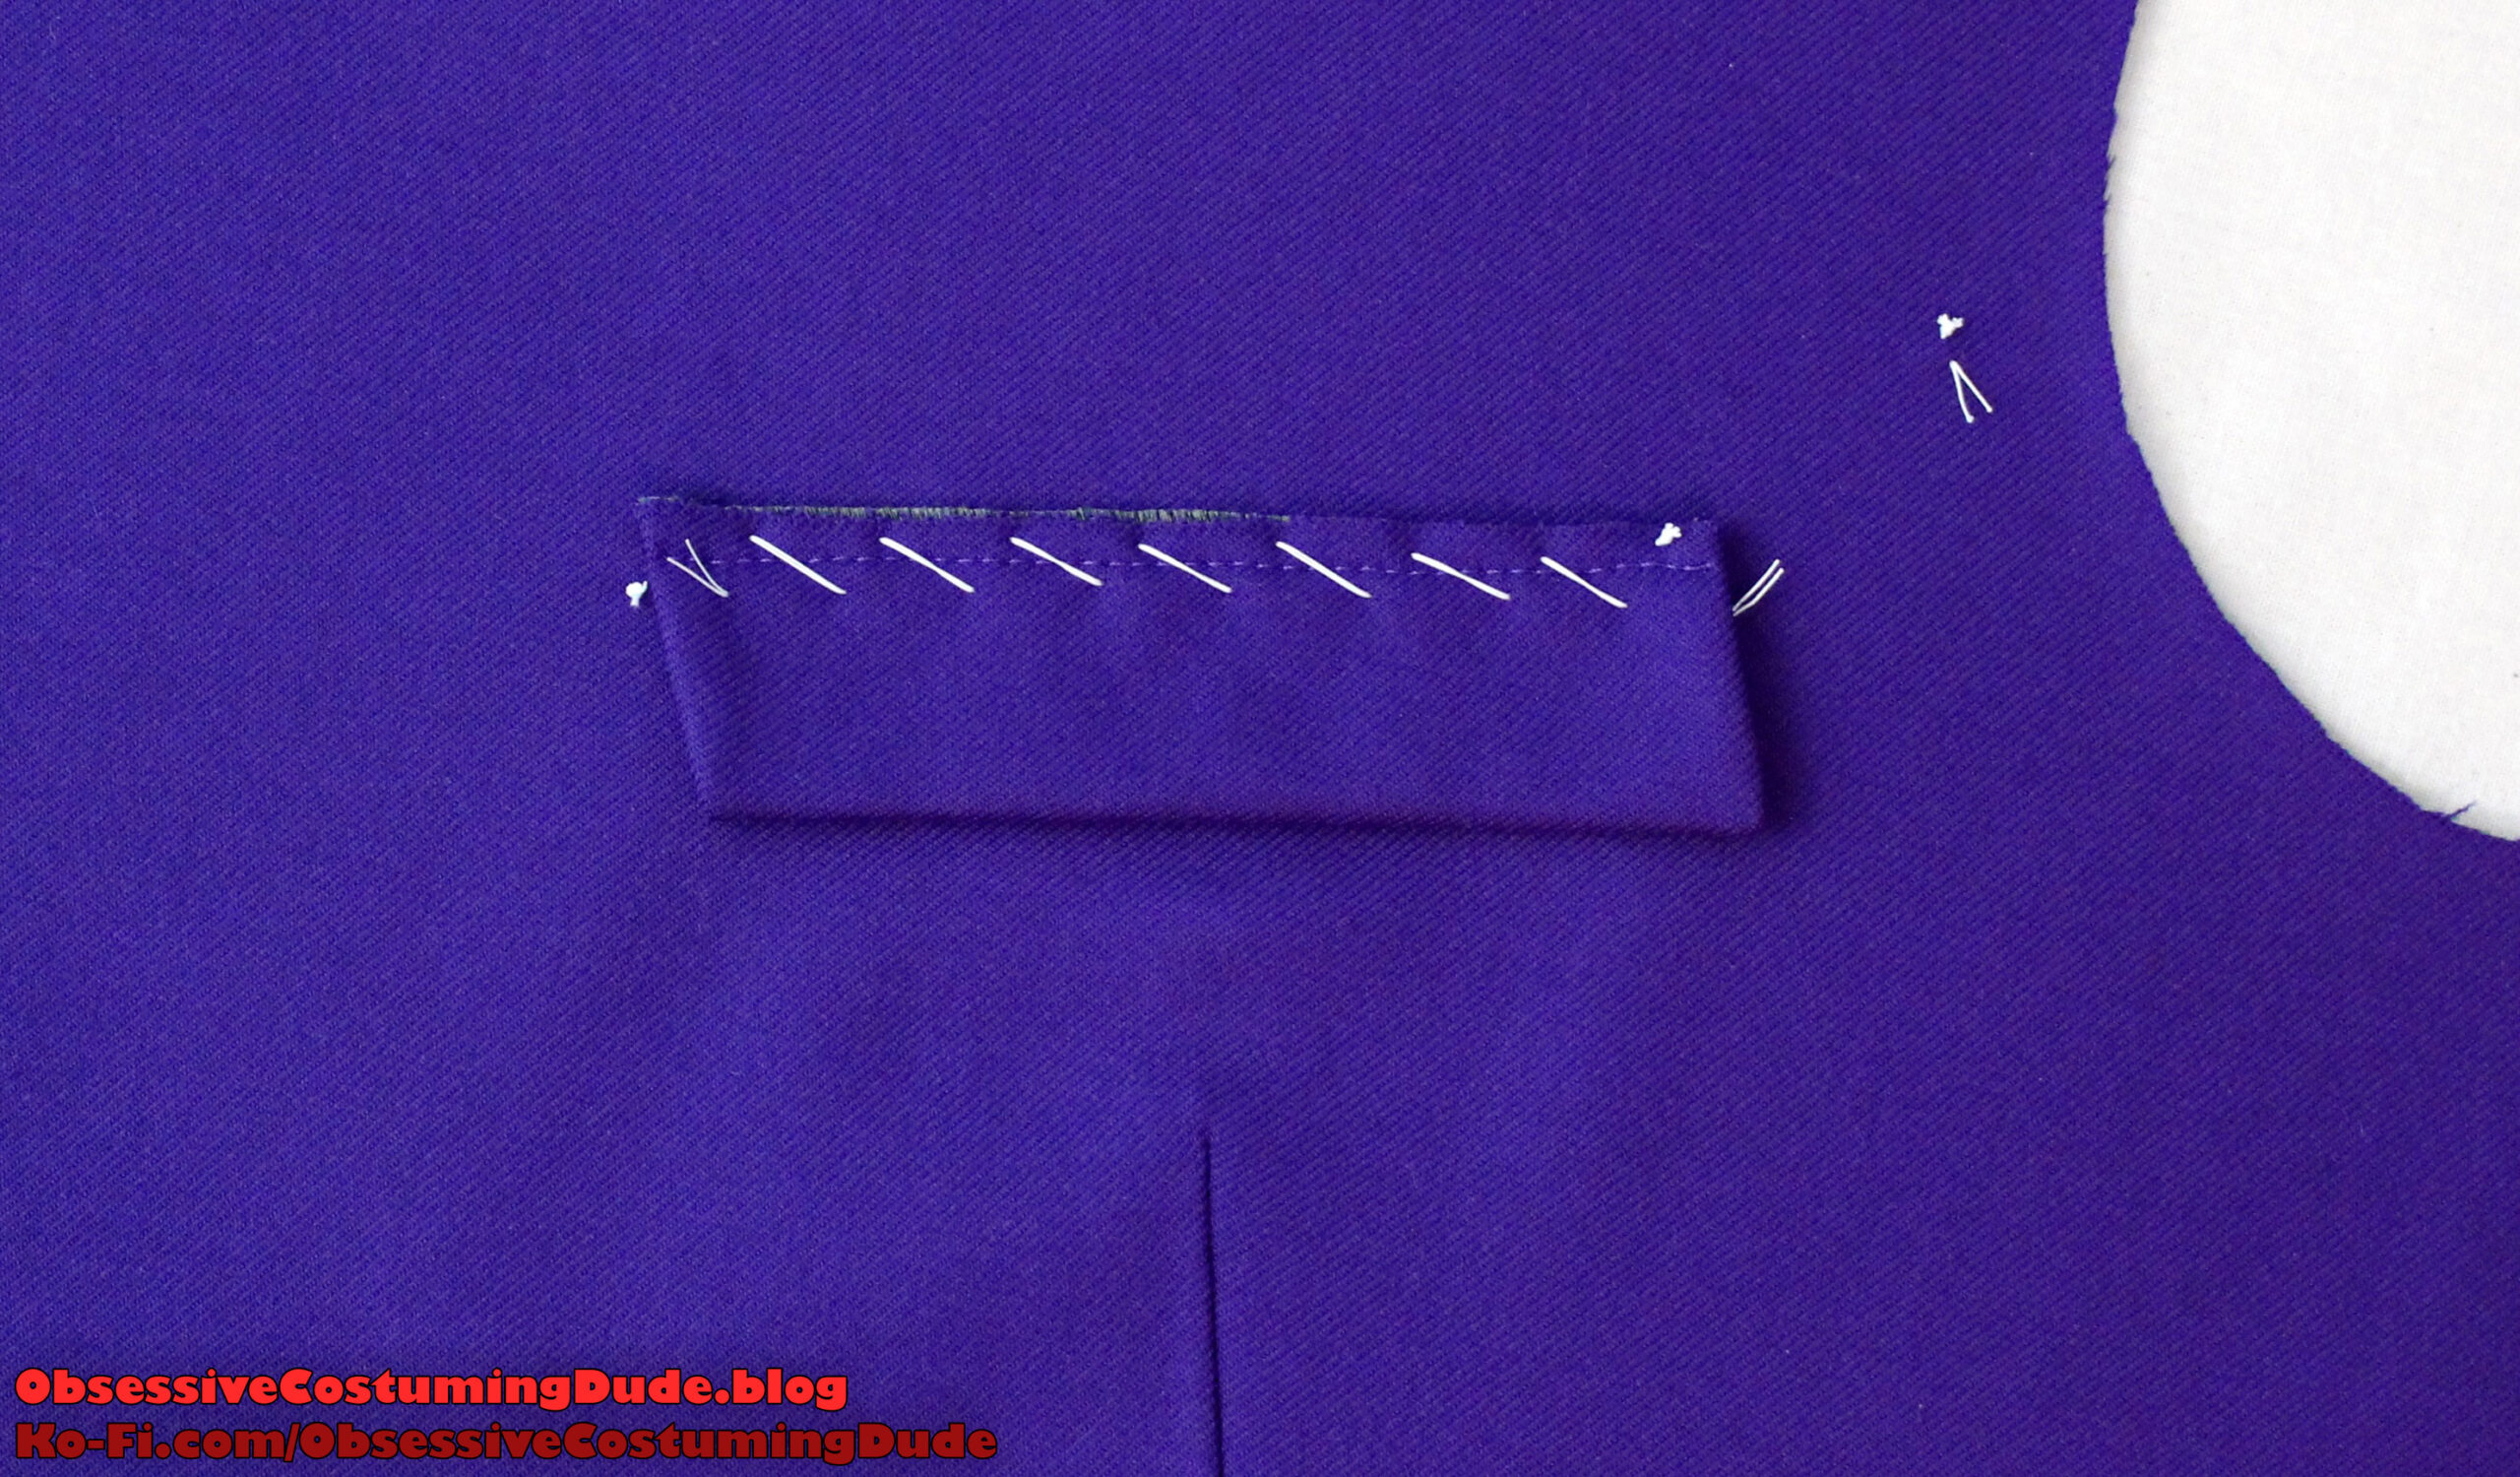
Hand-baste the welt into place over the pocket opening, with its raw edges flush with the upper stitch line.
From the underside, sew the pocket welt into place by stitching again over the lower stitch line, beginning and ending your stitching exactly at the corners of the pocket opening. (I like to use a quilting/walking foot for this.)
Slide the interior pocket bag (piece R) underneath the upper edge of the pocket, as close to the stitch line as you can manage.
Pin the pocket bag into place over the pocket opening.
Again from the underside, sew the pocket bag into place by stitching again over the upper stitch line, beginning and ending your stitching exactly at the corners of the pocket opening.
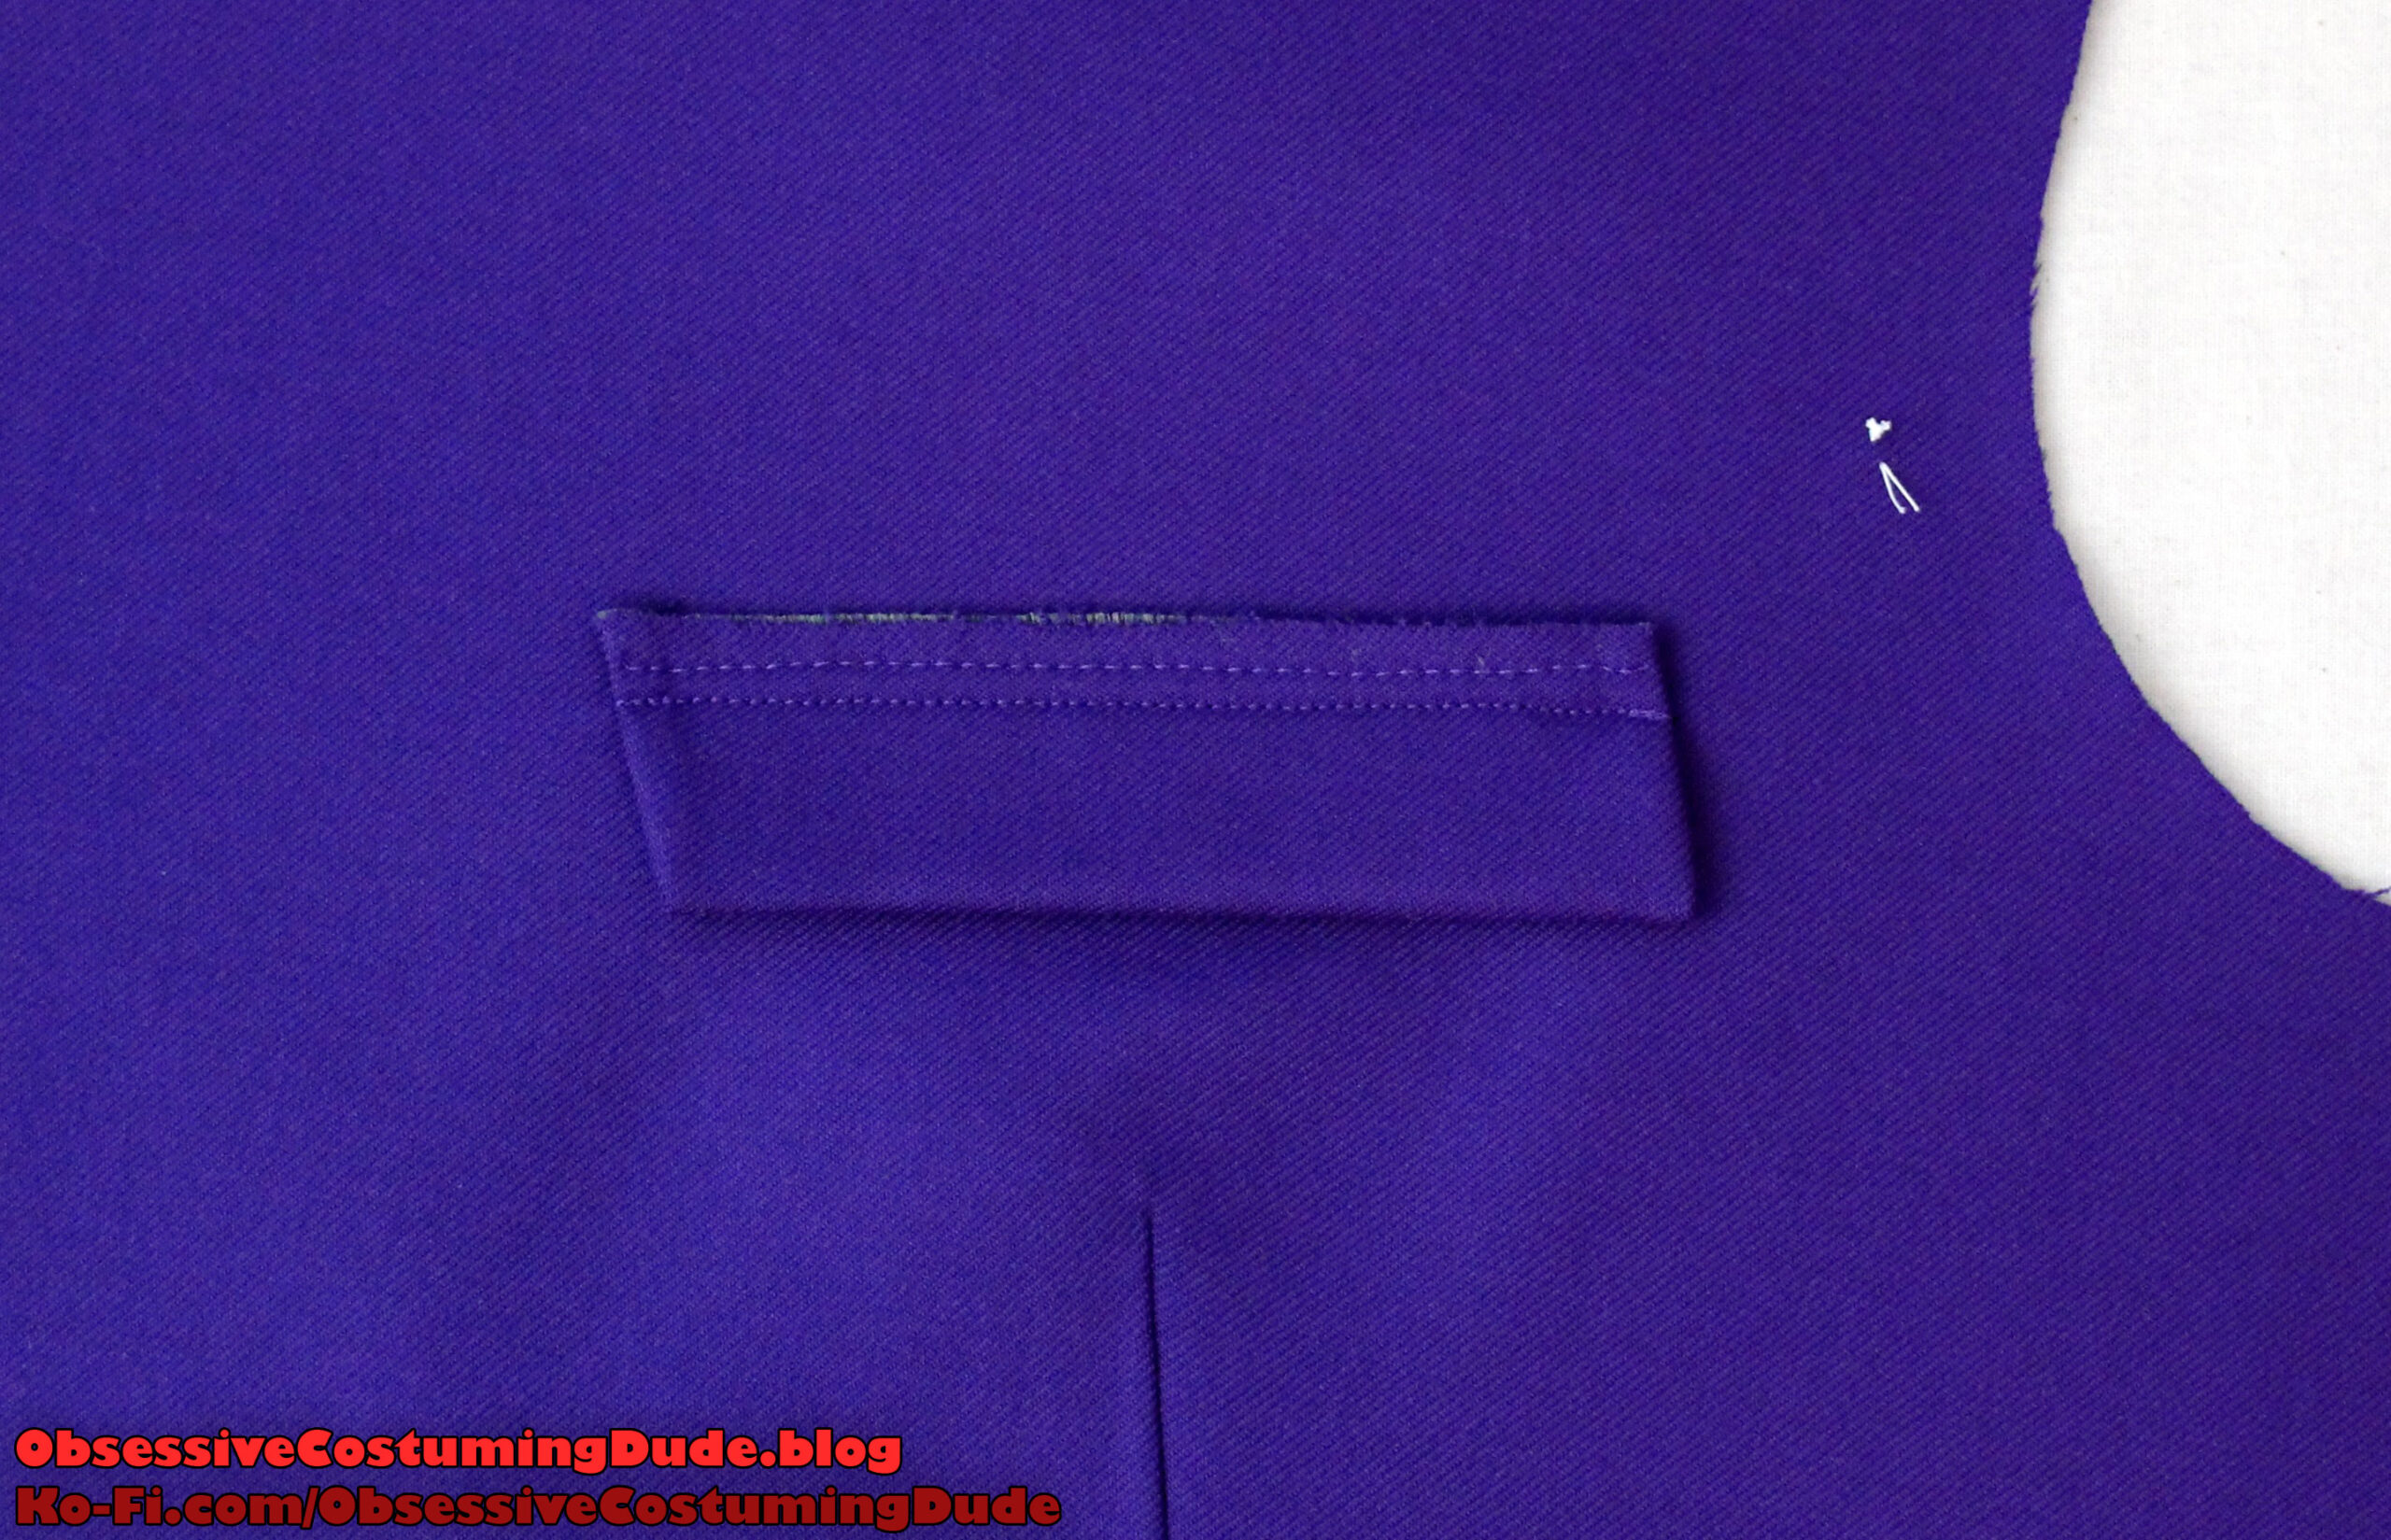
Slash the pocket opening halfway between the two longer stitch lines, stopping about ⅜” from the ends and snipping a “Y” shape to the corners on each side, catching only the facing and lining fabric (not the welt or pocket bag).
Turn the pocket bag under and press. (Be sure to press these seam allowances upward.)
Turn the pocket welt upward and press. (Be sure to press these seam allowances downward.)
Turn the triangular “prongs” under and press.
On the underside, fold the pocket bag upward, and then back down again so its free end is flush with the pocket opening’s lower/welt seam allowance.
Sew the end of the pocket bag to the lower allowance, close to the previous stitch line.
Fold the pocket bag back downward.
Sew the sides of the pocket bag closed, catching the triangular “prongs” in the stitching.
I like to curve my stitching slightly toward the bottom, rather than producing sharp lower corners.
Stitch again ⅛” from the previous stitching and trim the allowances with pinking shears.
Finish the pocket by making a small bar tack on each side through all layers.
Sew the front interior assembly to the side back lining and press the seam allowances open, as done previously for the coat shell.
Like the front lining, instead of sewing the dart into the skirt lining, I suggest instead making a small pleat along the top inch or so, the same width as the dart.
Attach the skirt lining to the interior front/side assembly as done previously with the coat shell (matching dots and aligning the skirt lining pleat with the side seam).
Sew the interior front/side/skirt assembly to the center back lining (piece N) as done previously with the coat shell (in three separate stitches, forming the ½” pleat, etc.).
Sew the interior assembly together at the shoulders. Press the shoulder seam allowances open.
Stay-stitch the upper sleeve lining at the upper corner of the vent.
Clip the upper sleeve lining allowance diagonally to the stitching at the upper corner.
Press the vent allowance under, and clip the allowance at the hem line so it will lie flat.
Press the under sleeve lining vent allowance under.
Fold the upper sleeve lining allowance back downward at the vent.
Sew the sleeve lining together along the back seam, reinforcing several times at the dot.
Clip the under sleeve lining allowance to the stitching at the dot, and press the seam allowances open.
Stitch the sleeve lining closed across the top of the vent.
Sew the sleeve lining closed along the front edges, and press the seam allowances open.
Sew the sleeve lining to the interior assembly armscye, easing to fit.
Stitch again ⅛” inside the previous stitch line, then trim the upper armscye allowances down to ½” and the lower armscye allowances down to ¼”.
Repeat for the other side.
JOINING ASSEMBLIES
Now we need to begin joining the four assemblies together.
I prefer to do this in halves, then join the right and left sides together.
The shell assembly is joined to the interior assembly in two stitches.
Beginning at the collar notch, sew the layers together along the outer edge of the stay tape – across the peak lapel, down the front edge, pivoting at the lower front corner and stitching to the skirt dot (pulling the skirt allowances out of the way).
Note that the front facing is ¼” longer than the coat front; ease in this excess at the roll line.
For the second stitch, fold the waist allowances out of the way and sew the assemblies together from the skirt dot down to the center back.
Clip the neckline allowances to the stitching at the collar notch.
Press the front/lapel seam allowances open to firmly establish the seam line.
You can trim these front seam allowances however you like, but I suggest grading them by trimming the facing allowance down to ⅜” and the front allowance down to ¼” to help reduce accumulated bulk along the seam.
Press the seam allowances back toward the underside.
Tack the seam allowance to the stay tape by hand along the lower front curve.
Turn the assembly right-sides-out and press the seamed edges flat. (I like to roll the seam lines slightly to the underside where possible.)
With the coat front lying as flat as possible, tailor-baste the front and facing layers together close to the facing/lining seam line.
Carefully pull the lining away so the facing/lining seam allowance is visible.
Hand-sew the facing/lining seam allowances to the front canvas as far up as possible (ideally, all the way up to the shoulder seam).
I also suggest hand-sewing the lining and shell allowances together a few places along the armscye (where there seams and balance points match), as well as the upper waist allowances along the side of the coat.
Repeat for the other side.
Pull the back lining out of the way.
Sew the two coat assemblies together along the center back, right sides together, from the neckline down to the dot. Reinforce your stitching several times at the bottom.
Clip the seam allowances diagonally to the stitching at the corner.
Press the pleat toward the right.
Turn the entire coat right-sides-out.
Sew the shell and interior assemblies together along the neckline, matching back and shoulder seams.
Hand-sew the sleeve linings to the lower sleeves, forming a small jump pleat at the bottom.
(I actually like to trim ½” off the bottom of my sleeve linings, to help prevent them from poking out underneath the sleeve.)
At the center back waist, press the left overlap allowances under (between the shell and the lining, so they’re tucked away and not exposed anywhere).
Hand-sew the center back shell and lining together along the edges, and along the upper edge of the overlap.
Then hand-sew the overlap into place along the upper edge.
COLLAR
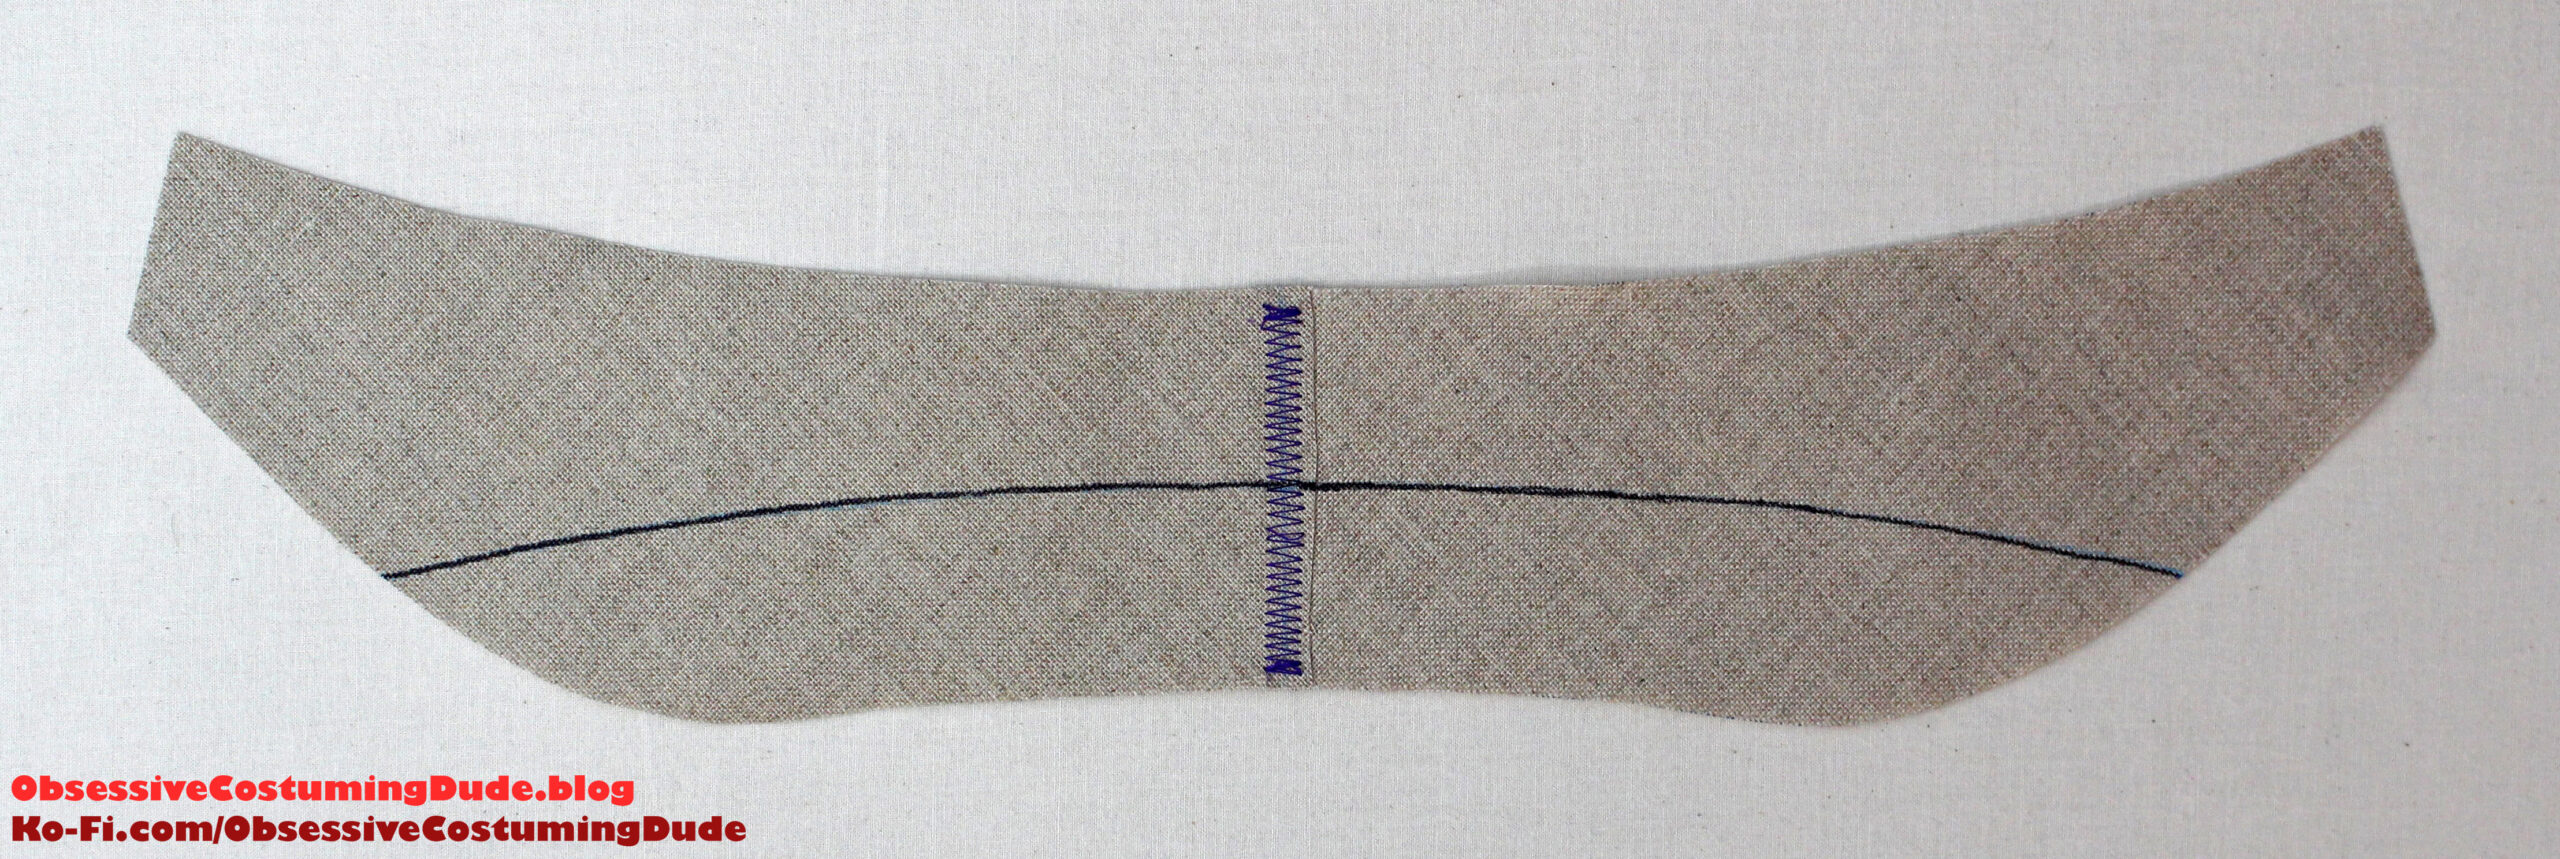
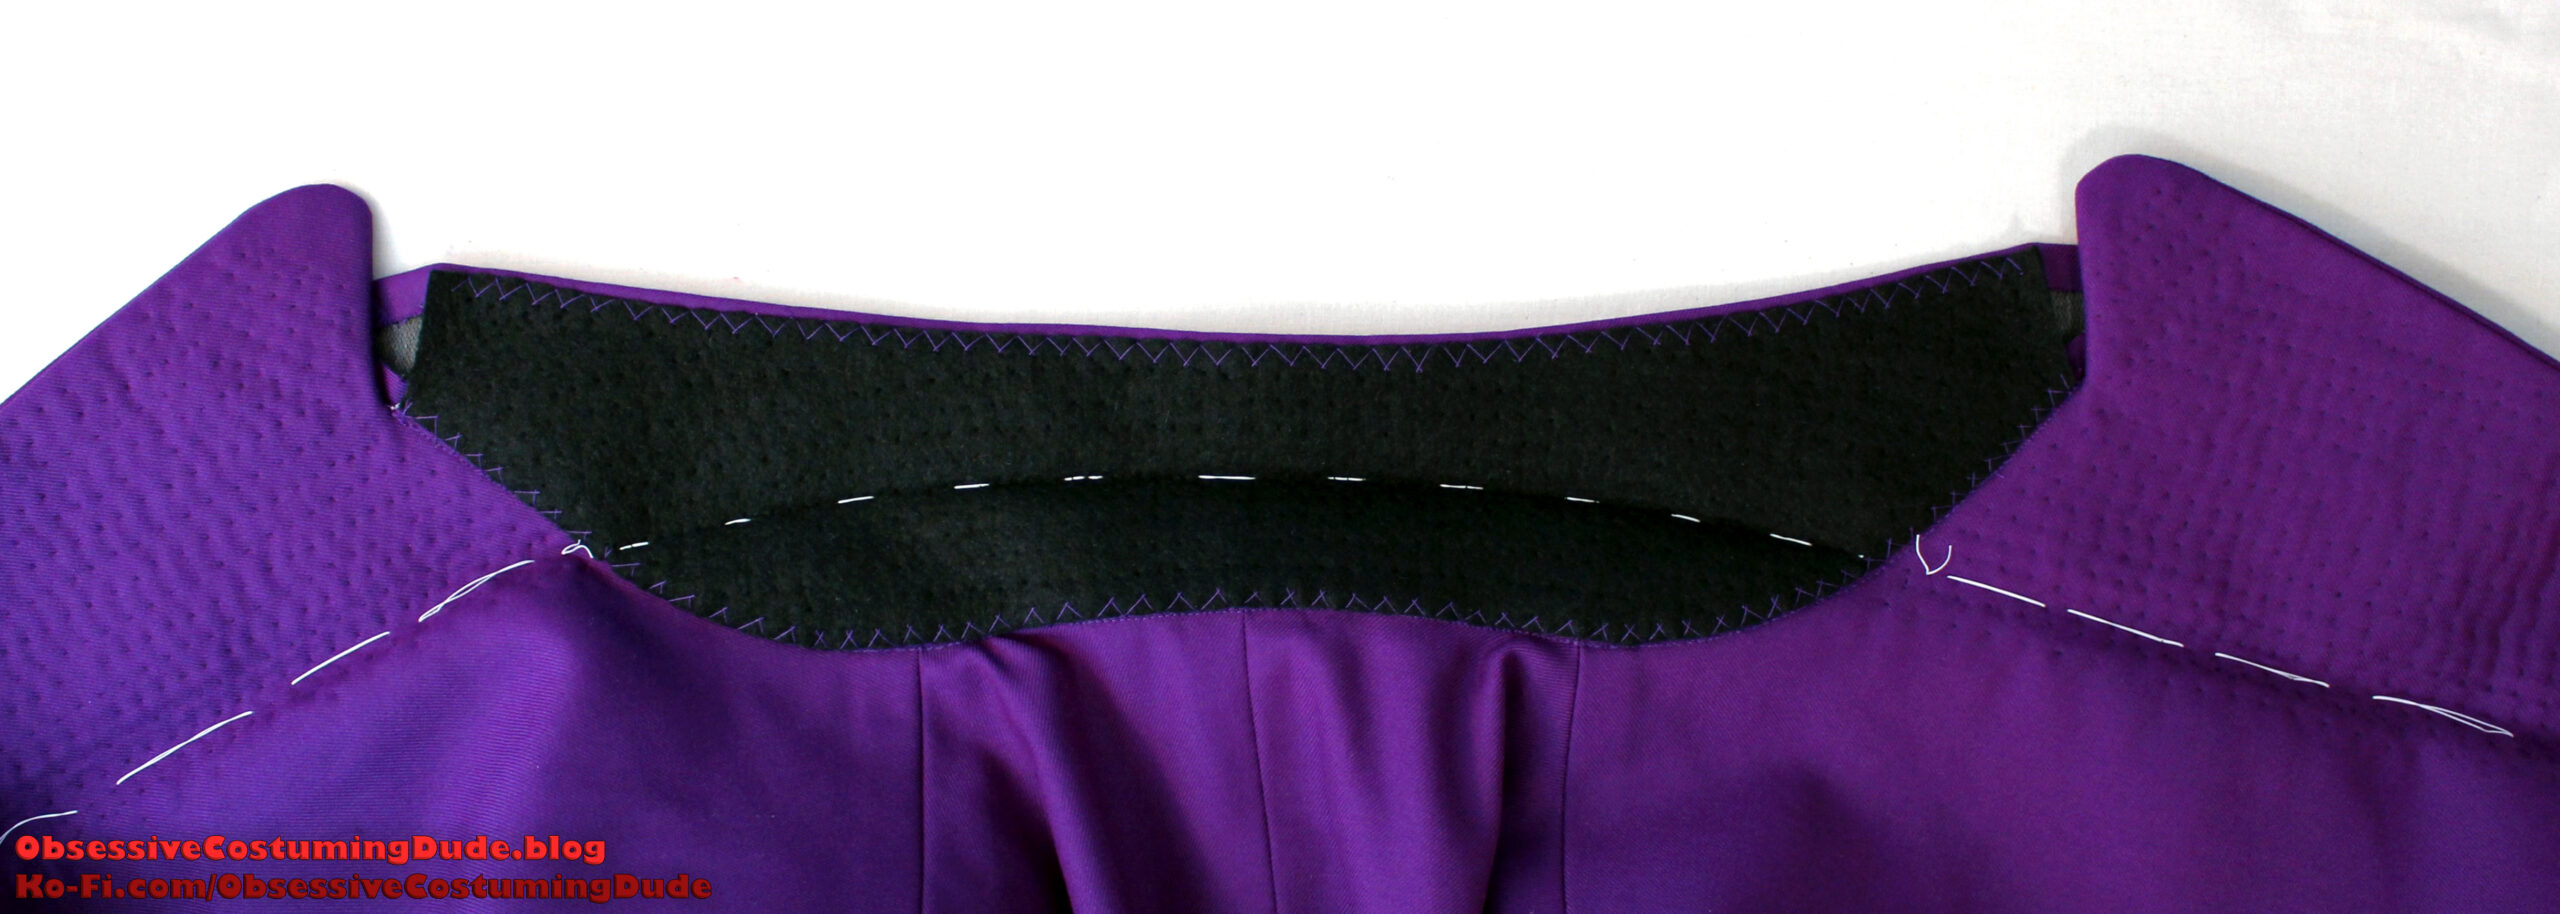
Now we need to make and attach the collar, which is comprised of two pieces: the upper collar (piece I) and the under collar (piece J).
The collar’s structure is provided by the undercollar, using bias-cut French canvas.
Although the undercollar felt/melton is cut as a single piece, the two pieces of French canvas are cut with the center back on the bias.
Overlap the two pieces of undercollar canvas at the center back, and sew them together across the seam line with a zig-zag stitch.
Trim the seam allowances close to the stitching.
There are different opinions about how to best padstitch the collar.
Personally, I like to padstitch the actual roll line, and then continue padstitching on each side in parallel rows.
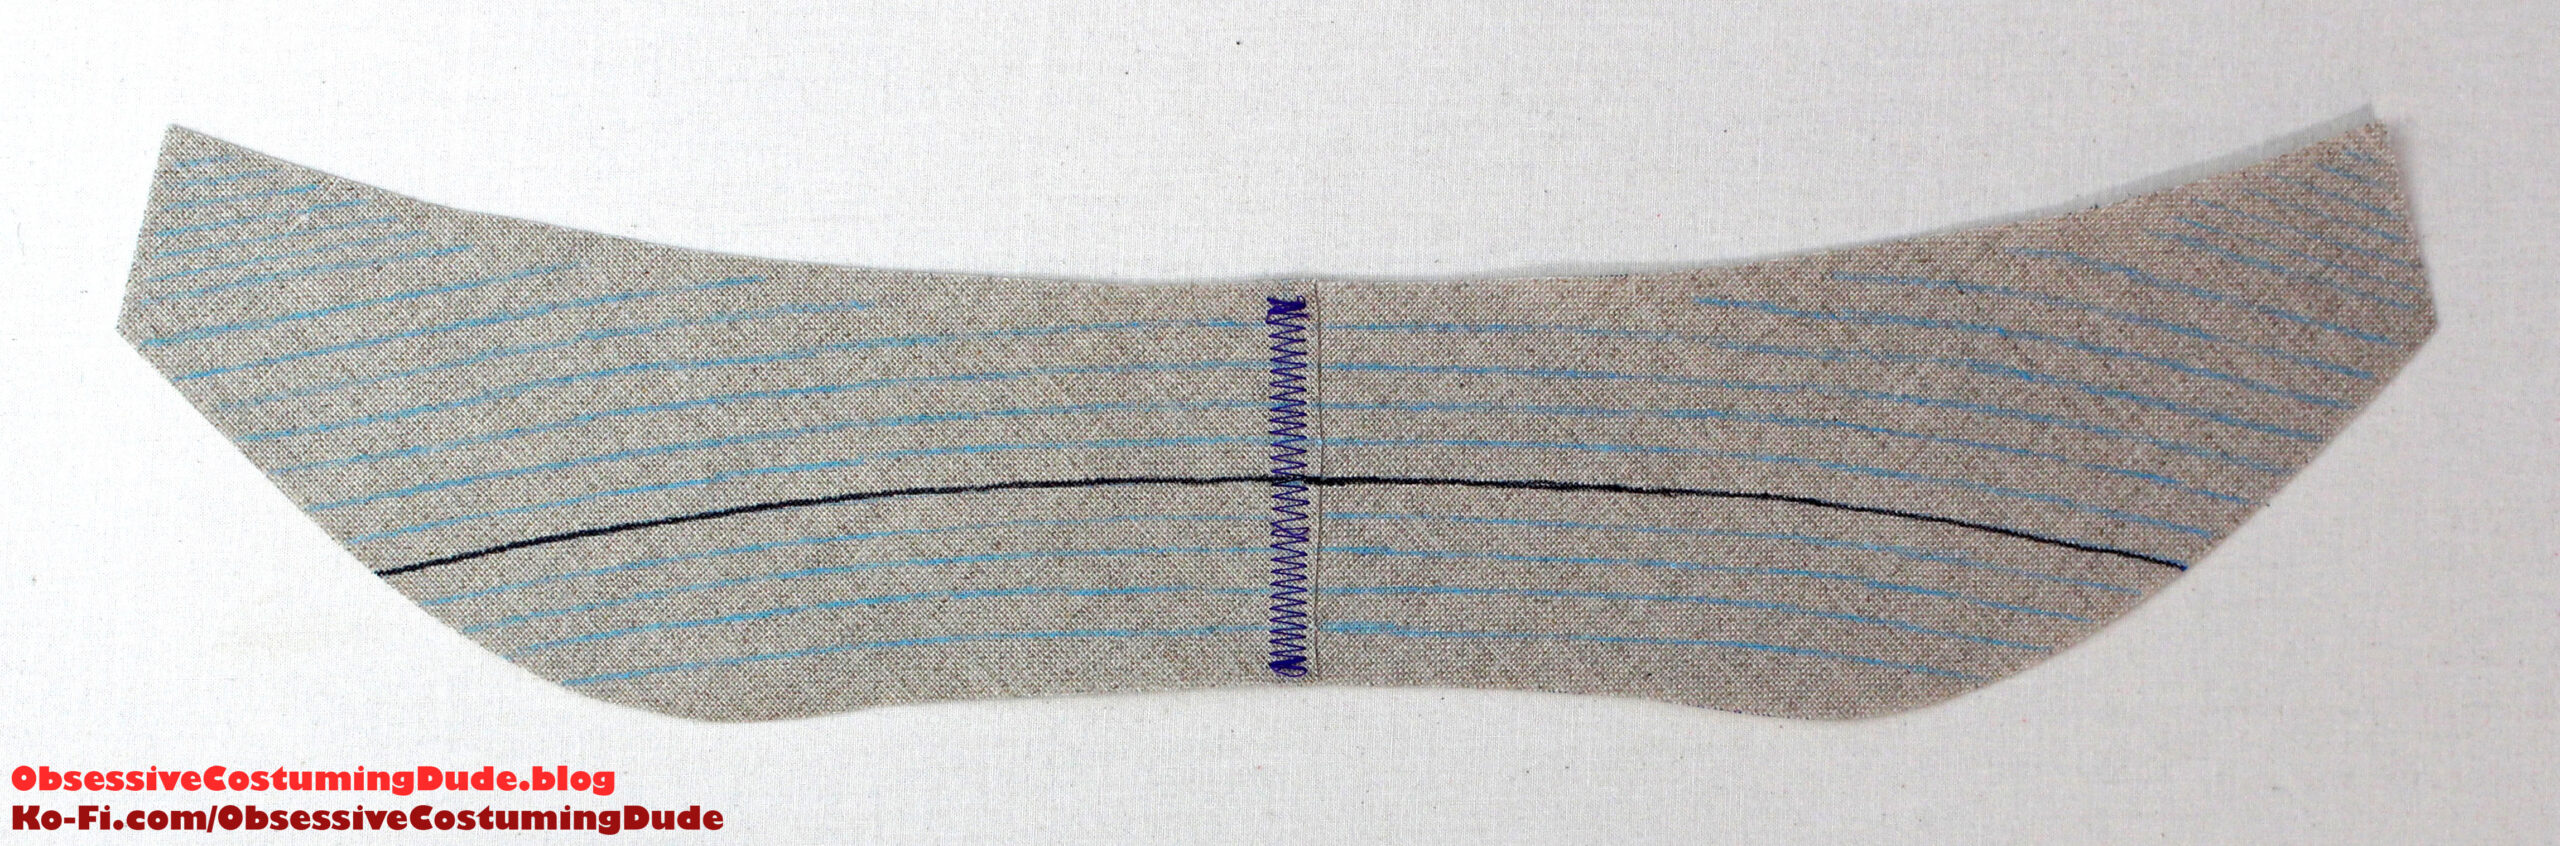
Mark the seam lines on the canvas, and the rows for padstitching.
Place the French canvas on the wrong side of the undercollar felt, matching edges, and baste the layers together along the roll line.
Trim the edges of the canvas so it’s slightly smaller than the undercollar felt.
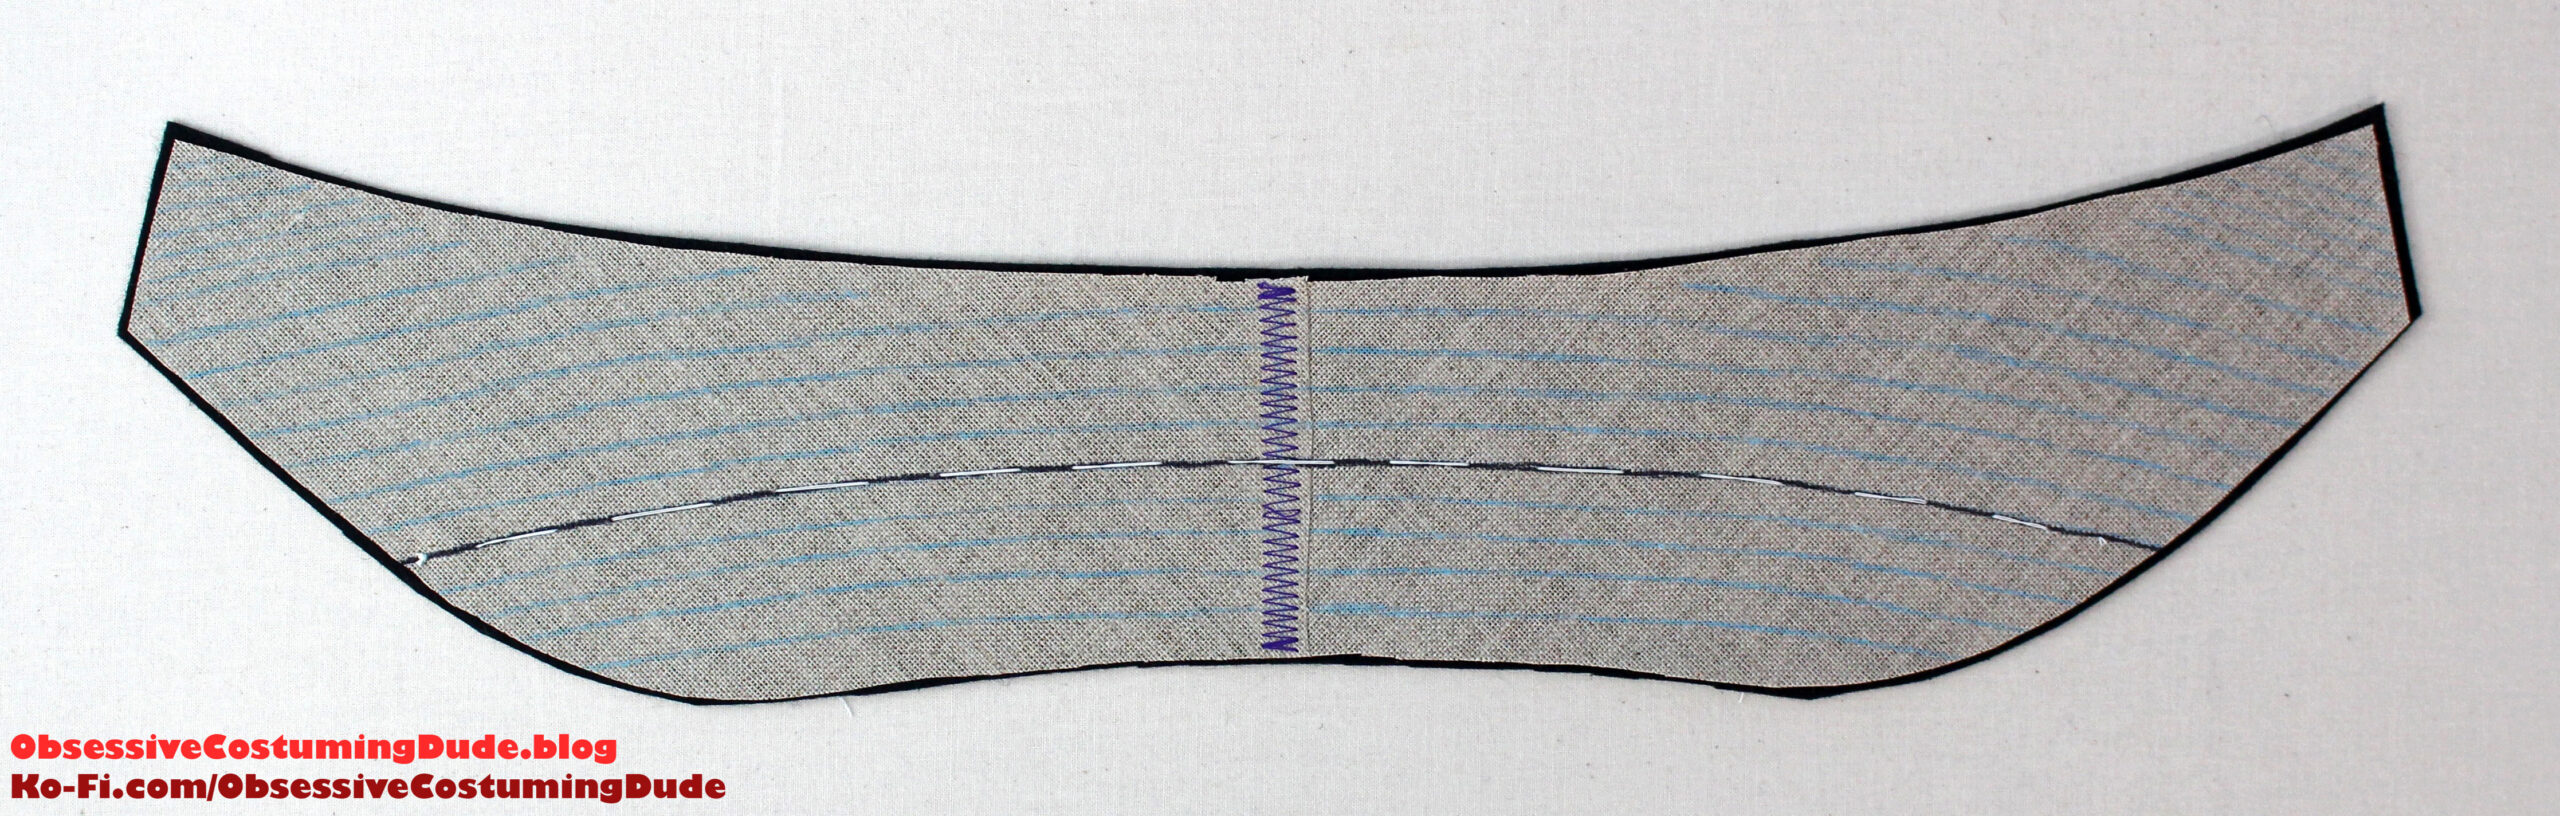
Padstitch the undercollar, beginning and ending your stitching ⅛” from the edges.
Fold the undercollar along the roll line, pin it to a tailor’s ham, and steam it into shape.
Once it’s set and cooled, your undercollar should hold its shape nicely.
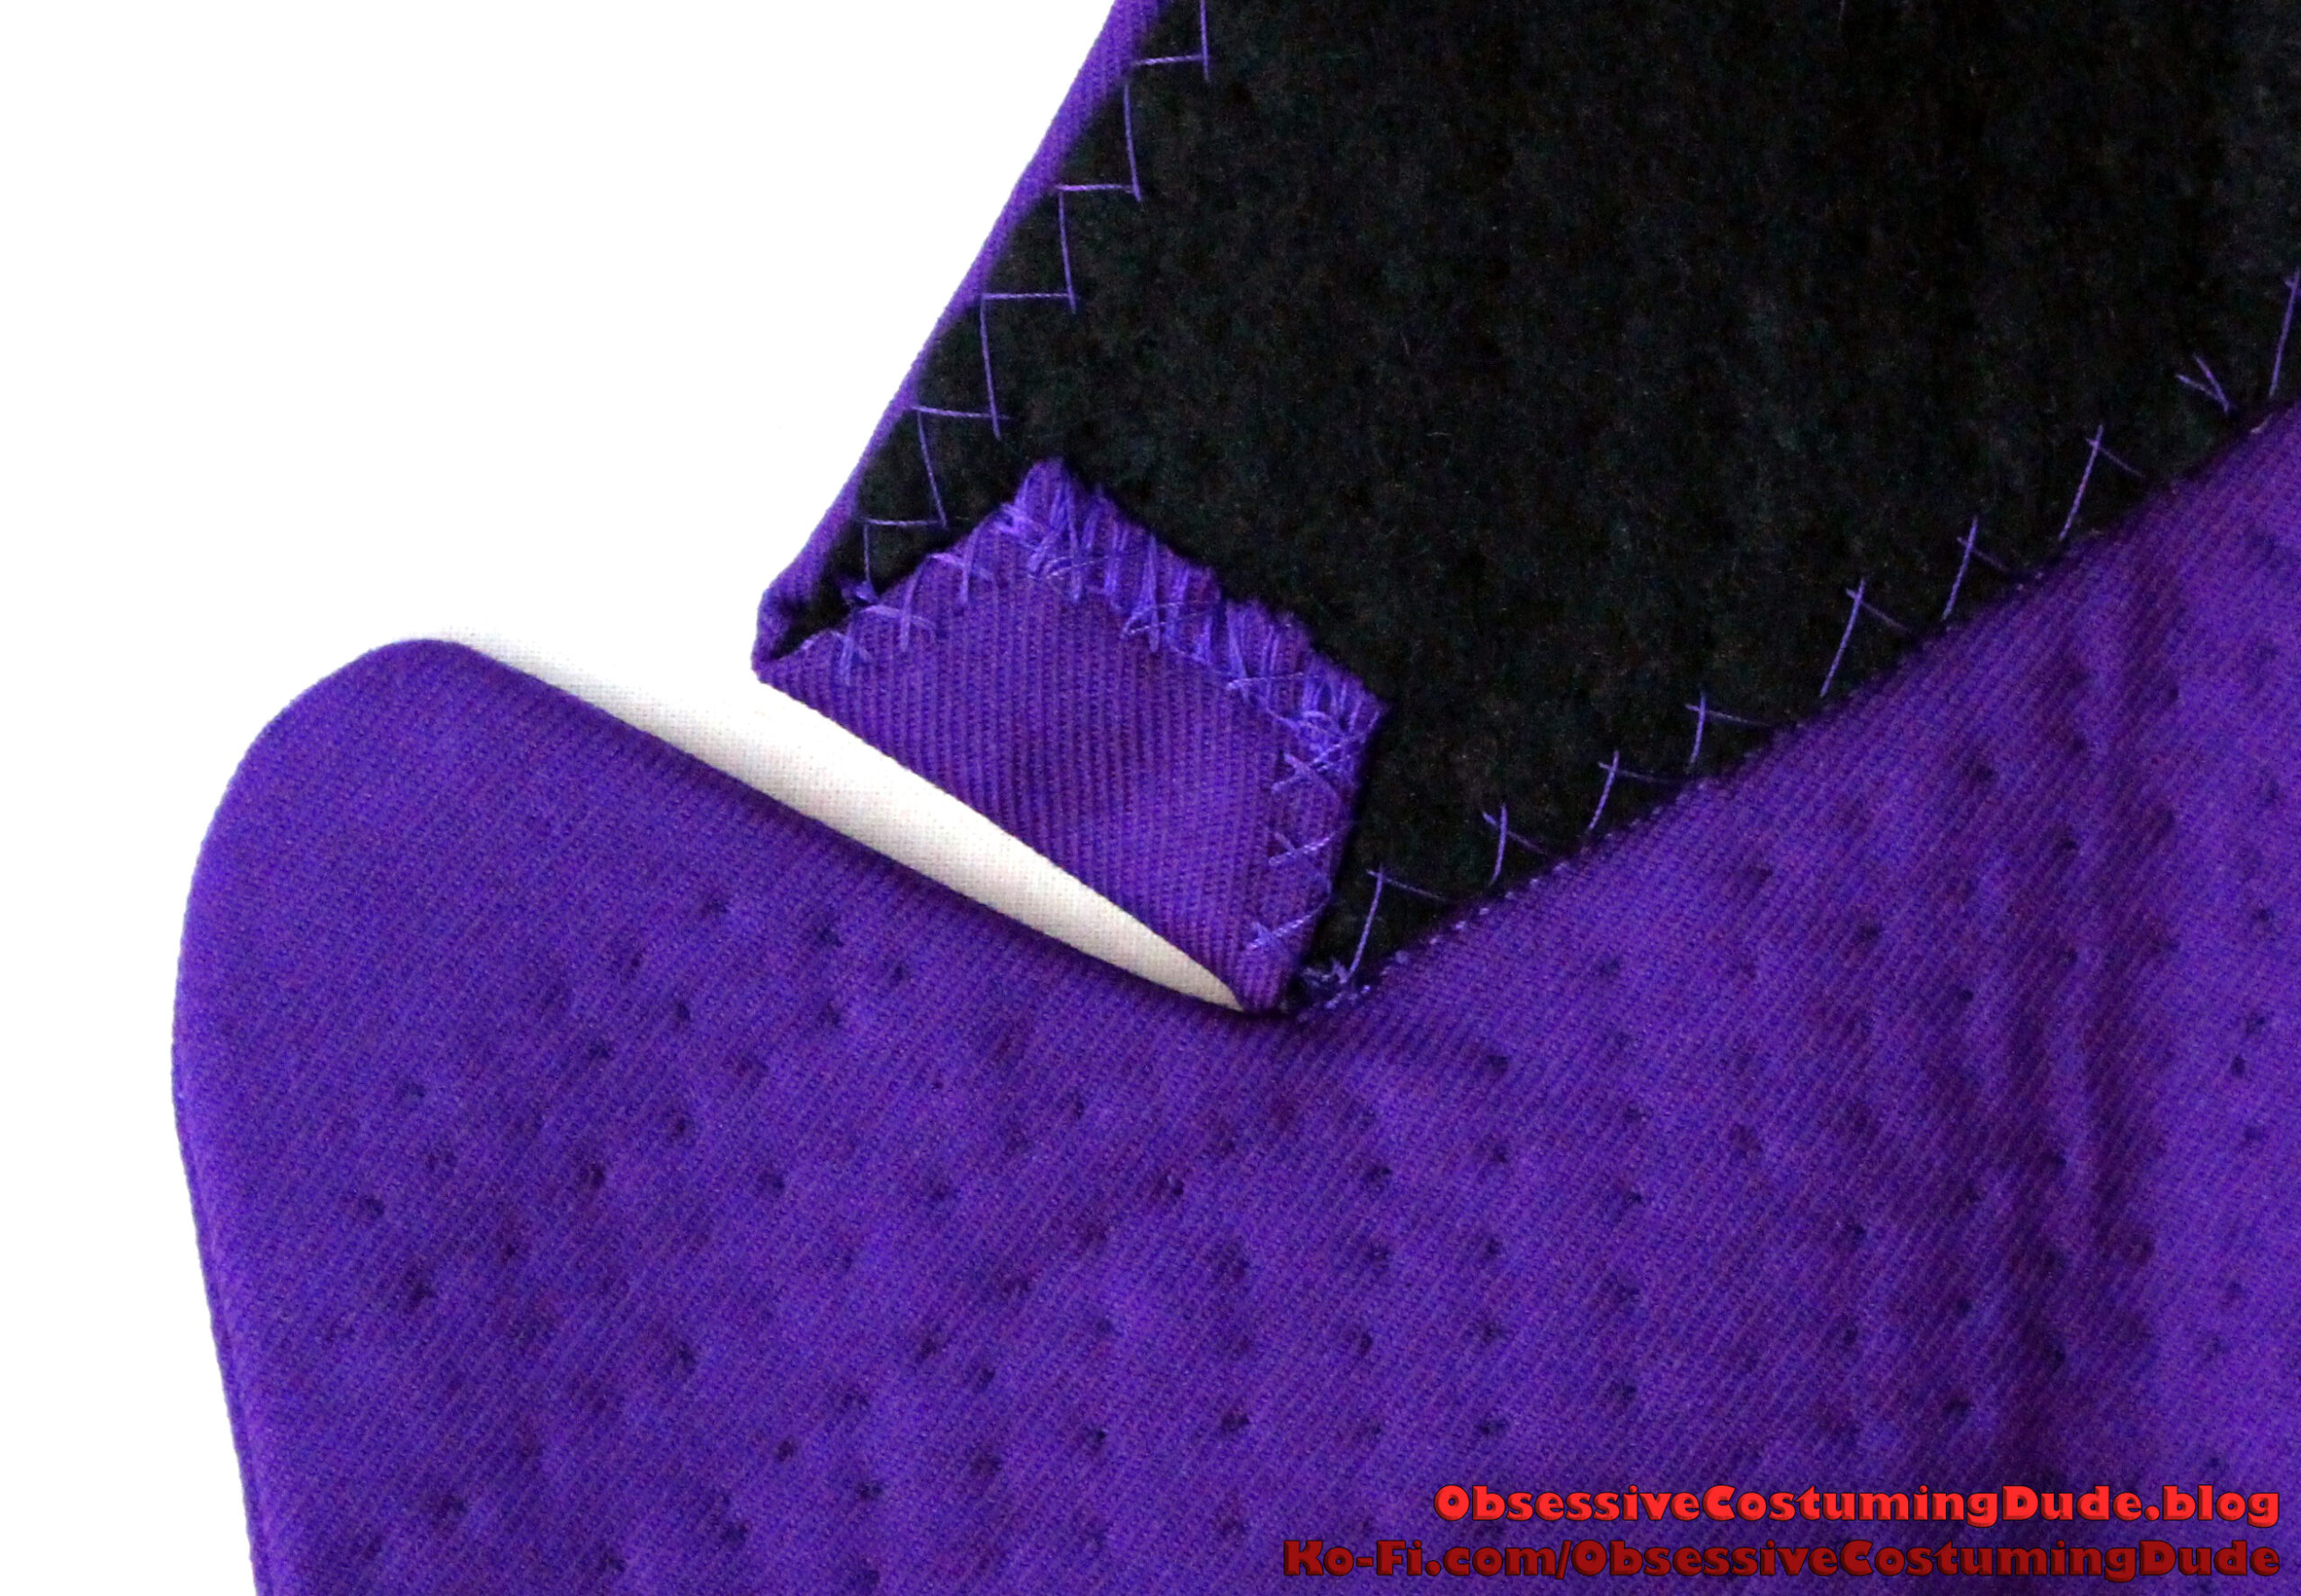
Trim the upper collar’s outer seam allowance down to ⅜” and press it to the underside. (You can either fold or notch the allowance at the front corners.)
Hand-sew the allowance into place, taking care to only stitch through the fusible interfacing and not onto the outside of the collar.
Sew the upper collar to the coat around the neckline, right sides together, matching collar notches and balance points. (The collar itself will extend beyond the collar notch.)
Press the seam allowances upward, toward the collar.
Position the undercollar assembly onto the underside of the upper collar so its lower edge is flush with the neckline stitching, the roll lines meet, the front edges are flush with the collar notches, and the upper edge is slightly under the folded edge of the upper collar.
Catch-stitch the undercollar assembly into place along the upper and lower edges.
Turn the upper collar’s front allowance under and catch-stitch it securely onto the undercollar felt.
FINISHING
Make six ¾” fabric buttons as described in the DIY button kit instructions.
Hand-sew two buttons to each coat front where indicated on the printed pattern.
Hand-sew the remaining two buttons to the side back/waist seam/back pleat intersection.
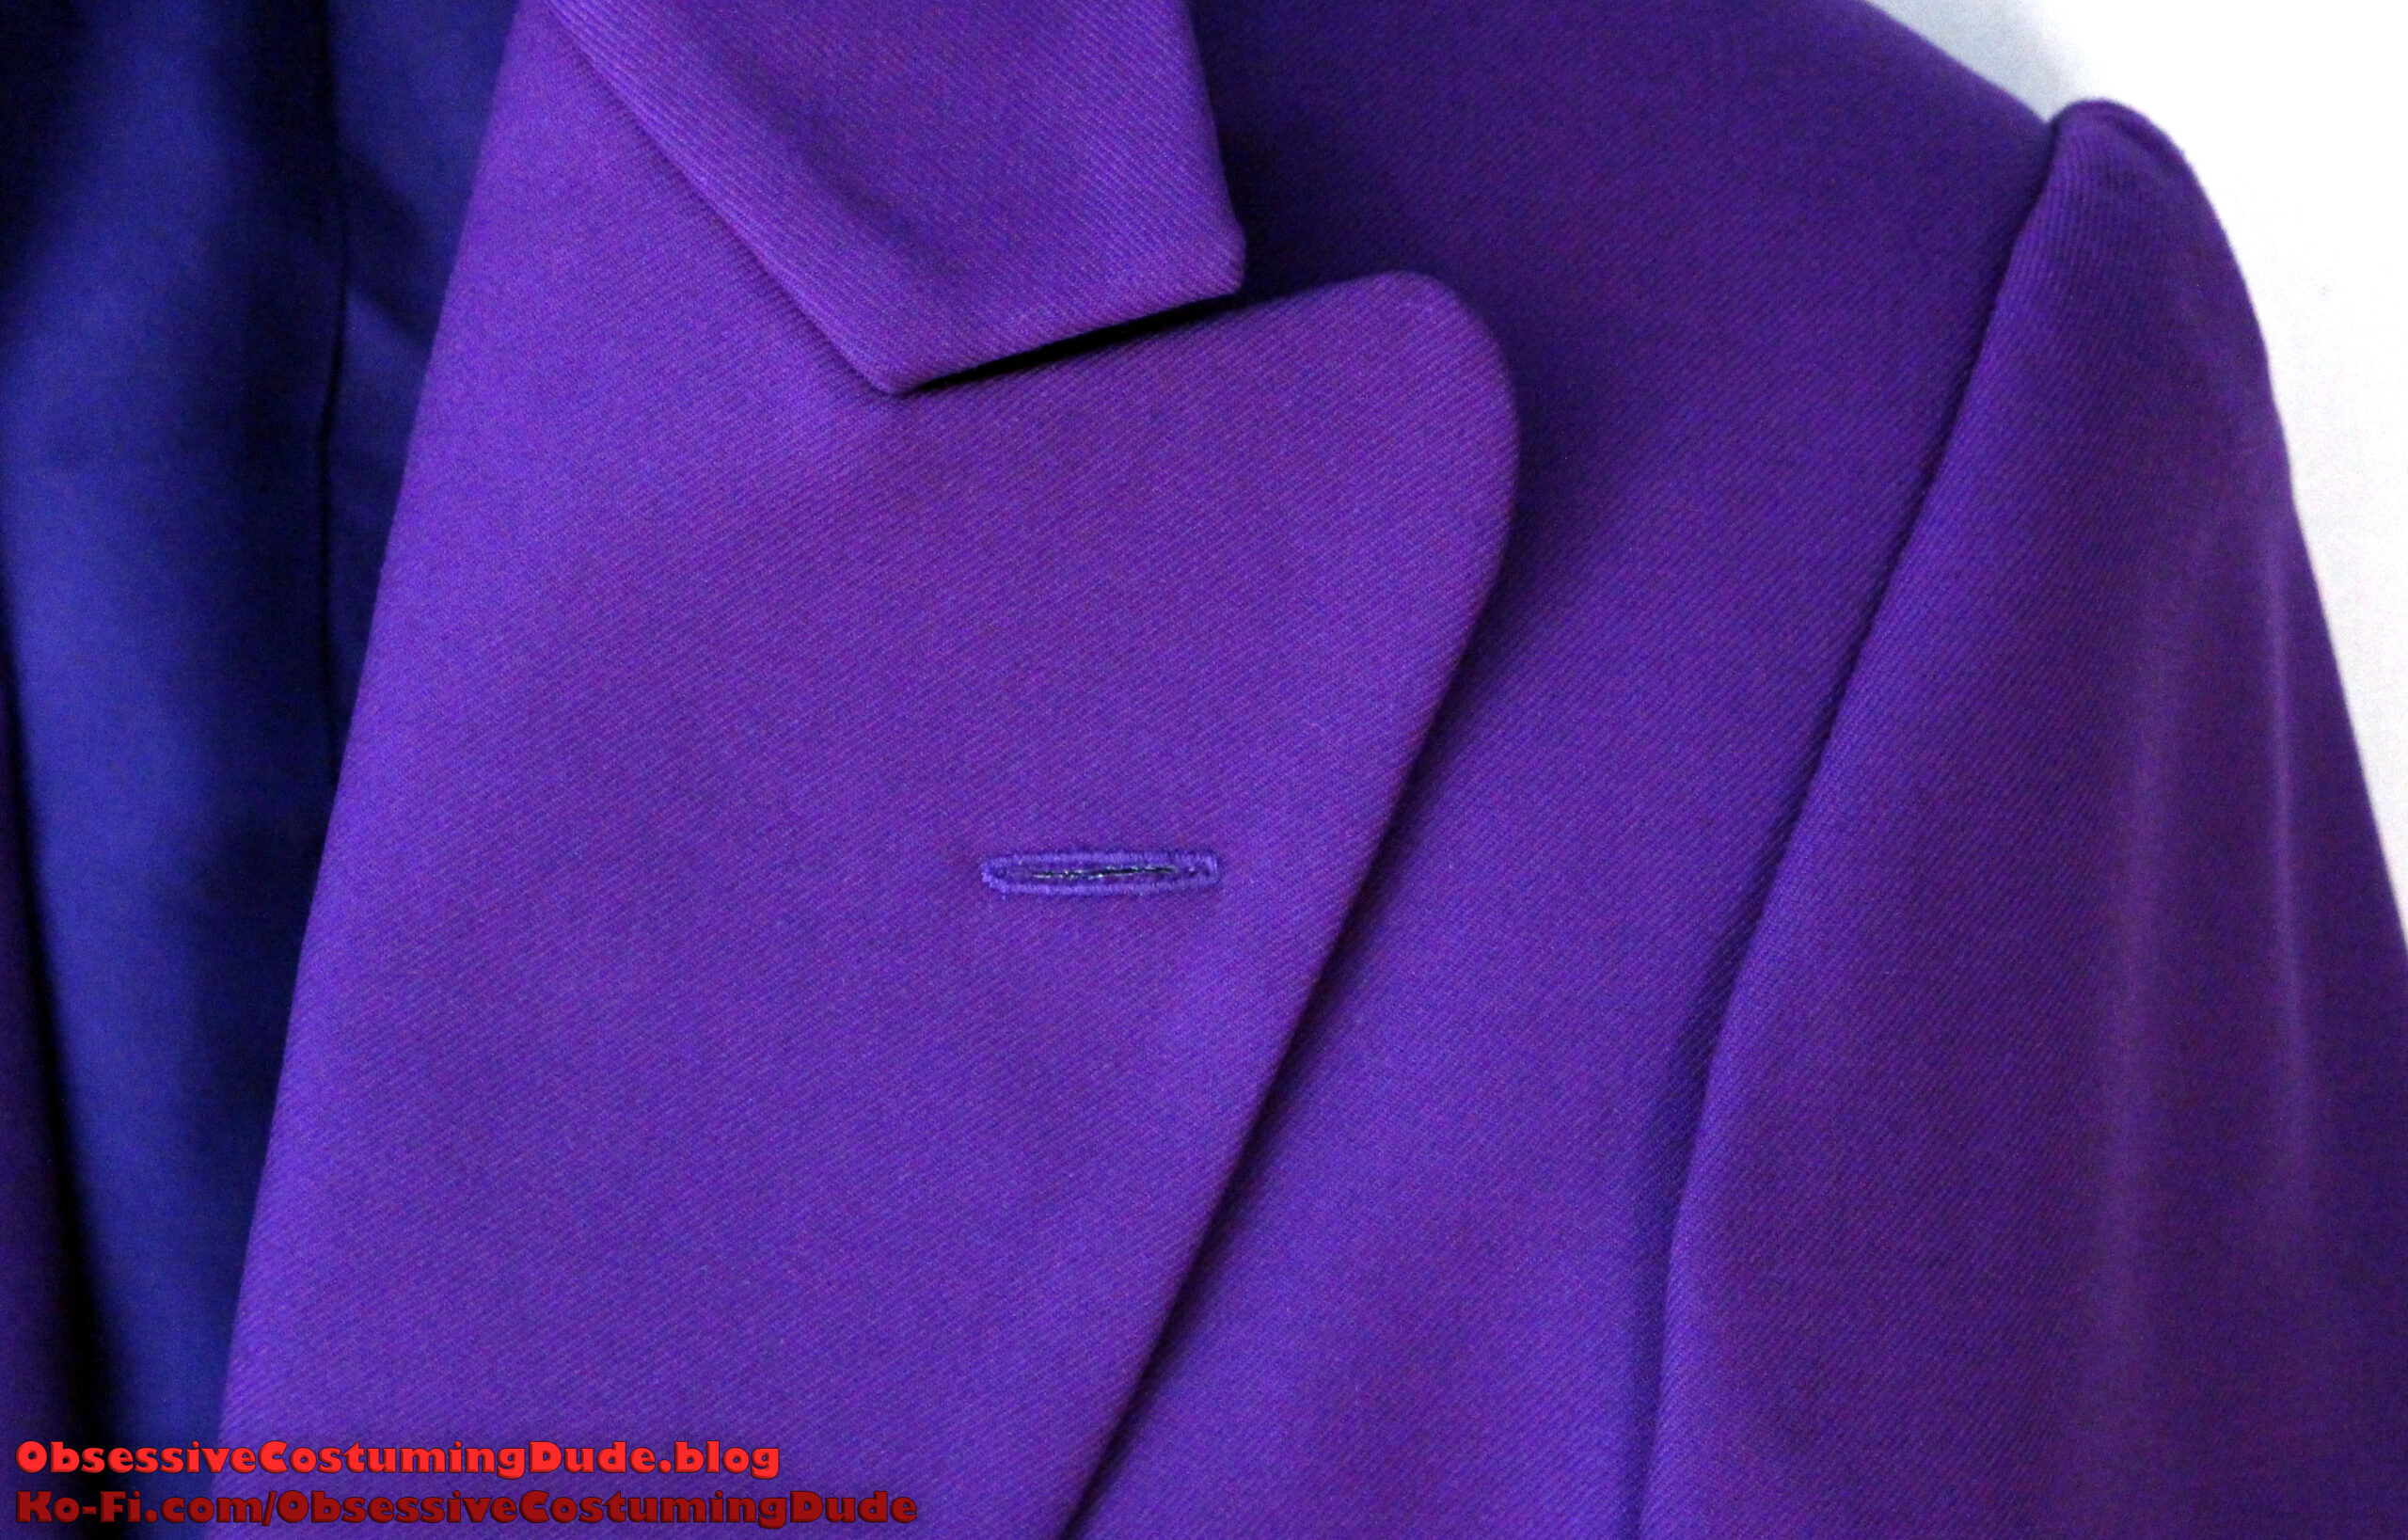
Make a small buttonhole on the left lapel for your lapel pin and/or acid-spewing flower. 🙂